Introduction
The Stock Units app helps you manage parts and equipment more accurately by introducing a flexible way to buy, hold, and sell stock in different units.
Instead of being restricted to a single “unit of measure,” you can now set up stock unit groups (for example, packs, weight, or volume), and define how items convert between them. This makes it easier to purchase in bulk, track stock consistently, and sell in smaller units when needed.
This guide will walk you through how to set up and use Stock Units effectively, so you can streamline inventory processes and maintain full control of your stock.
How to access the Stock Units module
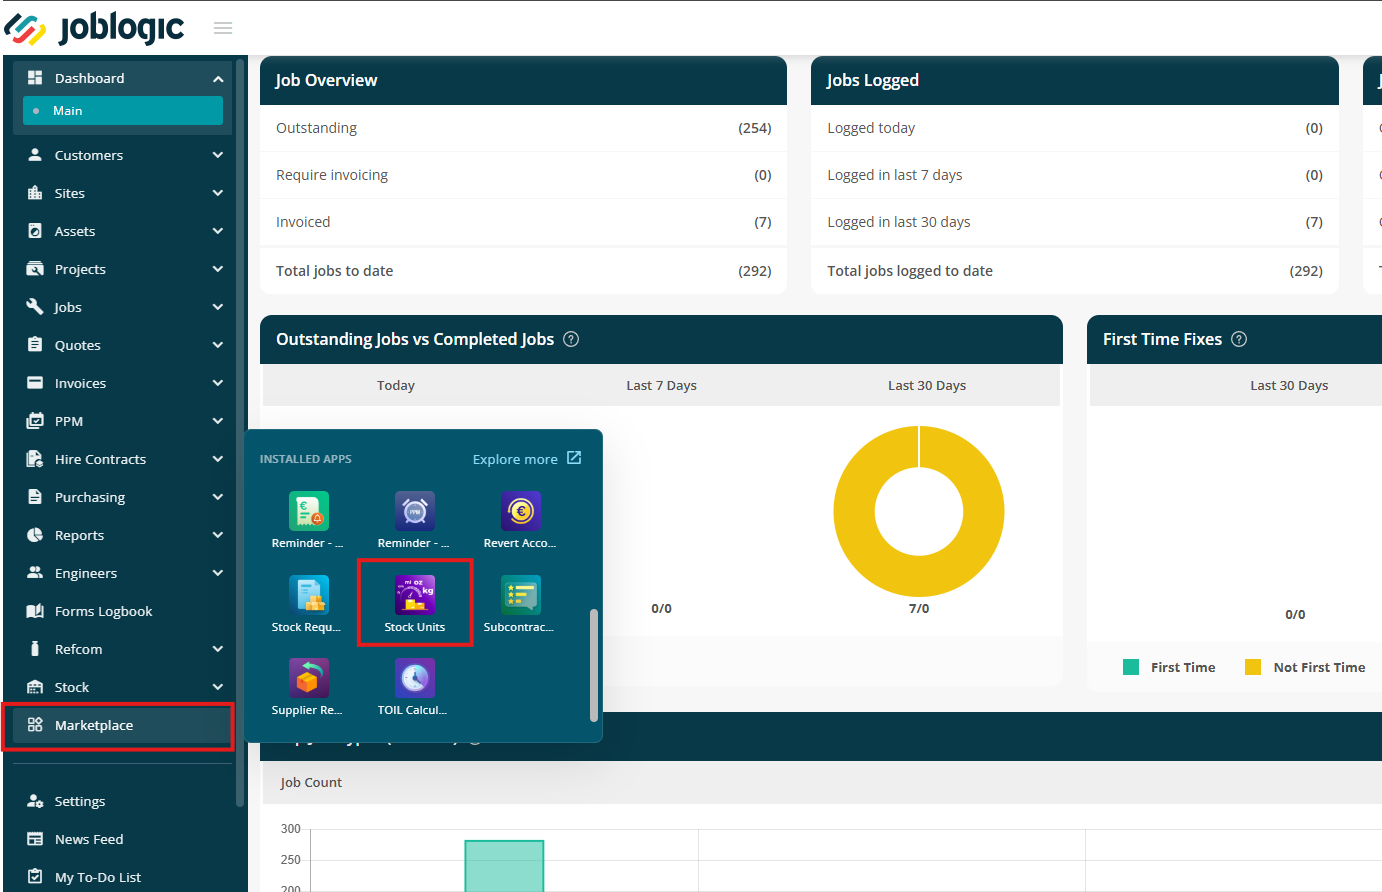
Click the Marketplace option on the main menu and then click Stock Units
Adding Unit Groups
On the main page, you'll see a list of default unit groups already set up for you.
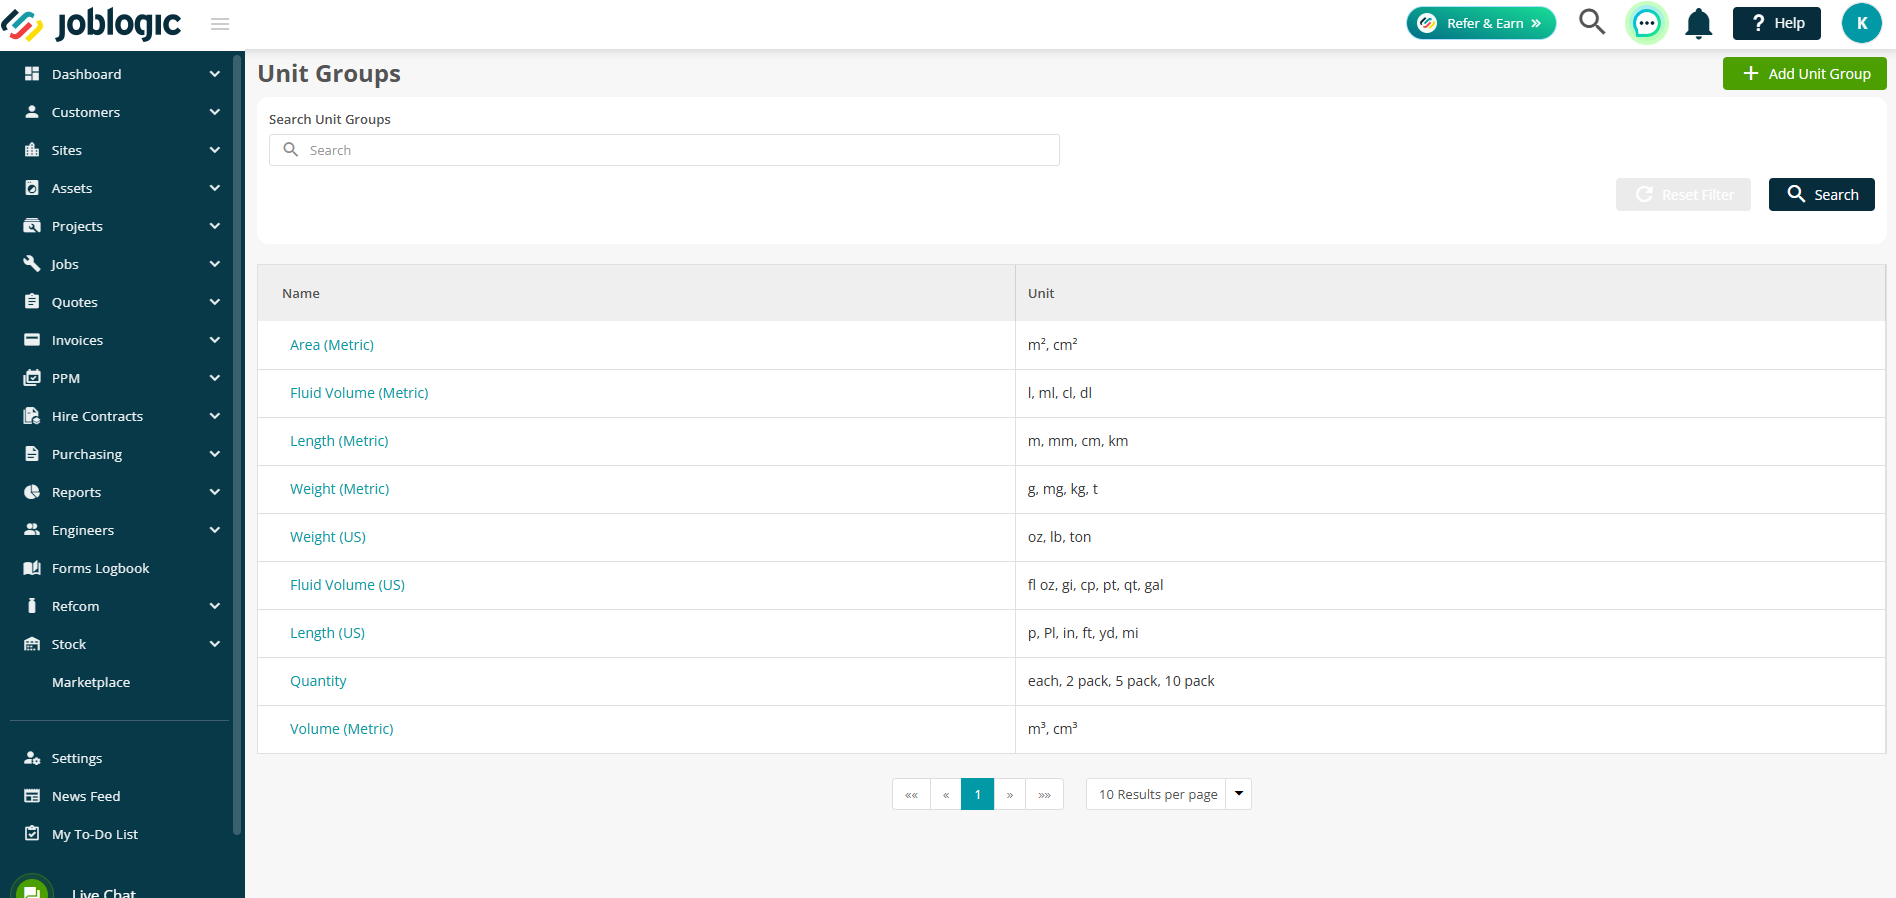
To view more details, click the blue hyperlink under Name.

Default groups cannot be edited, but you can add additional stock units to them if required.
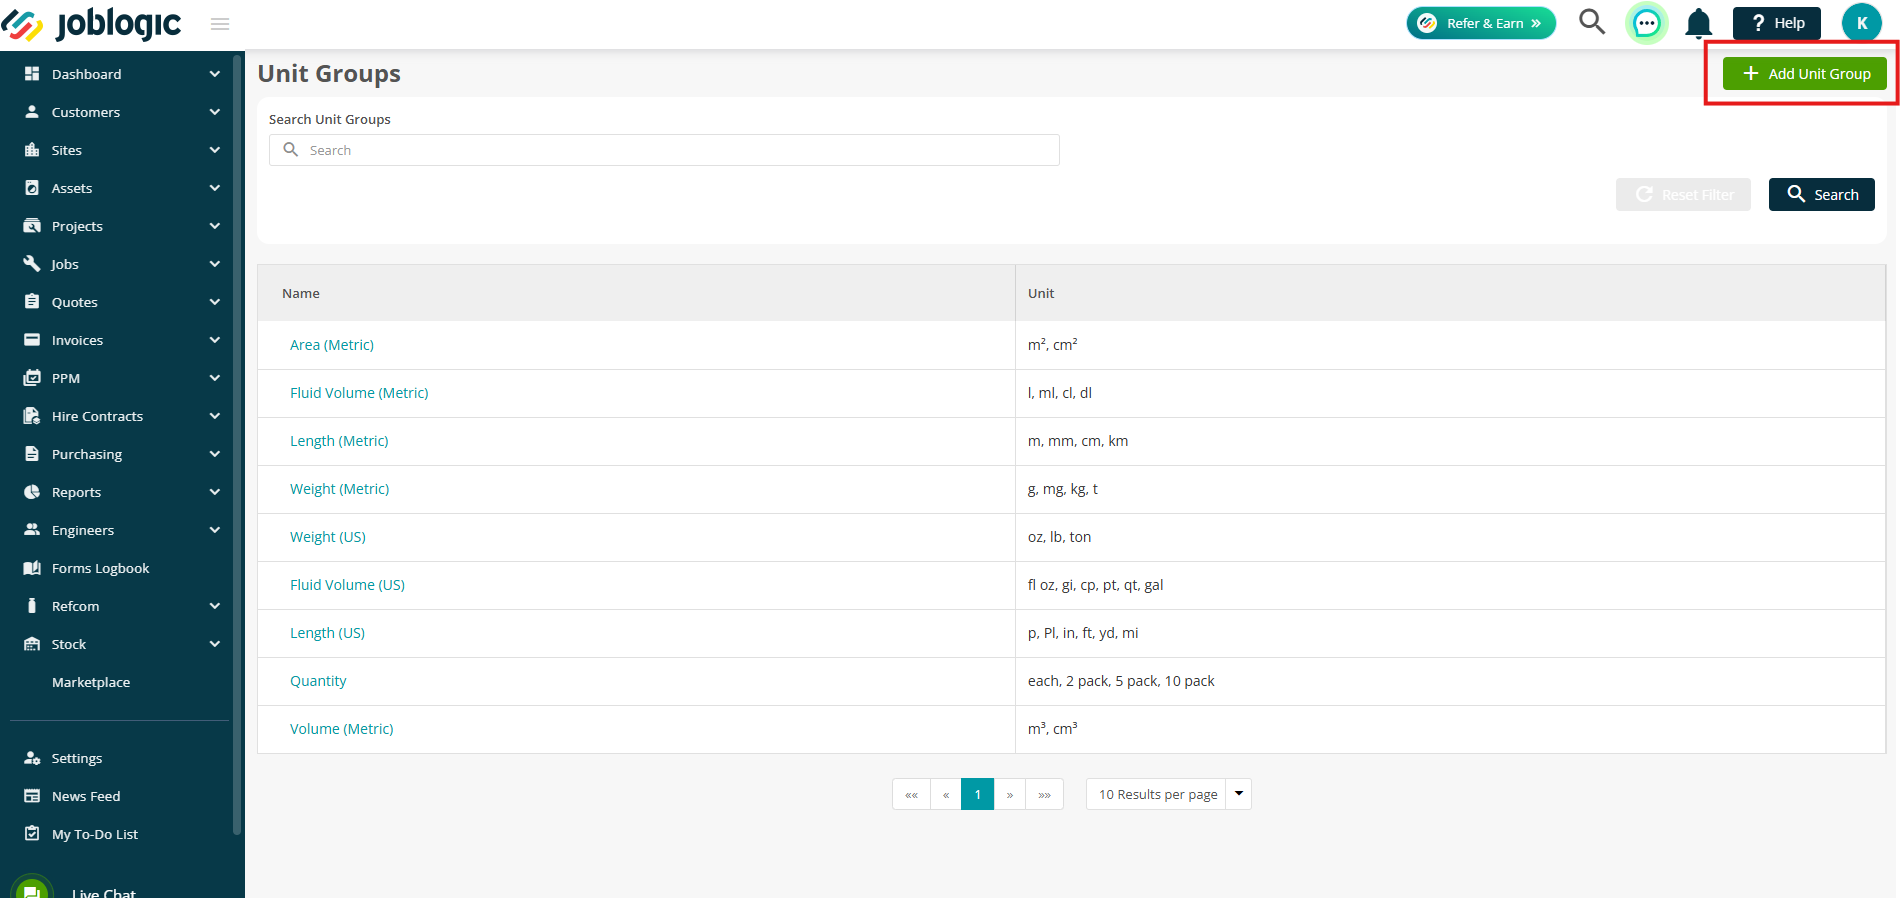
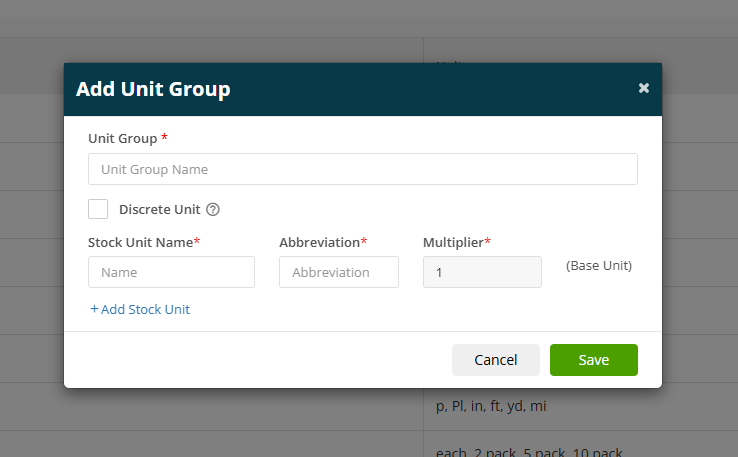
If you’d like to create a brand-new group, click Add Unit Group.
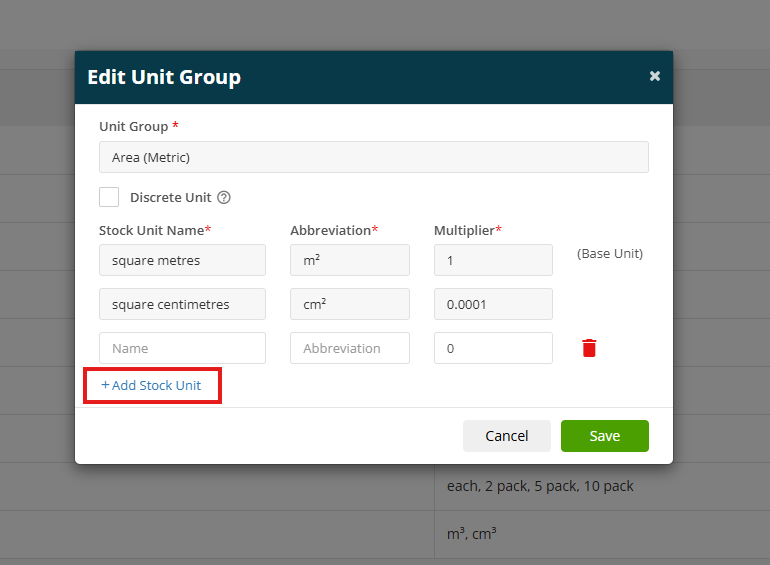
Enter your Unit Group, Stock Unit Name, and Abbreviation.
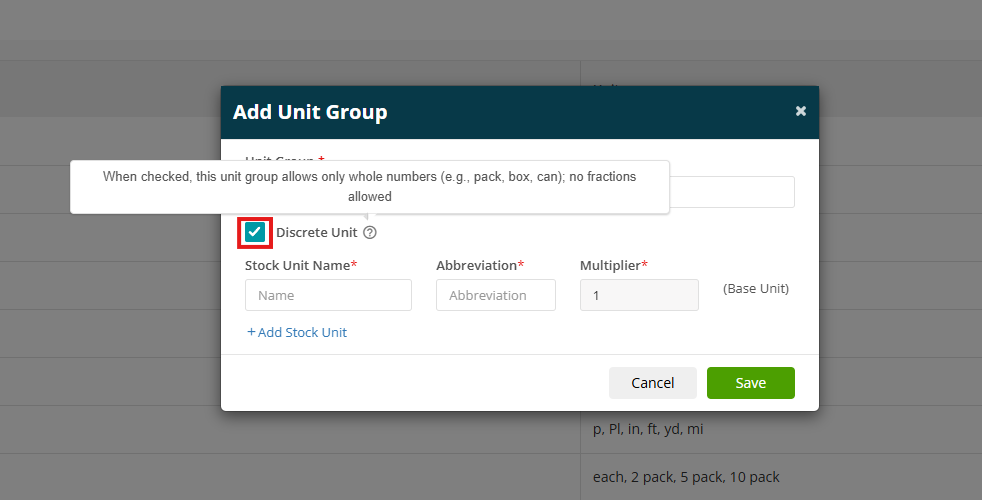
Tick Discrete Unit if you’d like the group to only allow whole numbers (e.g. pack, box, can), fractions won’t be accepted.
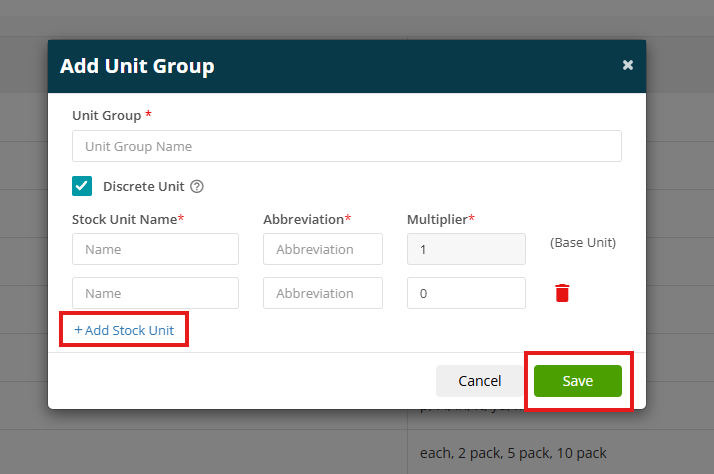
Click Add Stock Unit to include more units. This also lets you enter a different Multiplier for each one.
Once you’re happy, click Save.
Stock Unit fields against your Parts and Equipment
Now let's take a look at setting up the Price Per Unit (Buying), Price Per Unit (Selling), Buying Unit and Selling Unit for your parts and equipment.
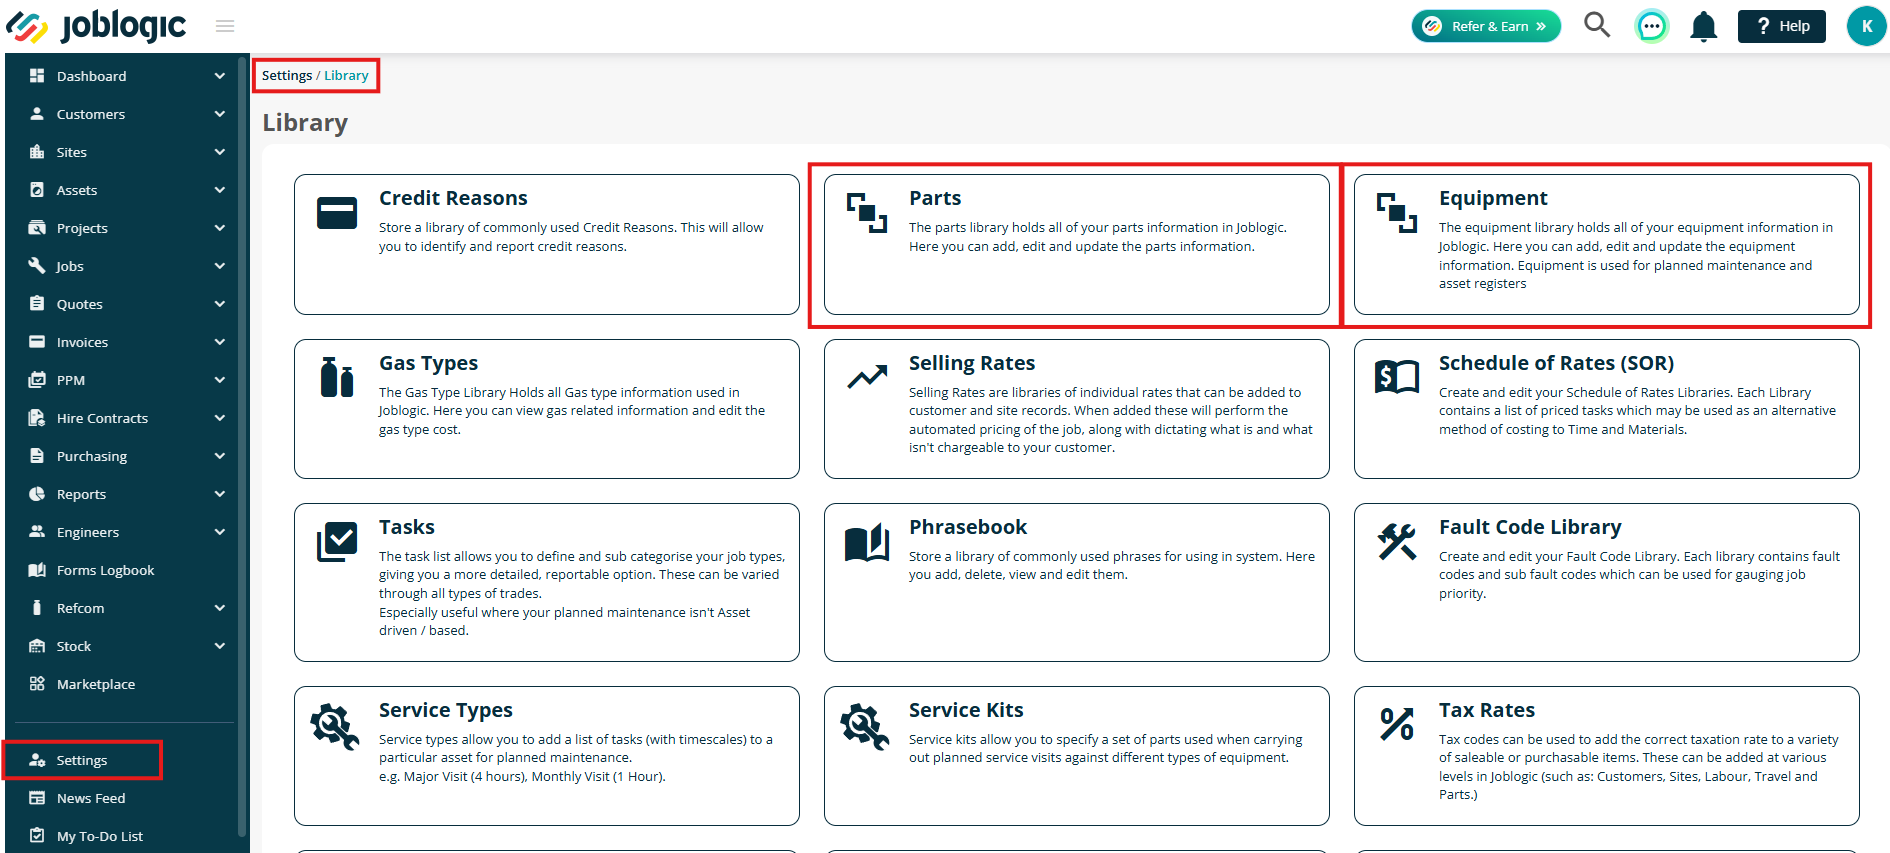
To get started, navigate to one of the following:
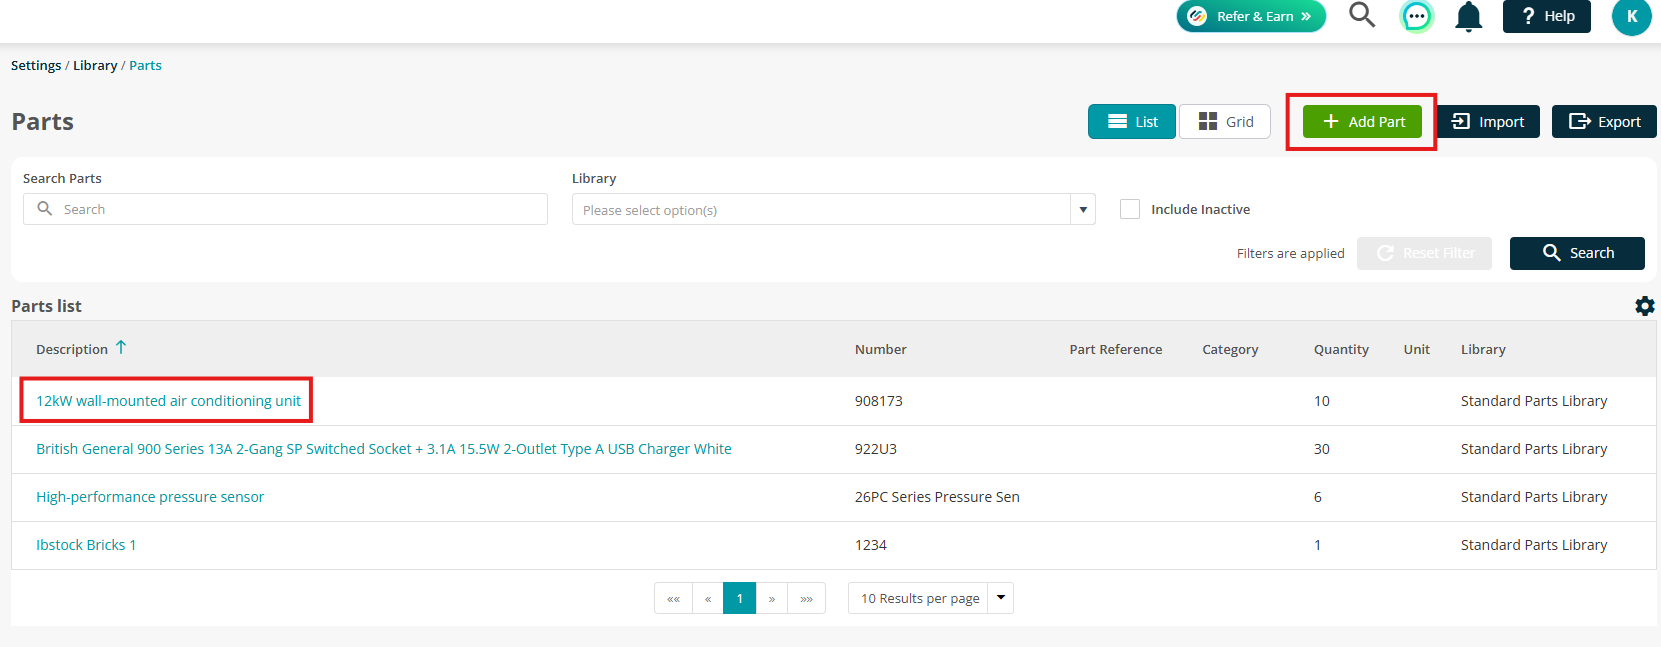
Parts:
Settings > Library > Parts
Equipment:
Settings > Library > Equipment
Either open an existing item and click Edit, or click Add to create a new one.
From here, you can set up the following:
- Price Per Unit (Buying)
- Price Per Unit (Selling)
- Buying Unit
- Selling Unit
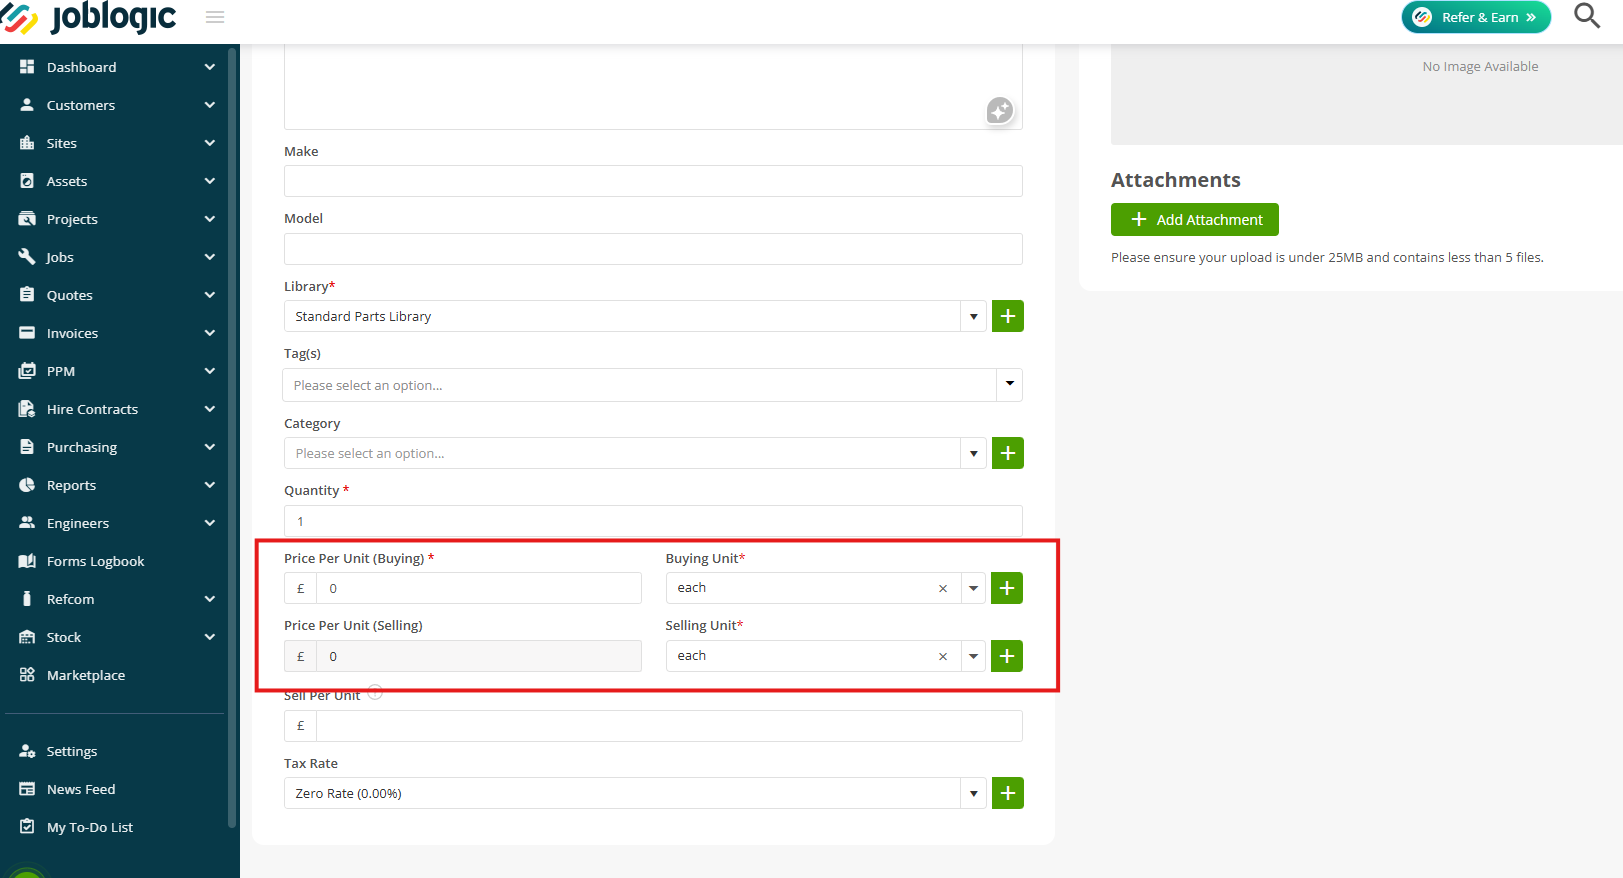
The Price Per Unit (Selling) will be automatically calculated based on the Price Per Unit (Buying) and the units you’ve selected.
You can still enter a Sell Per Unit as normal.
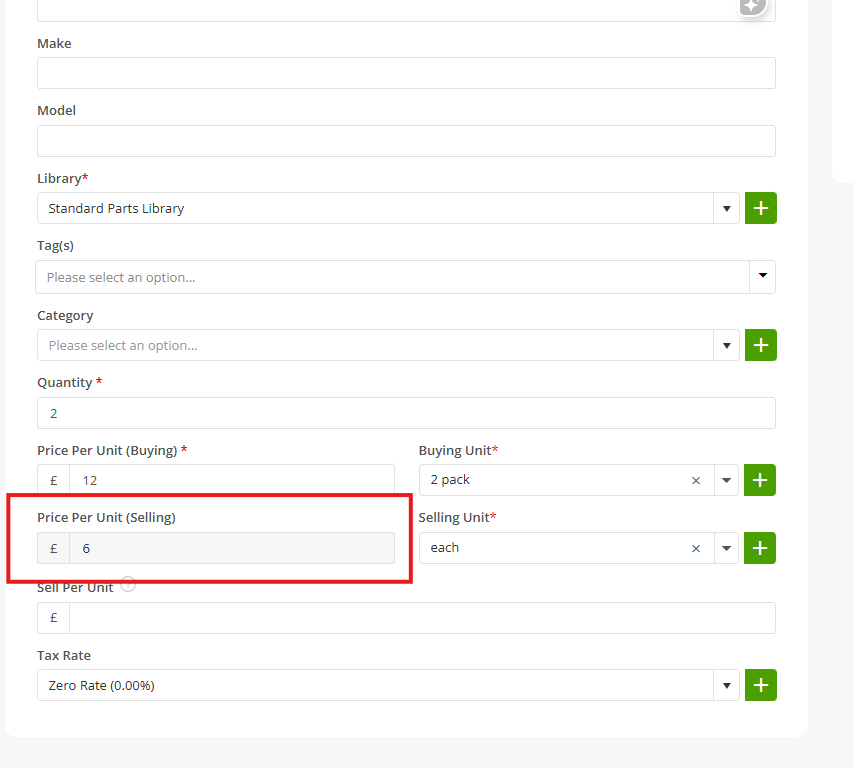
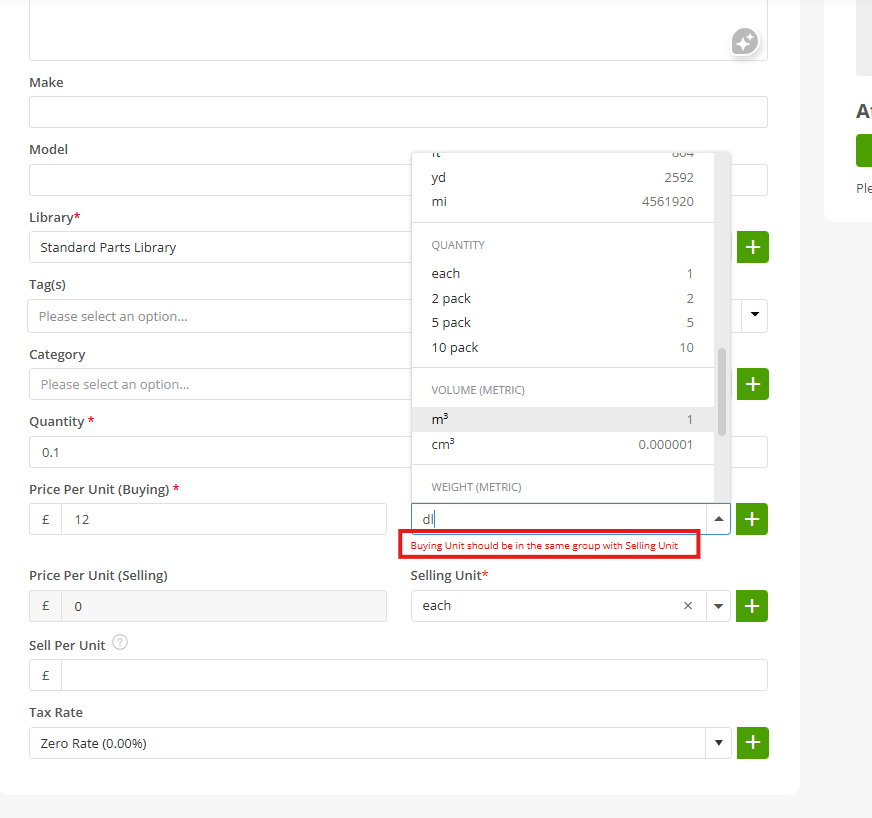
Please note: Both the Buying Unit and Selling Unit must belong to the same group. If you try to select units from different groups, an error message will appear.
Linked Suppliers
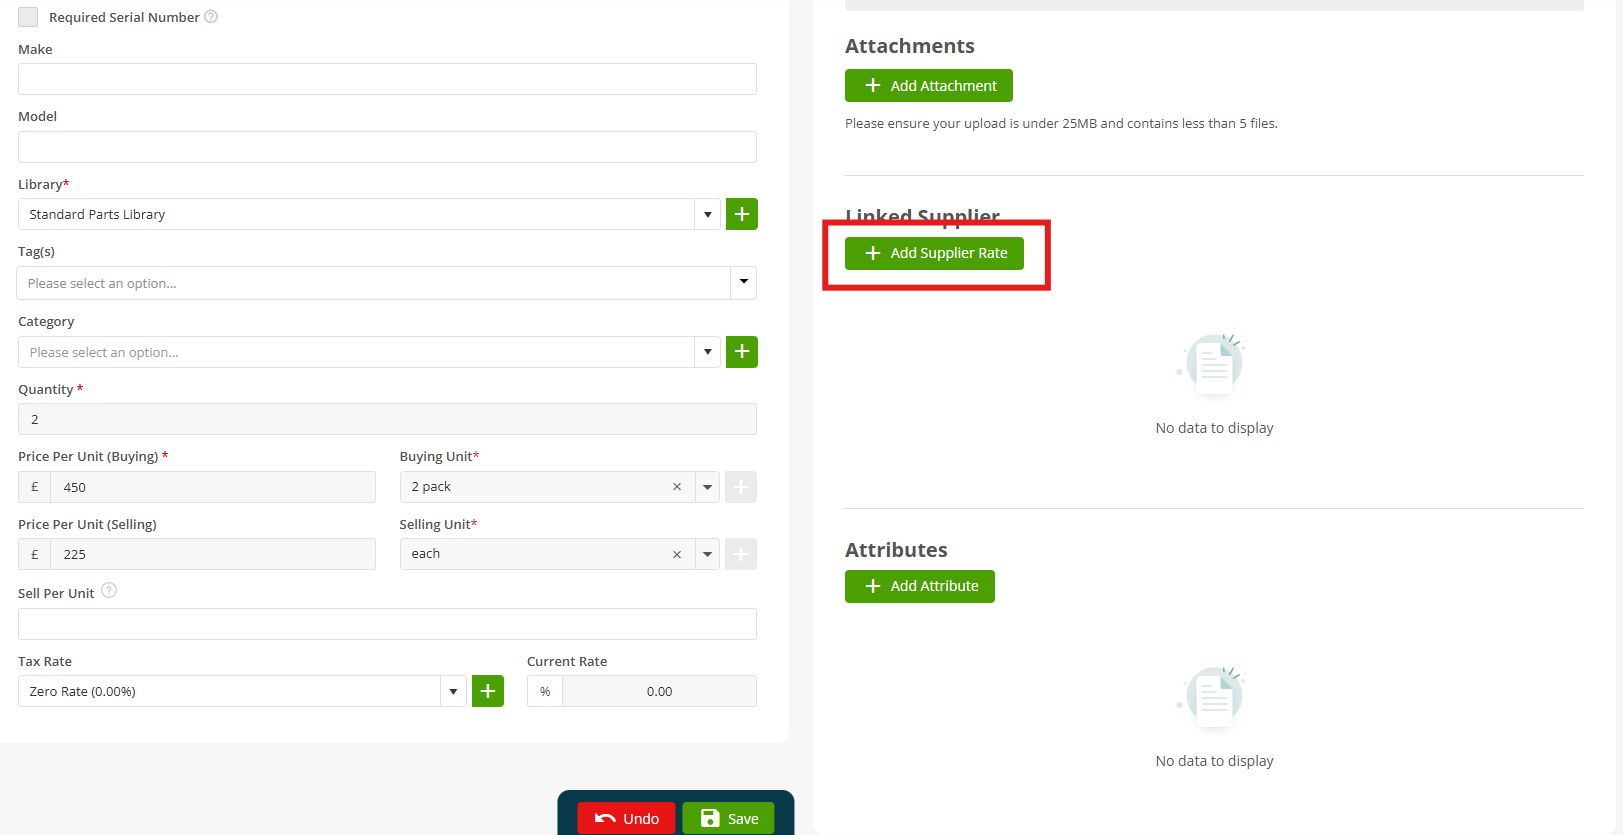
If you are linking suppliers to your parts/equipment, the buying unit will be displayed here when adding supplier rates.
Click Add Supplier Rate to get started.
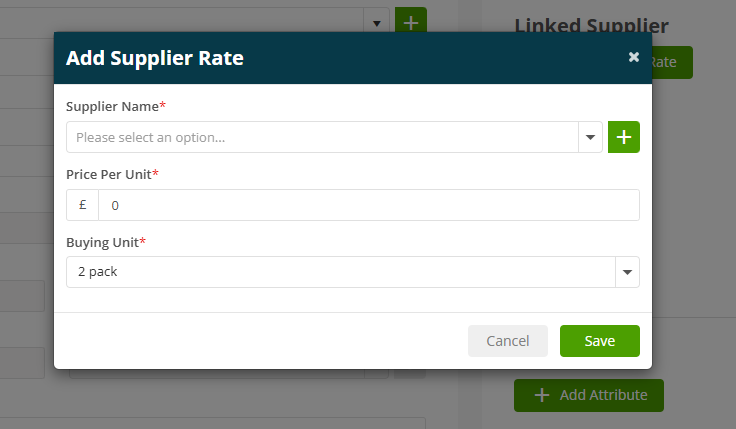
Choose your Supplier from the dropdown, enter your Price Per Unit and Buying Unit.
The Buying Unit will default to the Buying Unit entered against the part, but can be amended if needed.
Hit Save when you are happy with your Supplier Rate details.
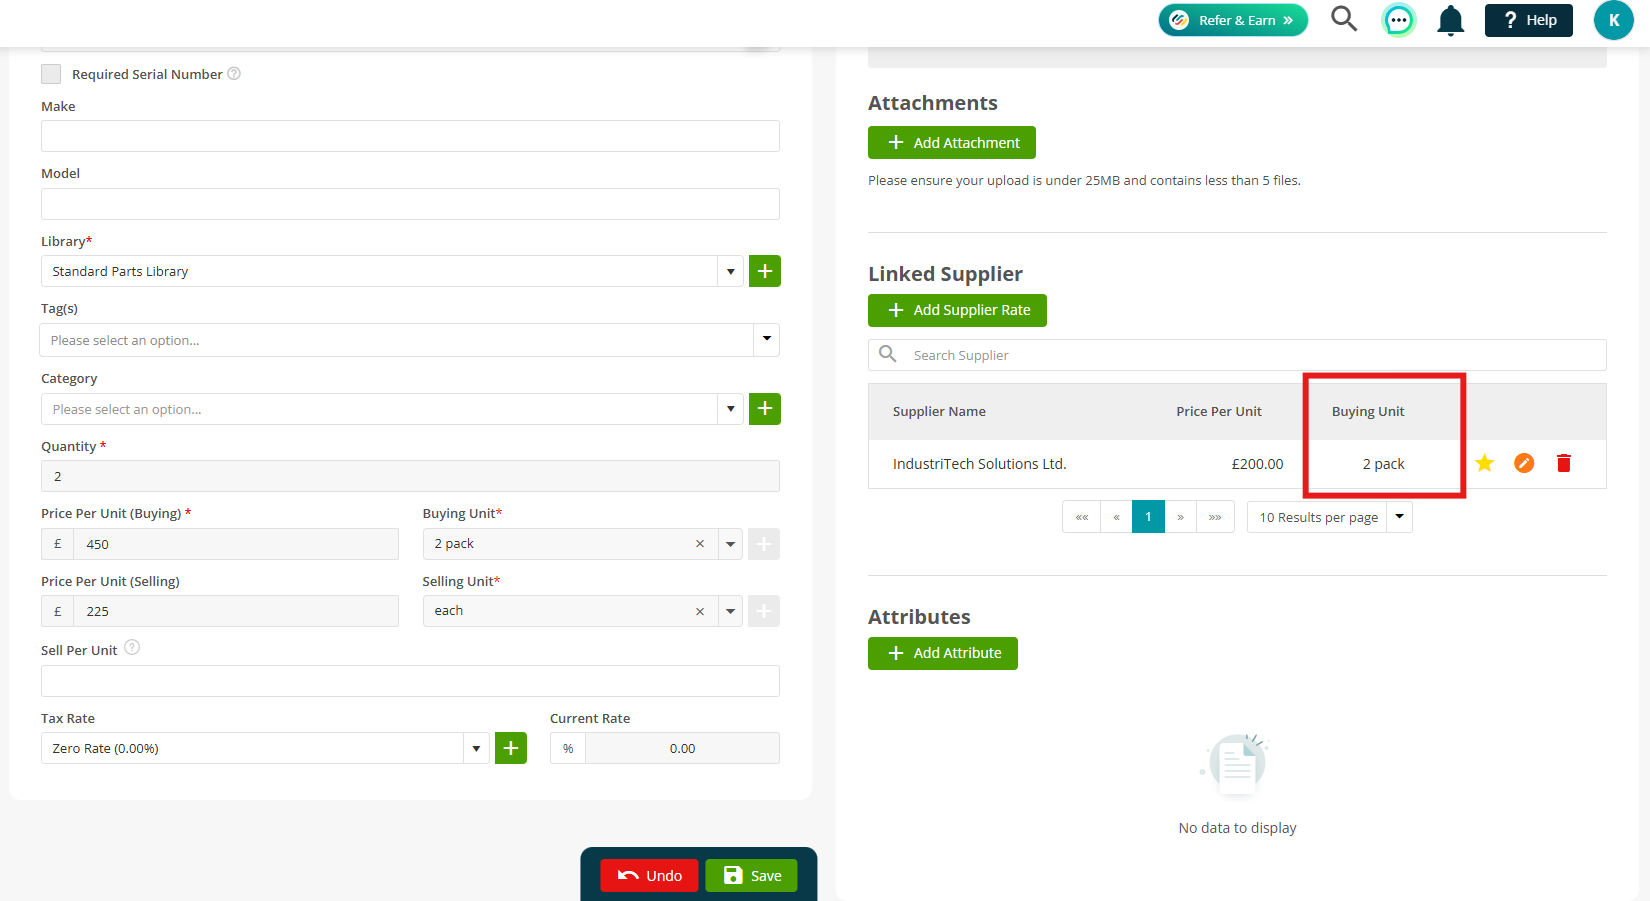
The Buying Unit will be displayed against the Linked Supplier.
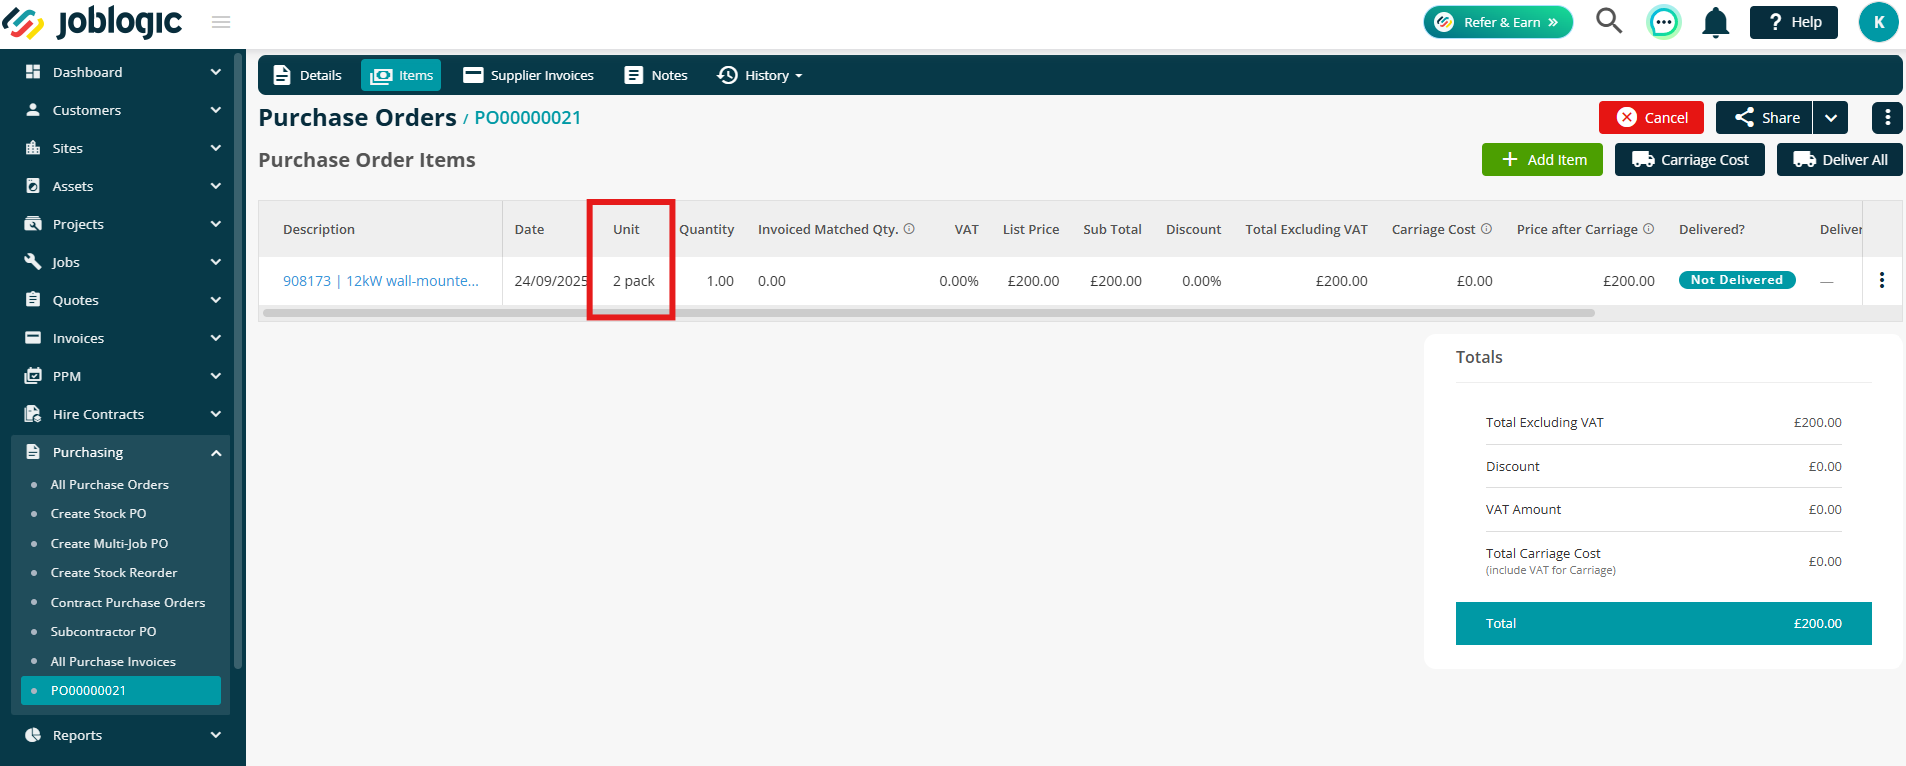
Purchase Orders
When adding items to a Purchase Order, Joblogic will automatically fill in the stock unit based on the supplier linked to the part or equipment record.
You can change the unit if needed, but only within the same Unit Group.
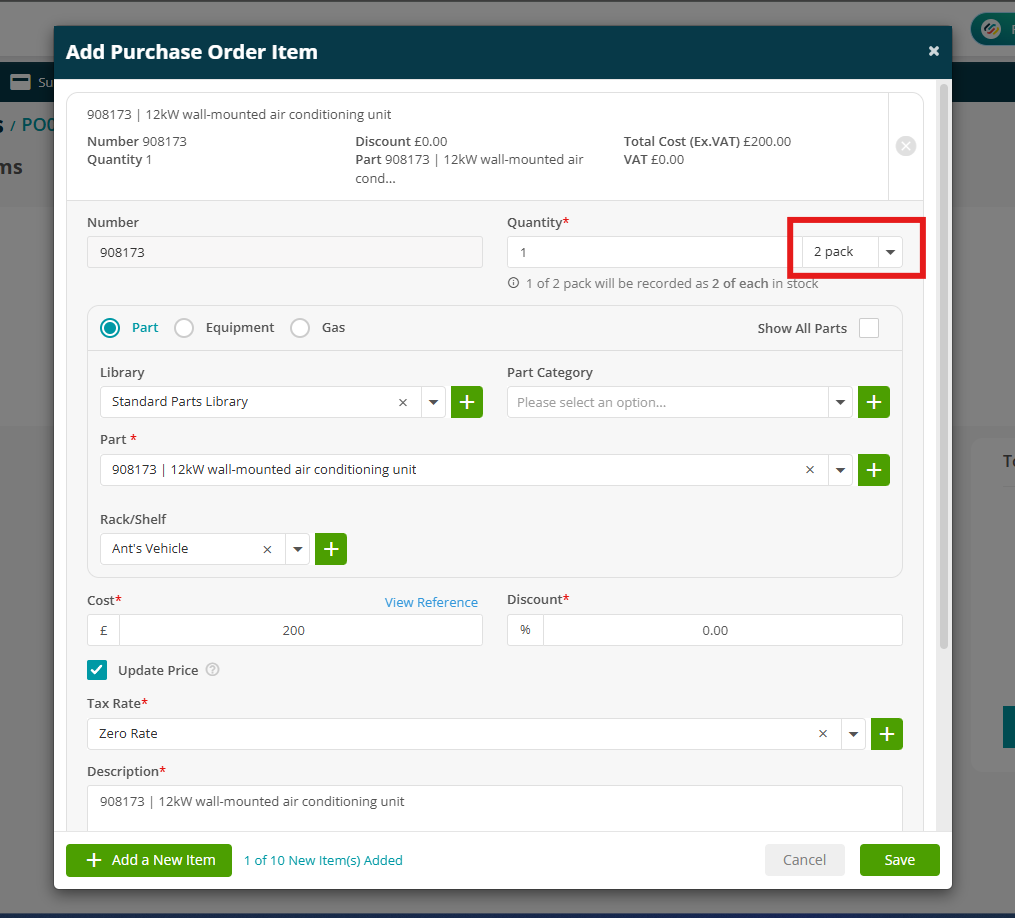
The Purchase Order items screen will then display the Unit here:
Further Support
For further information or assistance with the above, contact our Support Team on 0800 326 5561 or email support@joblogic.com. Alternatively, our Customer Success Management team can be reached by emailing customersuccess@joblogic.com
Publishing Details
This document was written and produced by Joblogic’s Technical Writing team and was last updated on the date specified above. Be aware that the information provided may be subject to change following further updates on the matter becoming available. Additionally, details within the guide may vary depending on your Joblogic account’s user permissions.