Introduction
The Supplier Return Notes feature is designed to help you manage and track goods or materials that need to be returned to your suppliers. Whether it's due to damage, incorrect items, or surplus stock, this feature ensures all returns are recorded accurately and processed efficiently.
It complements the existing Goods Received Notes (GRNs) functionality by handling the return side of your stock workflow, giving you full visibility and traceability over outbound stock movements.
In this guide, we’ll walk you through how to create and manage Supplier Return Notes, helping you streamline your return processes, reduce errors, and maintain better control over your supply chain.
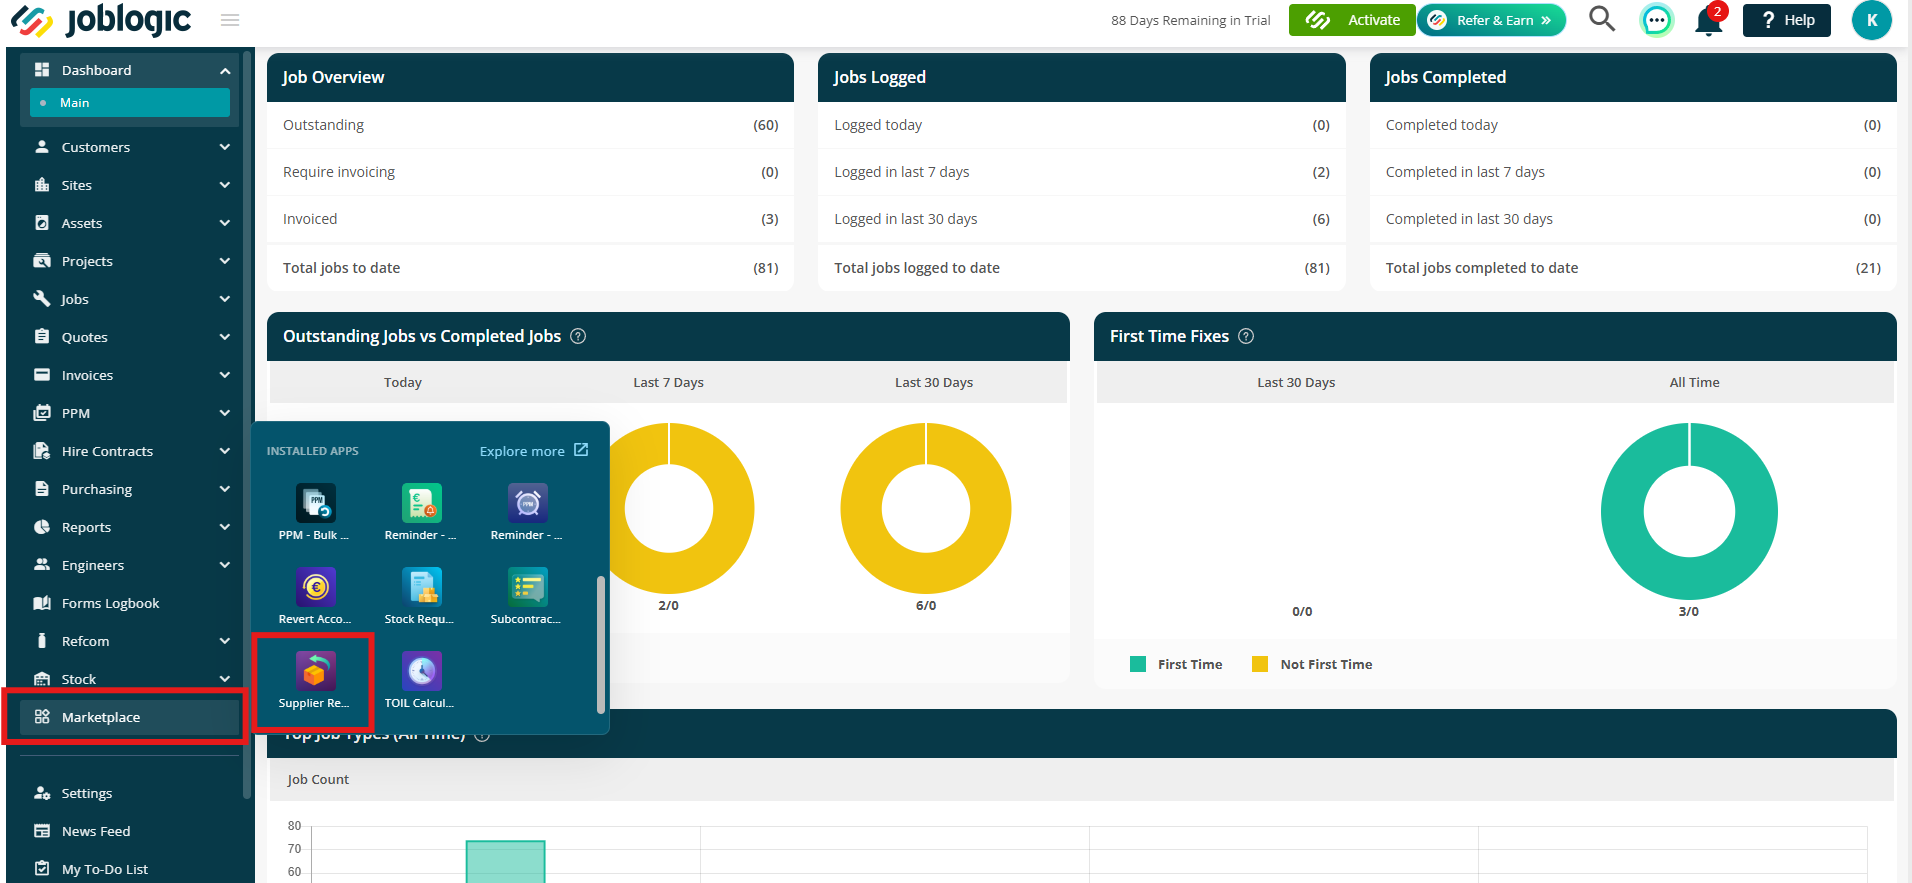
How to access the Supplier Return Notes module
Click the Marketplace option on the main menu and then click Supplier Return Notes

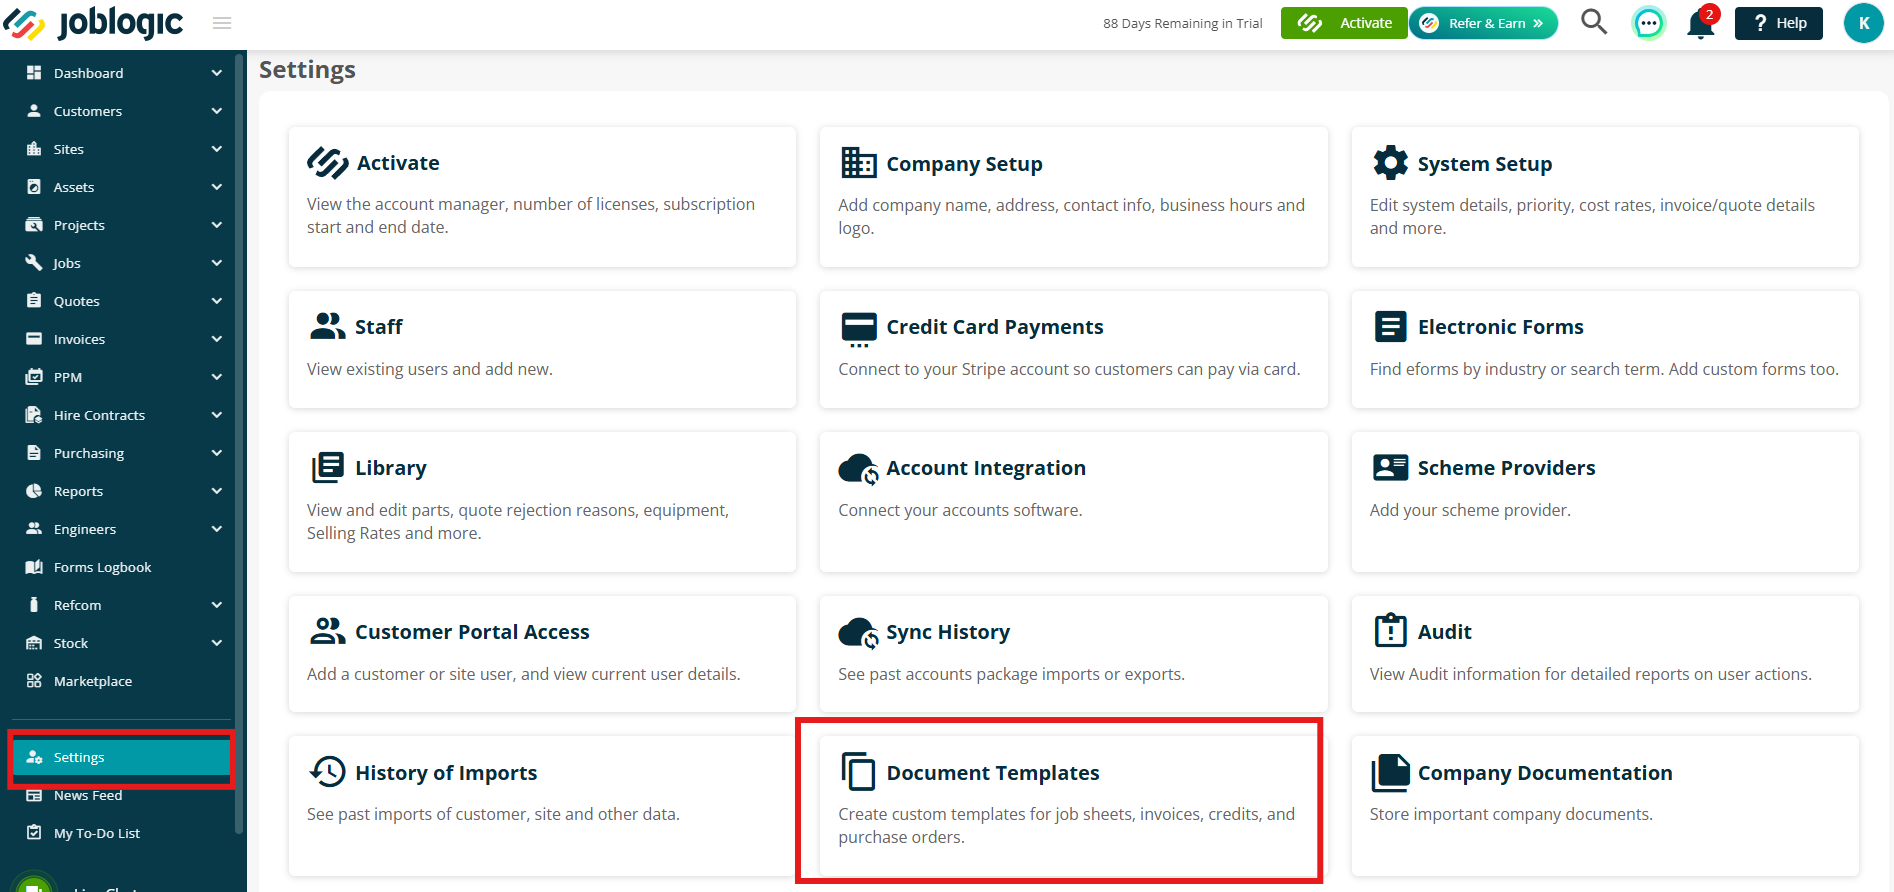
Settings
Before you get started, it’s a good idea to configure your basic settings.
Click the settings icon in the top right corner and select Settings from the menu.
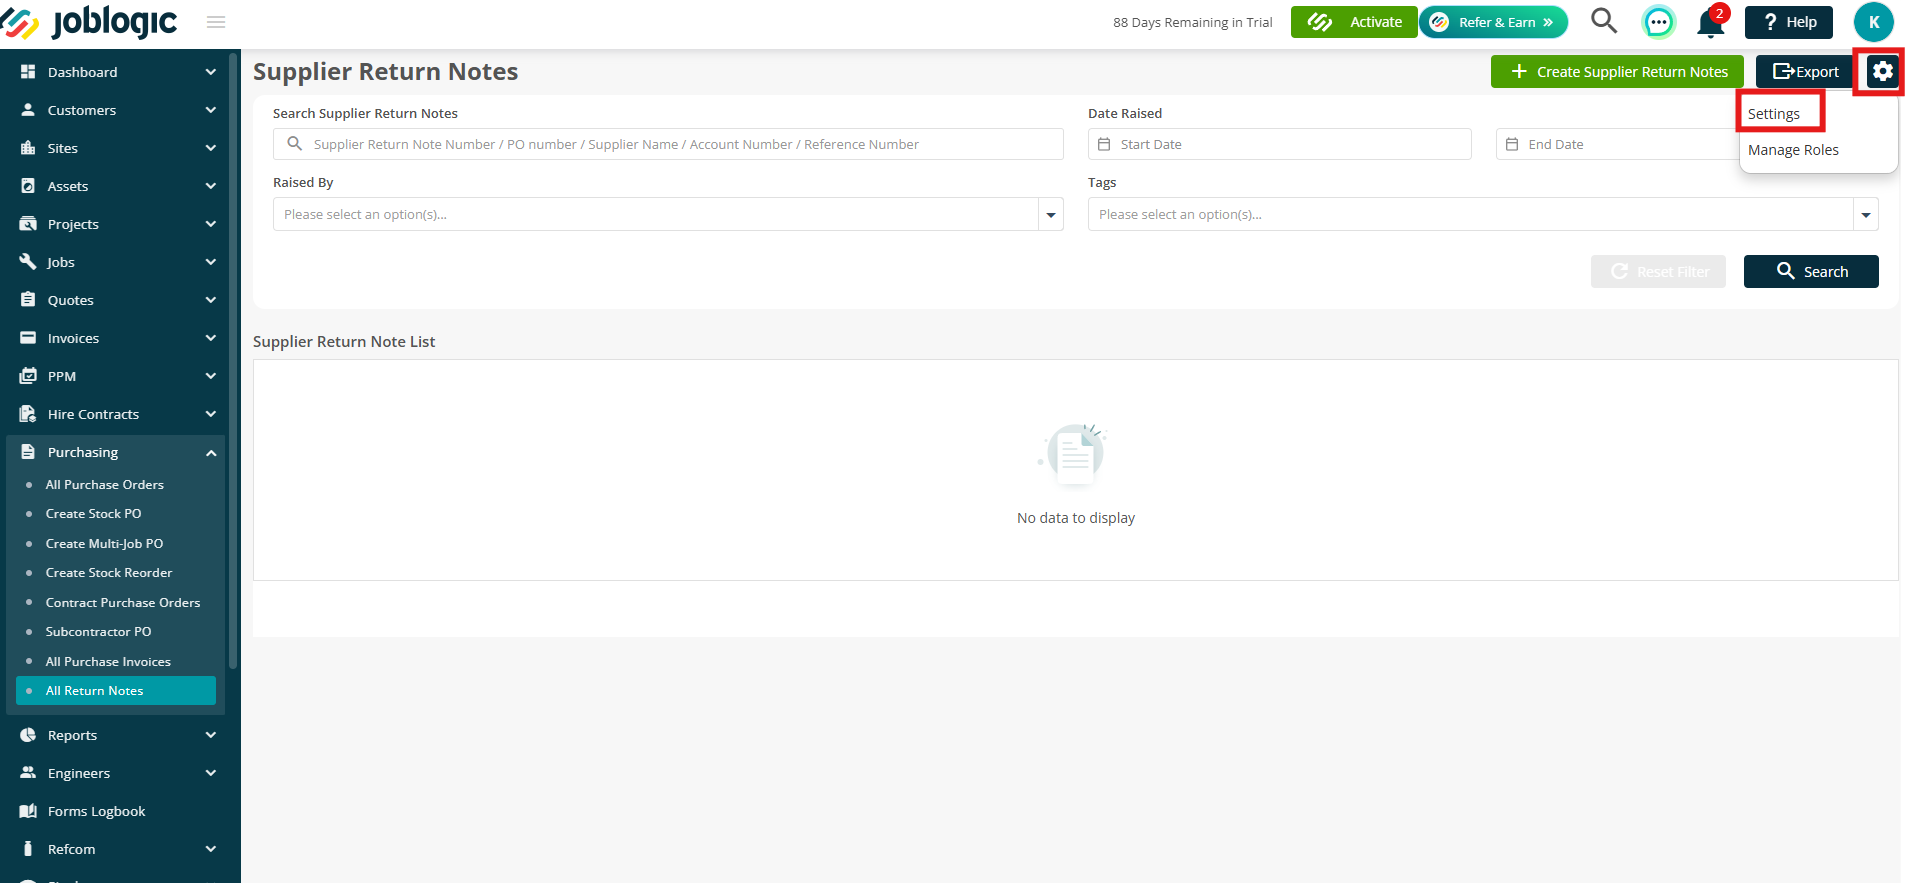
In this section, you can set your Number Convention and manage your list of Return Reasons.
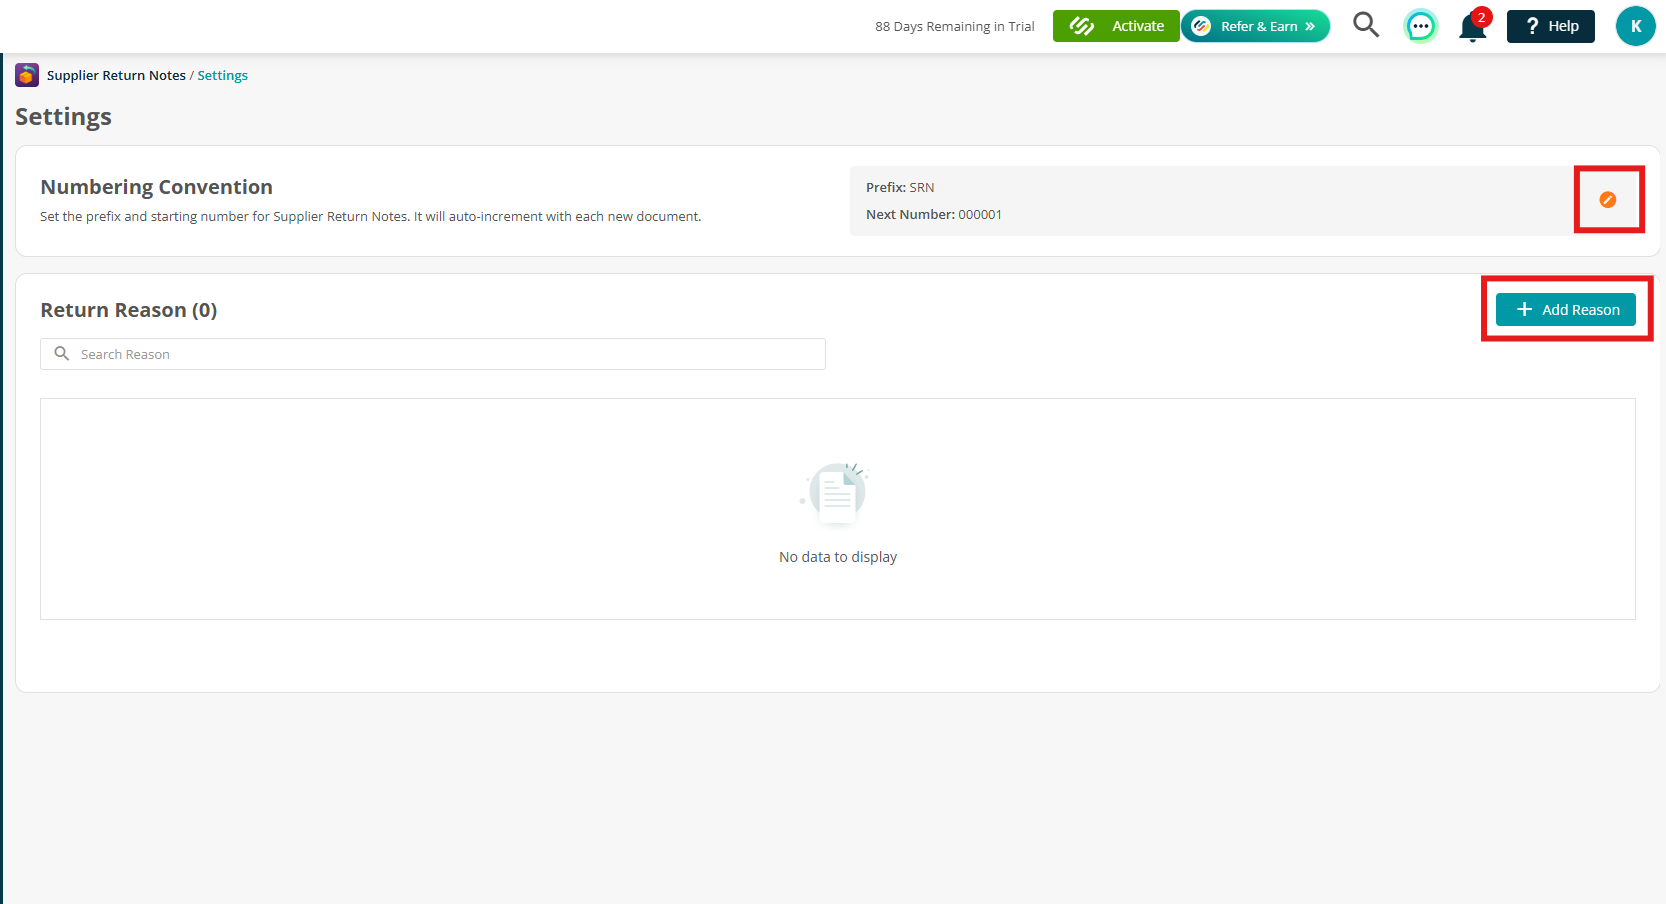
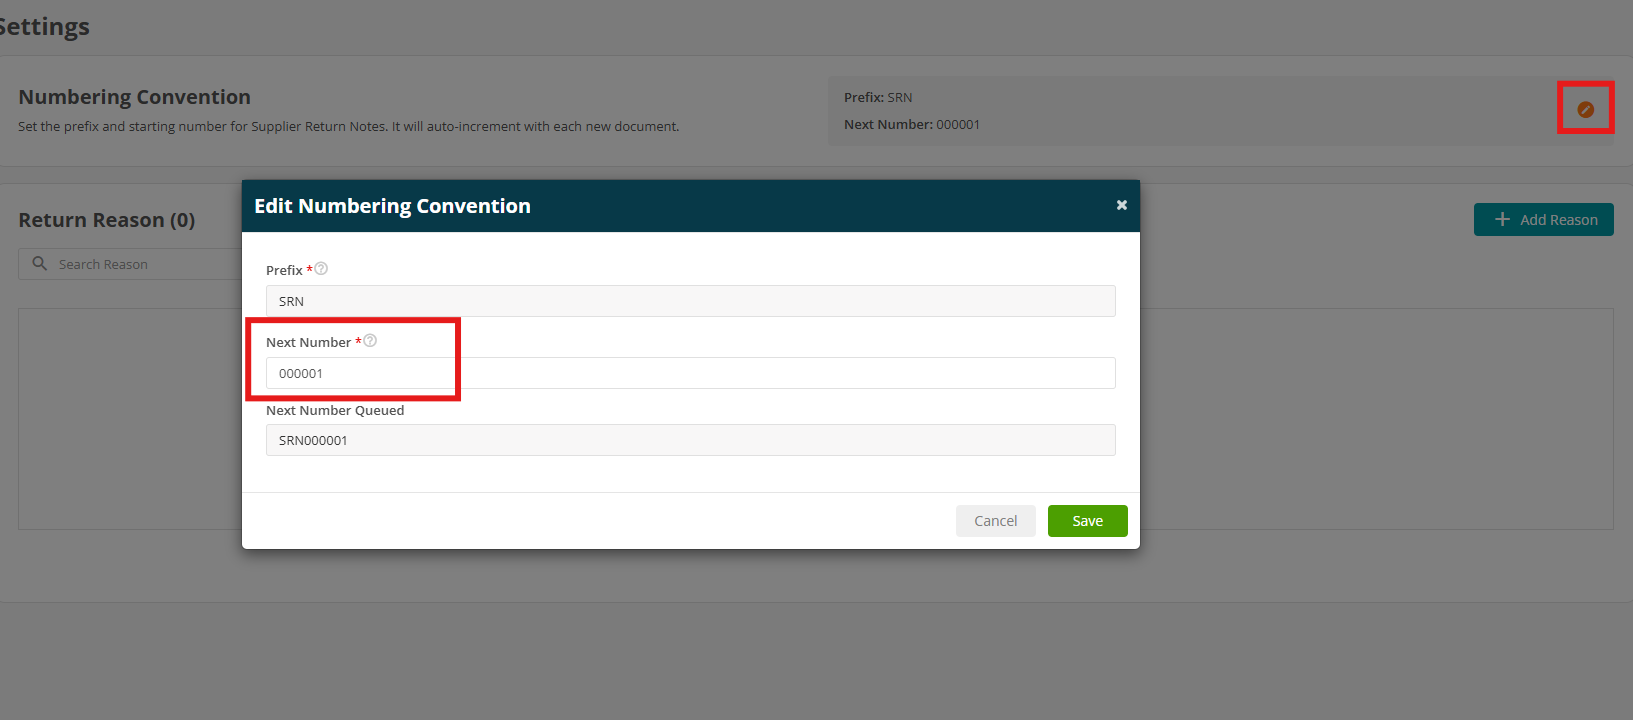
To update your number sequence, click the orange edit icon and enter your desired Next Number.
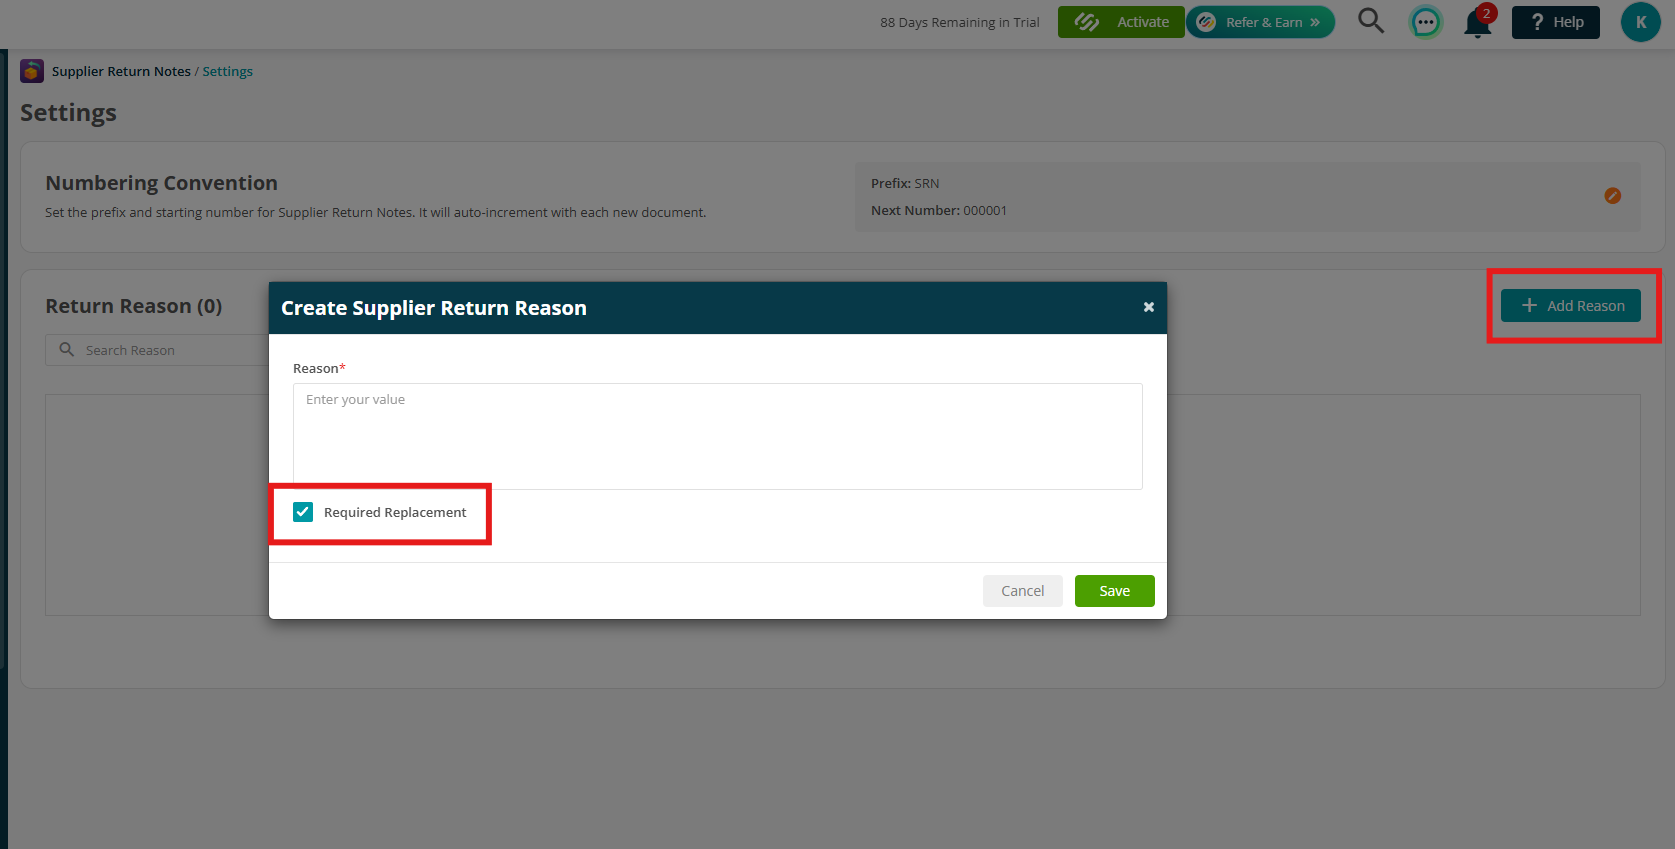
If you'd like to add a new Supplier Return Reason, click Add Reason.
You can also tick the Required Replacement checkbox if a replacement is required when this reason is selected.
These settings help standardise your return process and ensure everything runs smoothly from the start.
Setting up your Document Template
To customise or create your own Supplier Return Note template, go to Settings > Document Templates.
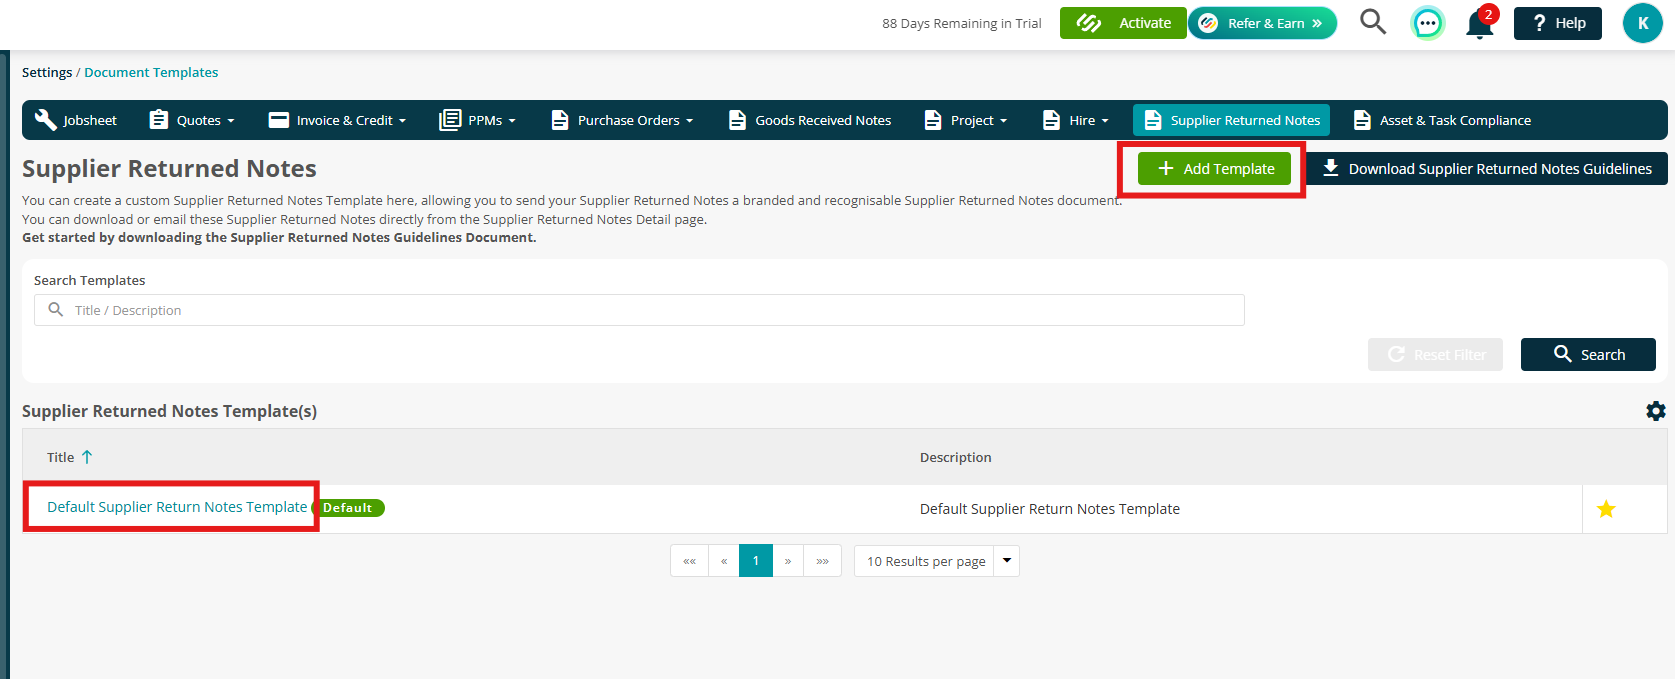
Next, click on the Supplier Returned Notes tab.
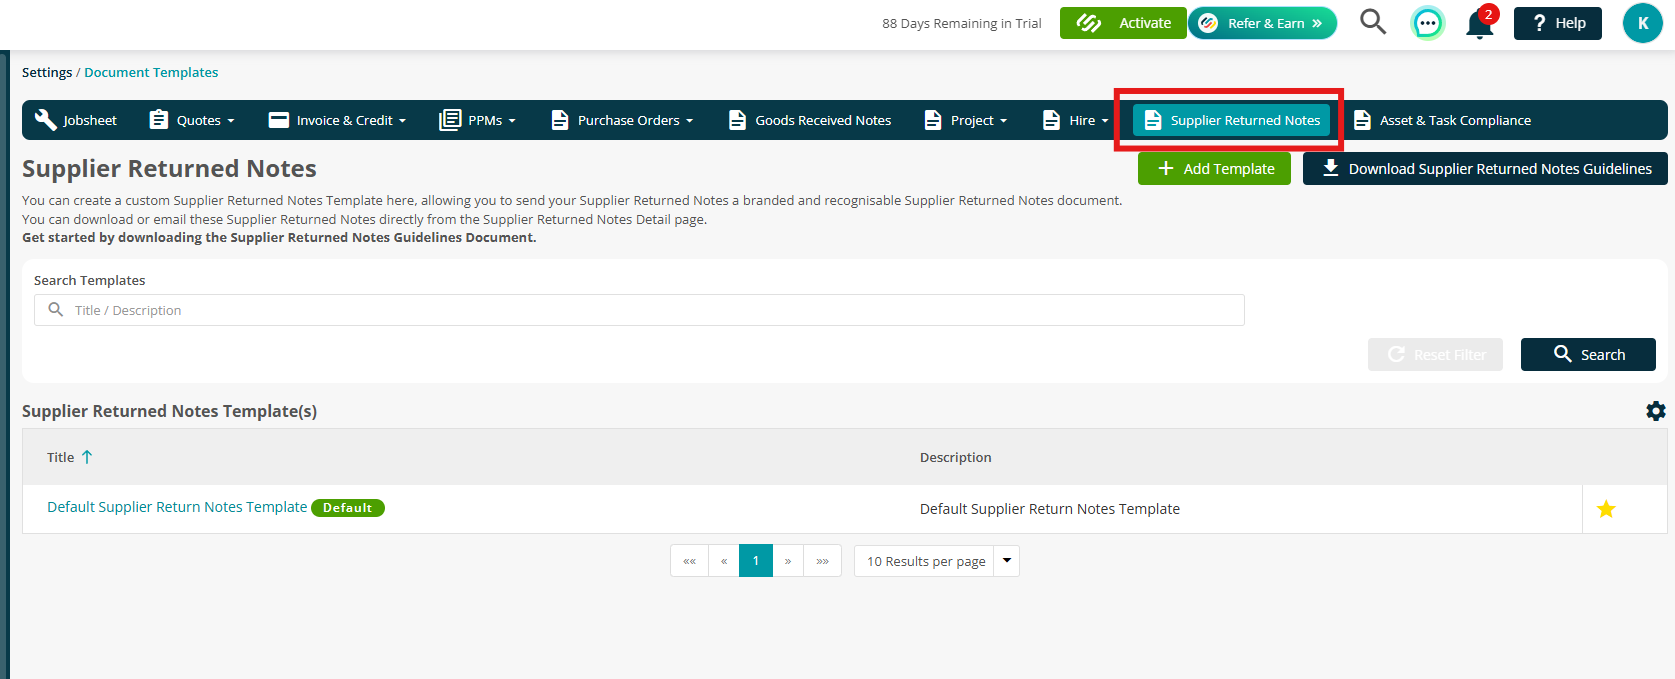
To edit the existing template, click the Title to download it. Once you’ve made your changes, you can reupload your updated version by clicking Add Template.
To read more about setting up your document templates, click here.
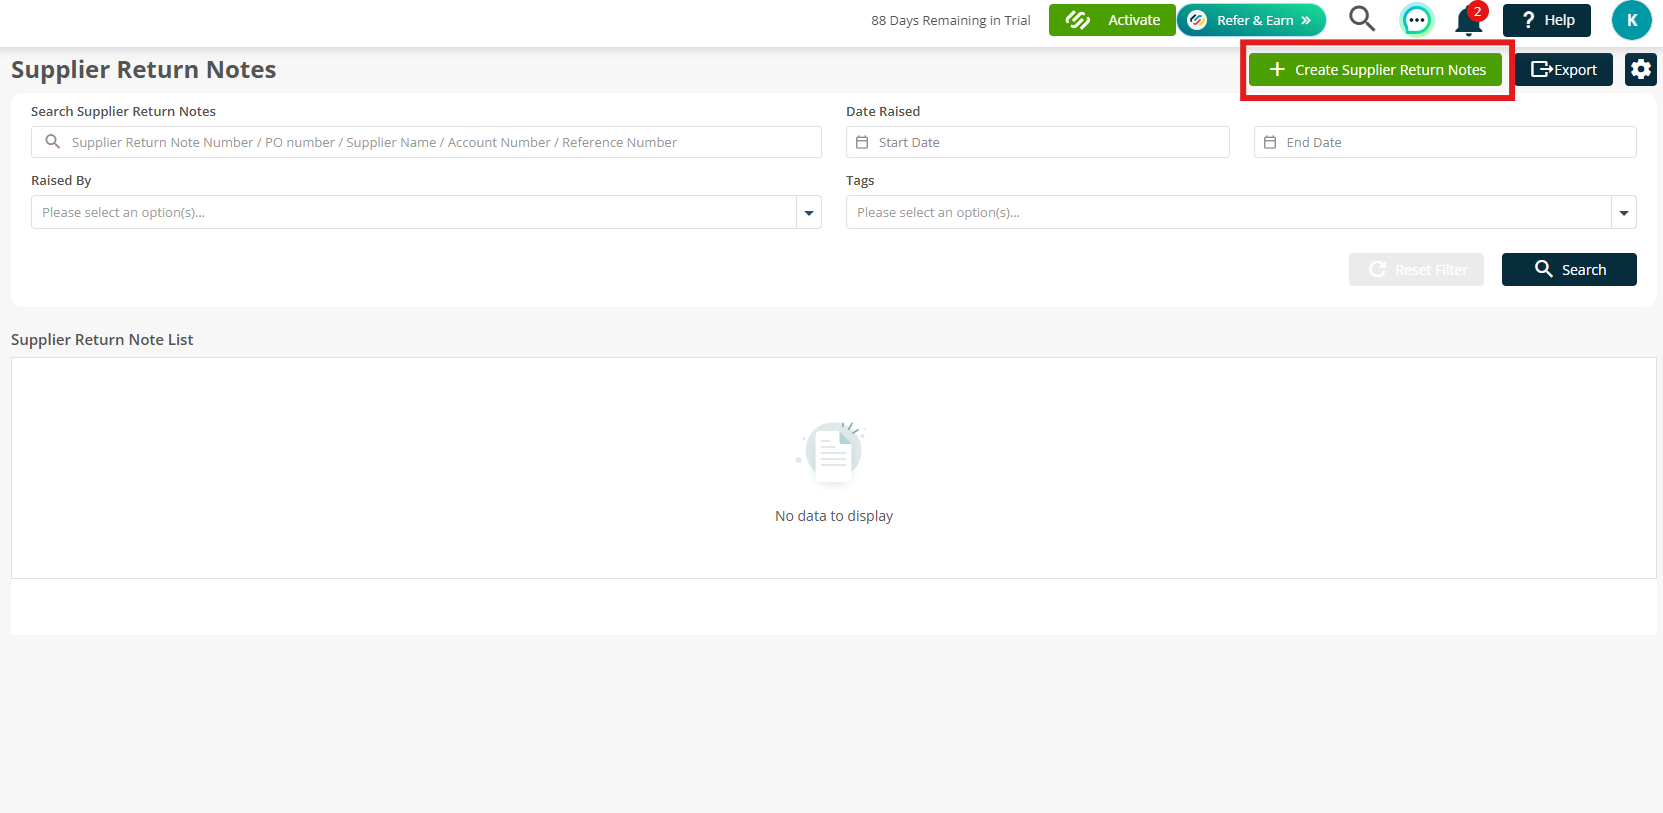
Creating a Supplier Return Note
To create a new Supplier Return Note, head back to the main page and click Create Supplier Return Notes.
Start by selecting your Supplier from the dropdown. You can also enter a specific Date if needed.
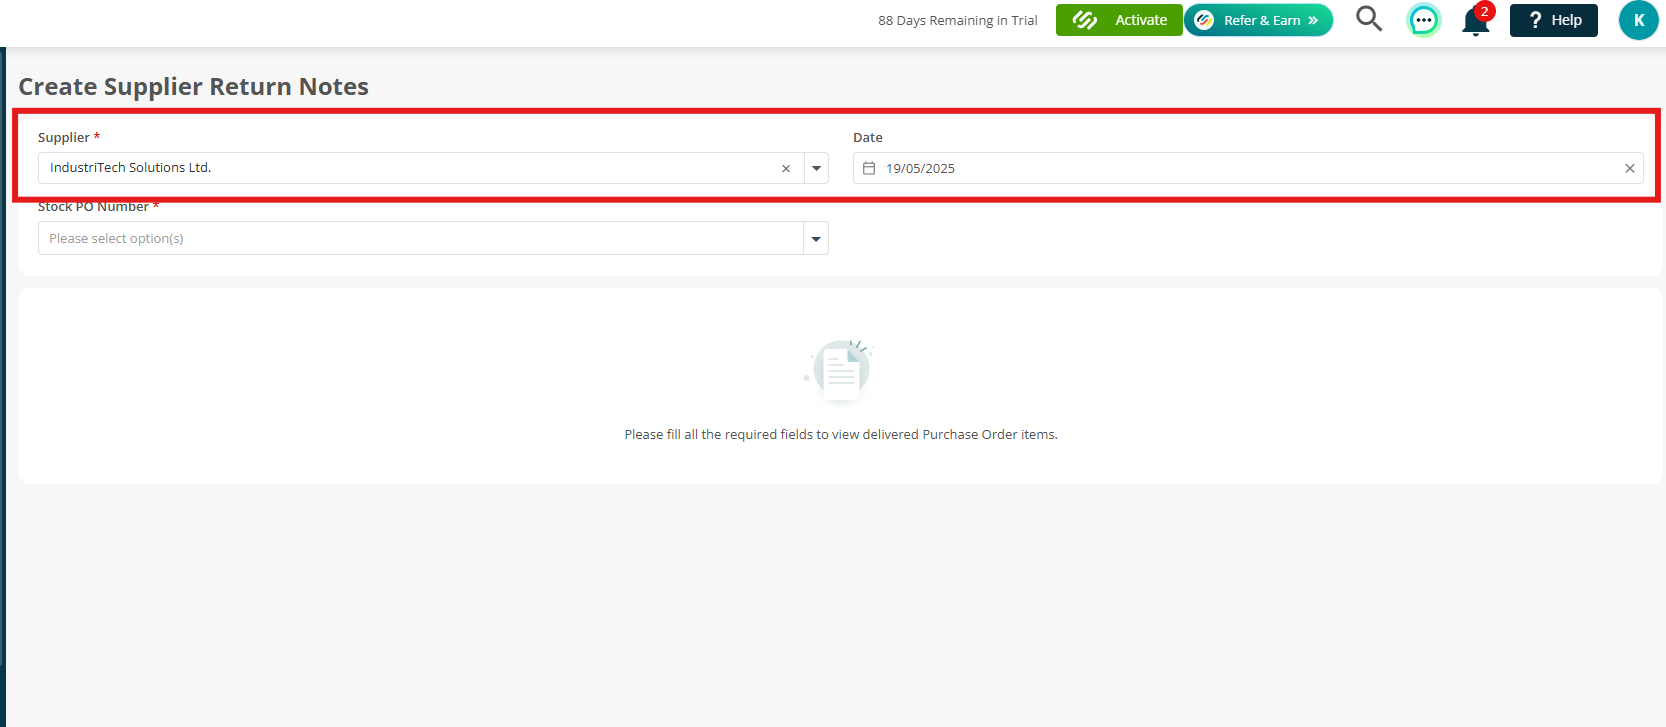
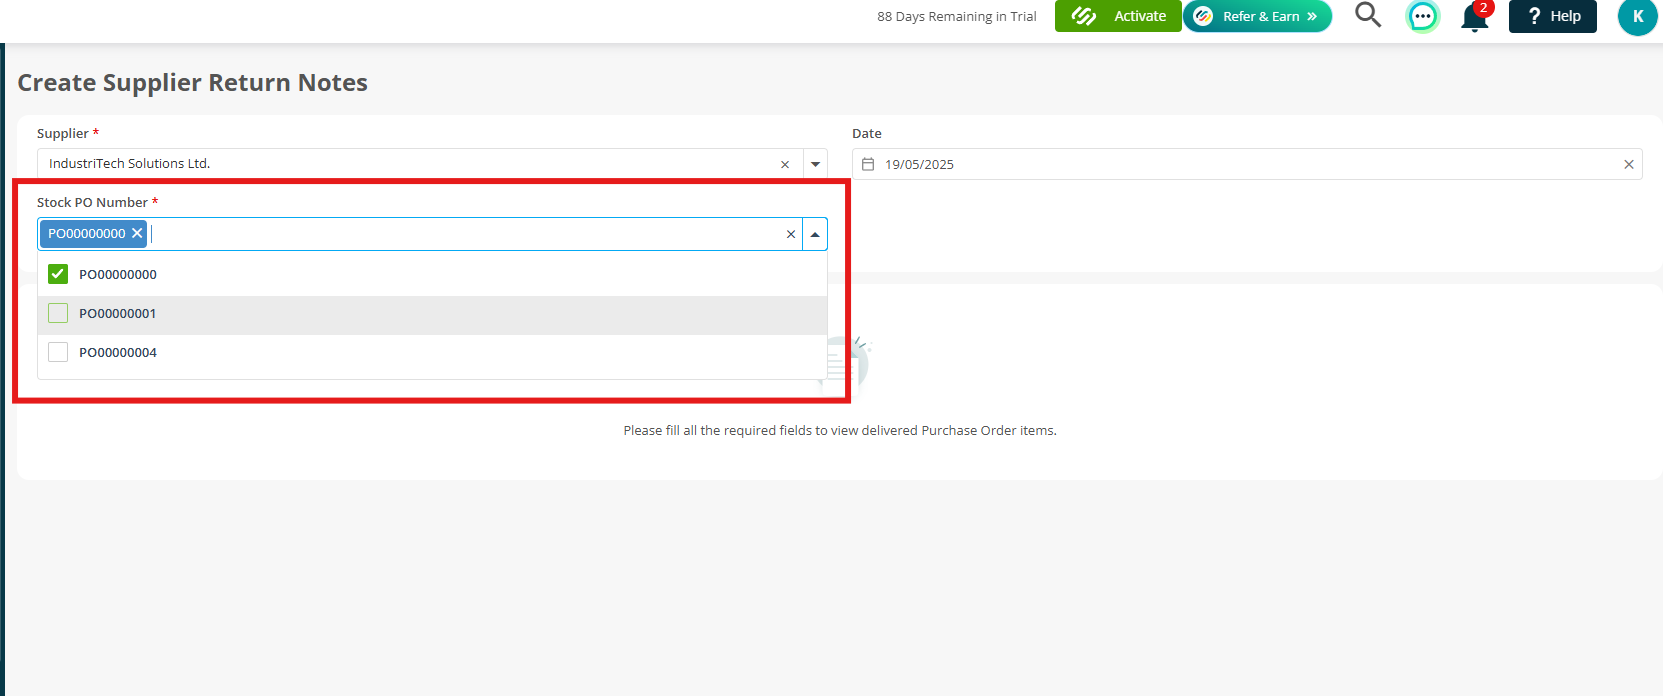
Next, choose the relevant Stock PO Number(s) you’d like to include in the return note.
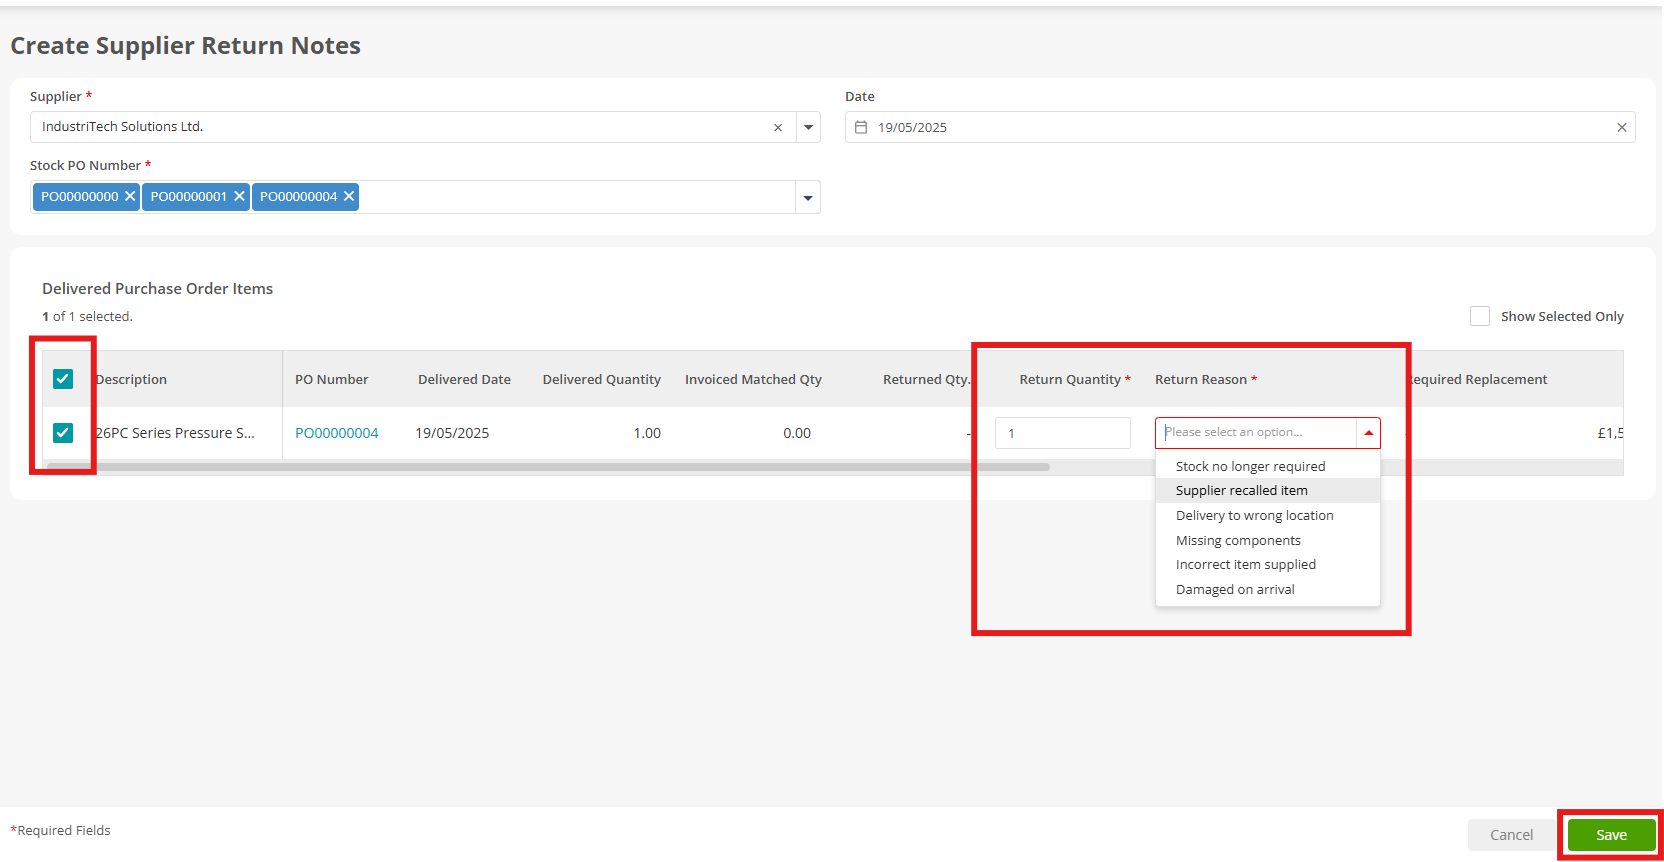
Select the specific items you'd like to add to the Note and then choose the Return Quantity and Return Reason.
Click Save when you are happy with your selections.
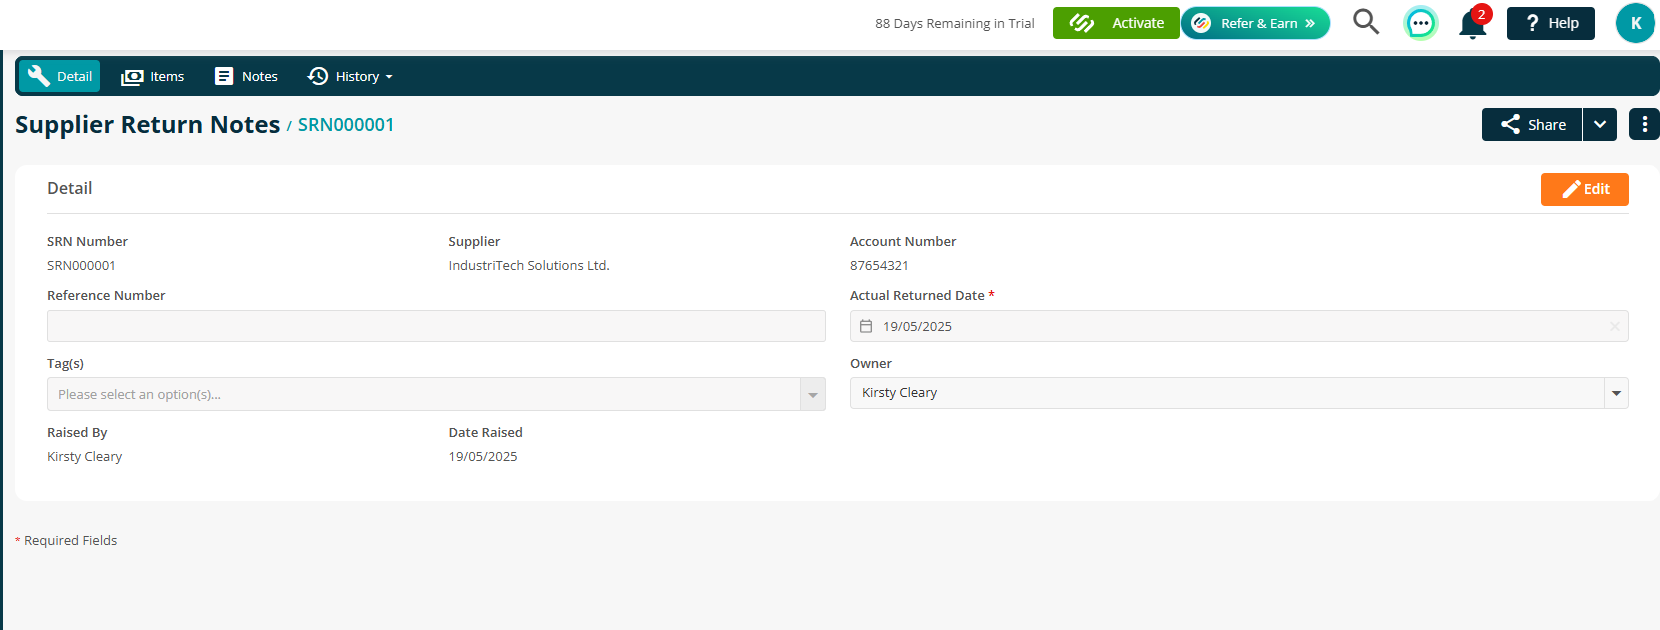
Your Supplier Return Note has now been created.
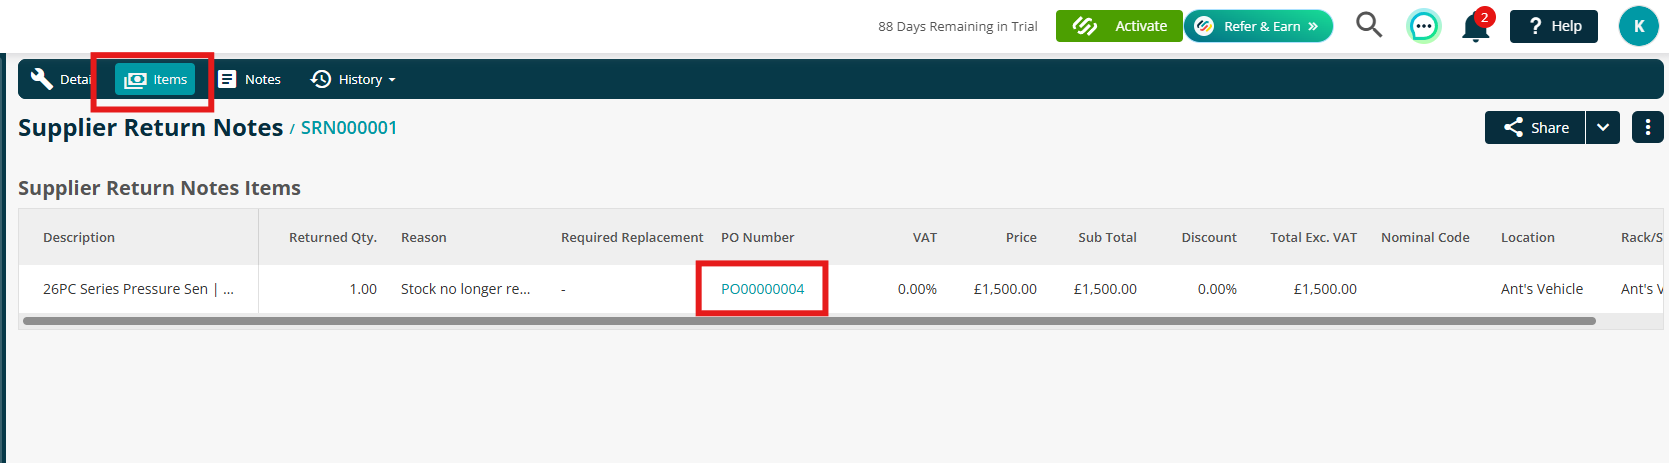
Impact on Purchase Orders
The related Purchase Order items will update automatically based on your return actions.
To view this, navigate to the Items tab within the Supplier Return Note, then click the relevant PO Number.
If you selected a return reason with Required Replacement ticked, the item will be marked as Not Delivered.
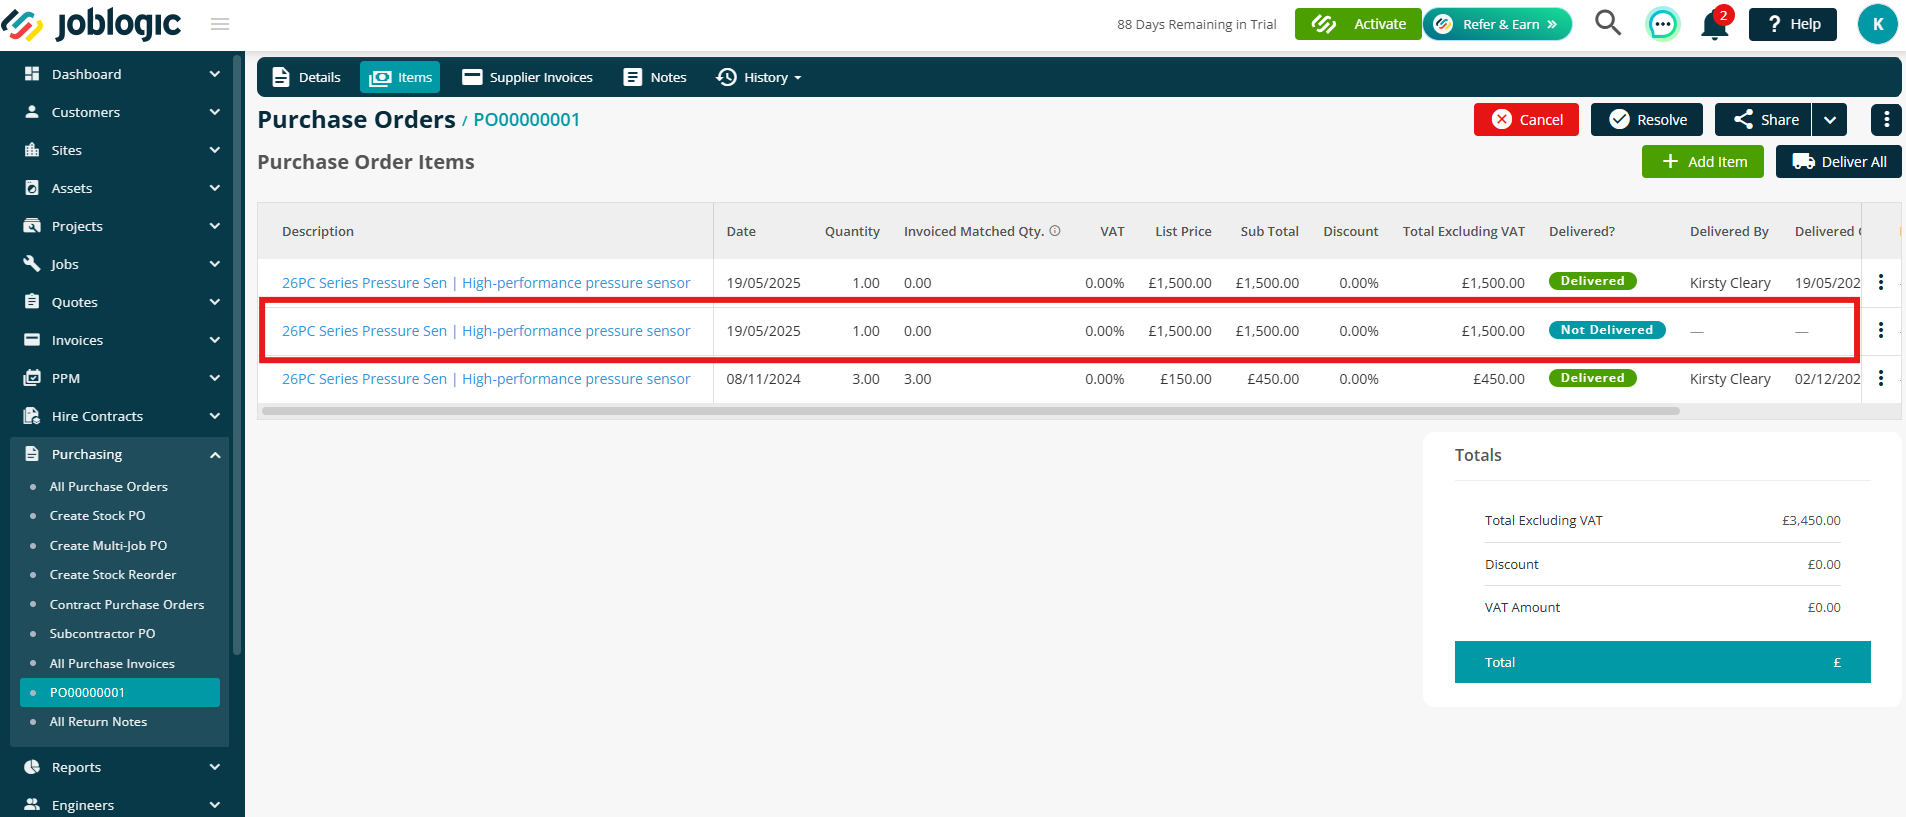
If Required Replacement was not ticked, the item will show as Not Required.
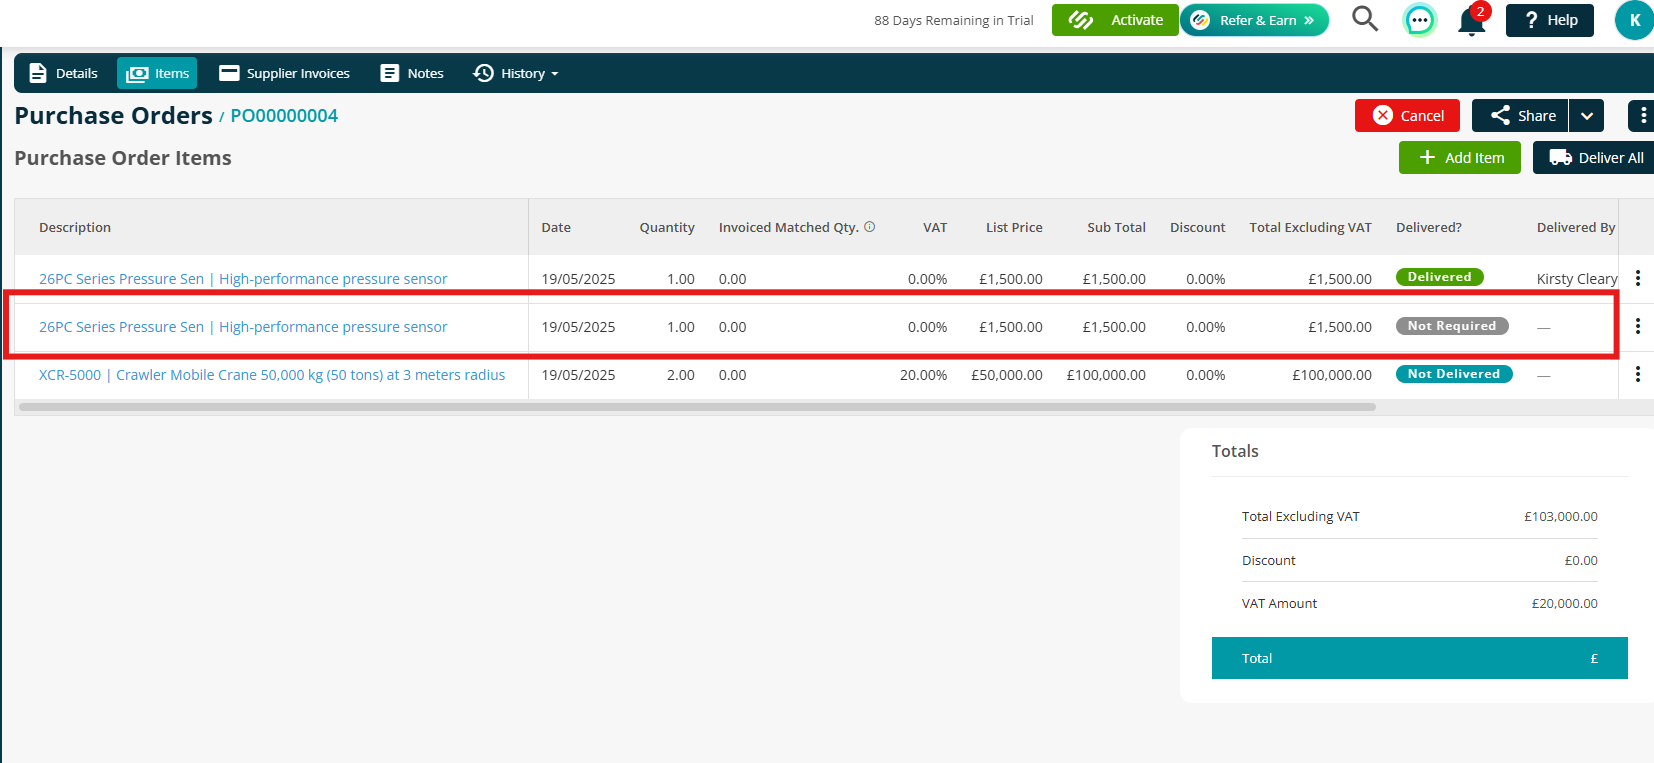
This helps ensure accurate tracking of what needs replacing and what doesn’t.
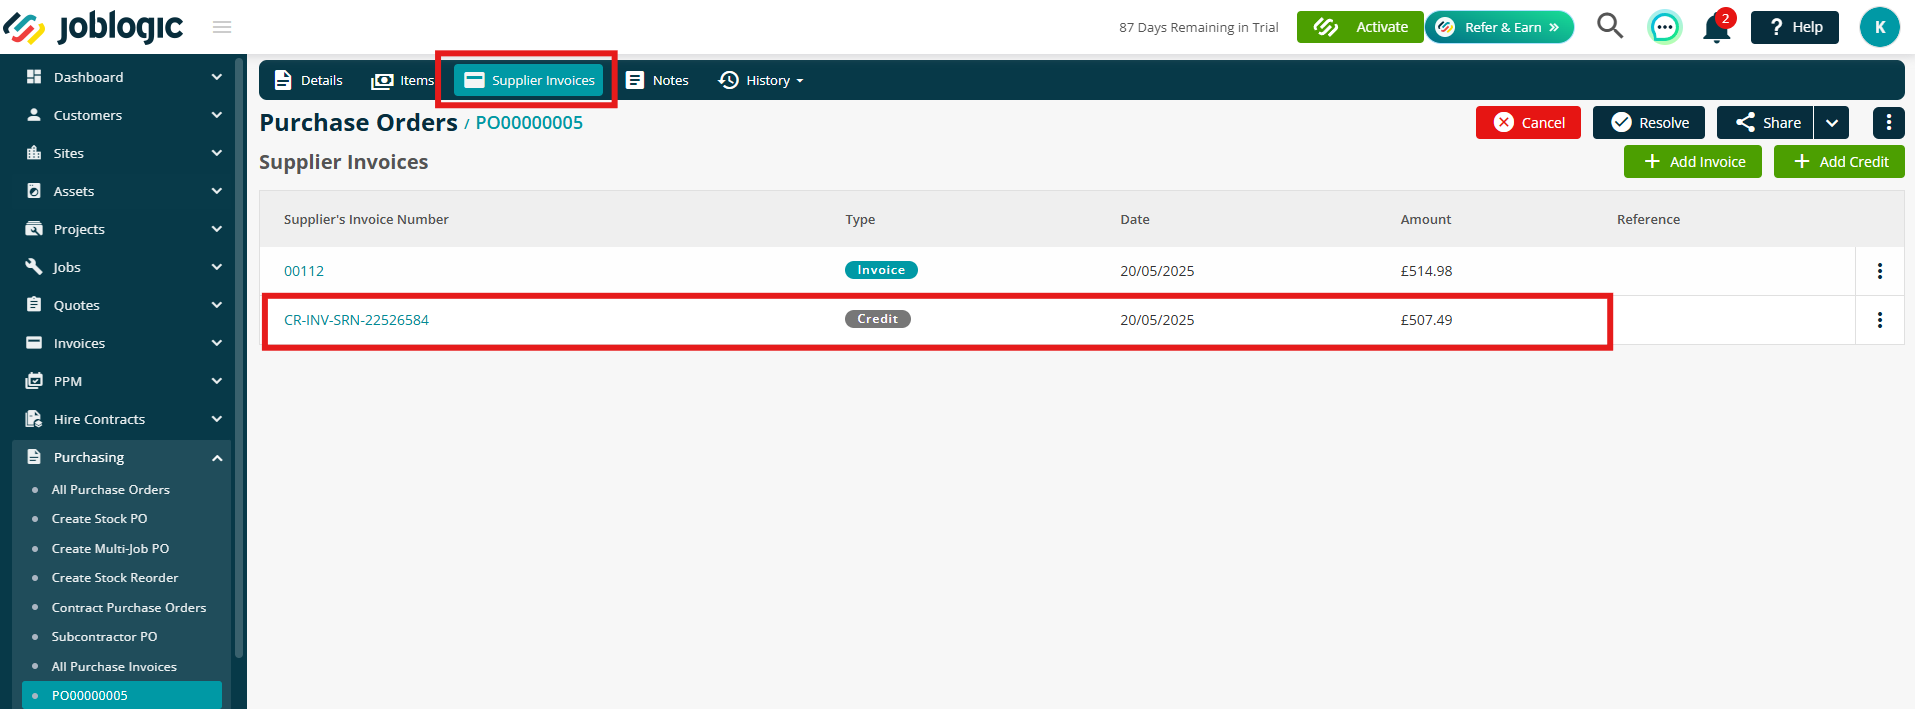
If any items on the return had already been invoiced, a Credit will be automatically generated.
To view it, simply click into the Supplier Invoice tab from the Purchase Order screen.
View, Edit and Share your Note
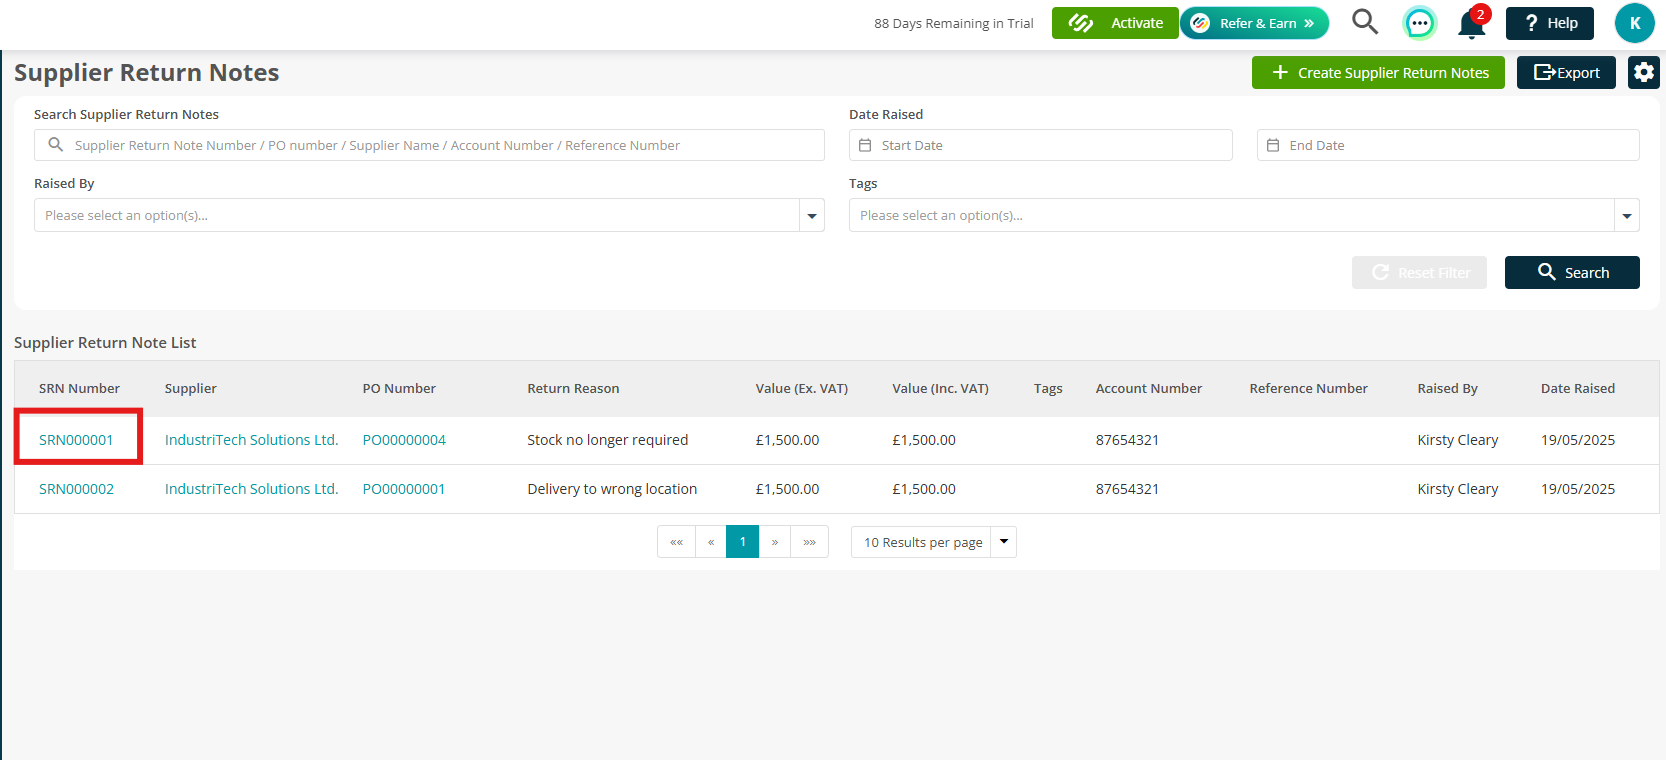
To access your list of Supplier Return Notes, head back to the app via Marketplace > Supplier Return Notes.
Click on a specific note by selecting the SRN number.
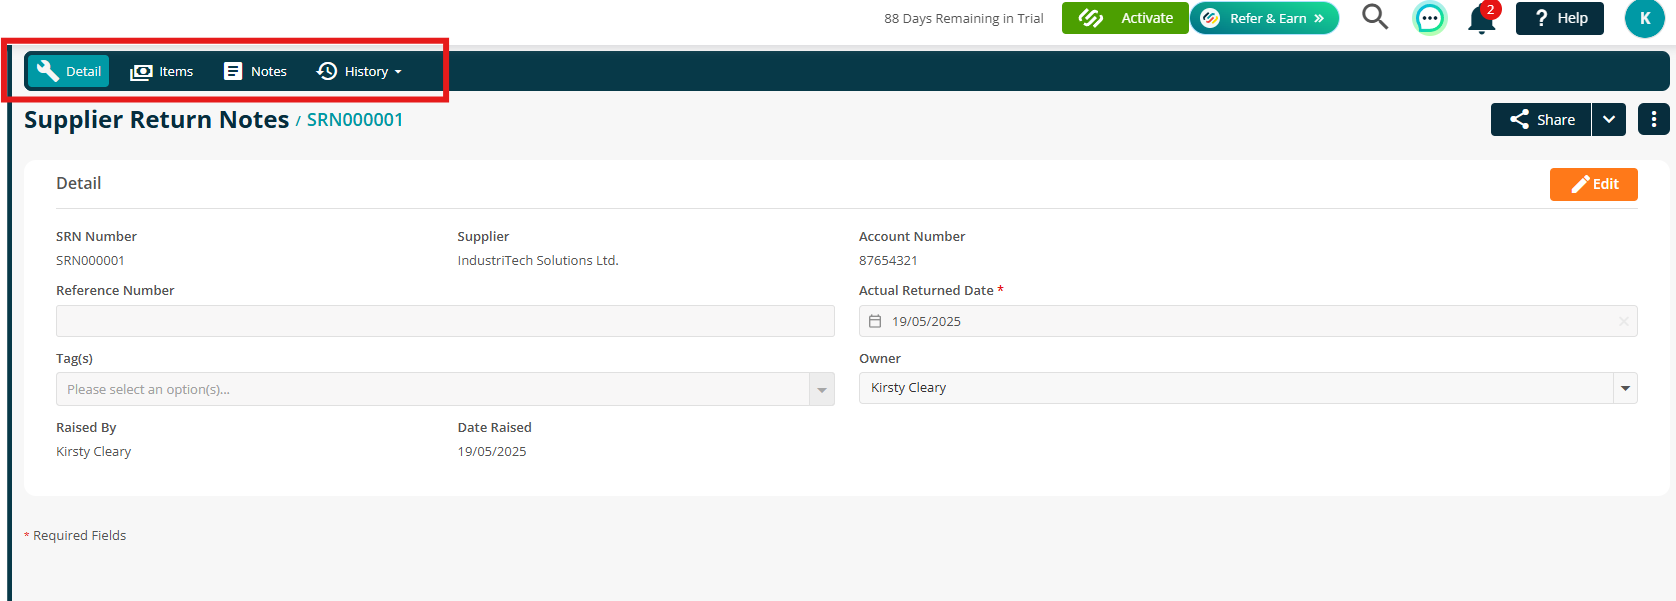
Once inside, you can view all the key information by navigating through the tabs at the top:
Details, Items, Notes, and History.
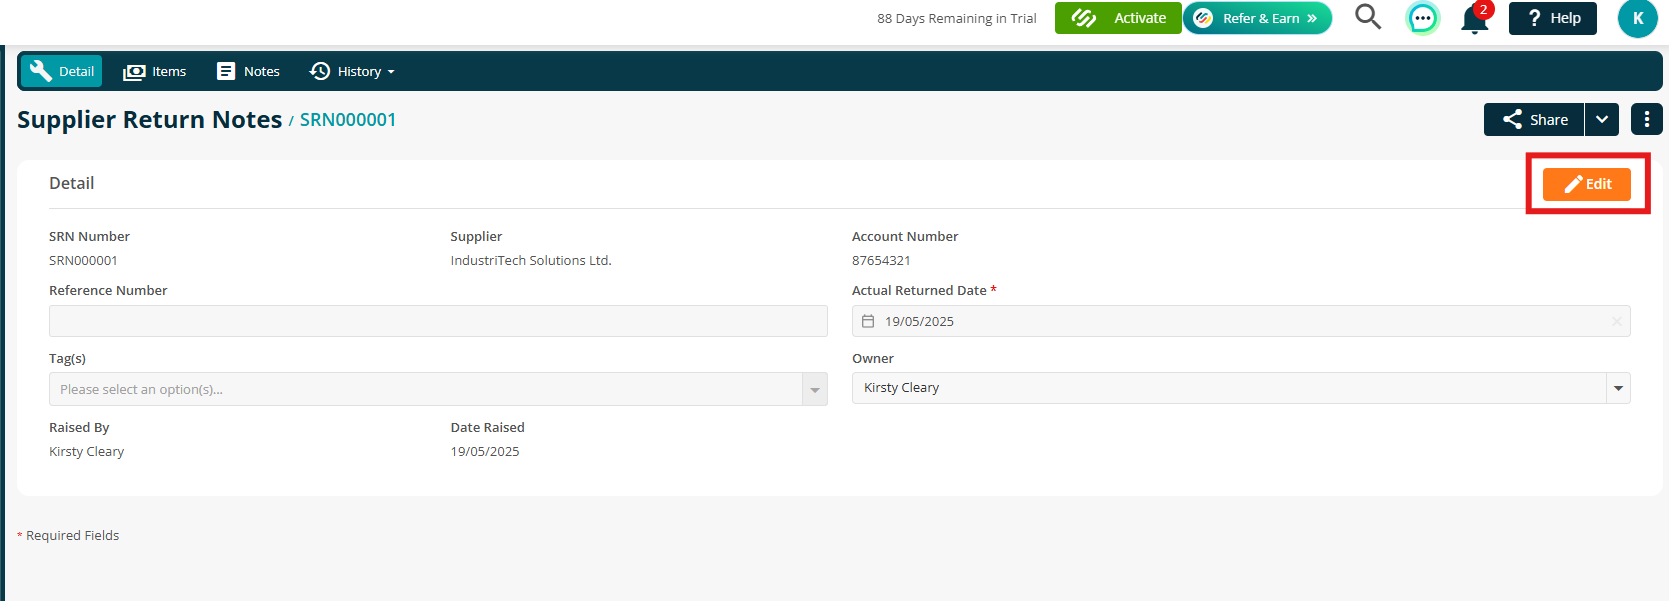
To make updates, simply click Edit.
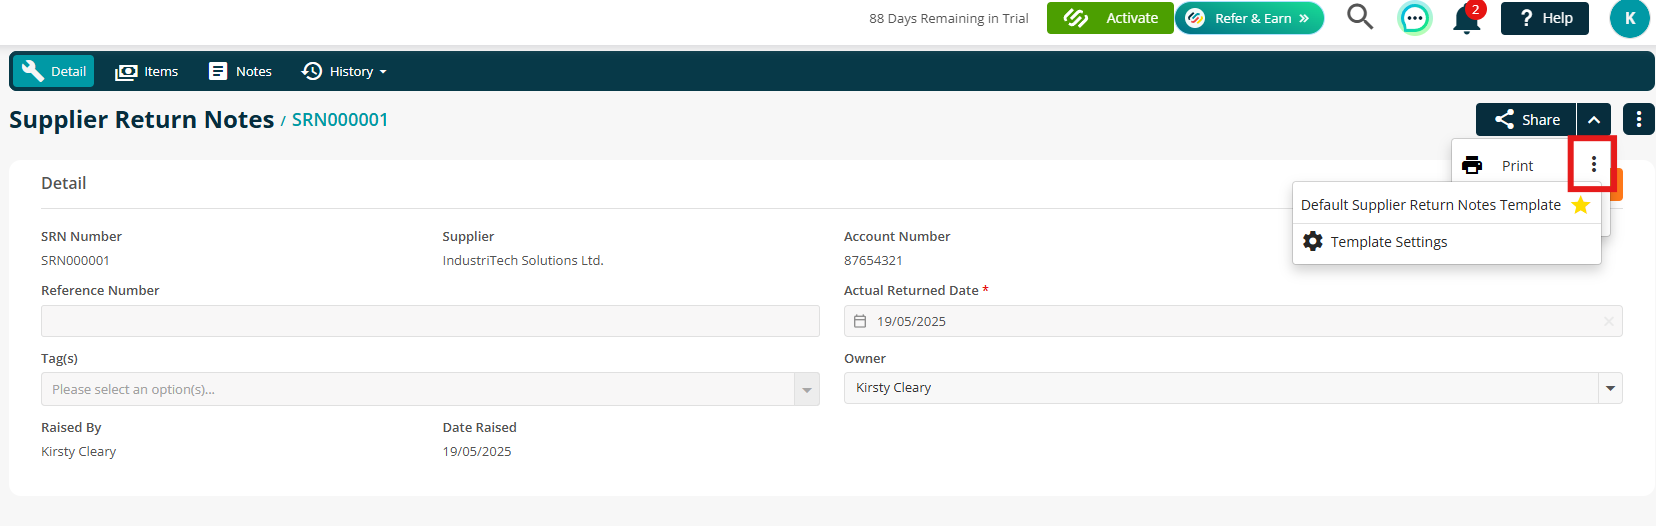
To share the Supplier Return Note, click the Share button. For more options, use the arrow next to Share.
You can choose to Print or Download the note using the template you previously set up.
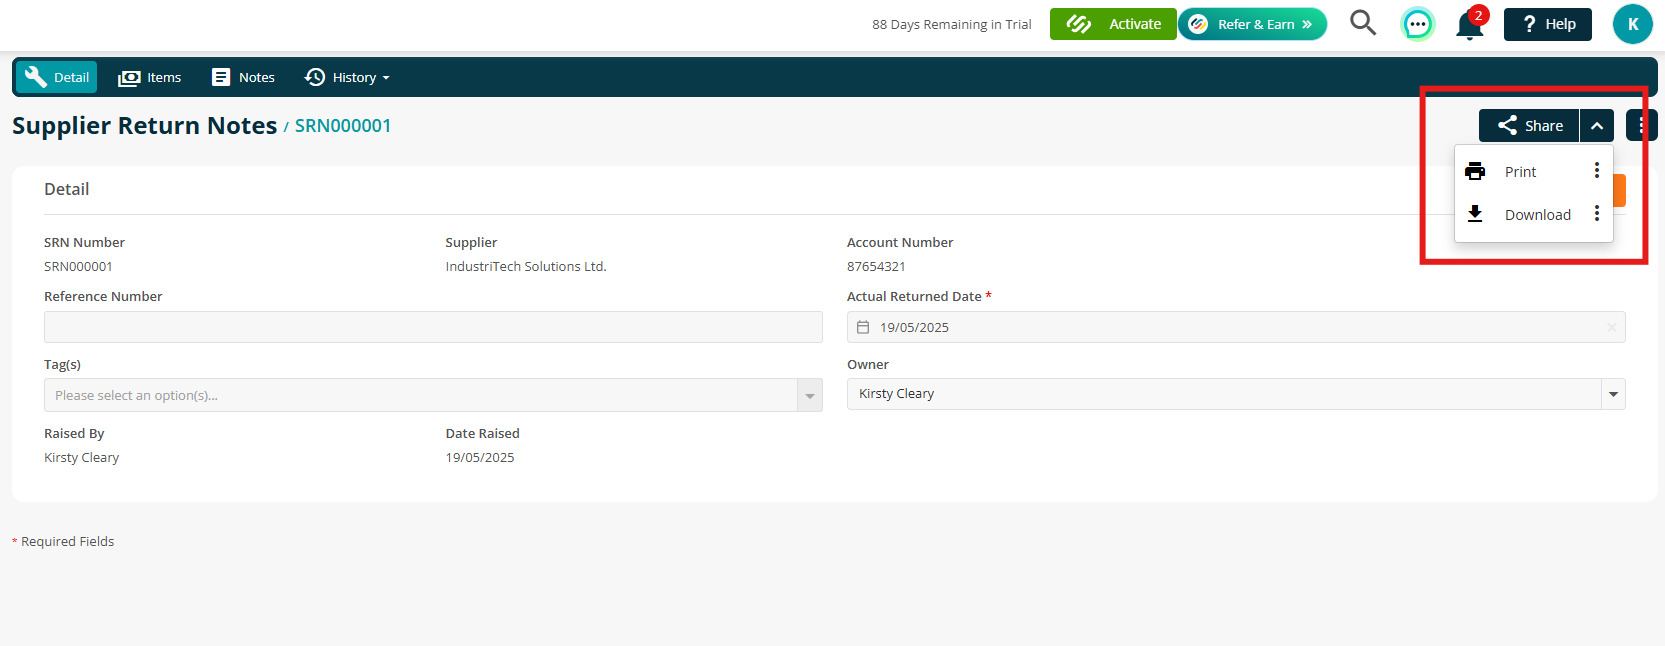
If you have multiple templates, click the three dots to select a specific one.
Further Support
For further information or assistance with the above, contact our Support Team on 0800 326 5561 or email support@joblogic.com. Alternatively, our Customer Success Management team can be reached by emailing customersuccess@joblogic.com
Publishing Details
This document was written and produced by Joblogic’s Technical Writing team and was last updated on the date specified above. Be aware that the information provided may be subject to change following further updates on the matter becoming available. Additionally, details within the guide may vary depending on your Joblogic account’s user permissions.