Introduction
Within Joblogic you have the ability to mark your Customers, Sites and Assets as Inactive or Suspended.
This is useful when you want to differentiate between active accounts/assets that can still be worked on and items that are suspended for any number of reasons, such as waiting on finances or business closure, for example.
This guide will walk you through how to suspend a Customer, a Site and an Asset and also explain what this will mean for your business processes.
Suspending a Customer
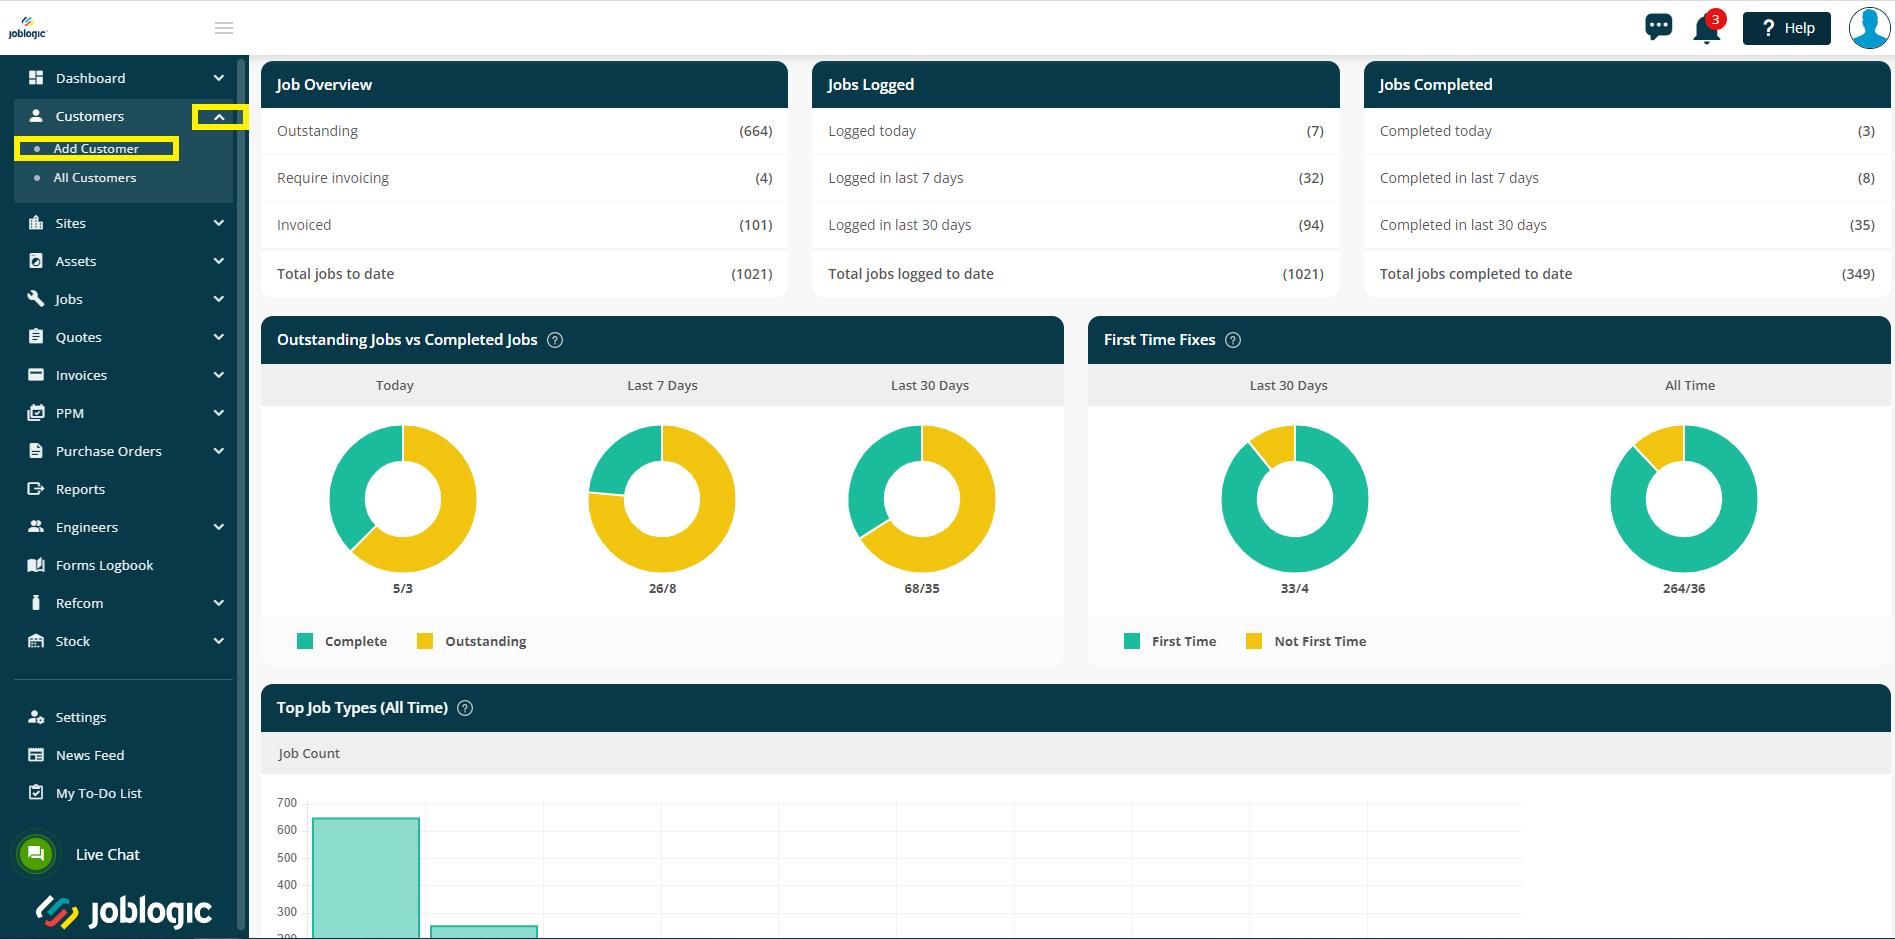
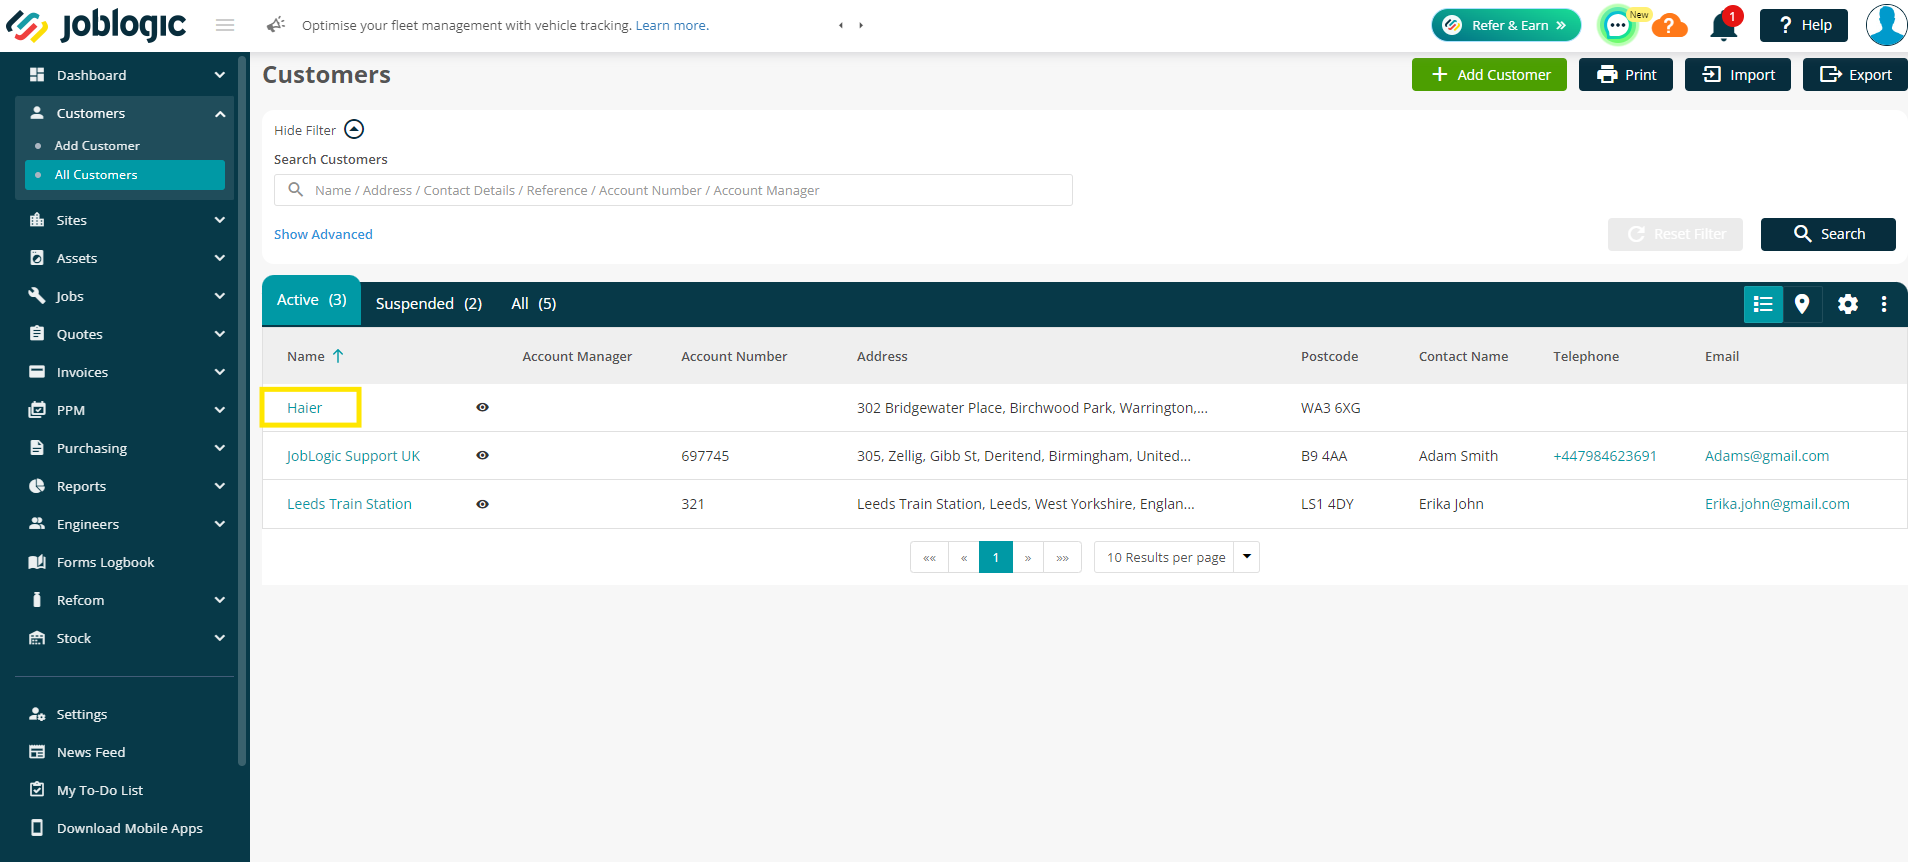
In order to view customers in Joblogic, navigate to the customers area via the left side menu and select ‘All Customers’
Once in the All customers area, click on the name of the customer you wish to suspend.
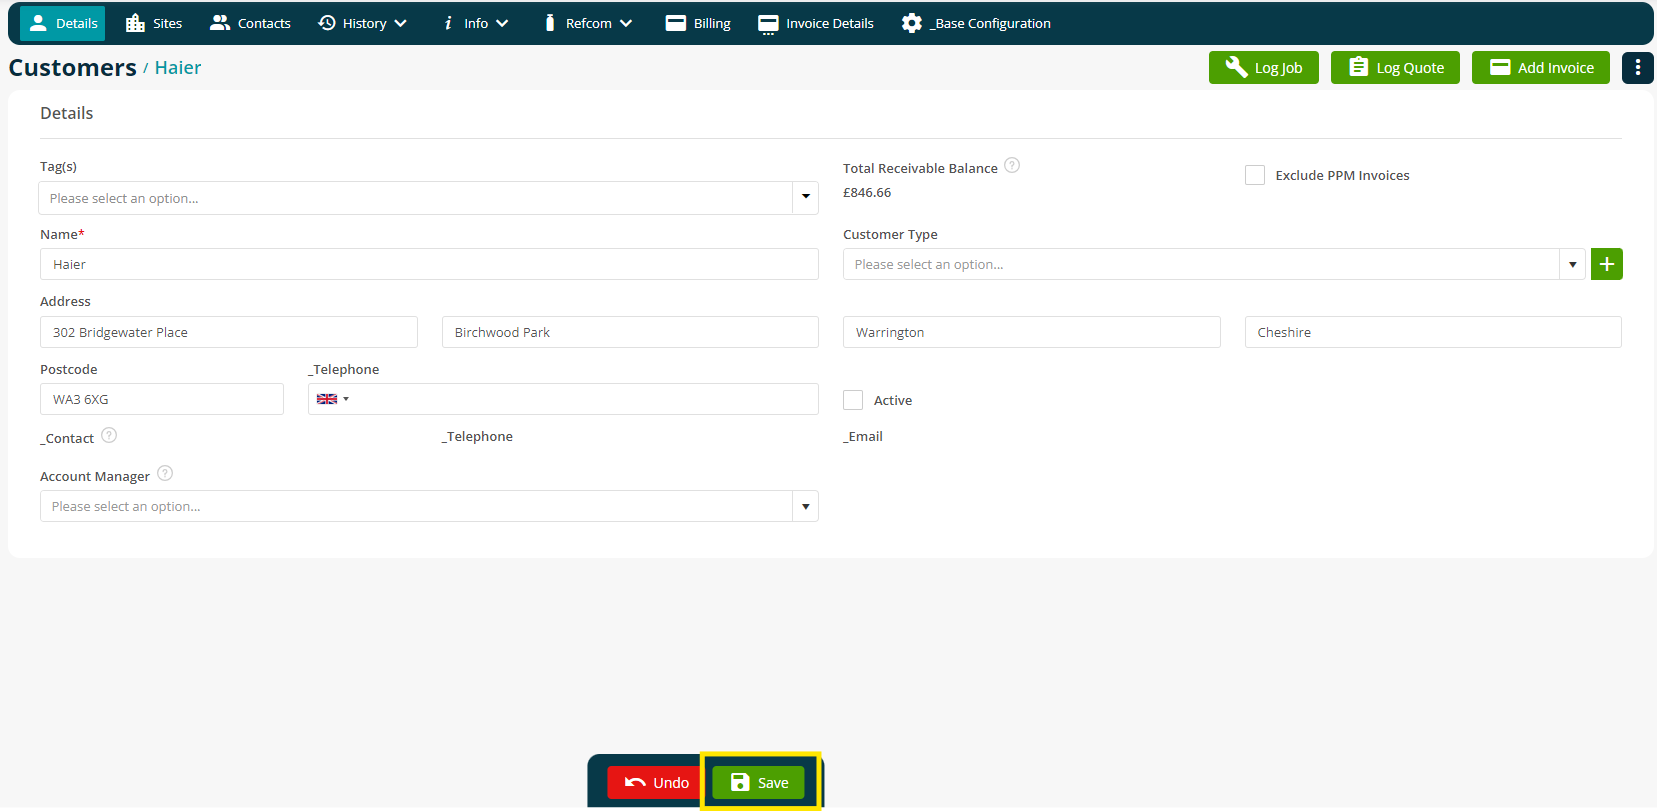
To make any changes to the customer details, click the edit button in the top right.
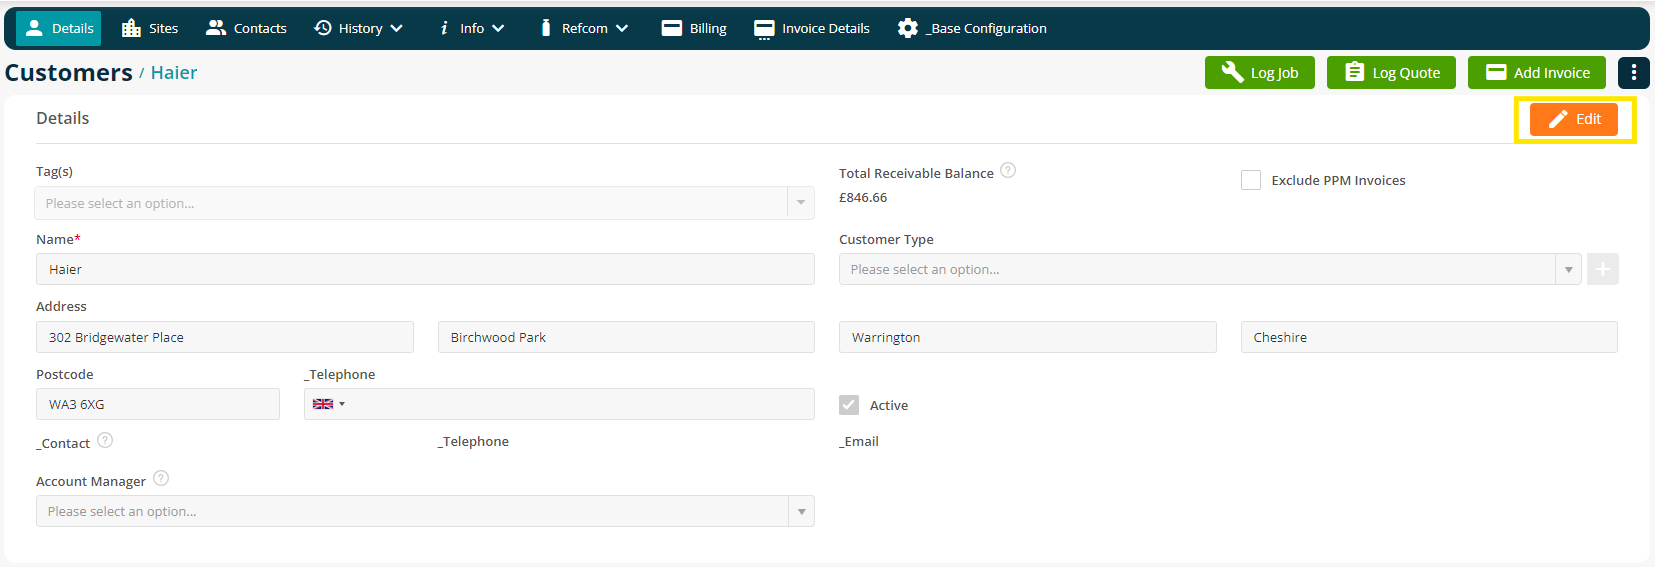
The Active tickbox controls the customers status in the system, which if checked means the customer is Active and jobs can be logged against them.
To make the Customer Inactive/suspended, untick this box.
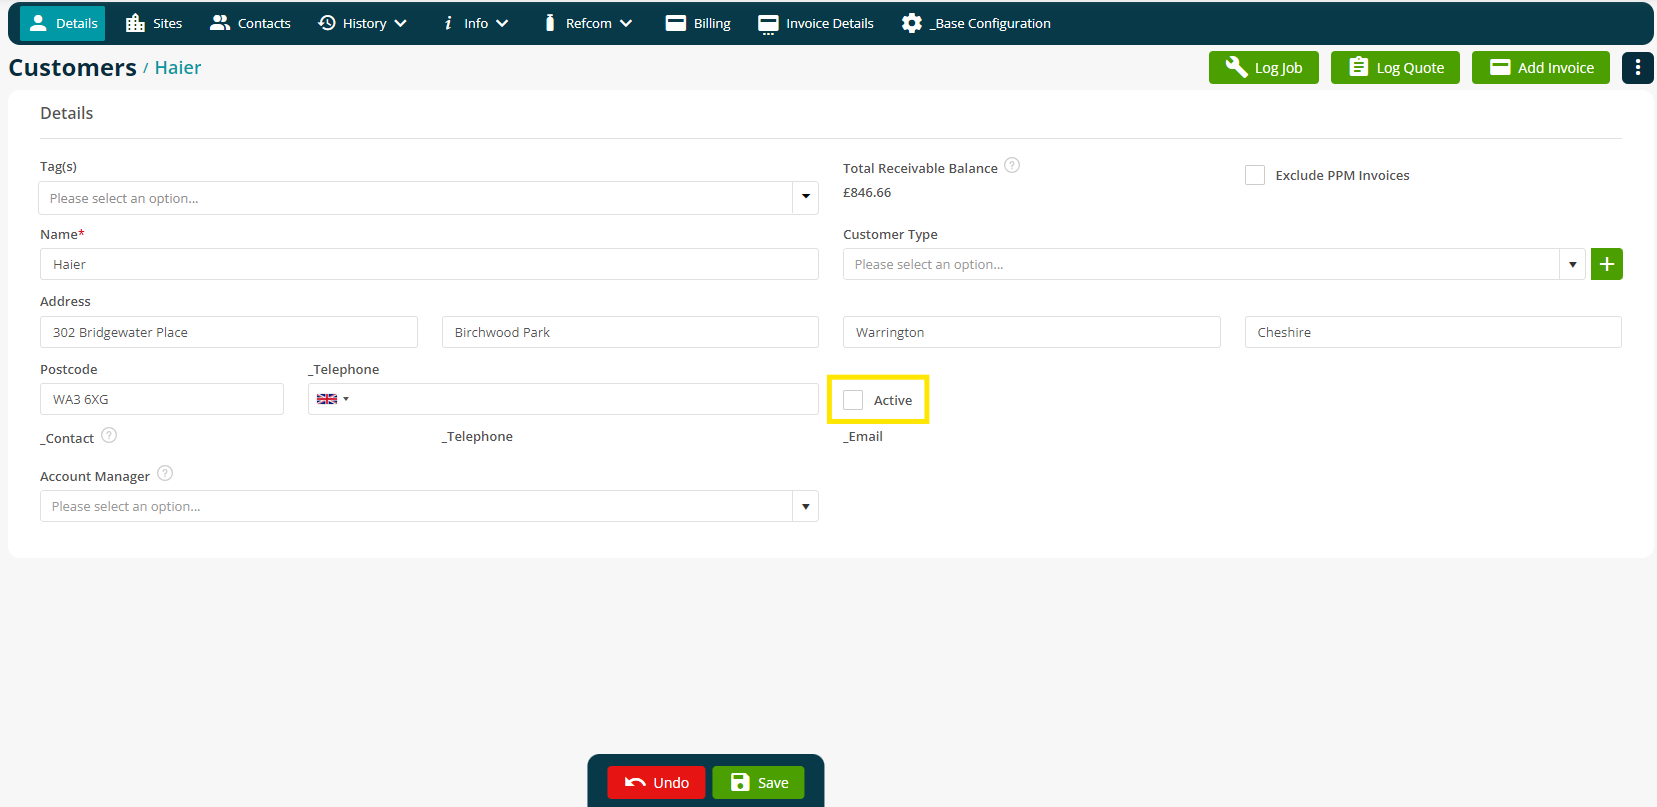
Click Save to finalise your changes.
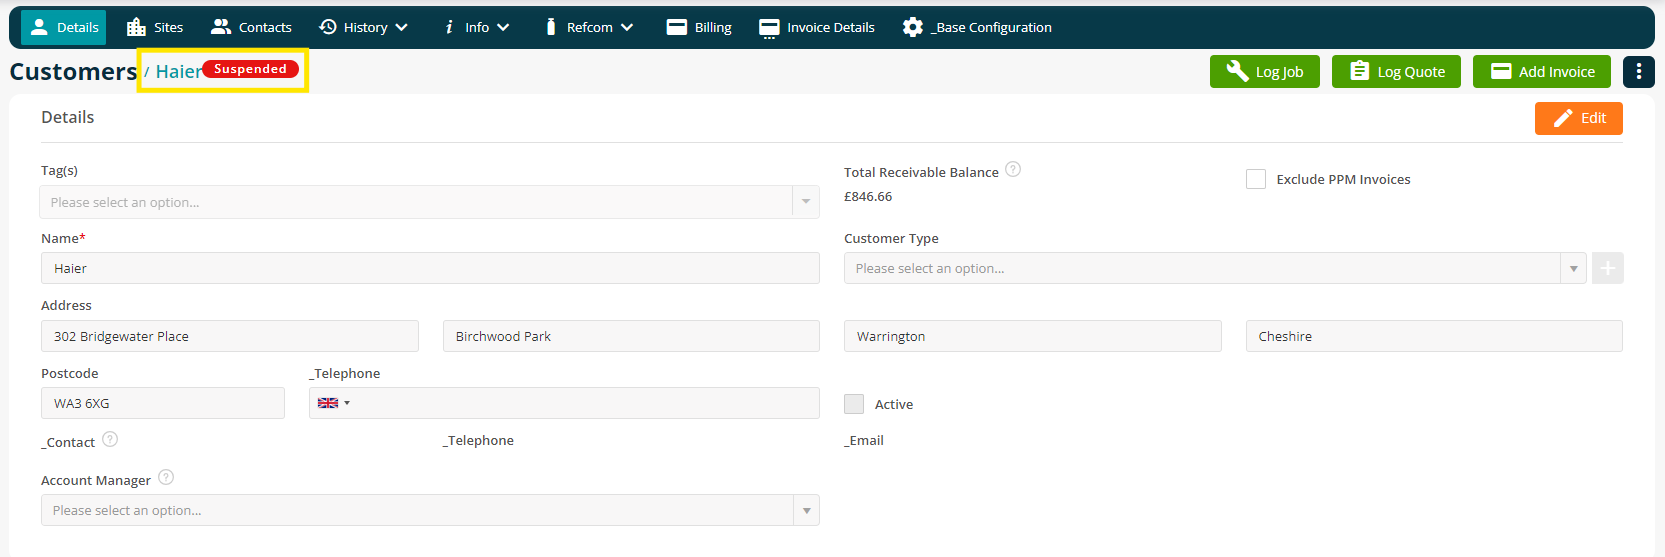
The Customer will now be marked as Suspended. A label will appear at the top of the Customer Details page to specify this.
Back on the All Customer list, your Suspended customers are easily identified by clicking into the Suspended tab.
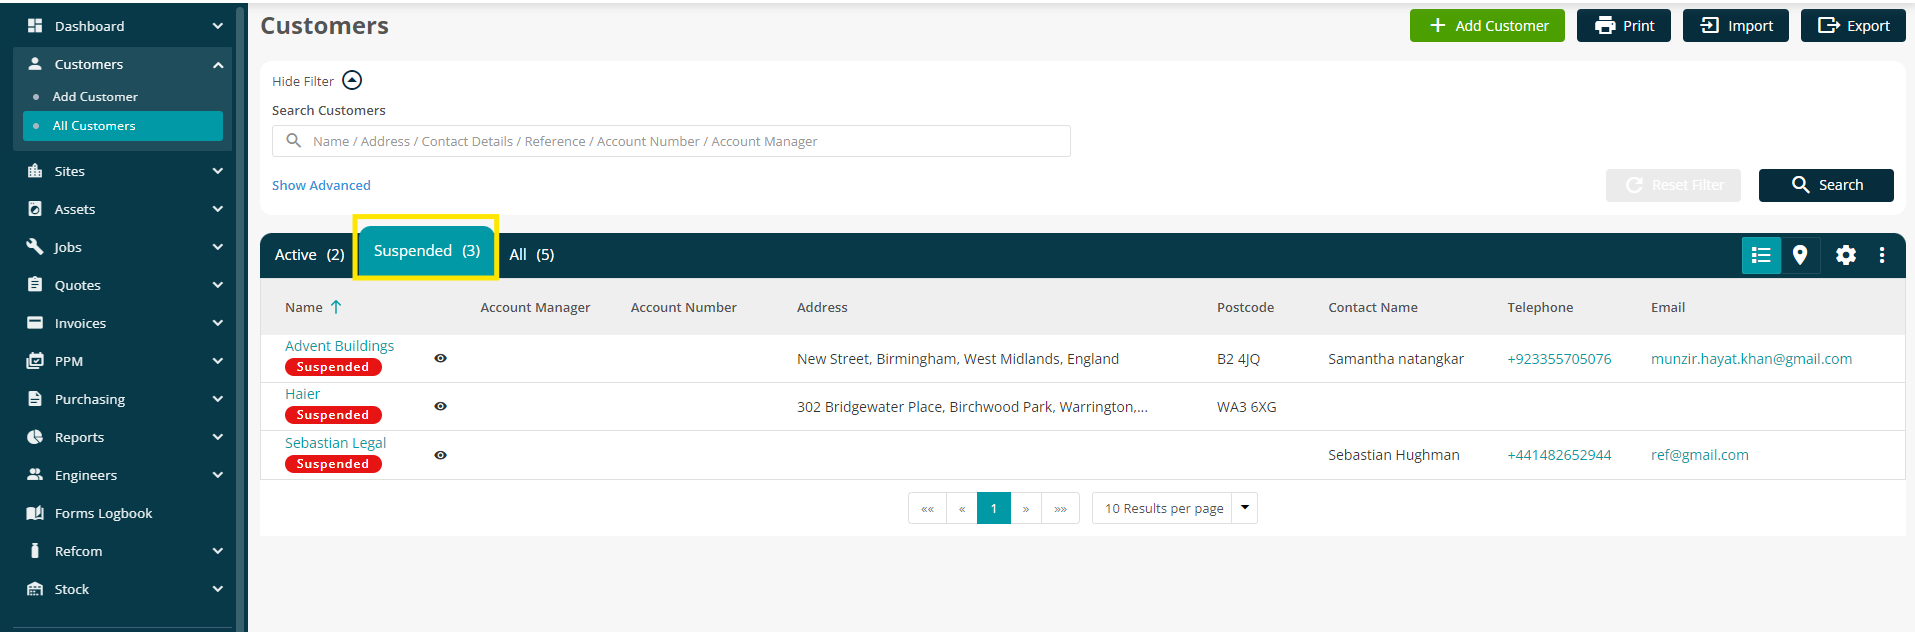
It is important to note that once a customer is suspended, they will not appear in the customer's dropdown while logging new work. But the historical data will remain intact and will be available for you to preview anytime.
If the situation changes again, you can simply follow the above steps to re-tick the Active button.
Suspending a Site
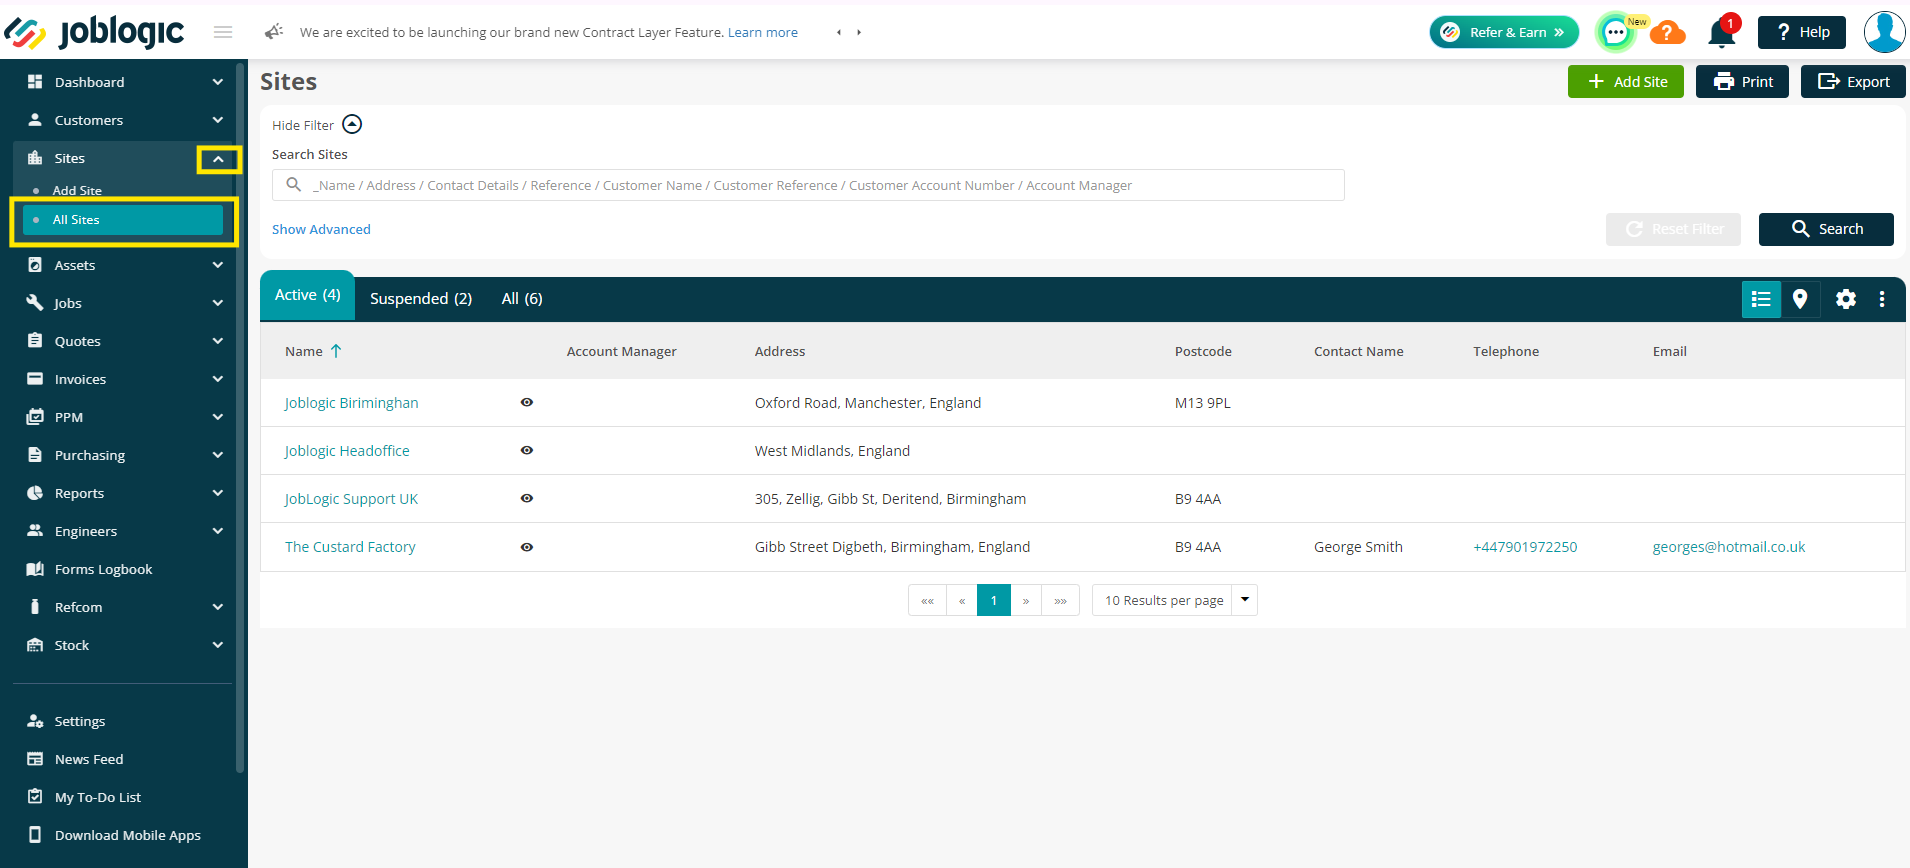
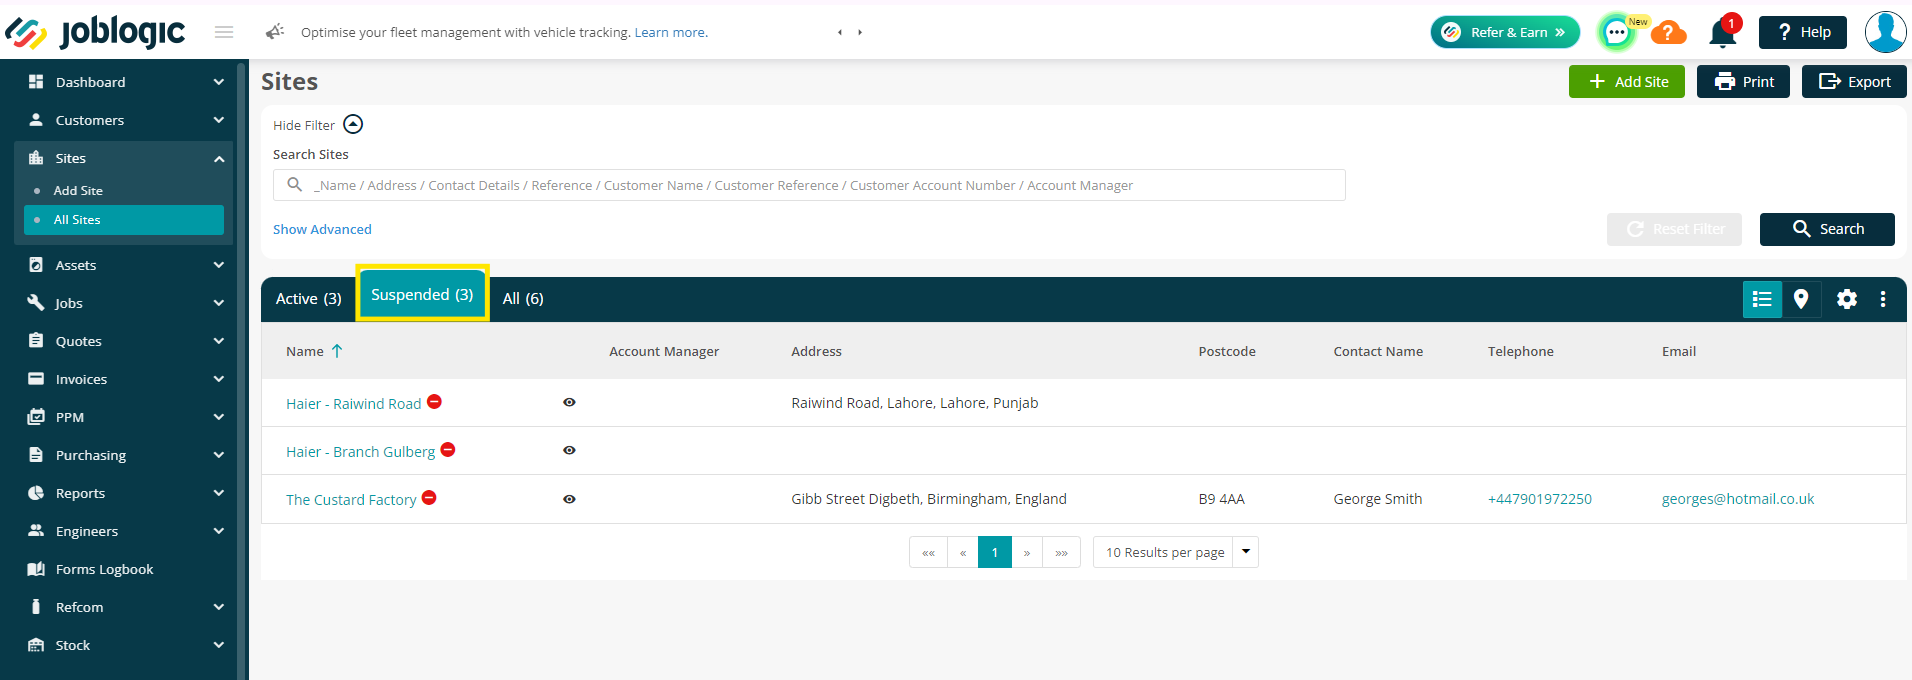
In order to view sites in Joblogic, navigate to the Sites area via the left side menu and select ‘All Sites’
Once in the All sites area, click on the name of the site you wish to suspend.

To make any changes to the site details, click the edit button in the top right.
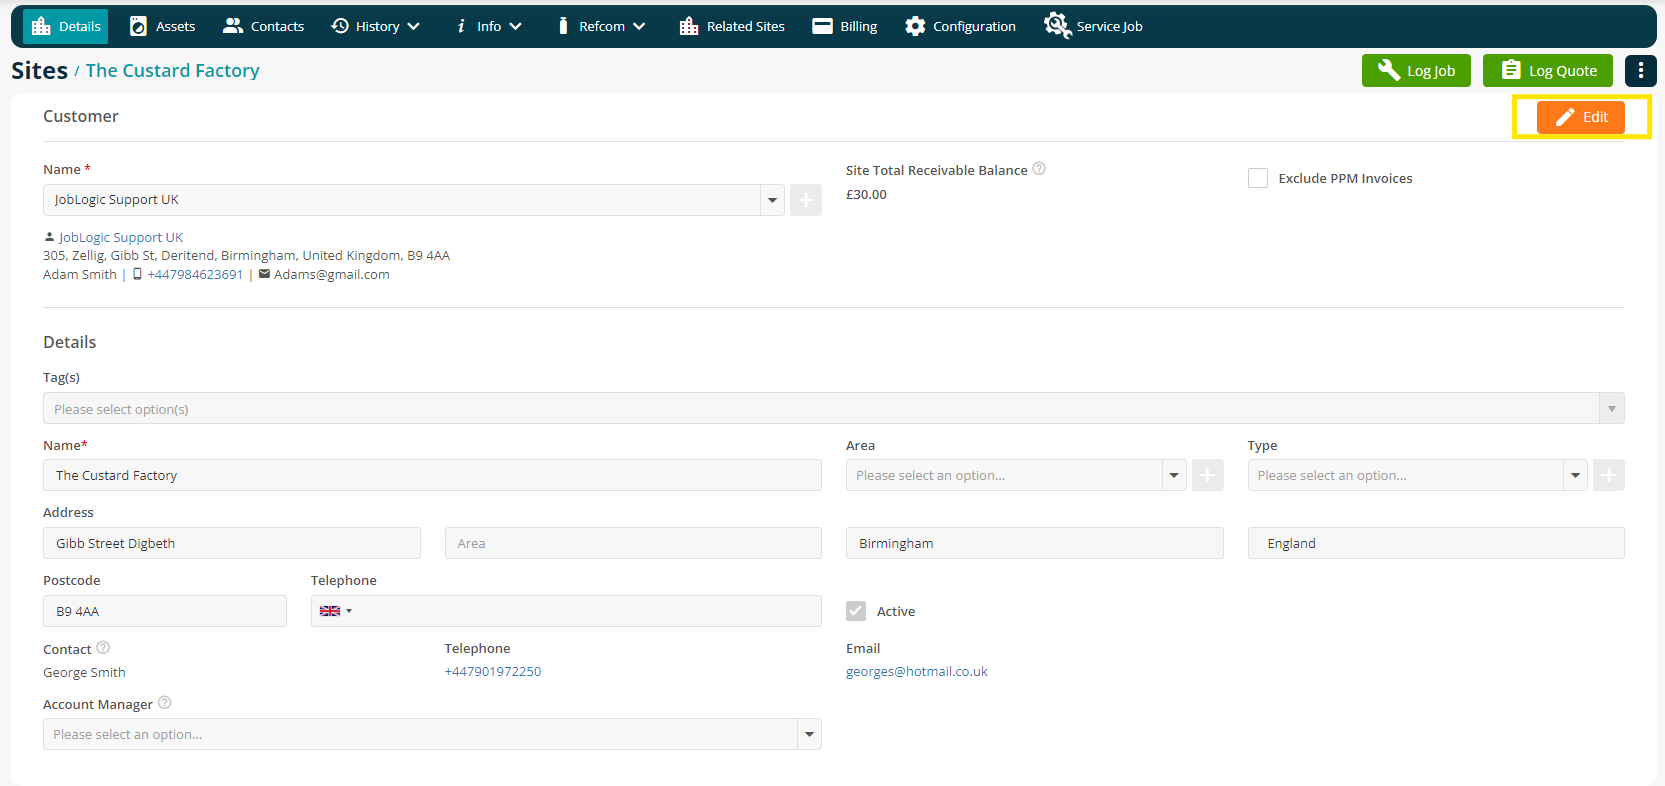
The Active tickbox controls the site status in the system, which if checked means the site is Active and jobs can be logged against them.
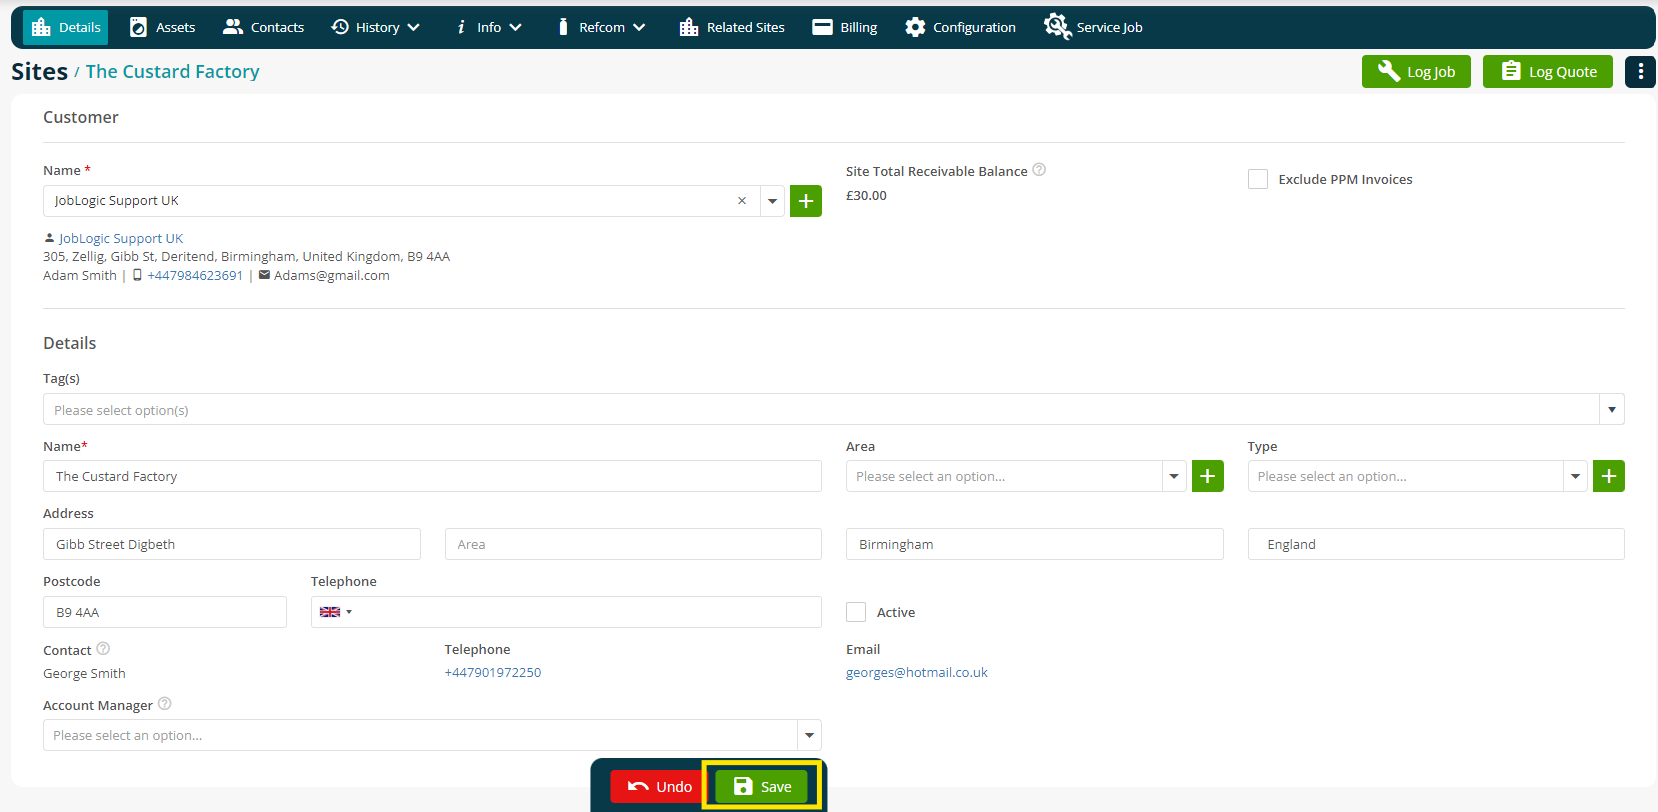
To make the Site Inactive/suspended, untick this box.
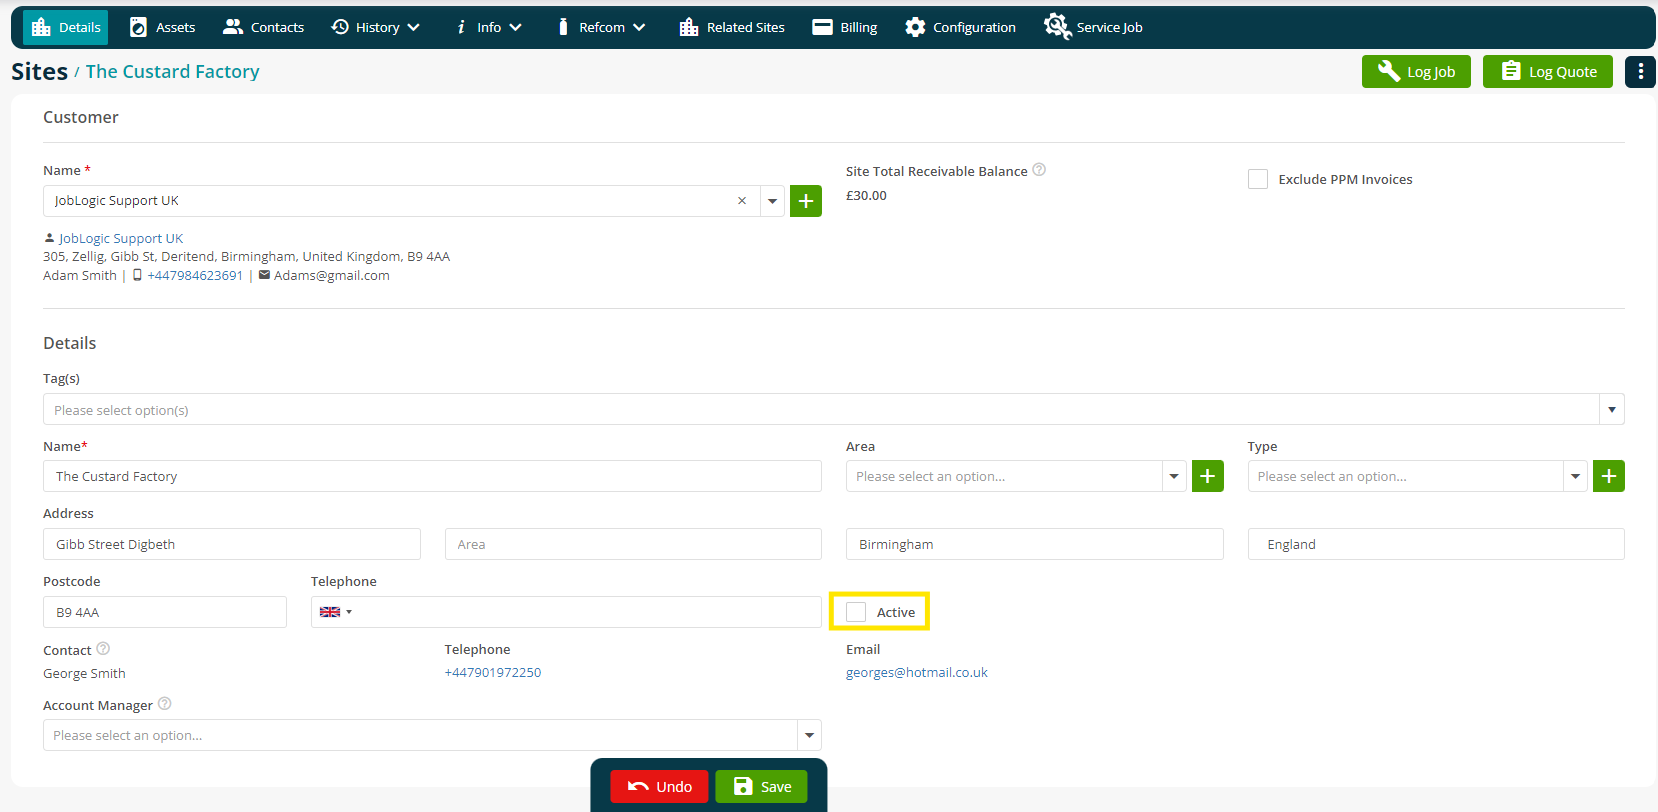
Click Save to finalise your changes.
The Site will now be marked as Suspended. A label will appear at the top of the Site Details page to specify this.
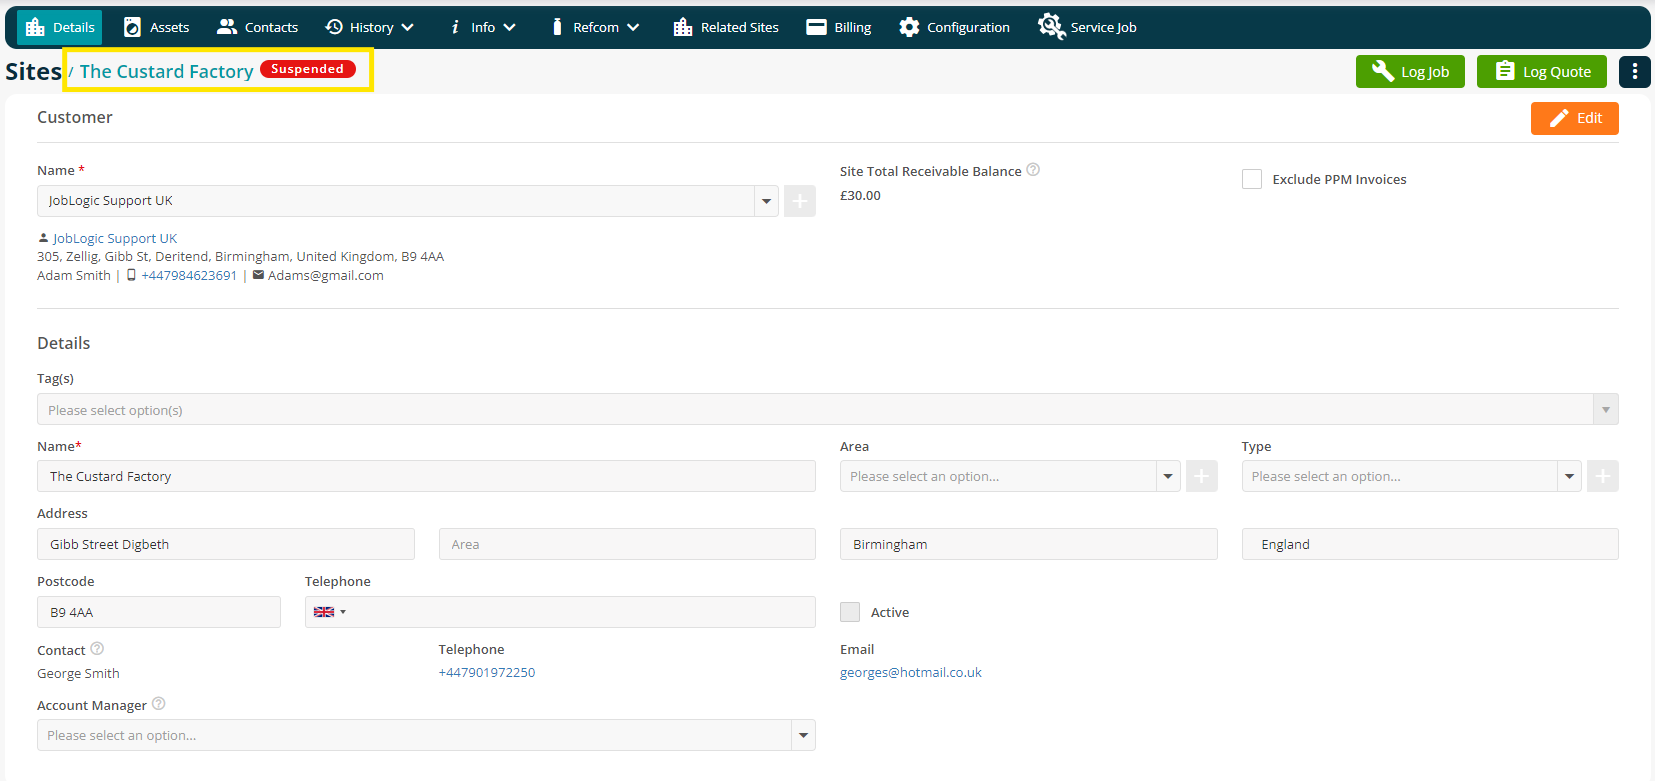
Back on the All Site list, your Suspended sites are easily identified by clicking into the Suspended tab.
It is important to note that once a site is suspended, they will not appear in the site's dropdown while logging new work. But the historical data will remain intact and would be available for the user to preview anytime.
If the situation changes again, you can simply follow the above steps to re-tick the Active button.
Suspending an Asset
In order to view customers in Joblogic, navigate to the Assets area via the left side menu and select ‘All Assets’
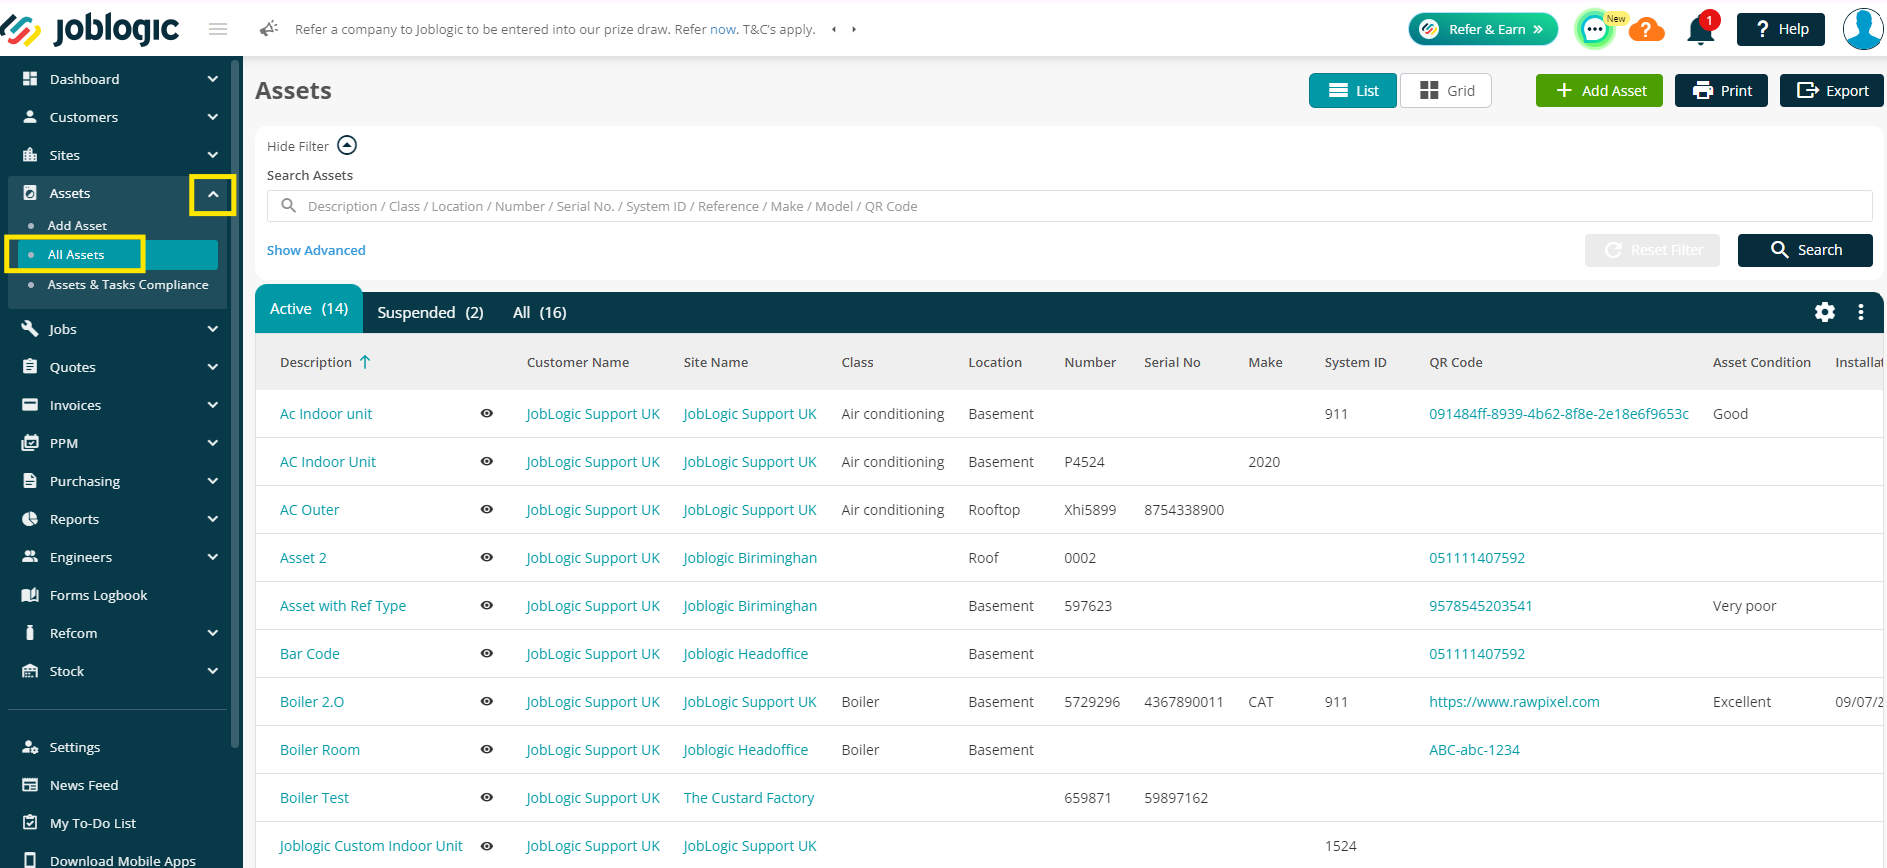
Once in the All assets area, click on the name of the asset you wish to suspend.
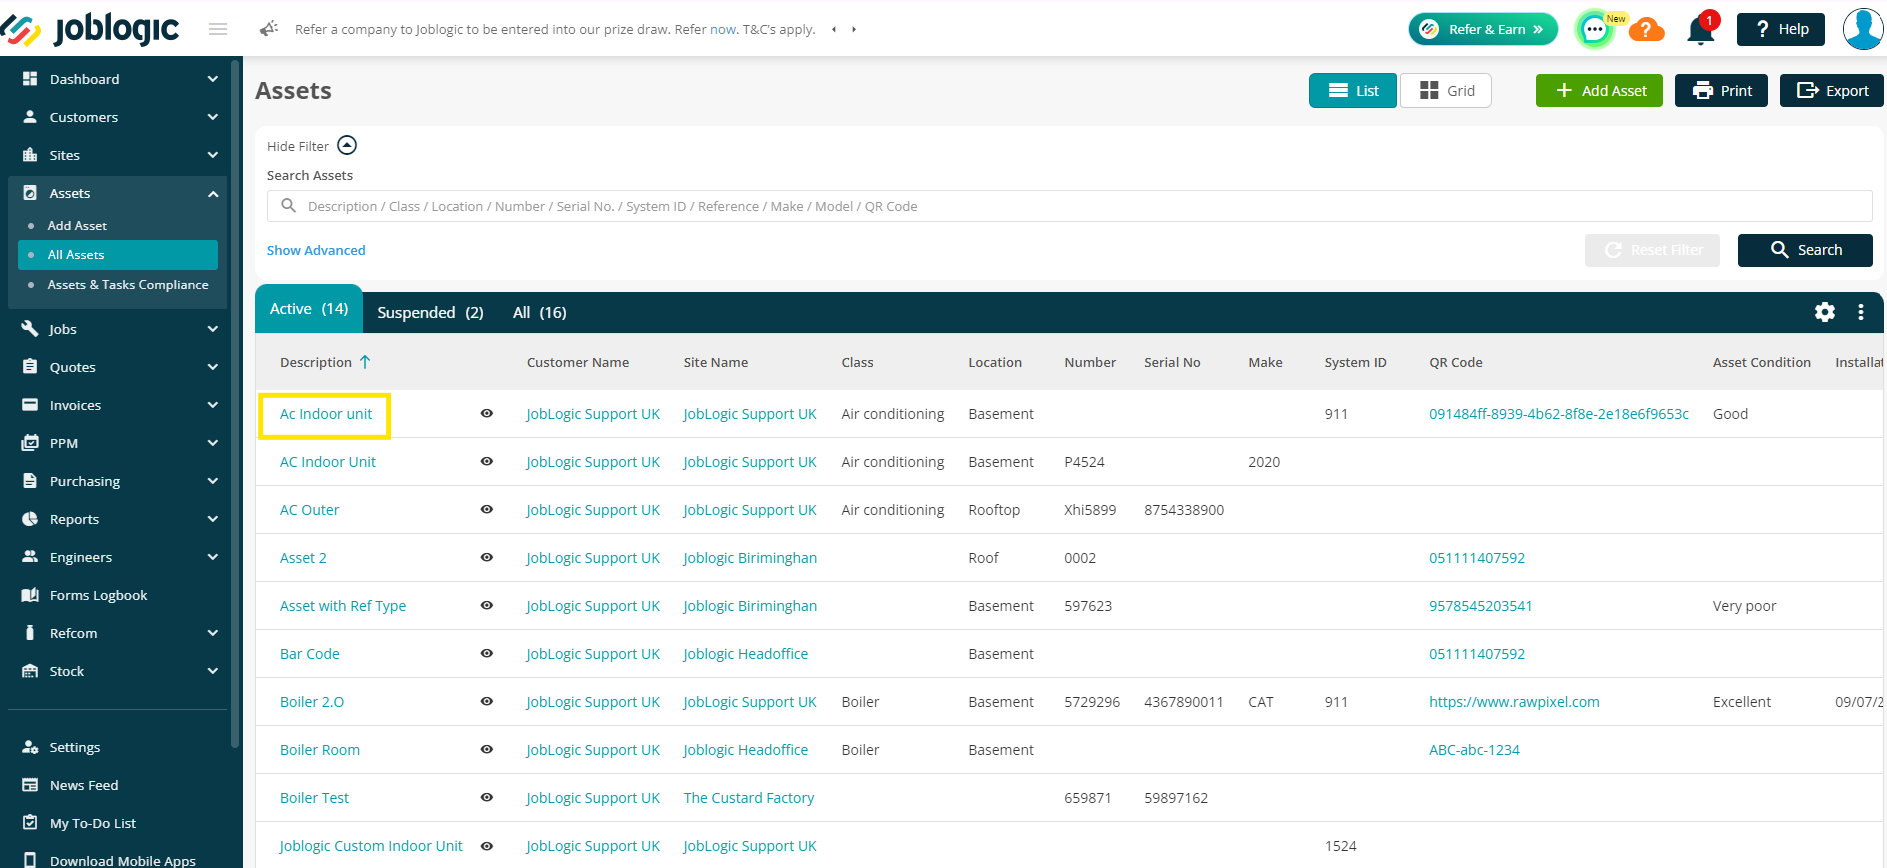
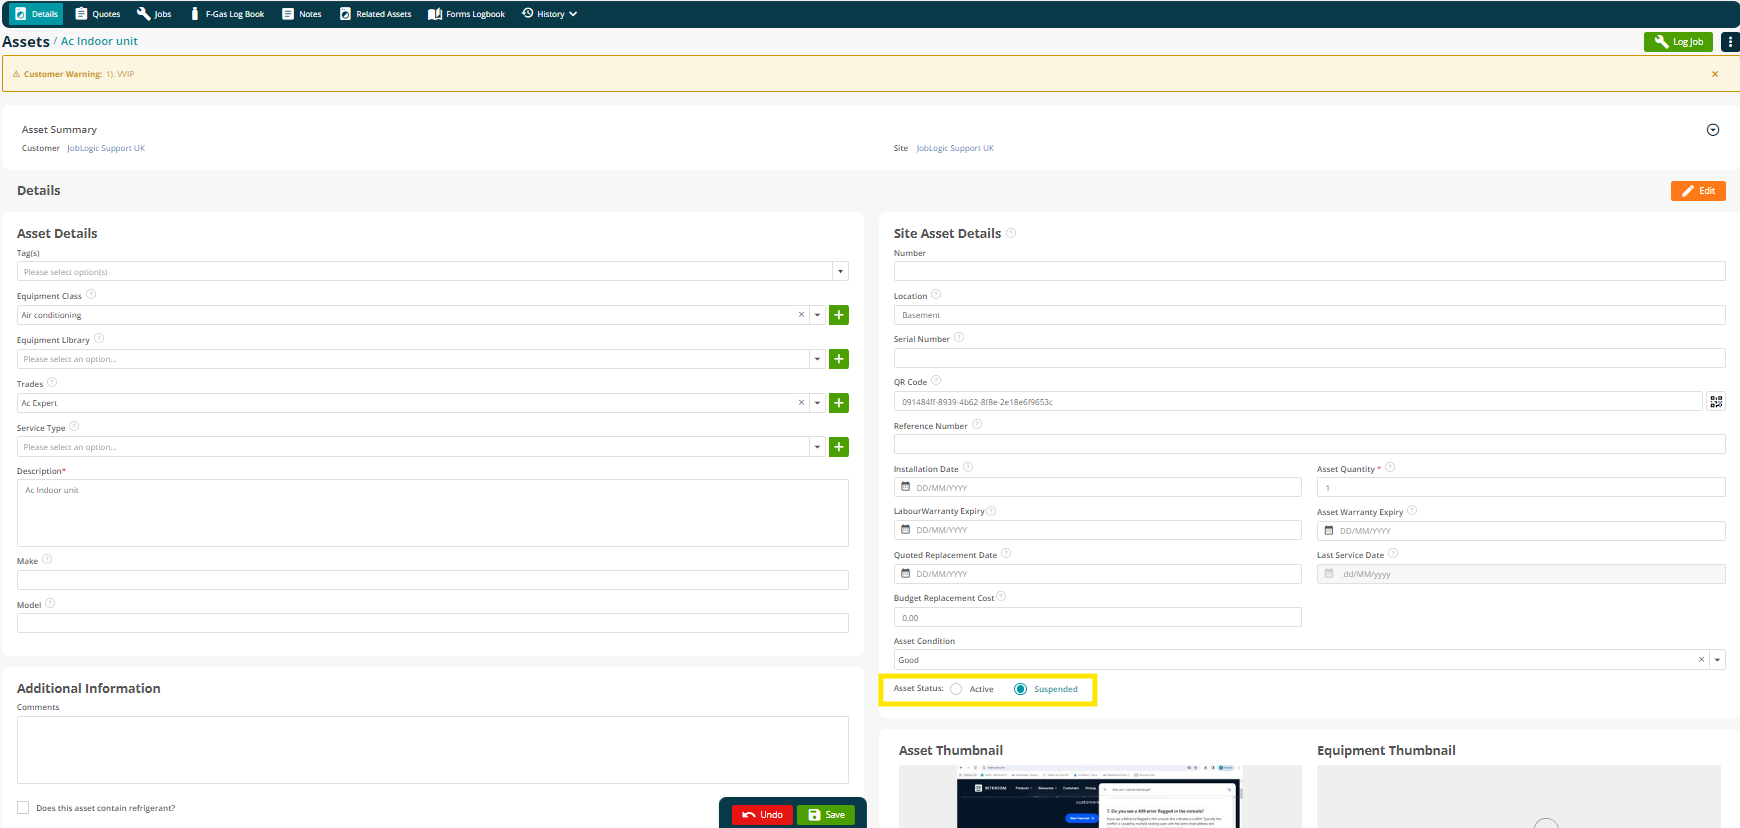
To make any changes to the asset details, click the edit button in the top right.
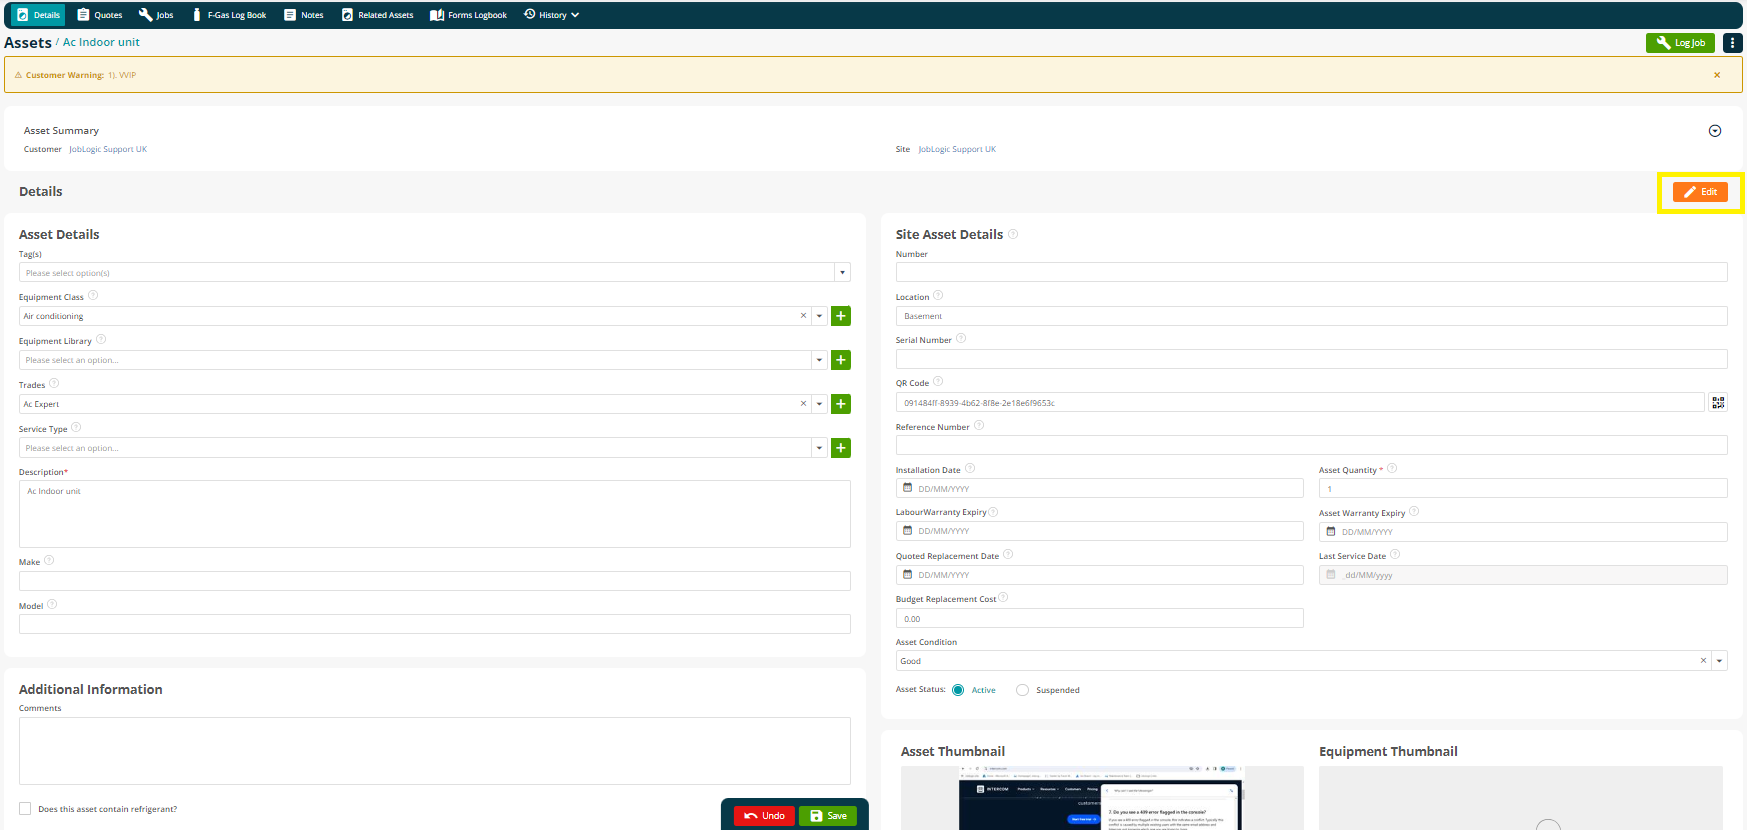
The Active radio button controls the asset status in the system, which if checked means it is Active and jobs can be logged against them / it can be serviced on jobs.
To make the Asset Inactive/suspended, the Suspended option needs to be selected.
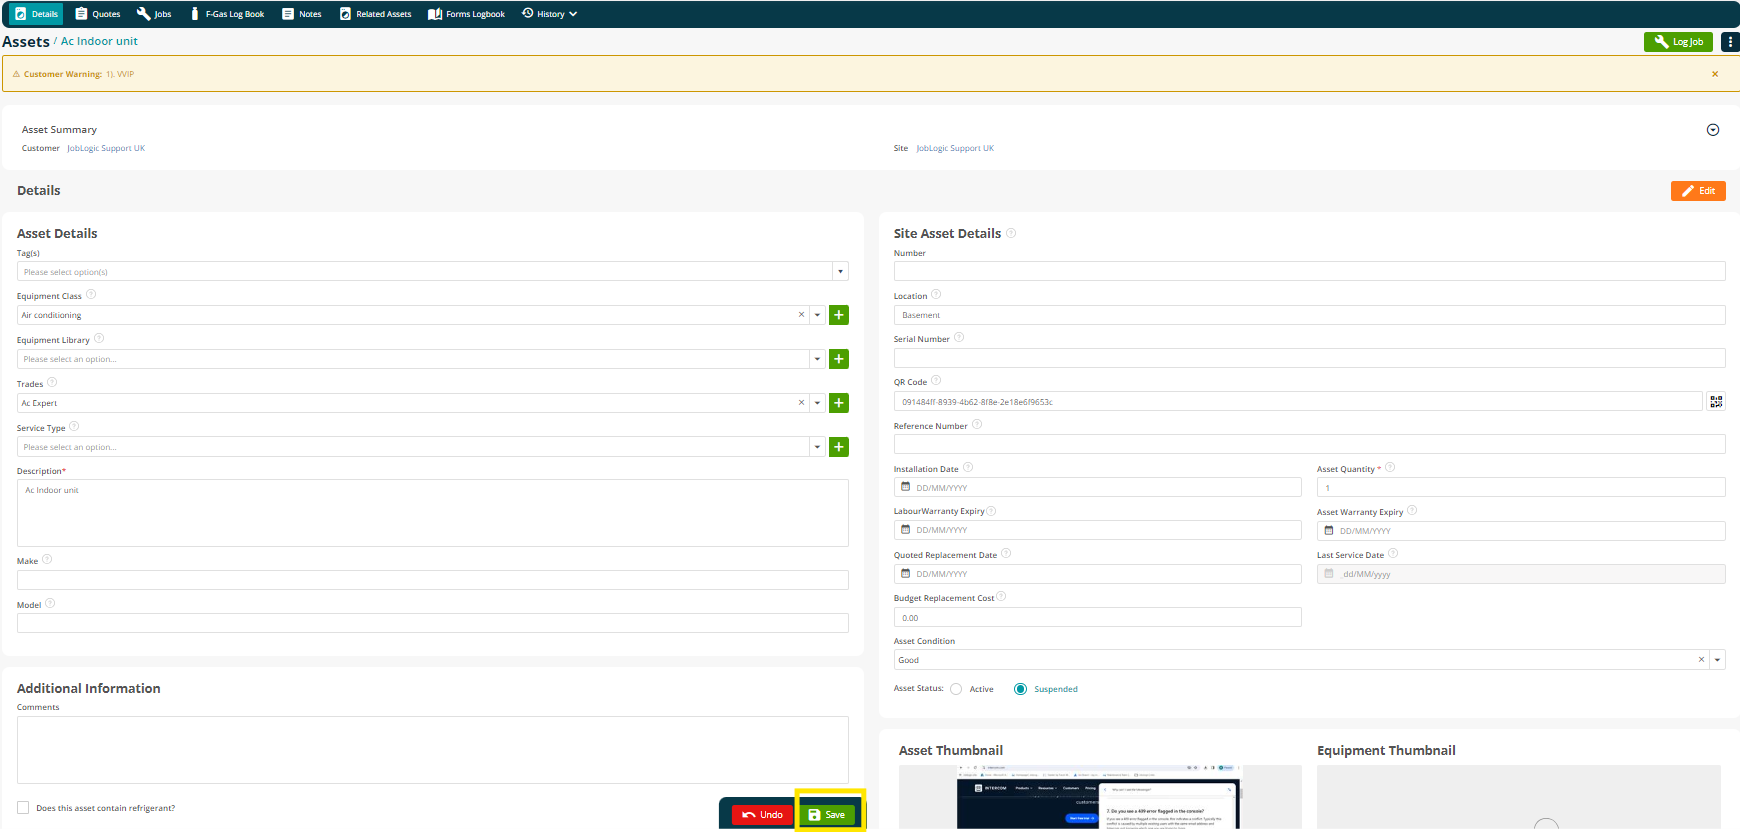
Click Save to finalise your changes.
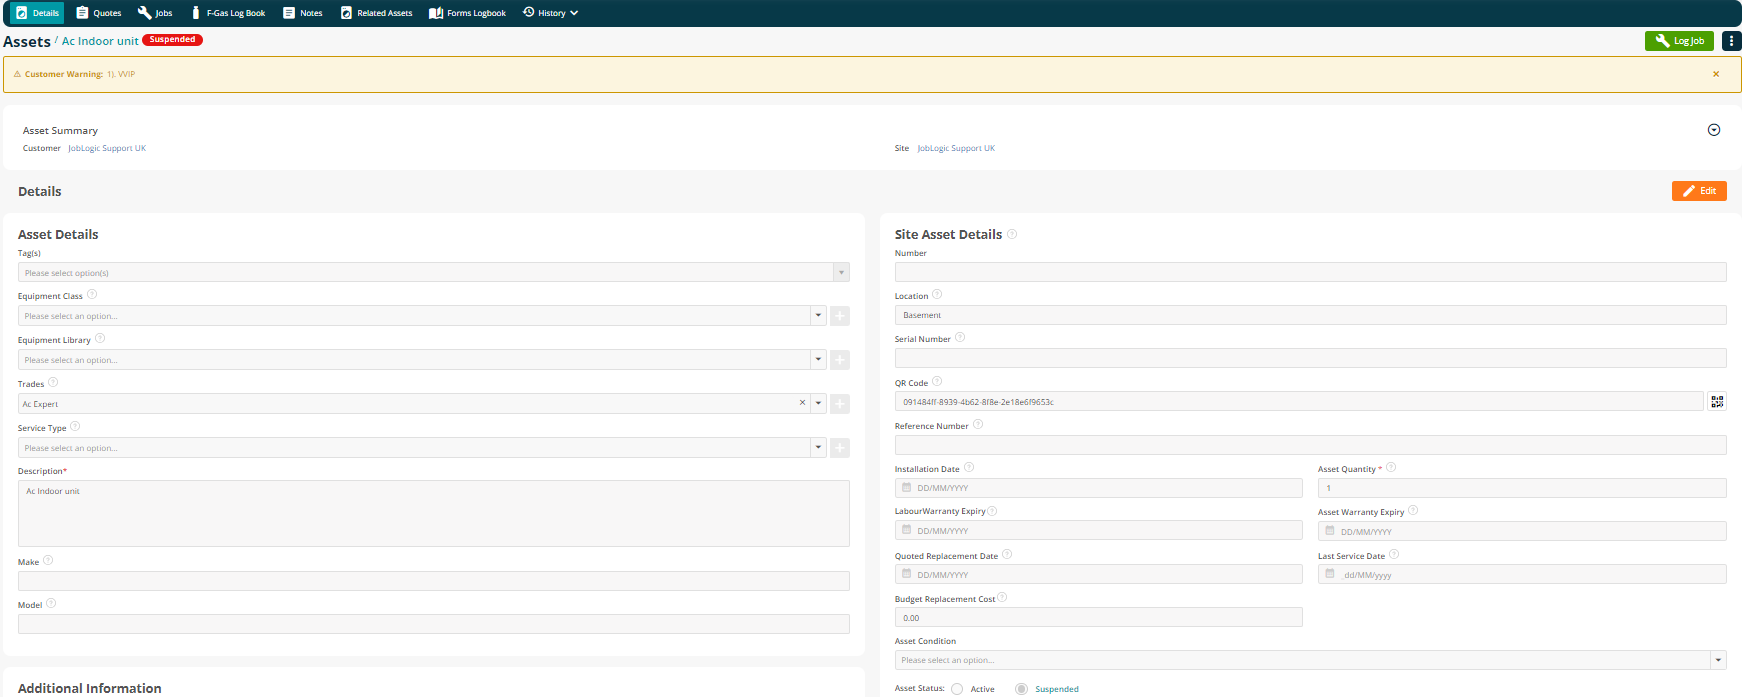
The Asset status will now be updated as suspended and will be reflected on the Asset details page.
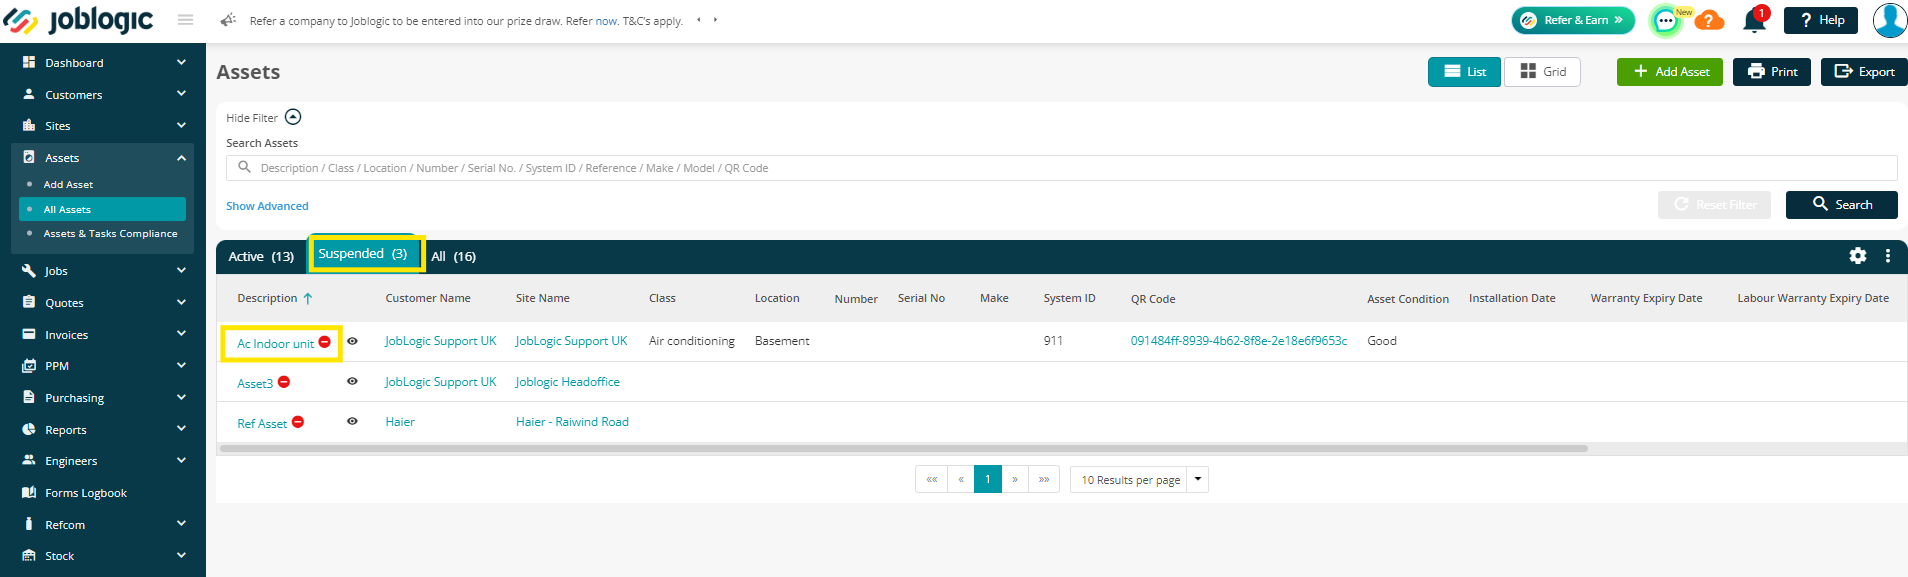
Back on the All Asset list, your Suspended assets are easily identified by clicking into the Suspended tab.
It is important to note that once an asset is suspended, they will not appear in the assets section while logging new work. But the historical data will remain intact and would be available for the user to preview anytime.
If the situation changes again, you can simply follow the above steps to re-tick the Active button.
Further Support
For further information or assistance with the above, contact our Support Team on 0800 326 5561 or email support@joblogic.com. Alternatively, our Customer Success Management team can be reached by emailing customersuccess@joblogic.com
Publishing Details
This document was written and produced by Joblogic’s Technical Writing team and was last updated on the date specified above. Be aware that the information provided may be subject to change following further updates on the matter becoming available or new releases within the system. Additionally, details within the guide may vary depending on your Joblogic account’s user permissions and settings or the electronic device being used.