Introduction
Quotes can be upgraded straight to jobs in Joblogic. The upgrade process allows you to move across relevant information from the quote, without having to duplicate data entry on the job.
This guide will walk you through how to upgrade a quote and the options that go along with it.
Approve Quote
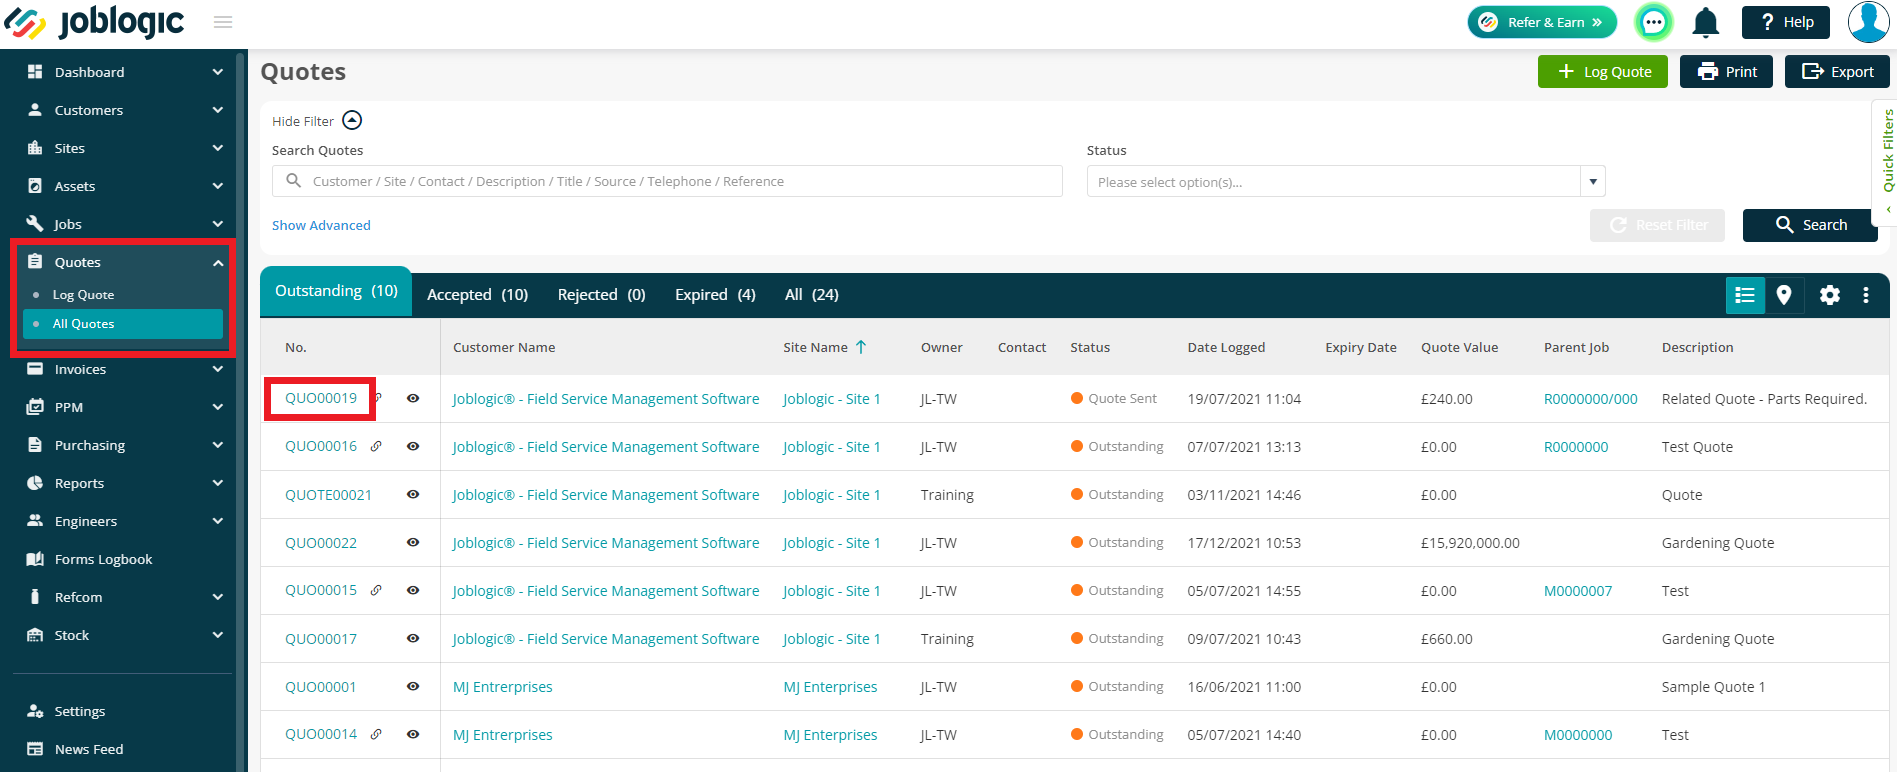
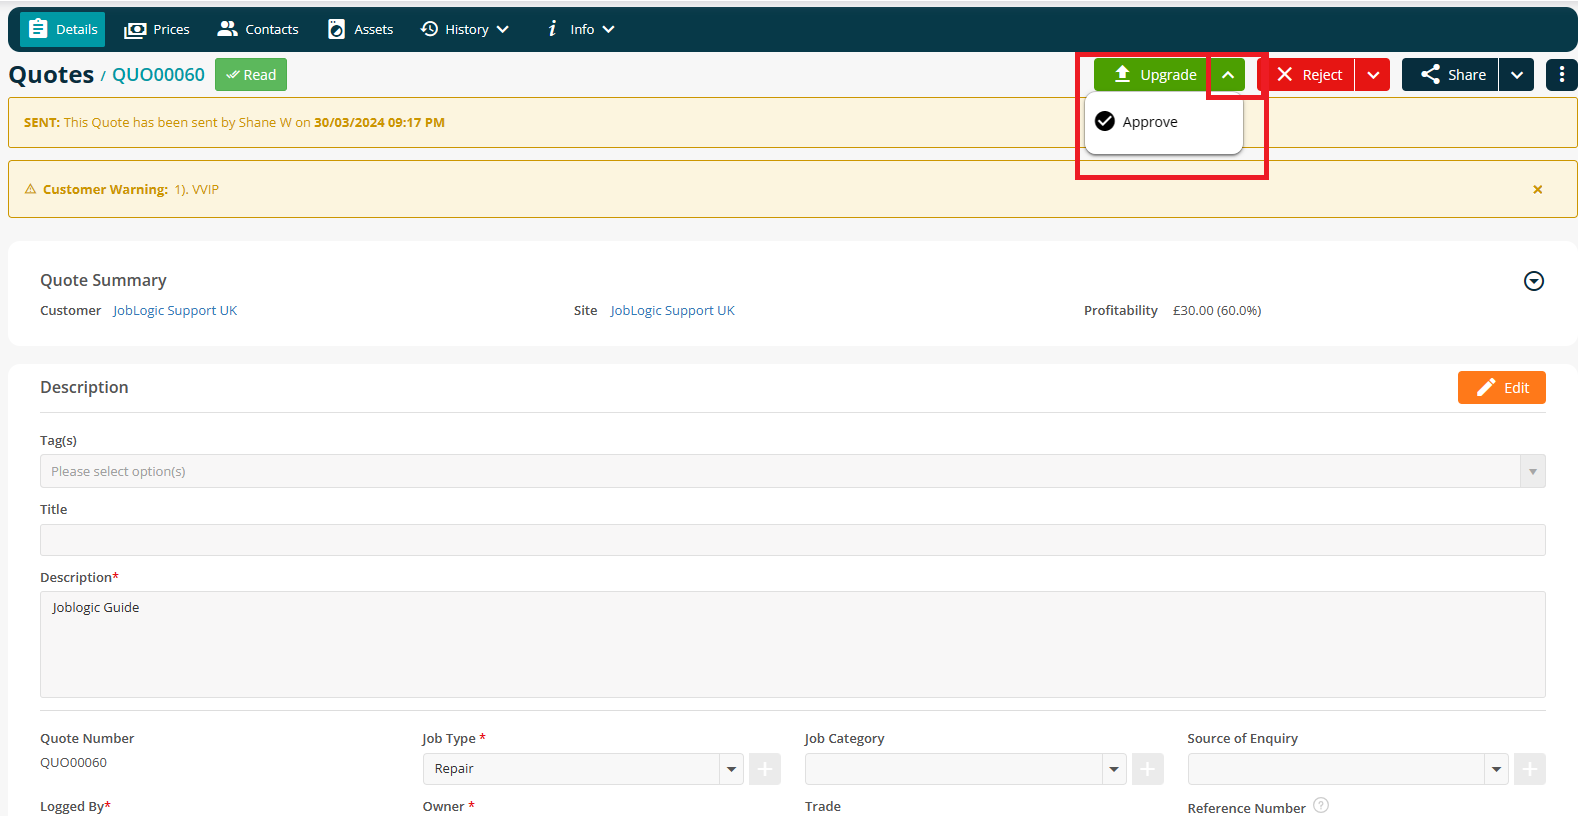
You have an option to simply ‘Approve’ the quote in the first instance. This can be done via Quotes > All Quotes > click Quote Number > click the arrow next to Upgrade > Approve
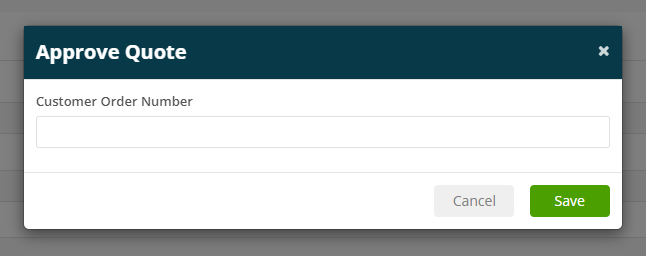
Here, enter an Order Number if required and then click Save
Alternatively, your customer can approve the quote via the portal if they have access.
Image
Upgrade a Quote
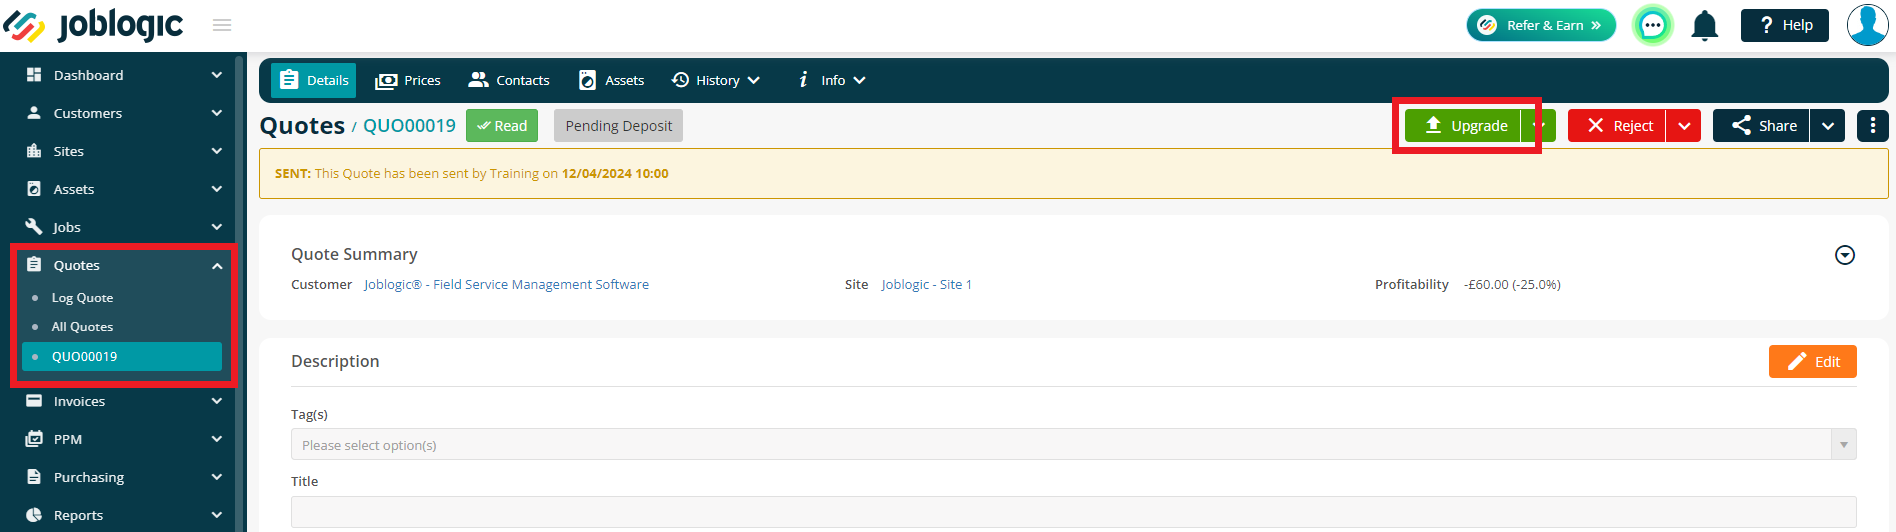
To Upgrade a quote, click through to Quotes > All Quotes > click Quote Number > Upgrade
You’ll then be presented with a pop-up window to confirm a few items before proceeding with the upgrade.
Job Information
On this screen, you can check over any current details, or add further information, if required, such as a Customer Order Number or Appointment Date.
These fields are not mandatory and can be left blank if preferred.
At the bottom of this screen, you have the option to send an Email Confirmation. The drop down will include your contacts from the Quote, Site and Customer, however you may also free type an email address into the box as needed.

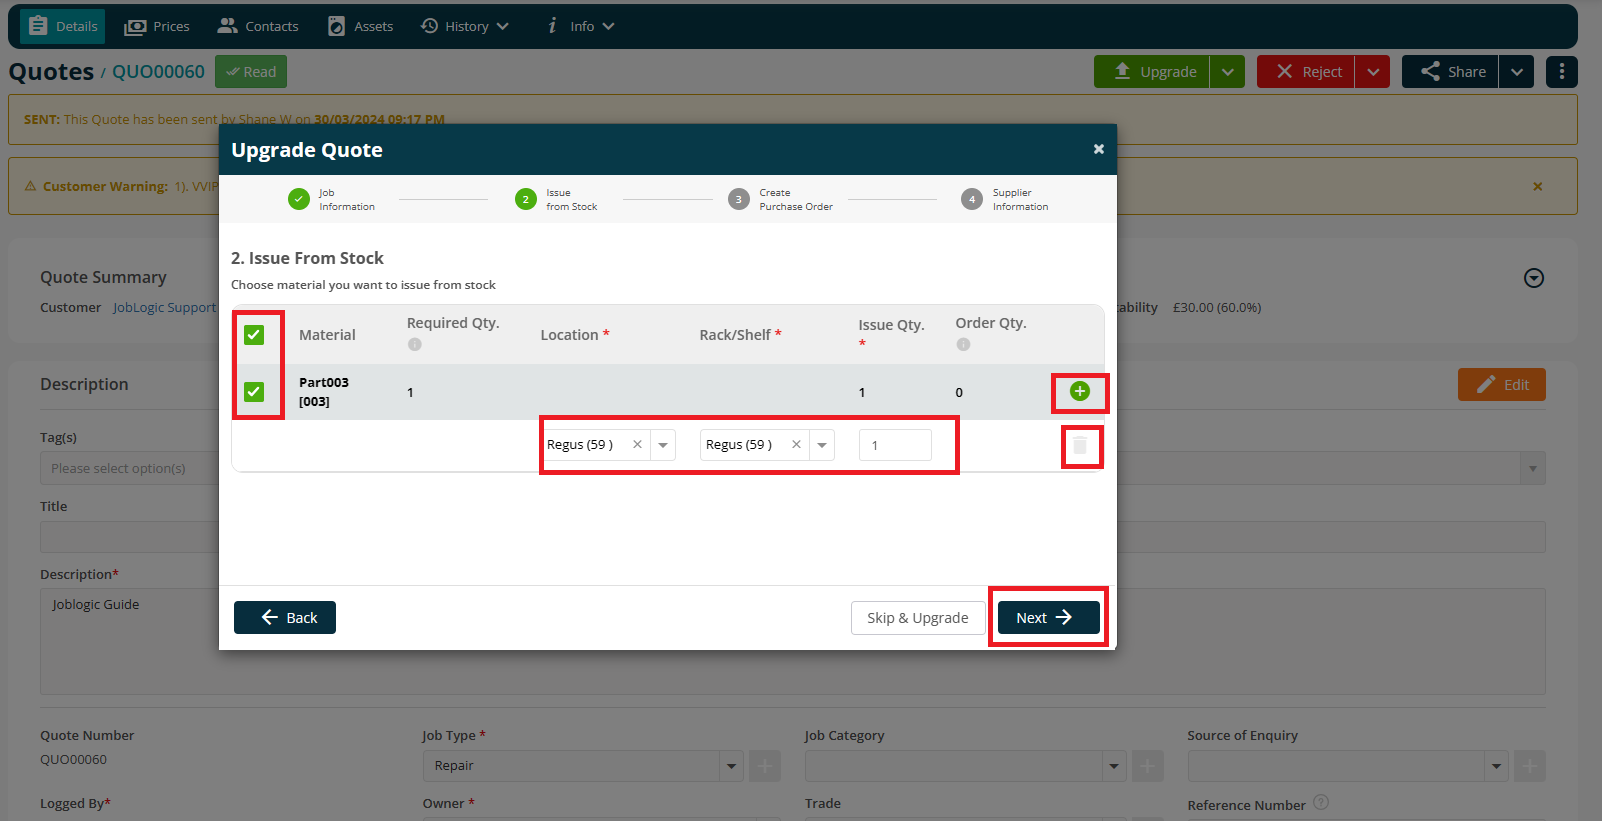
Issue From Stock
If there are any parts/ equipment added to the quote, you will have the option to issue the part from the stock, which in turn will update the stock record.
If you are not issuing the parts from stock but would like to create a Purchase Order, leave this page blank and click Next in the bottom right.
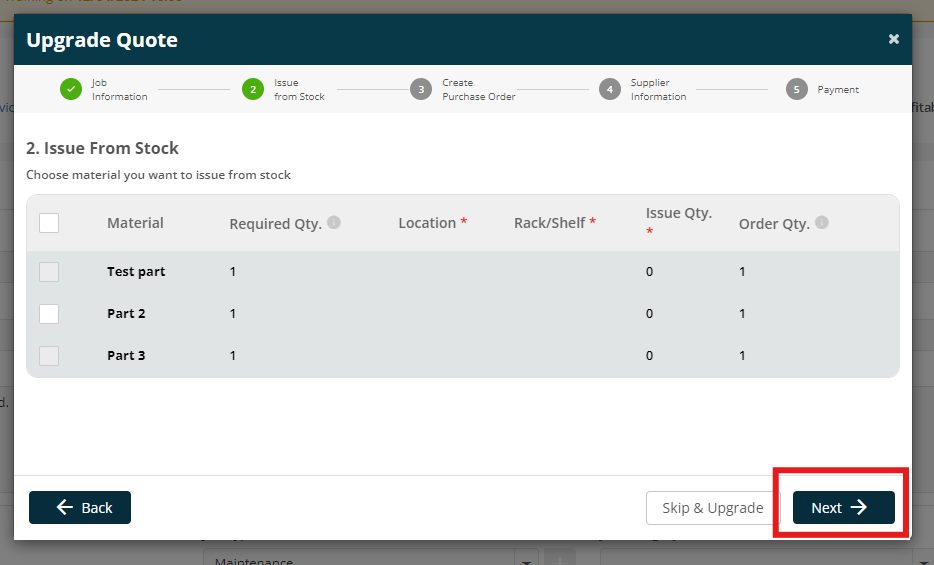
Select the part(s), it’s location and the rack/shelf along with the quantity. If you haven’t set up stock records for the part(s) in question, you can leave the checkbox unchecked and proceed further.
Clicking on the plus sign allows you to issue the stock from multiple locations, rack/shelf. You must have the stock in quantity from the location, rack/shelf you are issuing from.
Click Next when you are happy with your selections.
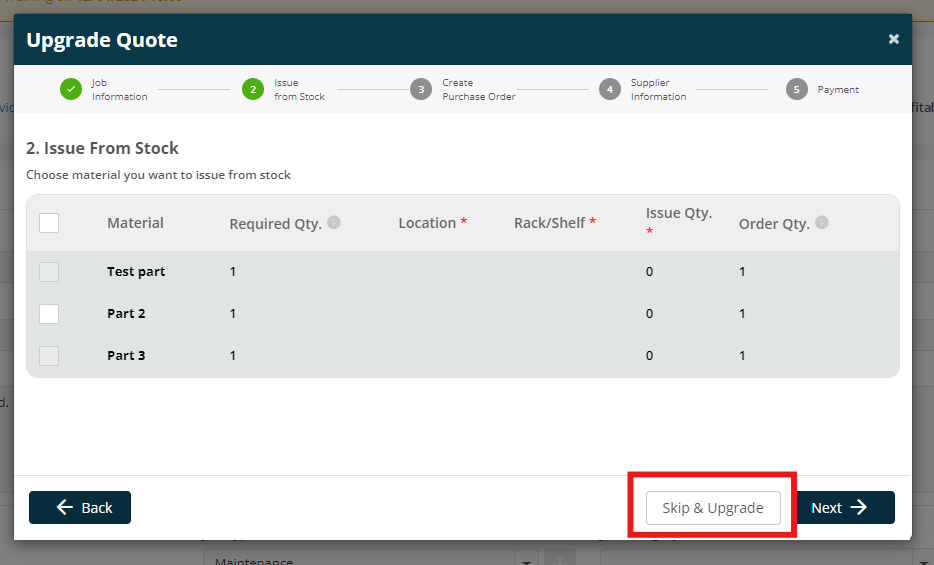
Alternatively, you can click ‘Skip & Upgrade’ to bypass this and the next couple of steps if they are not relevant.
Create Purchase Order
If you have completed the ‘Issue From Stock’ for any part lines, they will be greyed out on this page. You can click ‘Skip & Upgrade’ to continue forward if all are greyed out.
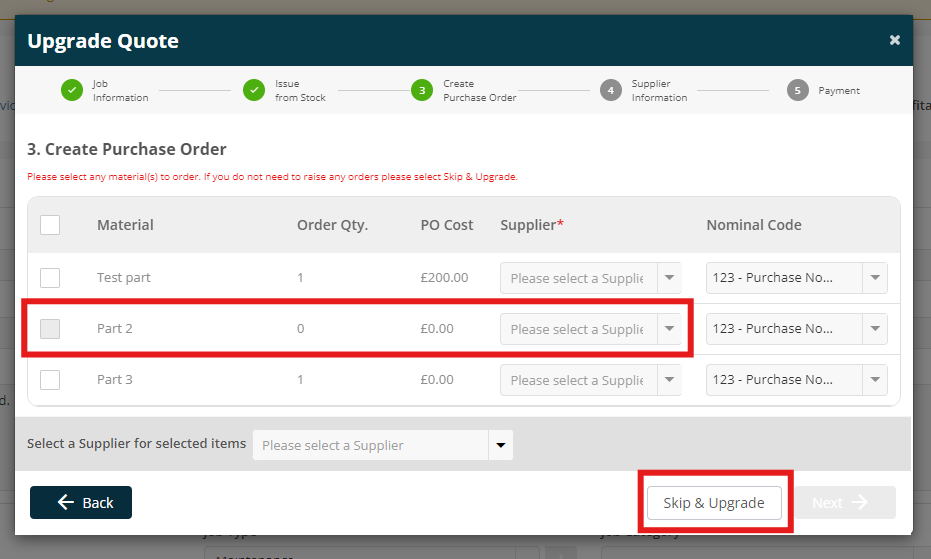
If you do not issue the part from stock, you will have the option to create a purchase order for part(s) added to the quote. You can firstly tick the box against the relevant parts, and then select the supplier you want to raise a purchase order against, along with the nominal code for accounting purposes.
You can also order all the parts from a single supplier by selecting the supplier from the list at the bottom instead.

Supplier Information
If you have entered details for a Purchase Order, your next screen will be for your Supplier Information.
Enter the required fields and set the job status to New Job or Awaiting Parts.
You can also select the purchase order template and select the checkbox Email to Supplier if you want to send the purchase order to the supplier.
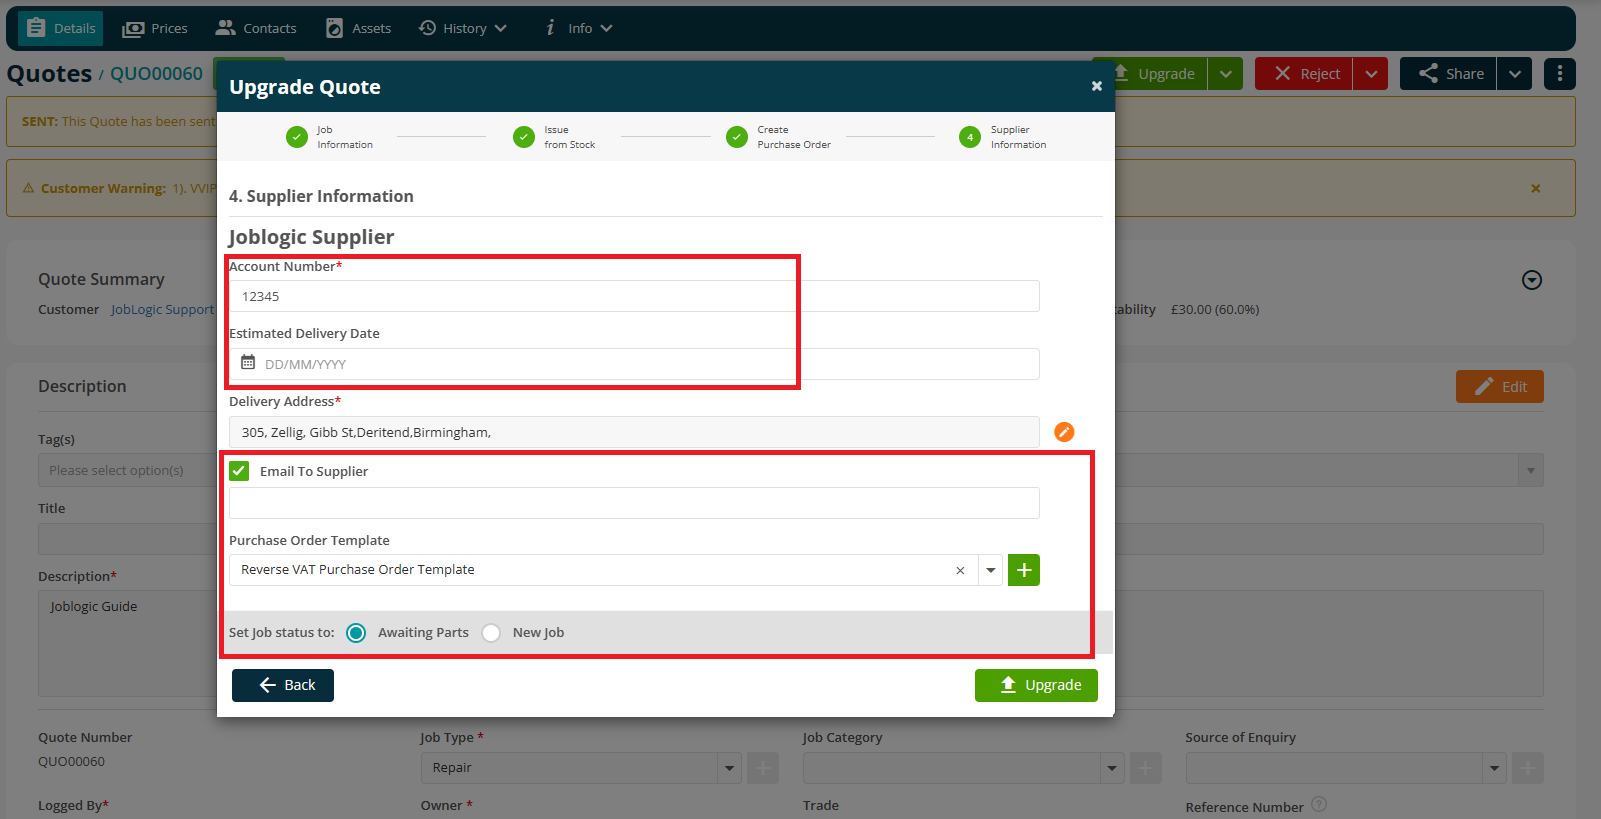
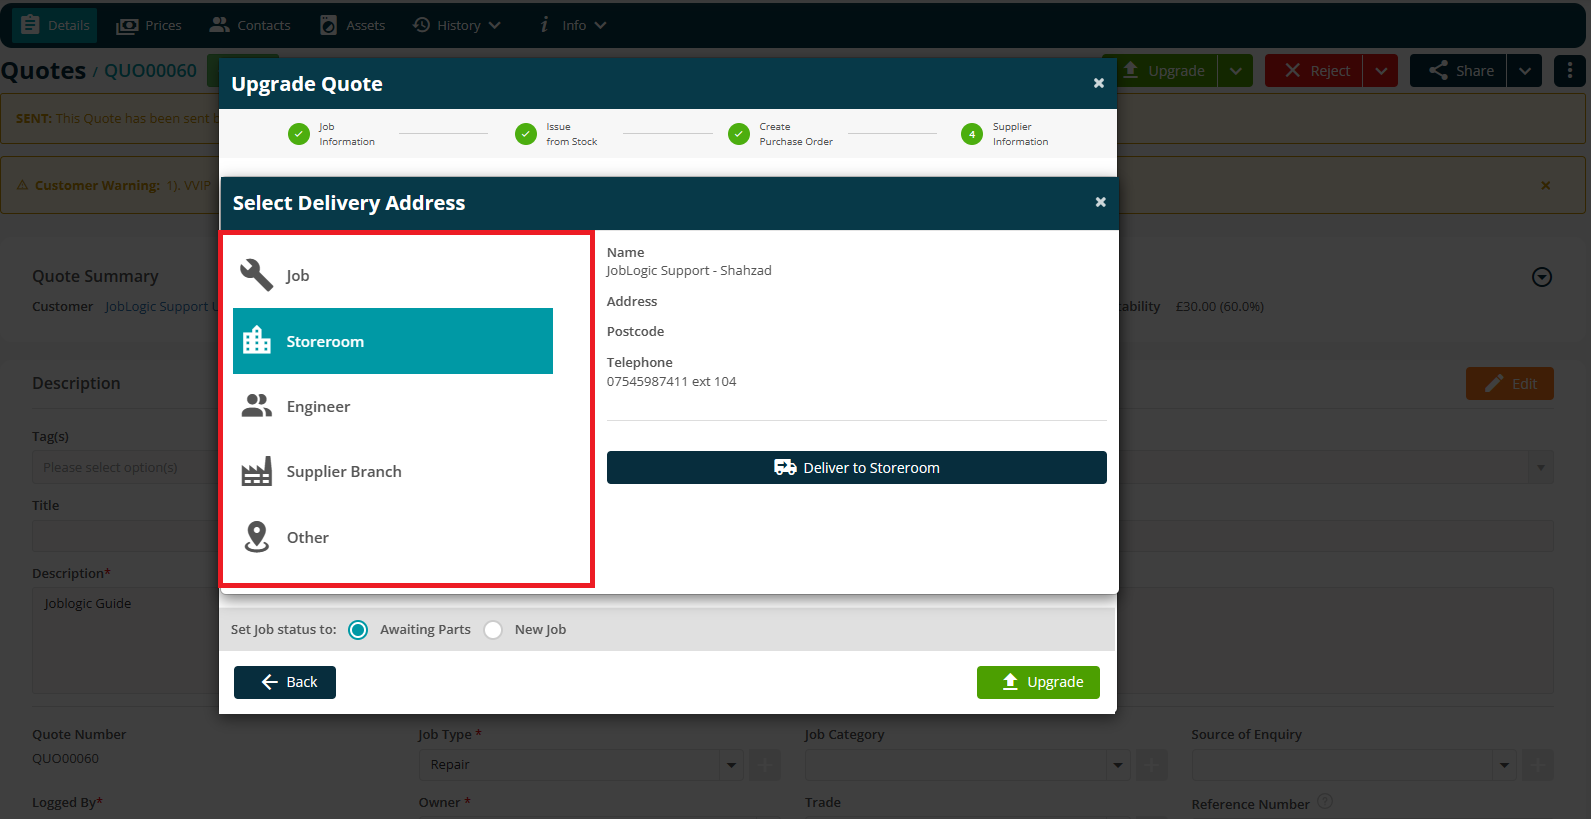
You can click on the pencil icon next to the address to change the delivery location. By default it has the site address however you can change it to Job, Storeroom, Engineer (manual address), Supplier branch or any Other address.
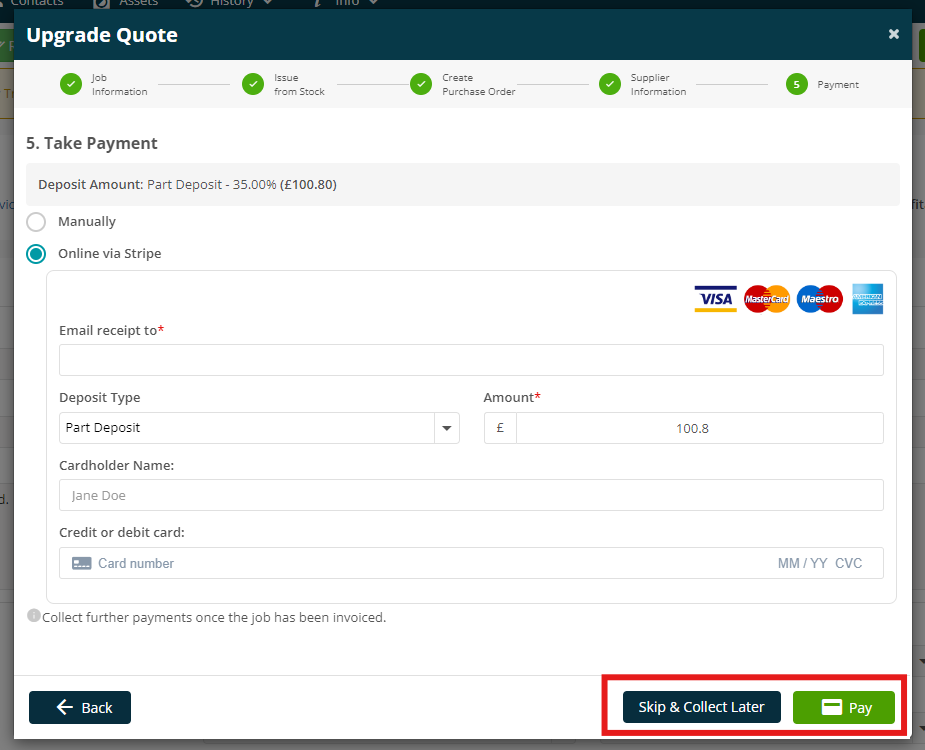
Once done, click Upgrade. You will be redirected to your new job, or the Payment screen if you have a deposit required.
Payment
On this final screen, you have the option to take payment if a deposit was set up during the Log Quote process.
You may take payments manually or through Stripe, if you have this set up.
To read more about taking quote deposits, click here.
Either click ‘Skip and Collect Later’ or ‘Pay’ to finish upgrading your quote.
Further Support
For further information or assistance with the above, contact our Support Team on 0800 326 5561 or email support@joblogic.com. Alternatively, our Customer Success Management team can be reached by emailing customersuccess@joblogic.com
Publishing Details
This document was written and produced by Joblogic’s Technical Writing team and was last updated on the date specified above. Be aware that the information provided may be subject to change following further updates on the matter becoming available or new releases within the system. Additionally, details within the guide may vary depending on your Joblogic account’s user permissions and settings or the electronic device being used