Introduction
User References allows you to add your own fields text or drop-down fields to the Job and Quote pages.
This guide will walk you through adding these extra fields, and then utilising them within the system.
Permissions
The ability to View and Edit this feature can be decided via the Permissions against each individual user.
To turn this on or off for an individual, go to Settings > Staff > name > search for User Reference for ease of finding it in the list.

Set up
Navigate to Settings > Library > User References
Here, you’ll see four items already set up for you to edit, along with the Screen they will appear on, and the Type of field they will be.
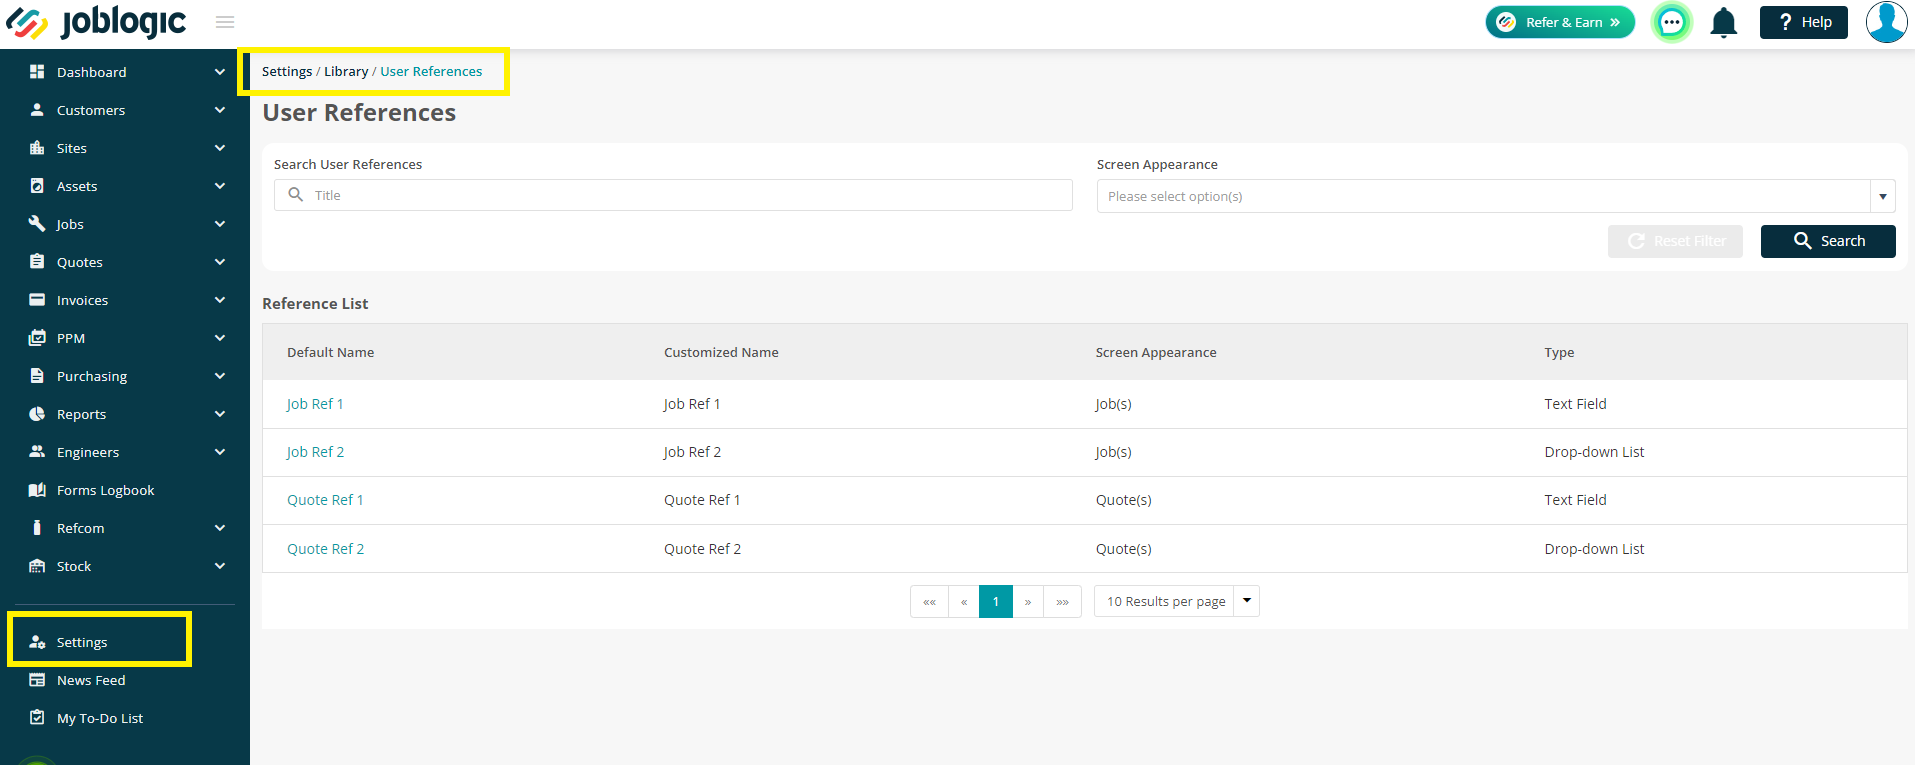
Click on the Default Name to edit a field.
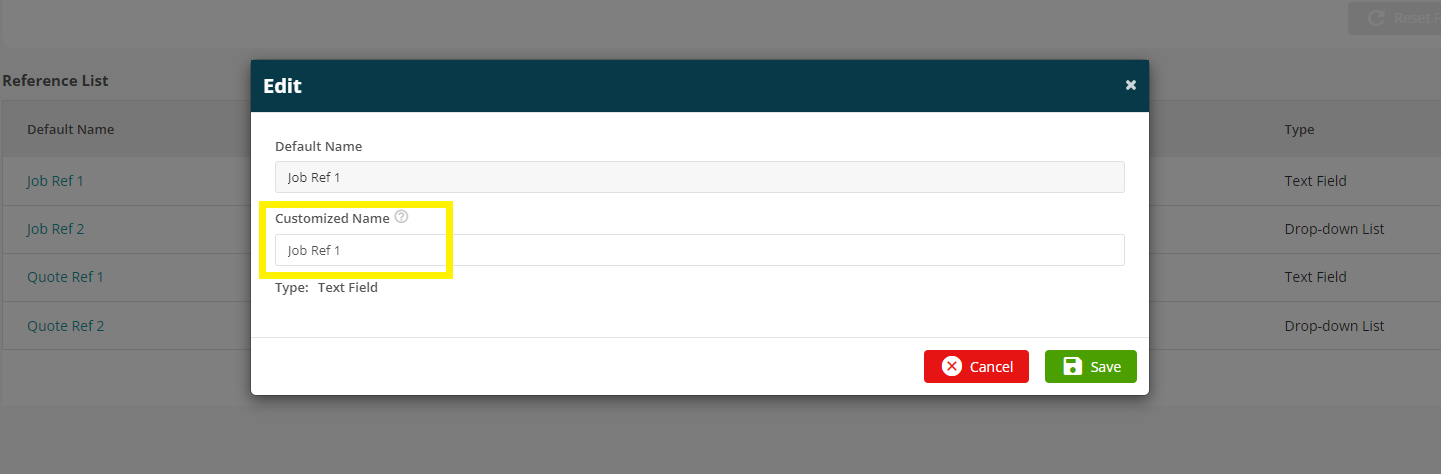
Editing a Text Field type will allow you to rename the Customized Name field only.
Editing a Drop-down List type will allow you to rename the Customized Name field, and Add drop down options.
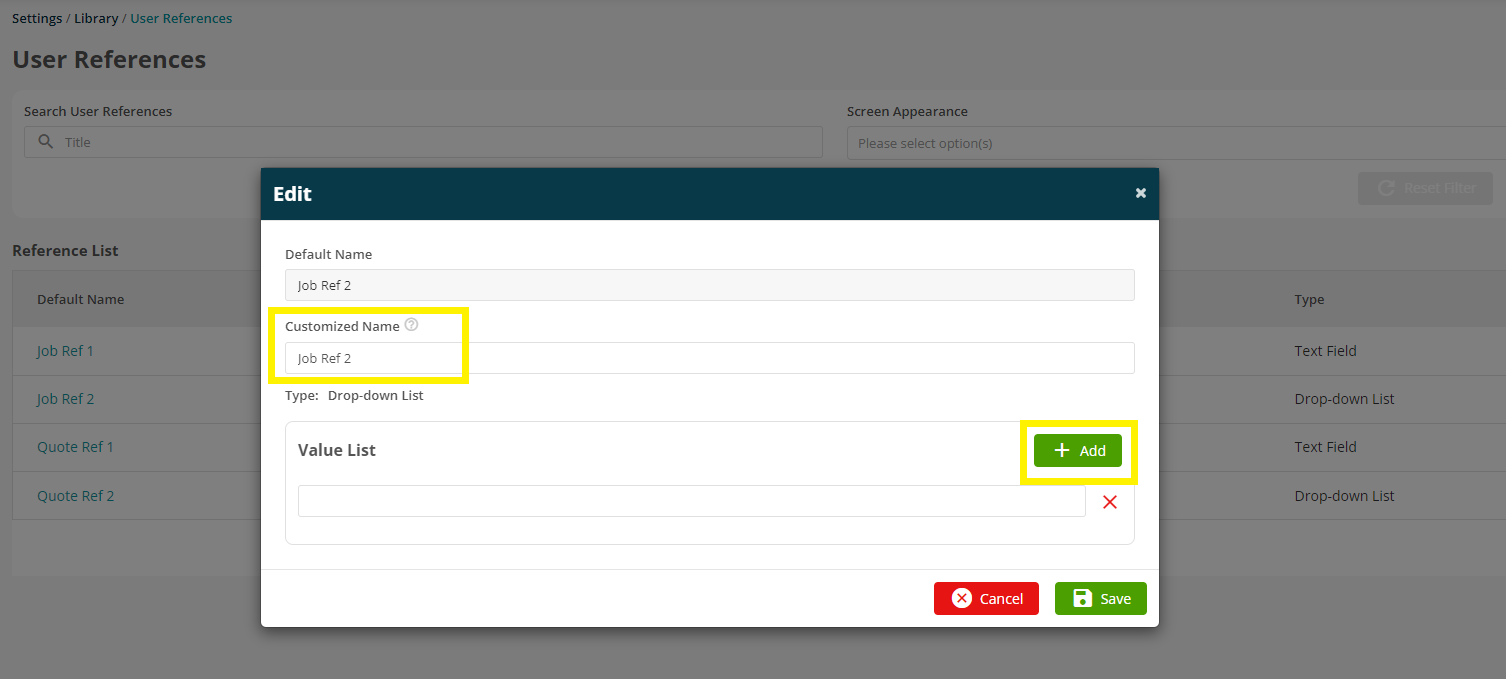
Click Save and your new Field has been updated. This can still be edited again later if required.
Using the new fields
Now when you add or edit a Job or Quote, you’ll be able to utilise your newly added fields as you would any other field within the system.
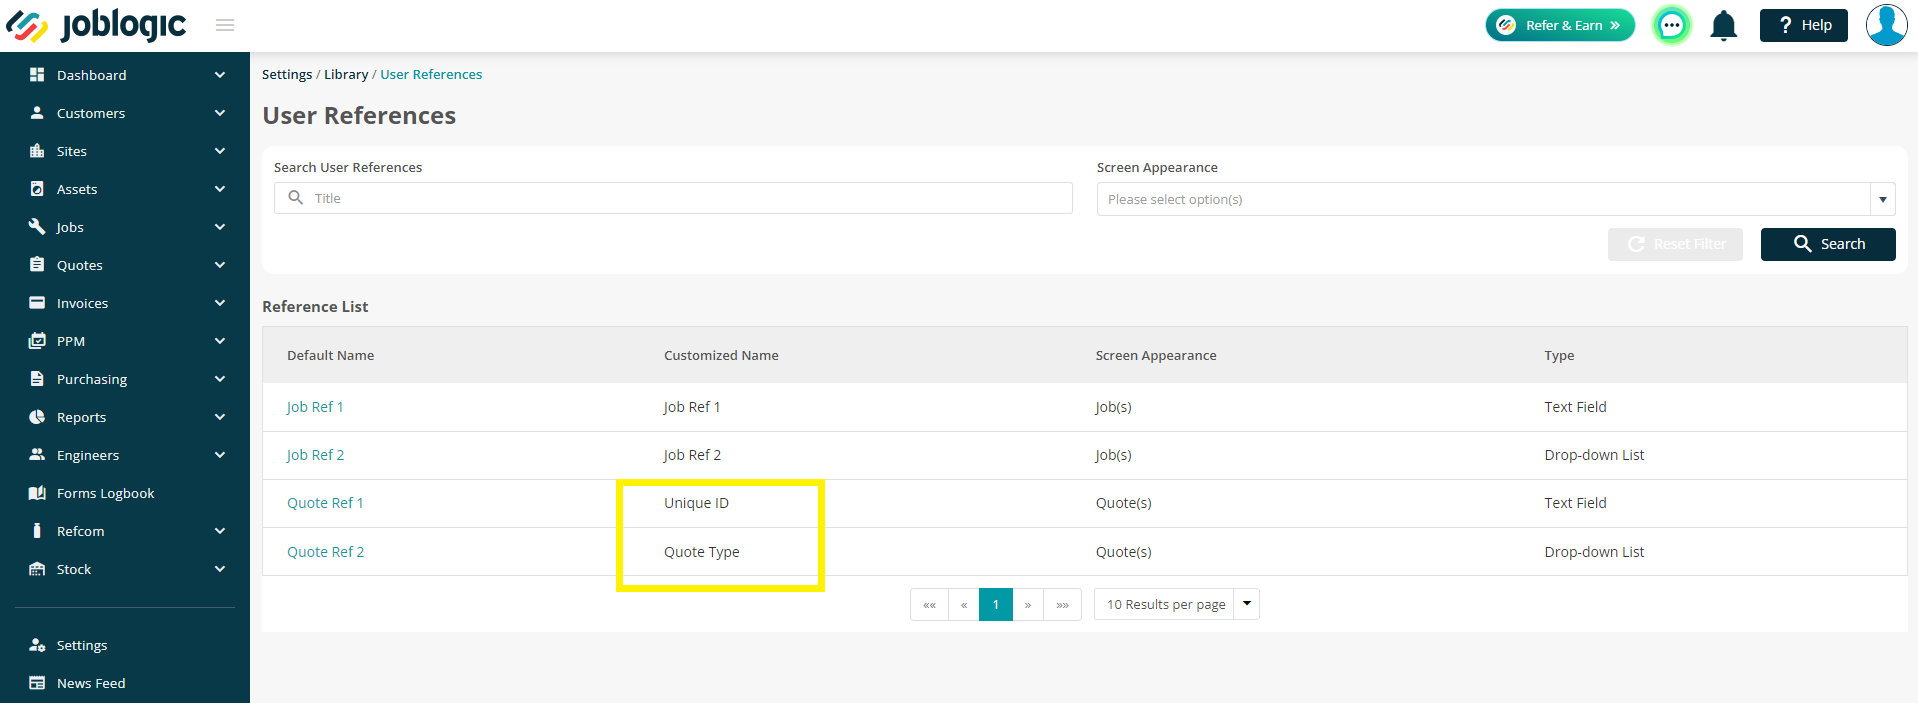
If you have renamed the fields, they will show as follows:
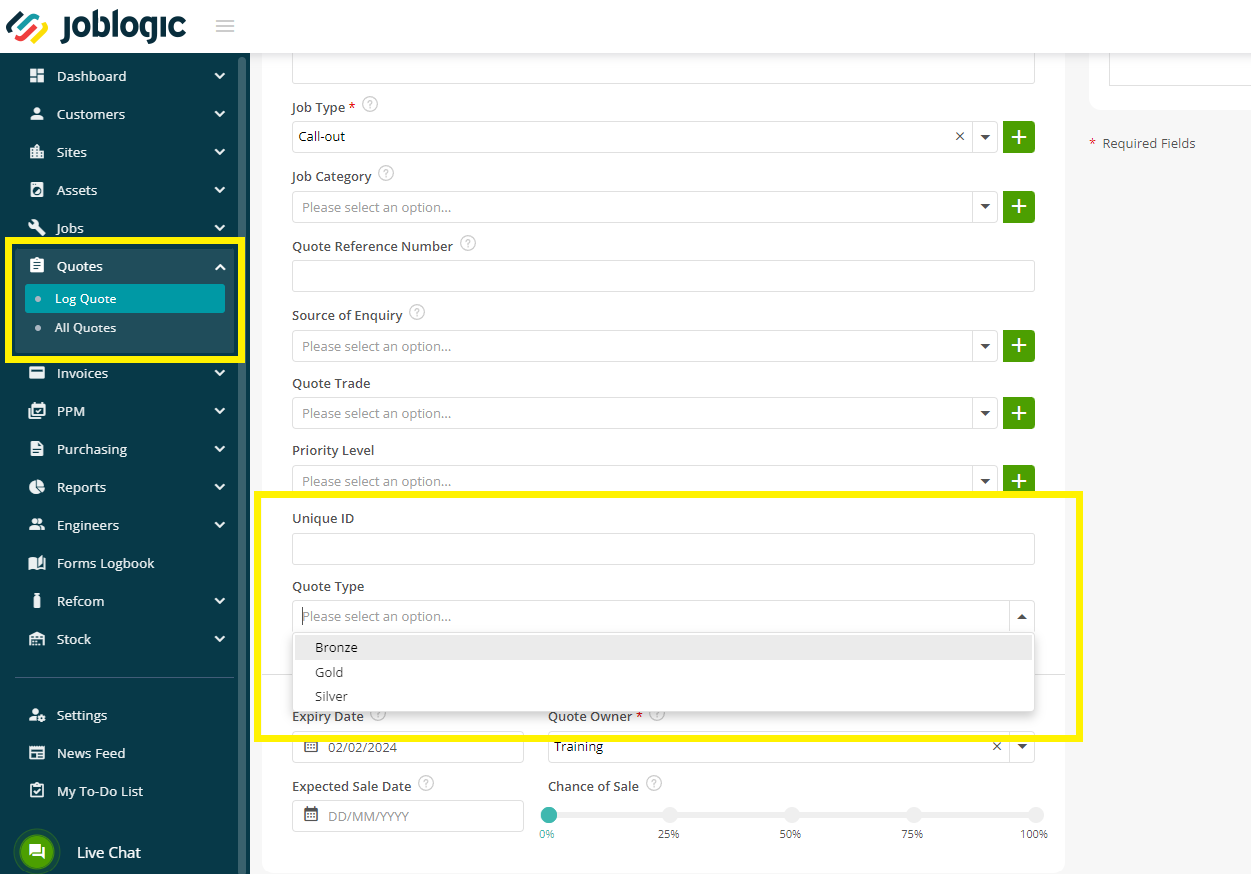
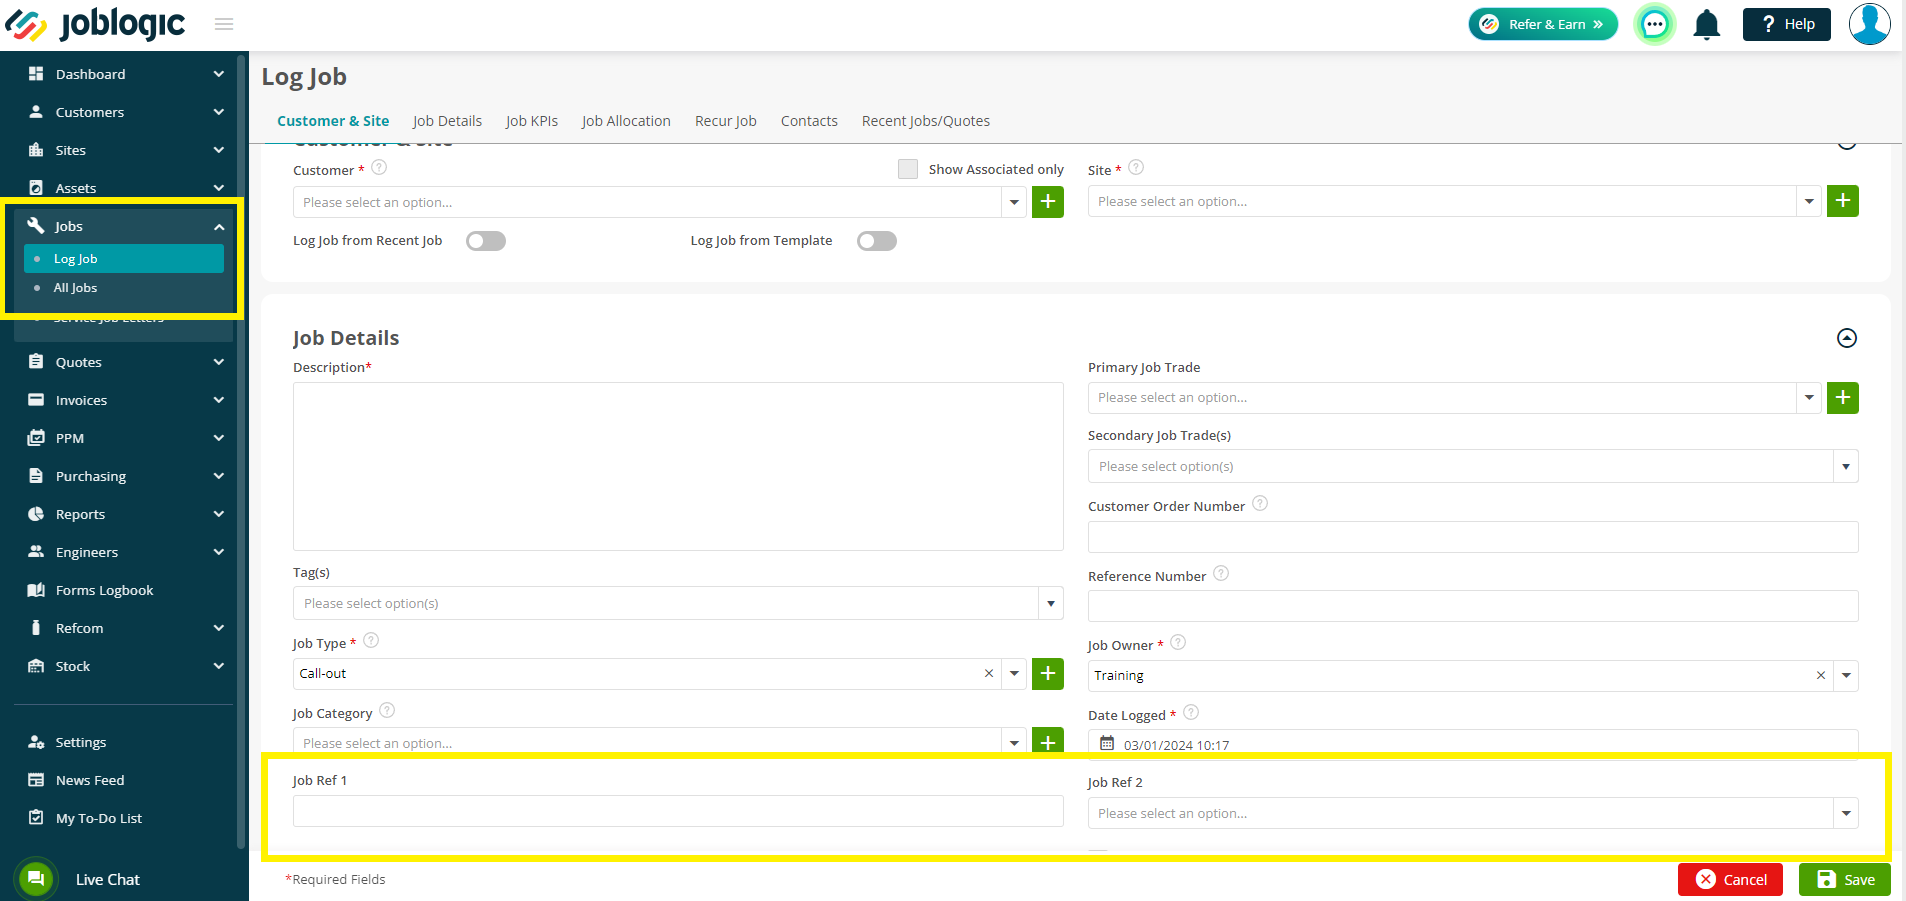
The fields will still be visible for you to use even if you have not customised them:
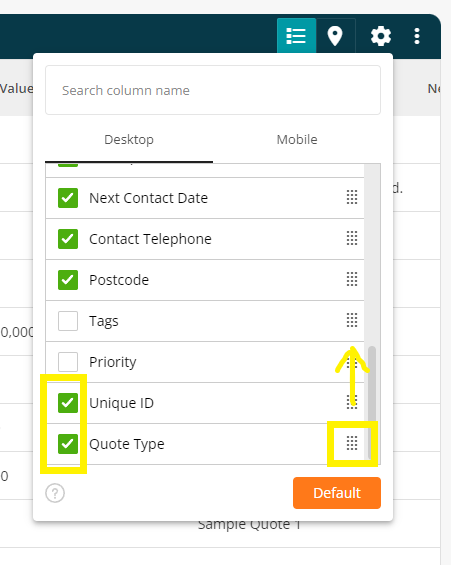
You can also add these columns to your All Jobs and All Quotes pages.
To do this, go to the relevant page and then click the Settings icon on the right.

From here, find your new fields and mark them with a tick. If you wish to move them to a more prominent spot on your page, simply drag the field towards the top.
Document Templates
If you wish to add the new fields to your Jobsheet, Quote or Multi-Section Quote templates, you can do so via Settings > Document Templates.
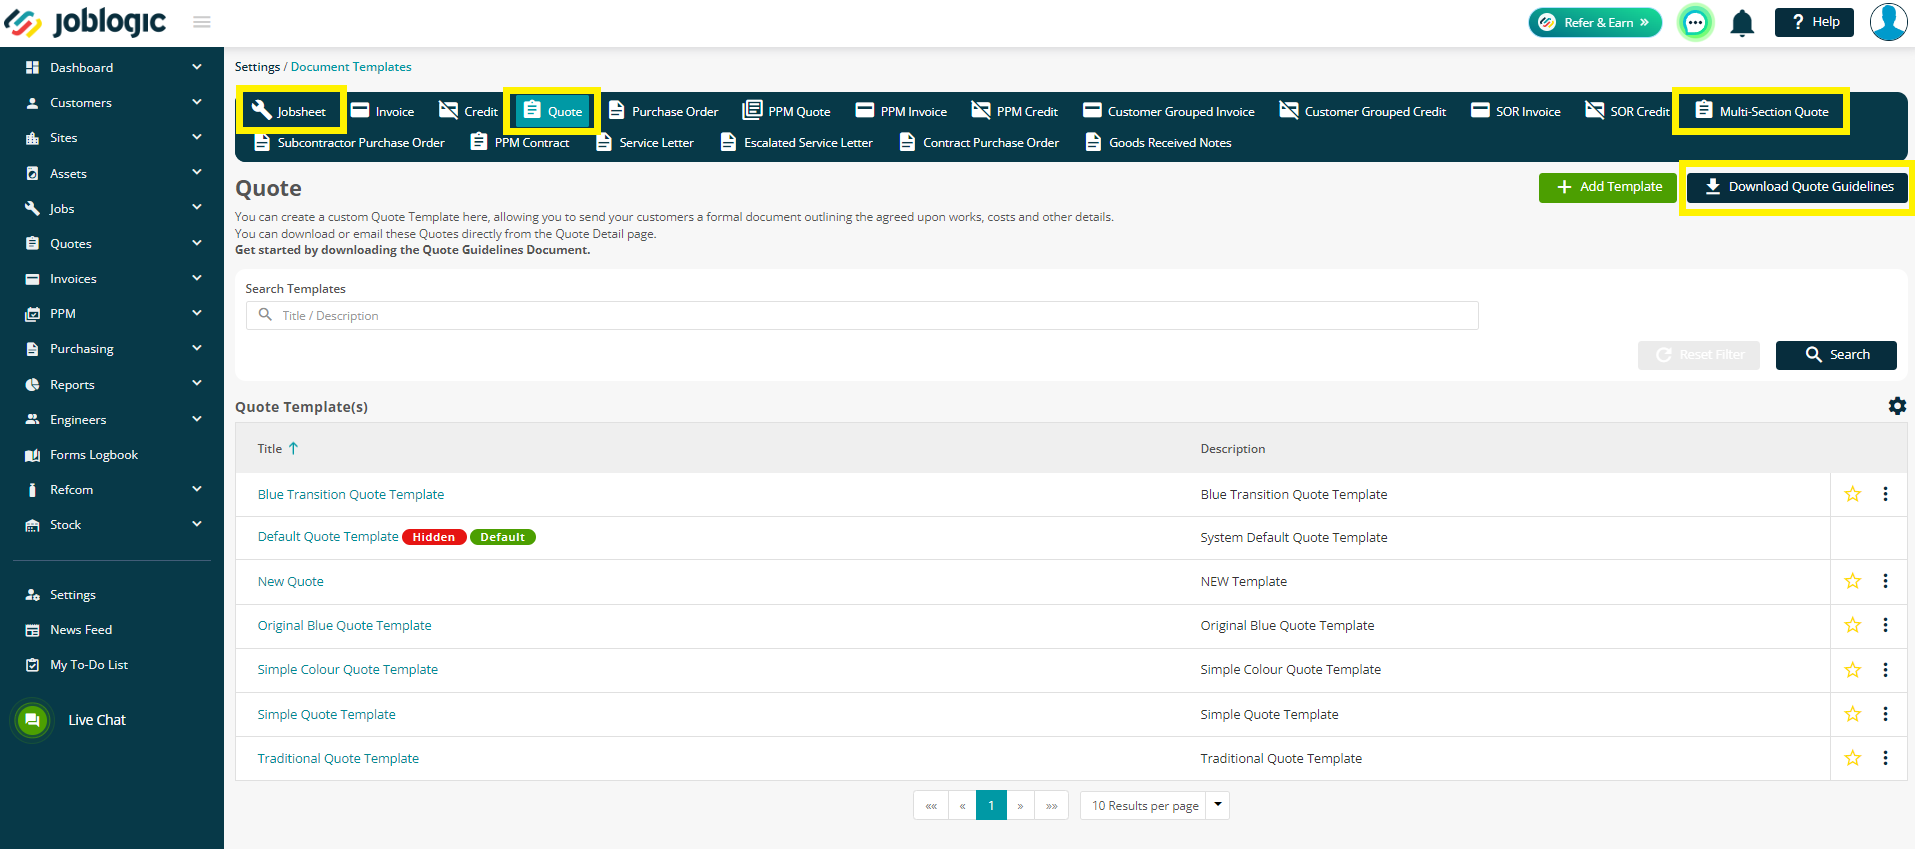
You will need to use the Default Name and not your new customised name (i.e. @@JobRef1@@, @@QuoteRef1@@, etc), however the tags will be visible in the relevant guidelines for reference.
To read more about setting up your document templates, please click here
Further Support
For further information or assistance with the above, contact our Support Team on 0800 326 5561 or email support@joblogic.com. Alternatively, our Customer Success Management team can be reached by emailing customersuccess@joblogic.com
Publishing Details
This document was written and produced by Joblogic’s Technical Writing team and was last updated on the date specified above. Be aware that the information provided may be subject to change following further updates on the matter becoming available. Additionally, details within the guide may vary depending on your Joblogic account’s user permissions.