Introduction
This user guide will detail how to view an asset and it’s details via the mobile application (app). It’ll also explain how to create new assets, how to record them against the job and how to search and sort them.
Viewing Assets via the Mobile Application
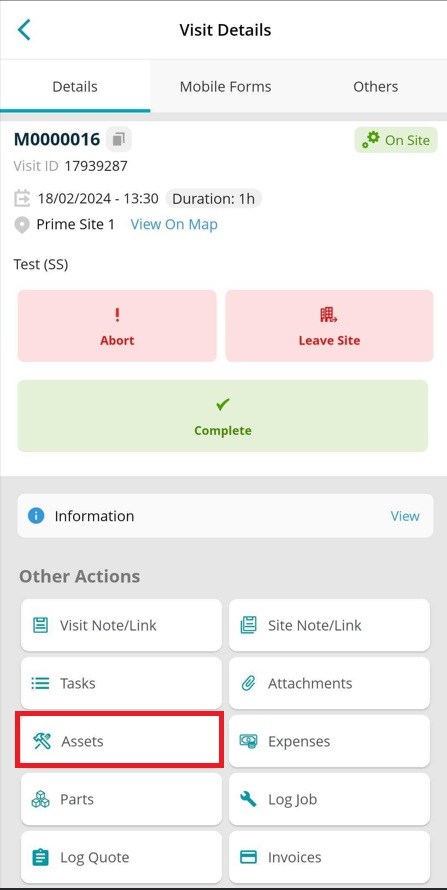
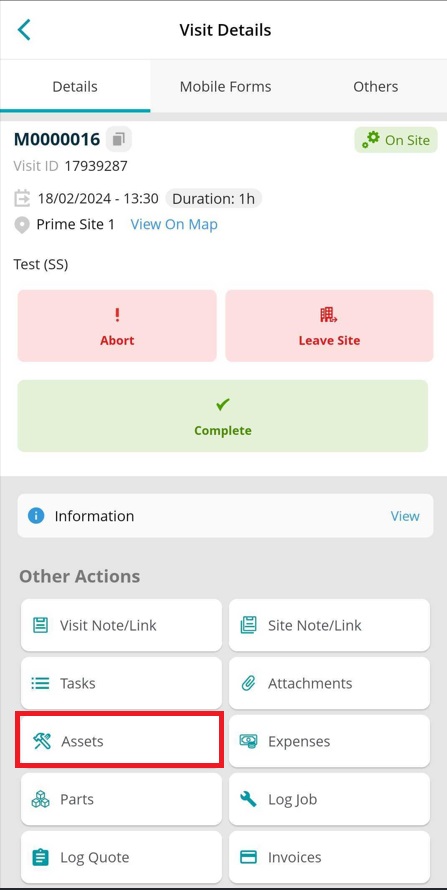
In order to view an asset via the mobile app, select the ‘Assets’ button from the ‘Visit Details’ page.
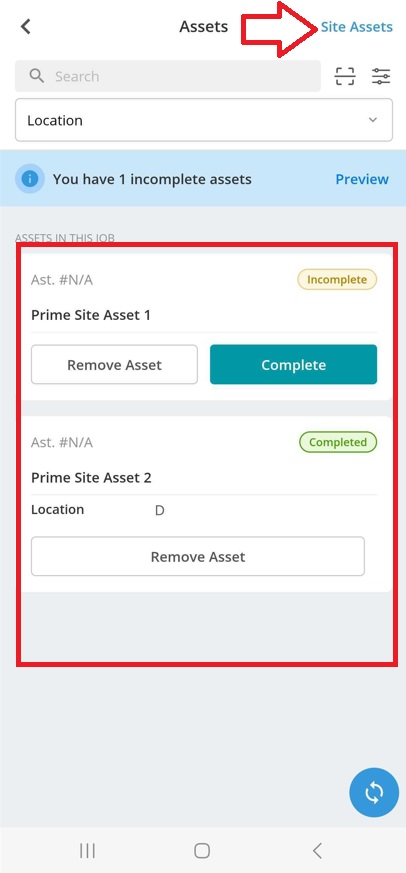
An ‘Assets’ page will then display, presenting any assets recorded against the job. This is indicated by the ‘Assets in this job’ area. The mobile user can then select each of the individual assets to view it’s details by tapping on them as applicable.
There is also a ‘Site Assets’ area which will show all available assets recorded against the site that the job is against.
Creating new assets and recording them against the Job
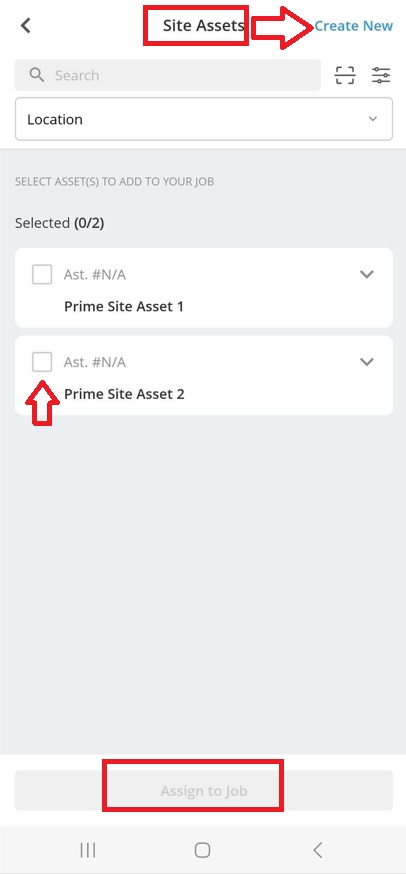
If no assets have been allocated to the job but need to be, and the assets are already logged against the site, the user can select the ‘Site Assets’ option. This will allow the user to select the assets which need to be added to the job via the tick boxes and the ‘Assign to Job’ option.
If no assets have been allocated to the job but need to be, and the assets are not already logged against the site, the user can select the ‘Create New’ option. Upon creation of the asset, the user can then select the newly created asset(s) which need to be added to the job via the tick boxes and the ‘Assign to Job’ option.
Service frequency, quick complete and asset details
The Service Type Frequency is shown against each asset, so you can see when it is due its next service.
To see how often your job assets need servicing, use the View Asset Highest Service Frequency button. It is in the three-dots menu of each visit and in the Other Actions section of the Visit Details page. It opens a screen that shows all the job assets and their highest service frequency. You need the Asset Highest Service Frequency - View mobile permission, which your back office switches on.
On the Assets page, each asset also has a View Asset Detail link that takes you straight to that asset's details.
If Quick Complete is available to you, you can mark assets and service type tasks as complete in one place with a few taps, without filling in several extra fields.
Search and Sorting Assets
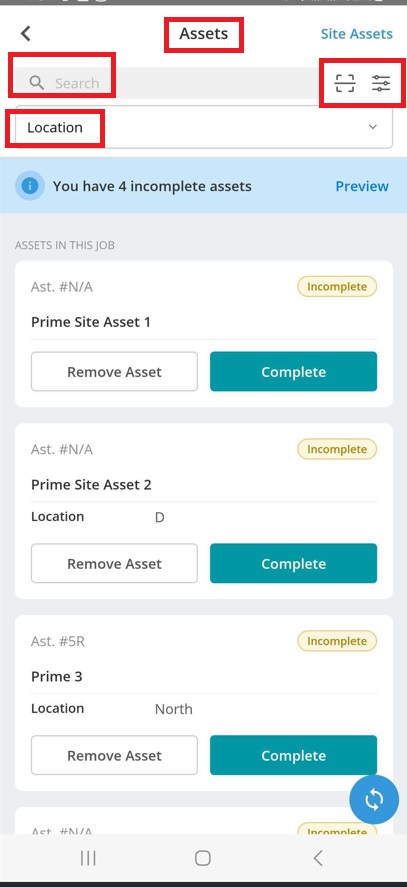
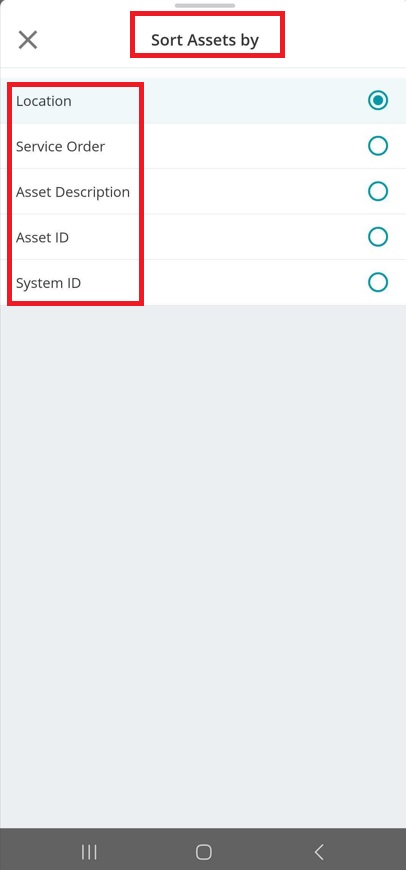
Assets can be searched and sorted by using the assets search and filter tool within the ‘Assets’ page.
User Permissions
There is not a specific user permission for the ability to view assets. However, upon request to our support team, we can hide the ‘’Assets’ button from the ‘Visit Details’ screen, preventing engineers from viewing assets and their details. Note: Having this change applied will implement it for all mobile users under the Joblogic account. We can not turn it off for one mobile user and on for another.
Further Support
For further information or assistance with the above, contact our Support Team on 0800 326 5561 or email support@joblogic.com. Alternatively, our Customer Success Management team can be reached by emailing customersuccess@joblogic.com
Publishing Details
This document was written and produced by Joblogic’s Technical Writing team and was last updated on the date specified above. Be aware that the information provided may be subject to change following further updates on the matter becoming available. Additionally, details within the guide may vary depending on your Joblogic account’s user permissions.