Zapier - Joblogic Configuration Manual
1. Overview
Zapier serves as an internet-based automation tool that establishes seamless connections between Joblogic and its associated services. By utilizing this integration, you can automate repetitive tasks related to your excel data templates within Joblogic without requiring any coding expertise or developer assistance.
Joblogic offers public Endpoint, allowing you to connect with our services and perform various data operations, including retrieval, creation, updating, and deletion of your personalized Joblogic data.
Within this document, we cover all the essential steps required to configure Zapier account integration with Joblogic, and efficiently import and export data from Excel, Google Sheets and all third-party applications configured on Zapier.
Here Endpoints List.xlsx you can preview all the available Endpoints and how they are being mapped in Joblogic.
2. Google Sheets - Connection
To establish a connection between Google Sheets and Zapier, follow the below steps:
-
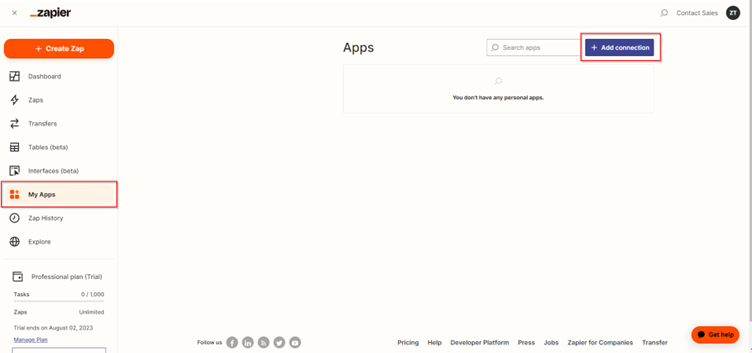
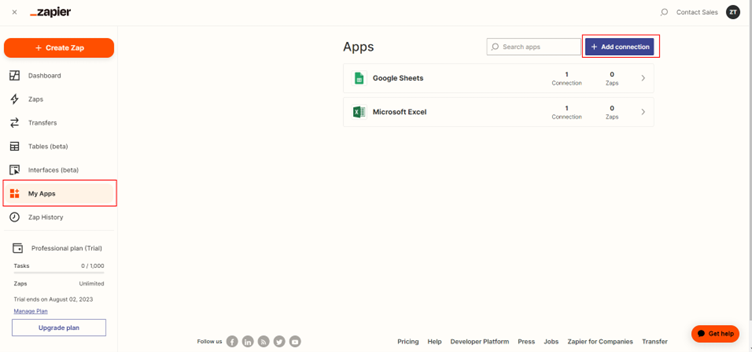
Access the Zapier My Apps Section.
-
Click the blue Add Connection Button located at the top-right corner.
- In the search bar of the newly opened dialog box, type Google Sheets and select the Google Sheets application from the search results.

-
Sign into your Google account by entering your username and password in the newly opened window.
-
Click the Allow button on the Zapier wants to access your Google Account page to link your Google account with Zapier

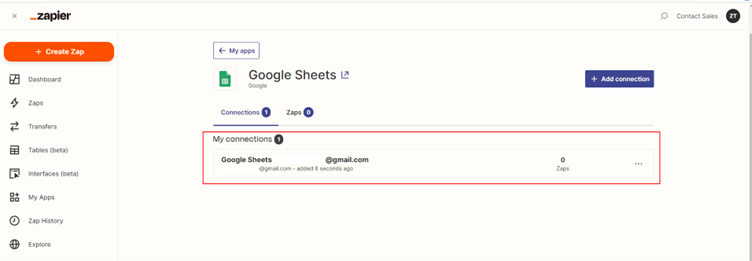
- Once you see the below response, it means the connection is successful. Otherwise, please repeat this step.
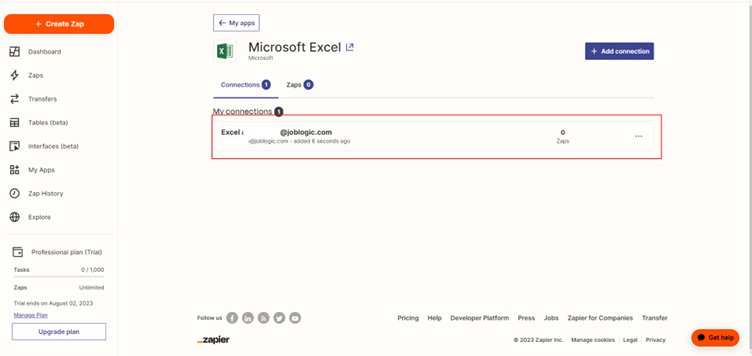
3. Microsoft Excel (One Drive) - Connection
To establish a connection between Microsoft Excel and Zapier, follow the below steps:
-
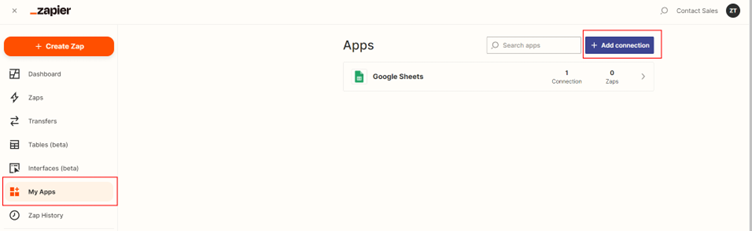
Navigate to the Zapier My Apps Section.
-
Click on the blue Add Connection Button situated in the top-right corner.
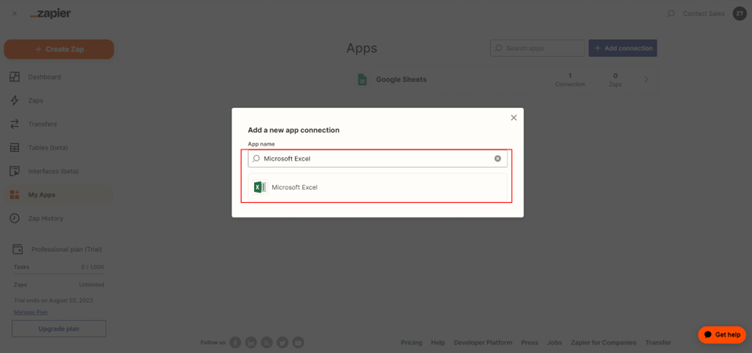
- In the newly opened dialog box search bar, enter Microsoft Excel and select the Microsoft Excel application from the search results.
- Sign in with your OneDrive account by providing your username and password in the newly opened window.
- Once you see the below response, it means the connection is successful. Otherwise, please repeat this step.
4. Joblogic Connection
To link your Zapier account with your Joblogic account, you will need to gather the following information as outlined below. Please contact our support to get this information.
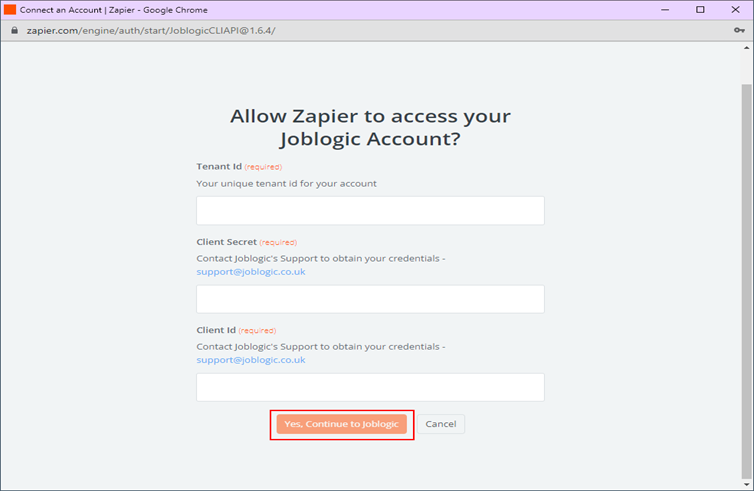
- Tenant Id: The distinctive identifier for your Joblogic account within its database.
- Client Secret: The confidential identification linked to your Joblogic account within its database is termed as the "Client Secret".
- Client Id: The specific identification assigned to your Joblogic account within the Joblogic database is known as the "Client Id".
4.1 Configuration Process
To establish a connection between your Zapier account and the Joblogic application, follow the below steps:
-
Navigate to the My Apps section within Zapier.
-
Select the blue Add Connection button in the upper-right corner.
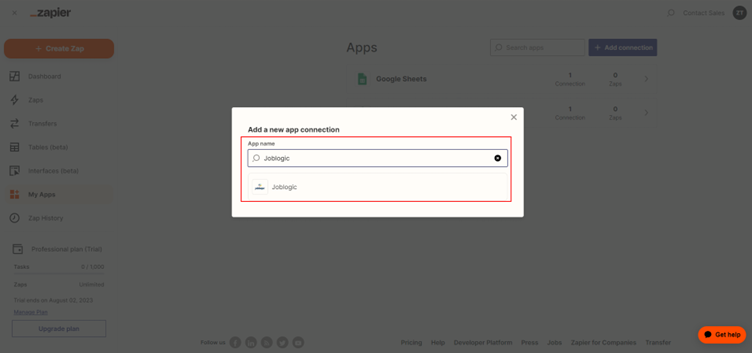
- Enter Joblogic into the search bar of the newly opened dialog box and choose the Joblogic application from the search results.
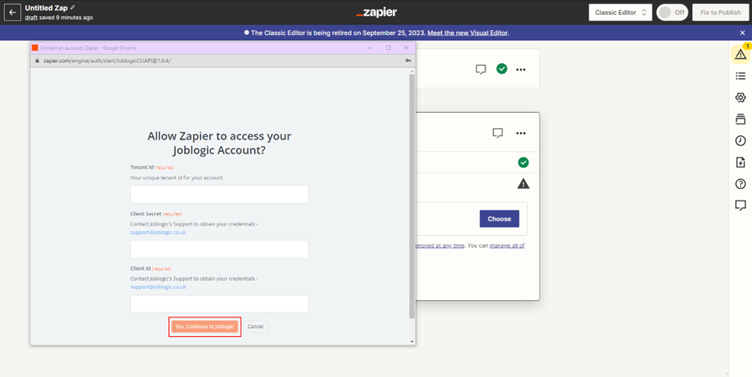
- Complete the authentication form for Joblogic in the newly opened window, using the credential details supplied by Joblogic Customer Support.
- Once the form is filled, click the Yes, Continue to Joblogic button to establish the connection with the Joblogic application.
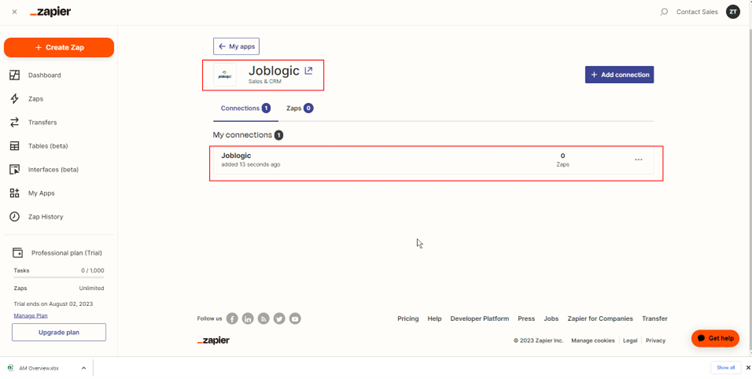
- Once you see the below response, it means the connection is successful. Otherwise, please repeat this step.
5. Excel Templates Configuration
We will provide you with a set of Excel Templates designed exclusively for Joblogic. We have created a comprehensive list of templates that cover a wide range of essential actions required for seamless data management within Joblogic.
These templates encompass various key entities, including "Customer", "Site", "Job", "Asset", "Contact", "Supplier", "Part", "Invoice", "Part Category", "Quote" and many more. Each template is tailor-made to facilitate specific actions, such as creating, updating, or deleting data associated with these entities.
To configure an Excel template for data import, follow these simple steps:
-
Navigate to the following drive link mentioned below to access and download import templates: Zapier Import Templates.
-
Upload to work Cloud Drive: The downloaded templates can be placed in your work cloud drive OneDrive, Google Drive, etc.
-
Review Column Headers: Carefully review the column headers in the template. Ensure they align with the required fields and attributes for the data you intend to import.
-
Populate Data: Enter your data into the corresponding columns of the Excel template, ensuring accuracy and adhering to any data formatting guidelines provided in the comment header section to understand the field properties.
-
Save the Template: Save the completed Excel template with your populated data, and make sure to create a backup copy for future reference.
By following these straightforward steps, you can effectively configure the Excel template for data import into Joblogic. These steps streamline the process, ensuring that the data is structured correctly and ready for seamless integration within the Joblogic system. With our specialized templates, managing your data becomes a smooth and efficient experience.
Note: The "Yellow" colored headers in templates indicate mandatory columns, and both Zapier and Joblogic Endpoints require these values to be provided during data import. The "Sky Blue" color represents non-mandatory columns, and both Zapier and Our Joblogic Endpoint allow data import without providing values for these columns.
The templates come with header modification restrictions to prevent human errors. Additionally, there are restrictions on modifying the data type of columns, as our Endpoint only accepts specific data type values. Other data type values are not allowed, and attempting to import such data may result in failures during the data import operation on Zapier.
6. Transfer Setup
For every item of data import, we create a distinct transfer to ensure smooth and accurate data import operations for each specific action within Joblogic. This organized approach allows for efficient management and synchronization of data across different entities within the system.
However, for reference purposes, we have only created a transfer for the 'Create Customer' action. To set up transfers for all other data import actions, follow the same steps.
-
Go to Create Transfer.
-
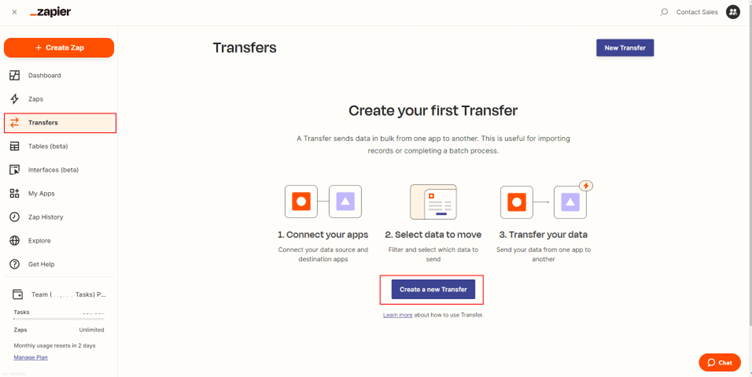
Click on ‘Transfers’ from the left navigation bar to create a transfer.
-
Click on the ‘Create a new Transfer’ button from the transfer screen.
-
Click on ‘Run Once’ button from the newly opened window.
-
Then Click on ‘Create a new Transfer’ from the next opened window.
-
Select the following options at the next window.
- Source App: Microsoft Excel
- Source data: Row
- Destination app: Joblogic
- Destination action: Create Customer
-
Click ‘Next’.

-
Select the Microsoft Excel account that we configured during the Zapier account Configuration > Microsoft Excel section and then click on Next button to proceed. If the next button does not work, then reconnect your Microsoft Excel account by following the Zapier account Configuration > Microsoft Excel section.
-
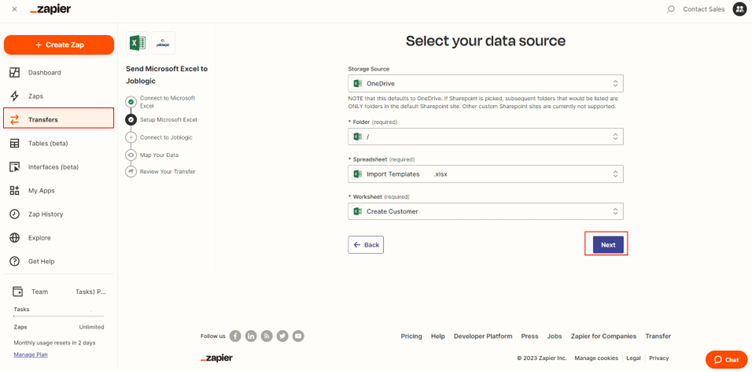
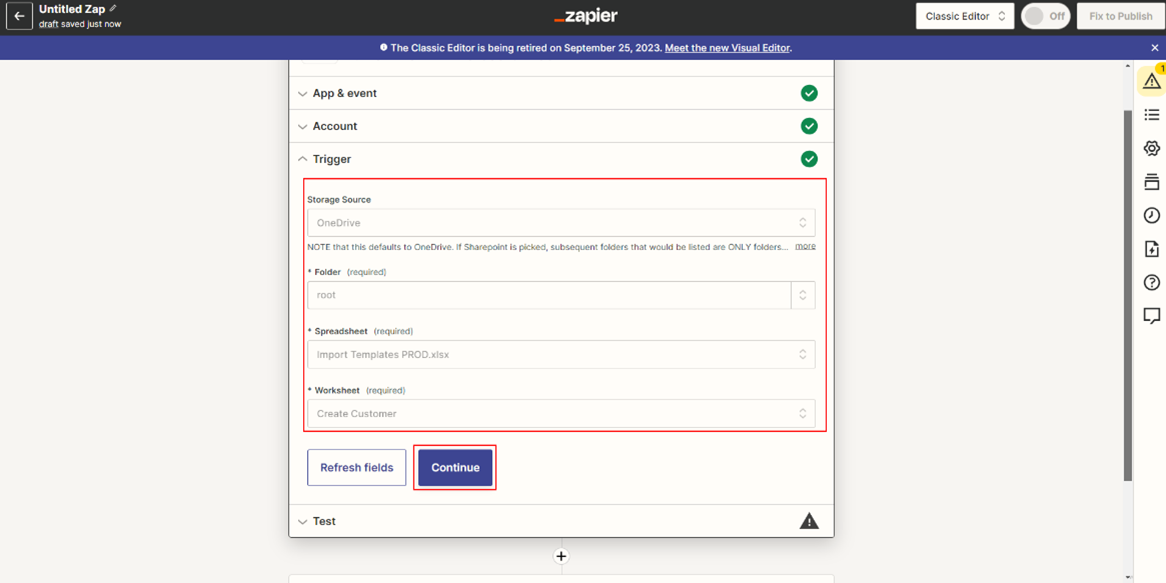
Select the following values:
- Storage Source: OneDrive
- Folder: Folder where you store your excel template file in OneDrive. Select ‘/’ if file placed in OneDrive root location.
- Spreadsheet: Chose your Excel Template from drop down list.
- Worksheet: Create Customer.
-
Click ‘Next’.
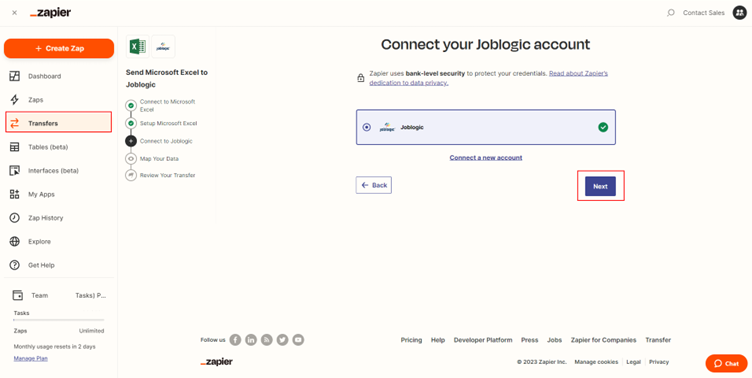
- On the next window select the Joblogic account that we configured during the Zapier account Configuration > Joblogic Connection section and then click on Next button to proceed. If the next button does not work, then reconnect your Joblogic account by following the Zapier account Configuration > Joblogic Connection section.
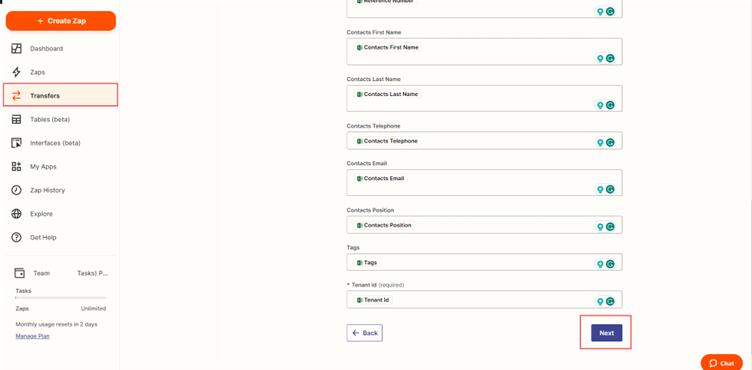
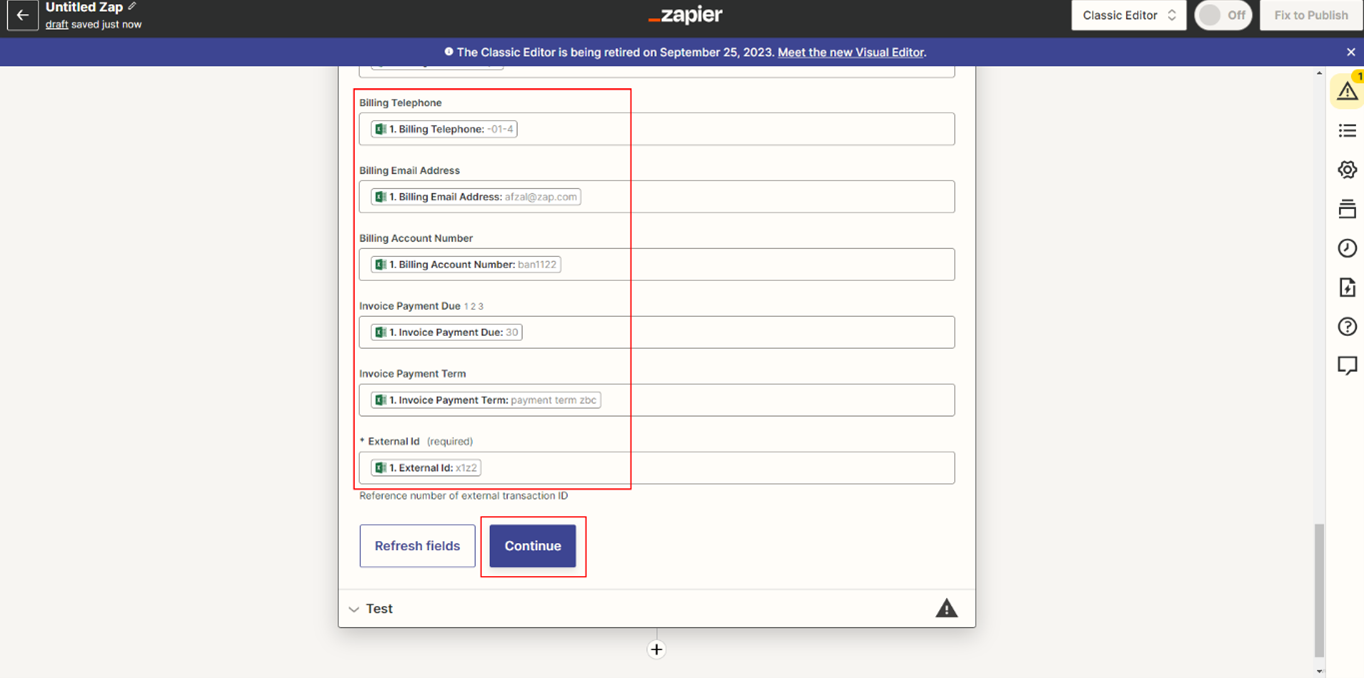
- On Map Your Data page, map excel template headers with the Zapier respective Input field. Enter the Reference Number of external transaction ID (Unique Identifier for maintaining the data logs) in the ‘External ID’ field.
- Click on Next and proceed to Review Your Transfer section.
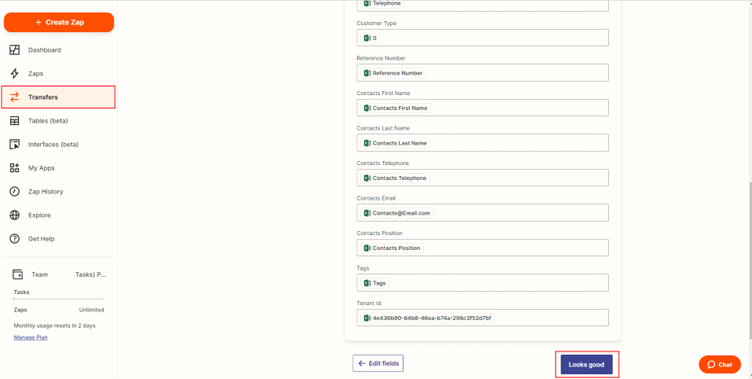
- Review Your Transfer Review and check all Zapier fields have the correct values that you entered in the excel template and click on Looks good button.
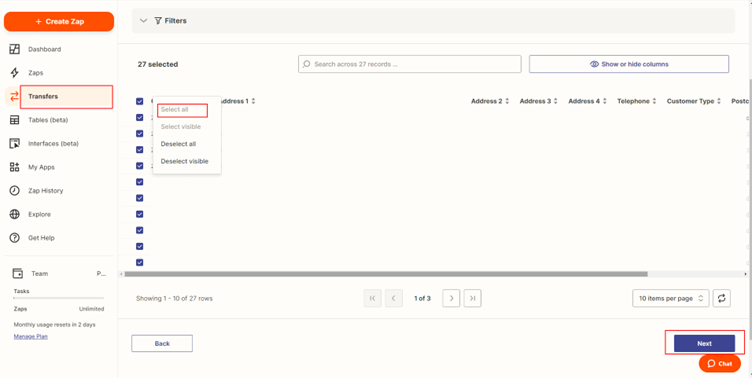
- The new window will load the data entered in the Excel import template. Here, you will be provided with two options, either select all the rows or individually mark the rows you intend to execute this action on.
- Please verify if all the data is successfully added, select the rows that you want to import and then click Next button.
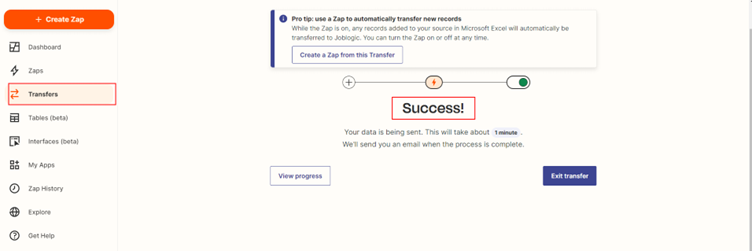
- Click Send Data to send the selected data into Joblogic system.
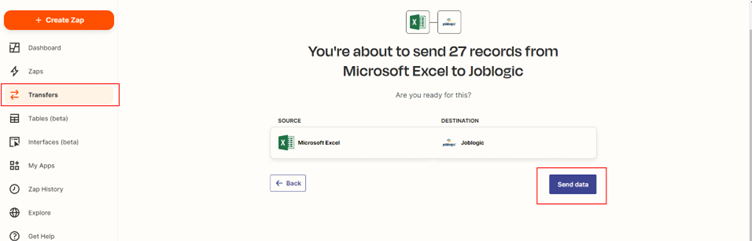
- You will see the Success message once the data is imported.
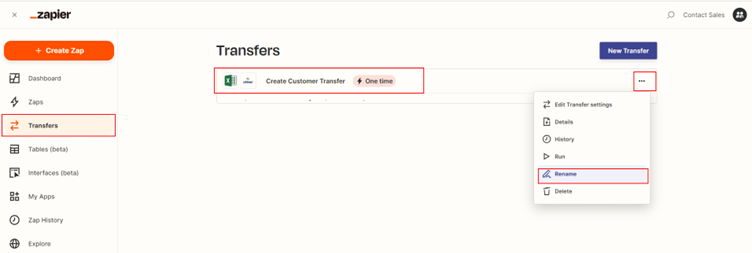
- You can rename the Transfer to something more meaningful i.e., Create Customer Transfer. Click Transfers from the left navigation bar, click on options of newly created transfer, and select Rename.
6.1 Convert Transfer into Zap
Once a transfer has been made, we can convert it into a Zap.
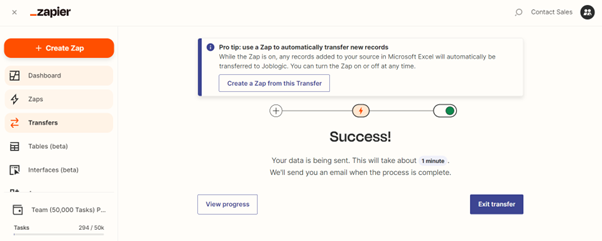
- Please click on the Create a Zap from this Transfer option as shown below.
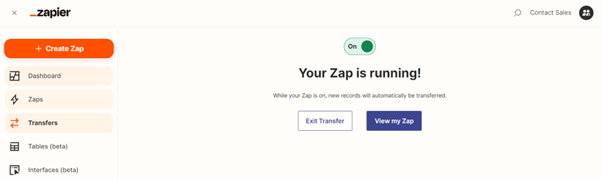
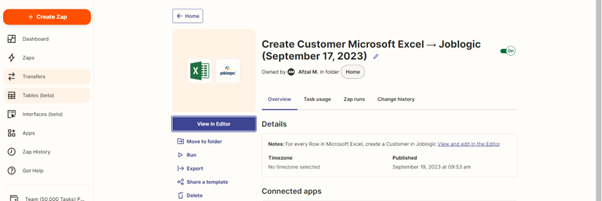
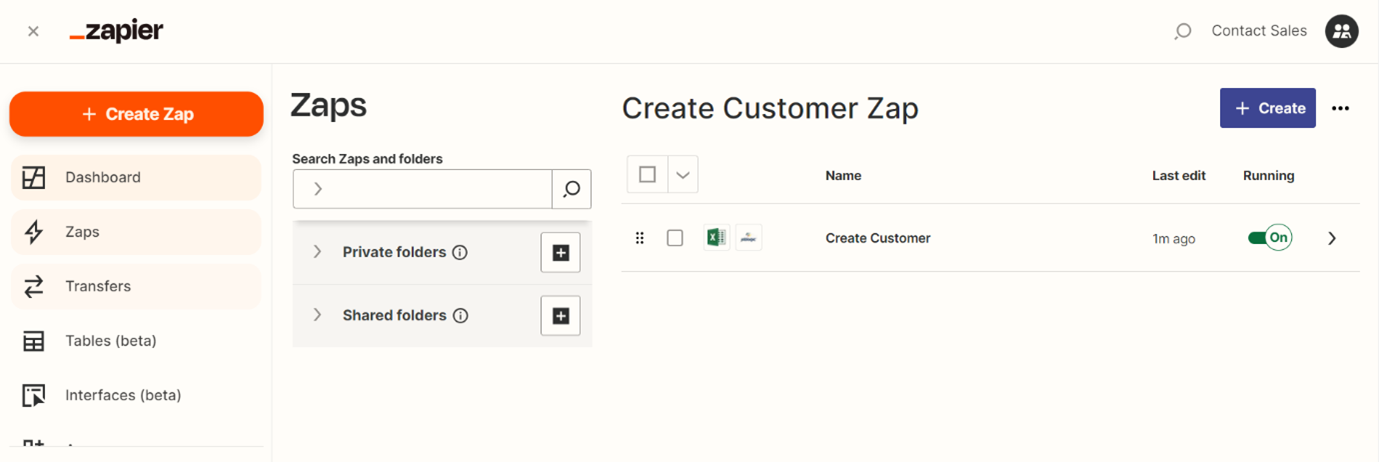
- At this stage you have successfully converted your Transfer into Zap and you can click on View my Zap to preview it similarly the newly created zap is accessible from the Zaps tab.
- Once in the newly created Zap you may click on the View in Editor option to make any additional changes.
6.2 Transfer History Analysis
To verify the successful import of data using Zapier Transfer into the Joblogic system, you can see Transfer history analysis. This involves checking the Transfer run status to ensure that the data was imported as intended.
By reviewing the Transfer history, you can confirm whether the data transfers were executed without any issues. Please follow the following steps:
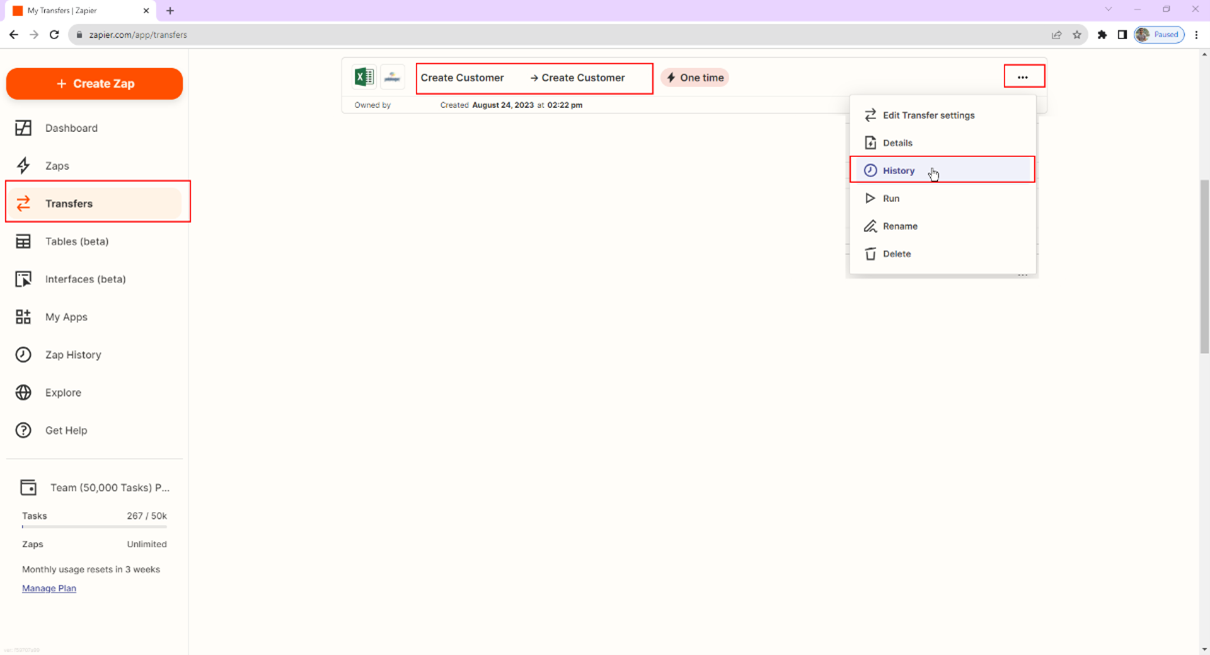
- Go to your Zapier Transfer page.
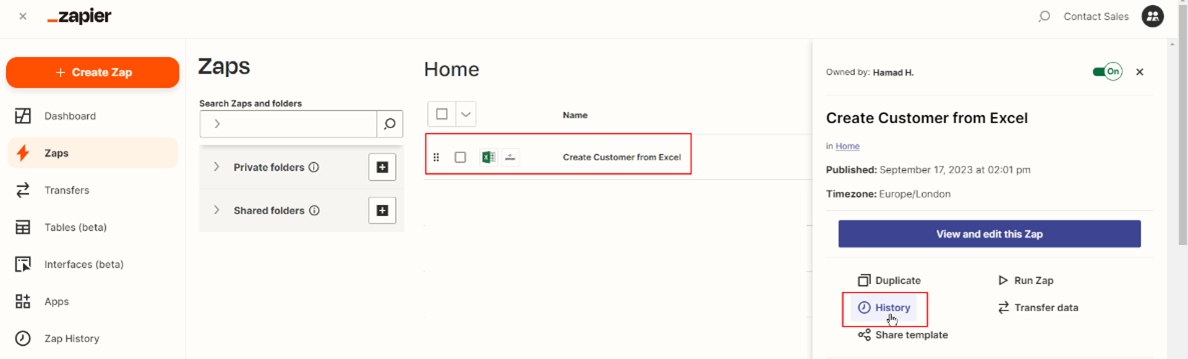
- Click the ‘Option’ of transfer.
- Click on the ‘History’ option.
For the details History analysis please refer to Zap History Analysis section.
7. Zaps Setup
A Zap is an automated process that links your applications seamlessly. Each Zap comprises a triggering step and one or more subsequent action steps. Once you activate your Zap, it will execute the specified actions whenever the triggering event takes place.
Note: If you need to leave the Zap editor at any time, your progress will be saved as a draft.
We have created a Zap for the Create Customer action. To set up Zap for all other integration actions, follow the below steps:
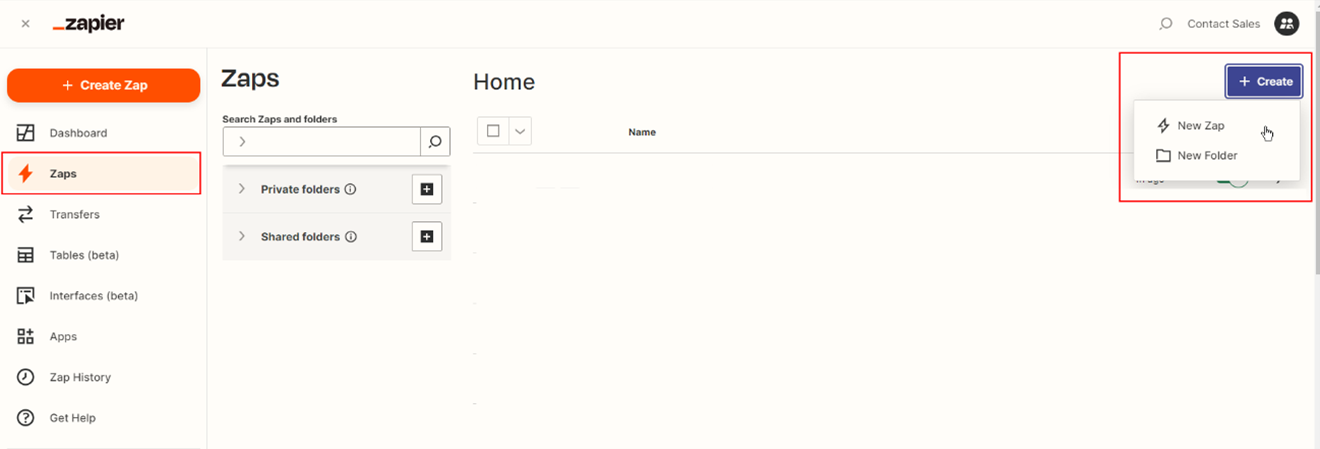
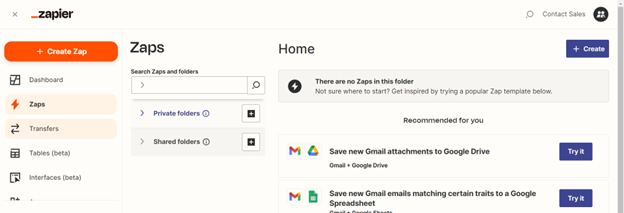
- Within your Zapier account navigate to the left sidebar menu and under the Dashboard section click Zaps.
- Click on Create button followed by New Zap from the dropdown options:
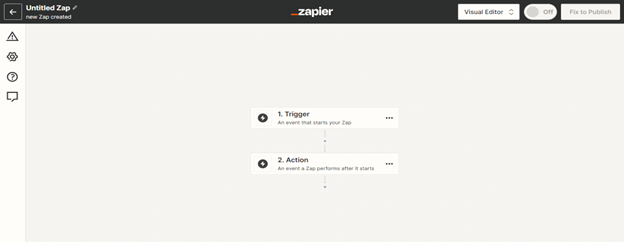
- You will see two options Trigger and Action for this Zap.
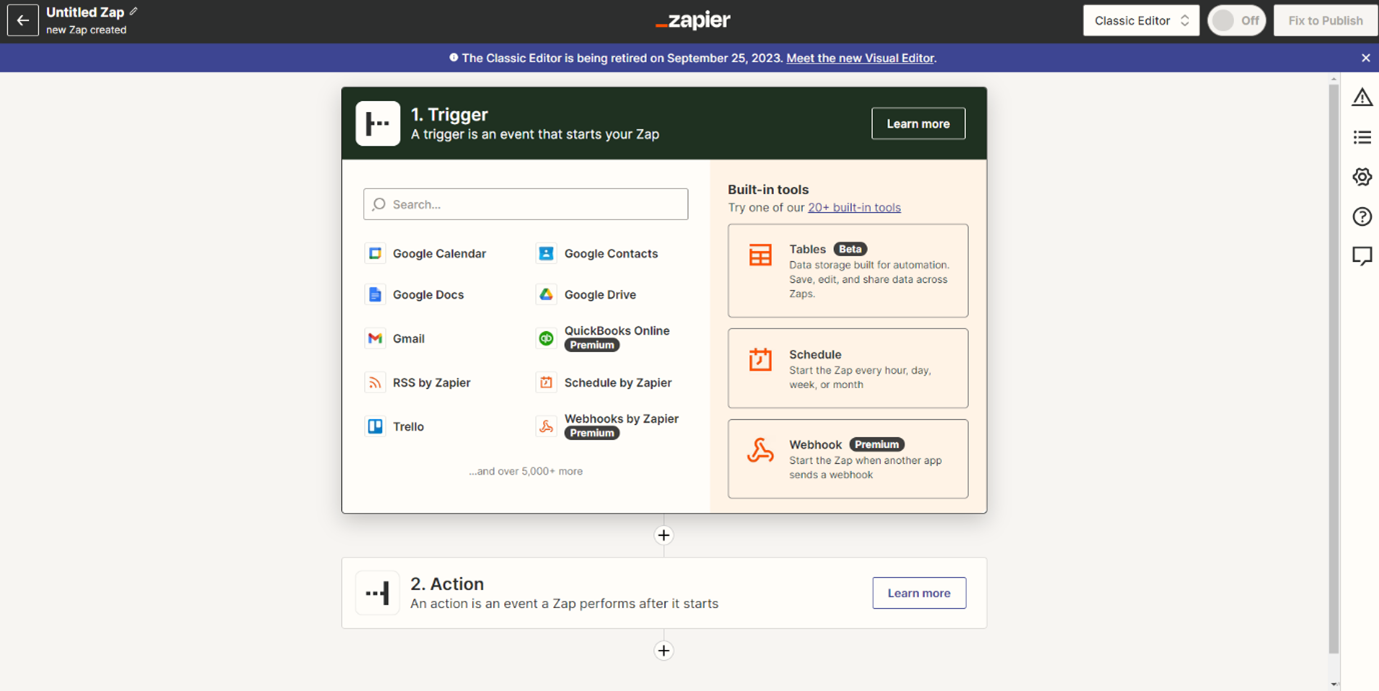
The initial step in setting up any Zap is to configure its Trigger. In the case of Create Customer action, we employ the Excel Template to trigger this event, followed by executing the Create Customer action within Joblogic.
7.1 Trigger Configuration
To configure a Trigger for the Create Customer action, follow these steps:
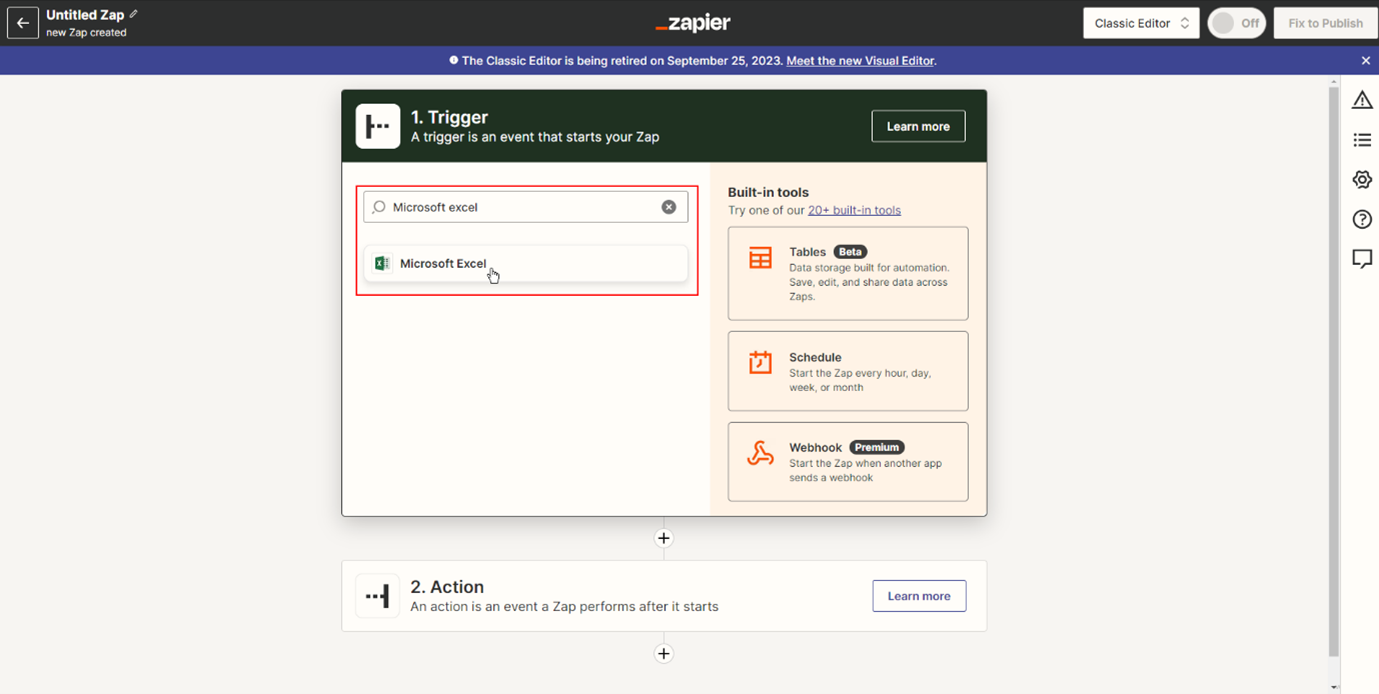
- The first step in configuring a Trigger is to choose the appropriate trigger app. You can do this by conducting a search, as illustrated below. In our example of Create Customer, we will opt for Microsoft Excel as the trigger app. The Zap will be initiated by an event within this application, specifically, Microsoft Excel.
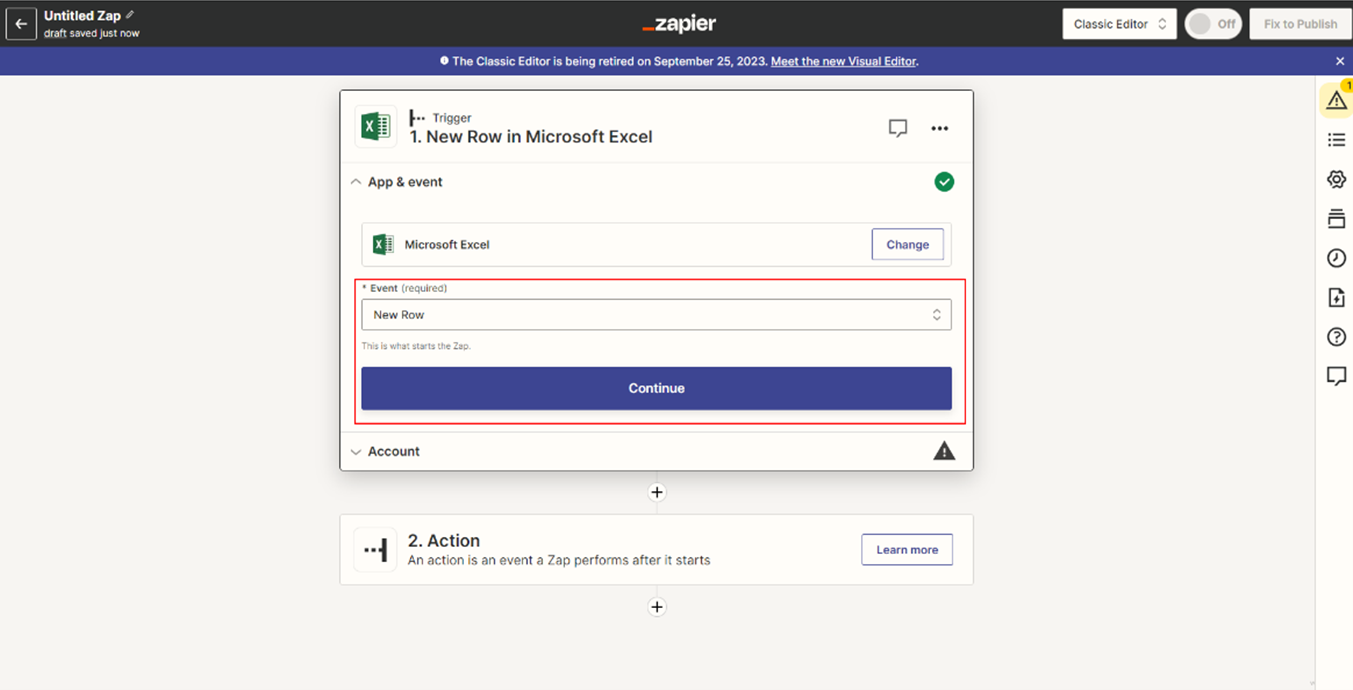
- Once you have chosen Microsoft Excel as the Trigger app, the App & Event section will become accessible. In this section, select the relevant Event that will trigger this Zap. In our example, we will use the New Row Event.
- Once you have chosen the event, proceed by clicking the Continue button.
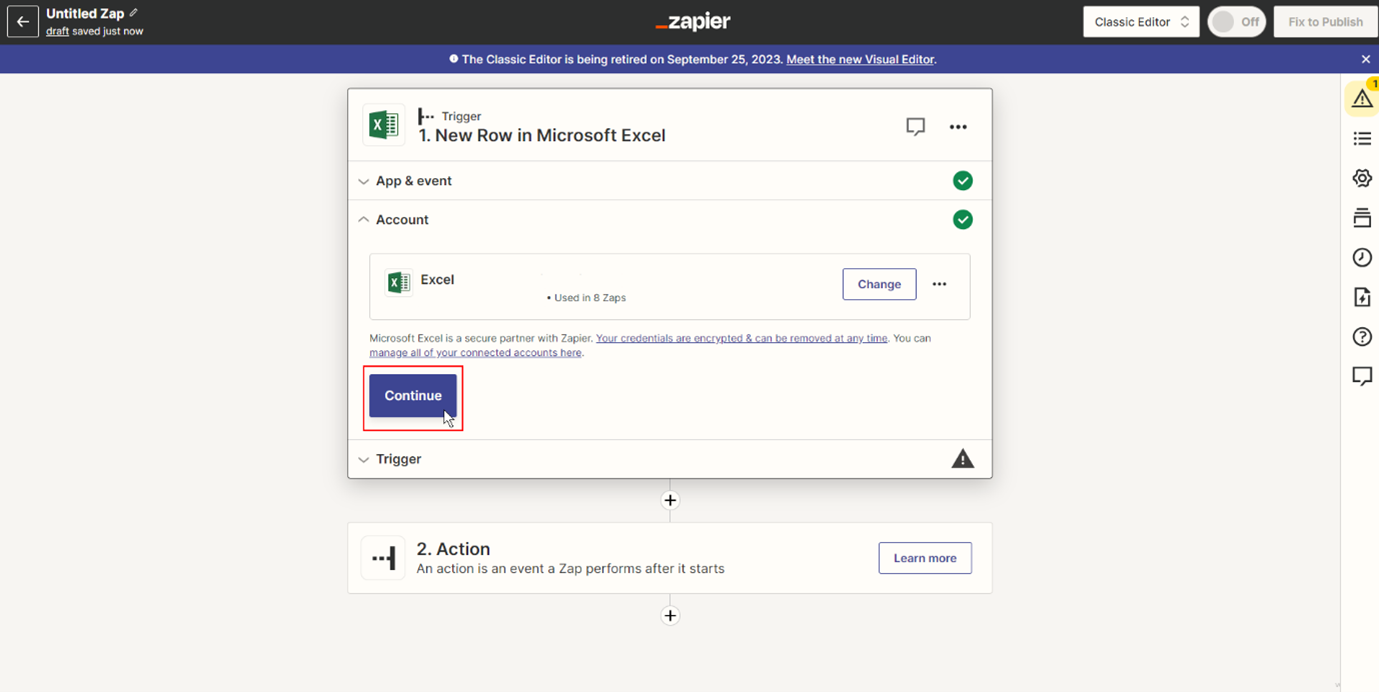
- Next, the Account section will become available. In this step, you'll need to establish a connection with your Trigger App account. In this example, we will connect with the OneDrive account to access the Excel Template. To do this, click on the Choose button and follow the prompts to connect to your account.
- Once you have successfully connected with your Trigger app account, click on the Continue button to proceed.
- Next, the Trigger section will become available. In this step, you will choose the source of your data that will be used in the Joblogic action, such as Create Customer. In our example, we will select our Excel sheet containing the Create Customer data values to proceed.
- After selecting the source of data, click on the Continue button to proceed.
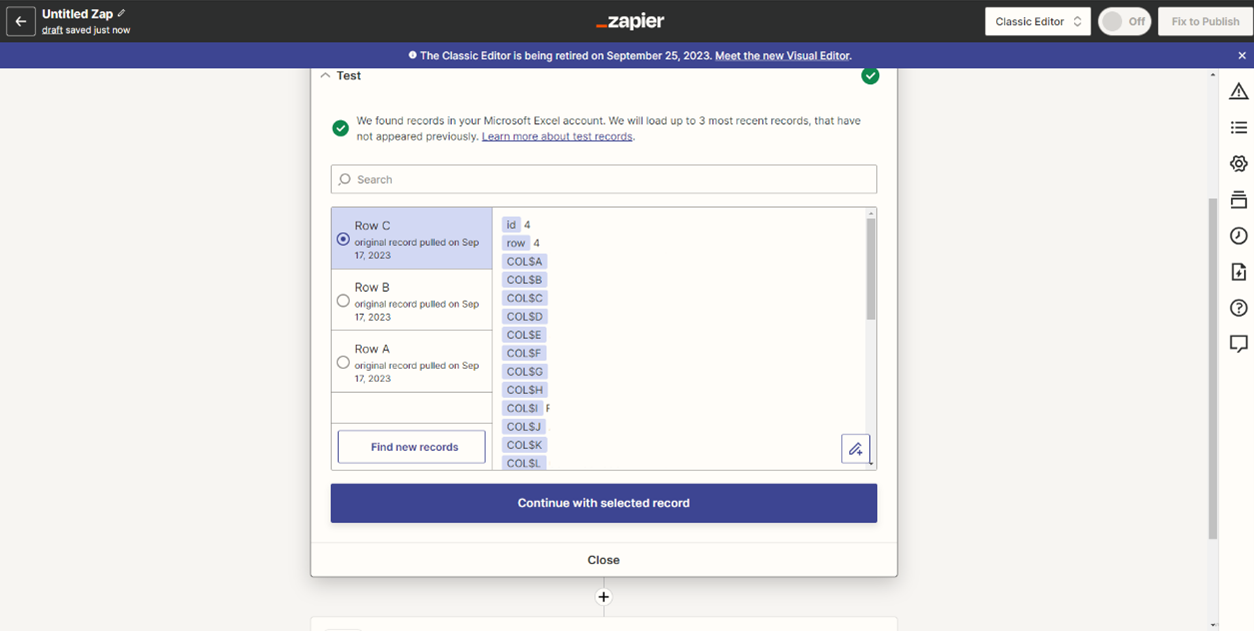
- Now the Test section will be available. In this step, you will be testing your Trigger configuration. If you have correctly followed all the Trigger configuration steps, clicking on the Test Trigger button will retrieve a few records of data from your data source. However, if there are any issues, it is essential to review and double-check your Trigger configuration and repeat the above highlighted steps.
- To continue, click on the Continue with selected record button.
- Additionally, you can skip the testing by clicking on the Skip Test option:
7.2 Action Configuration
To configure an Action for the Create Customer, follow these steps:
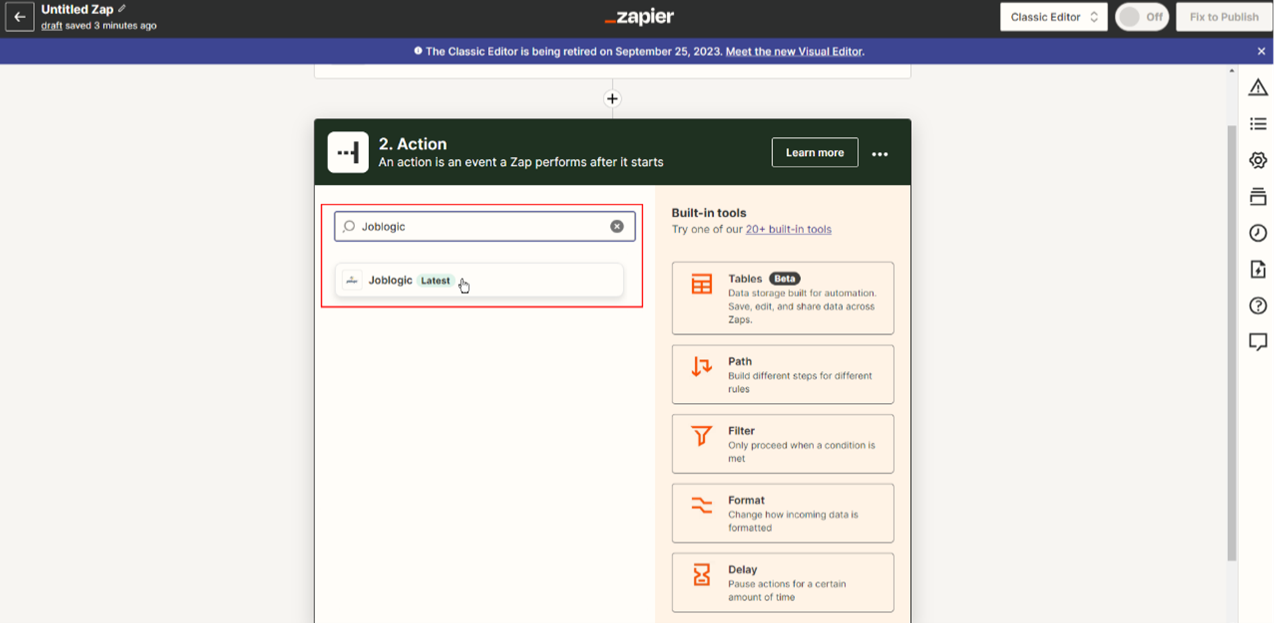
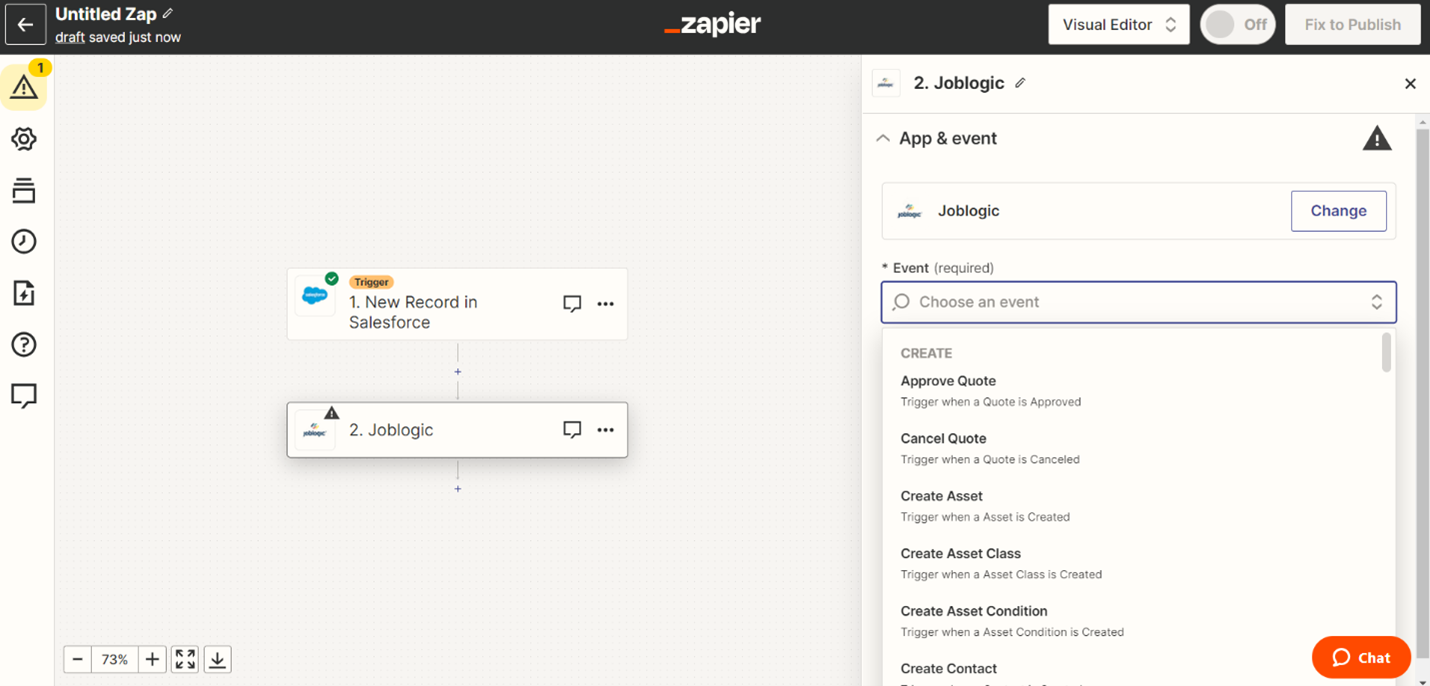
- Choose your destination application. To execute various actions in Joblogic, such as creating, updating, or deleting, you must select the Joblogic application from the action application search menu.
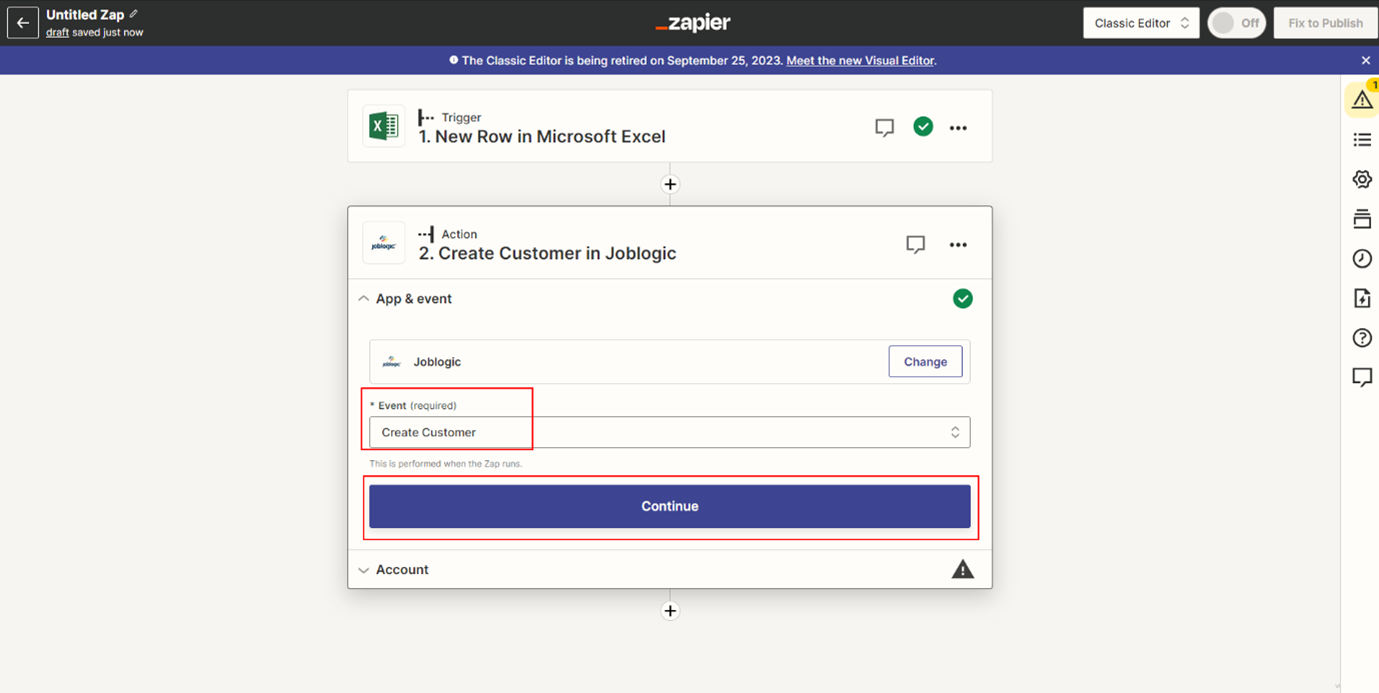
- Once you have chosen Joblogic as the action app, the App & Event section will become accessible. In this section, select the relevant Event that will perform by this Zap. In our example, we will use the Create Customer Event.
- Once you have chosen the Event, proceed by clicking the Continue button.
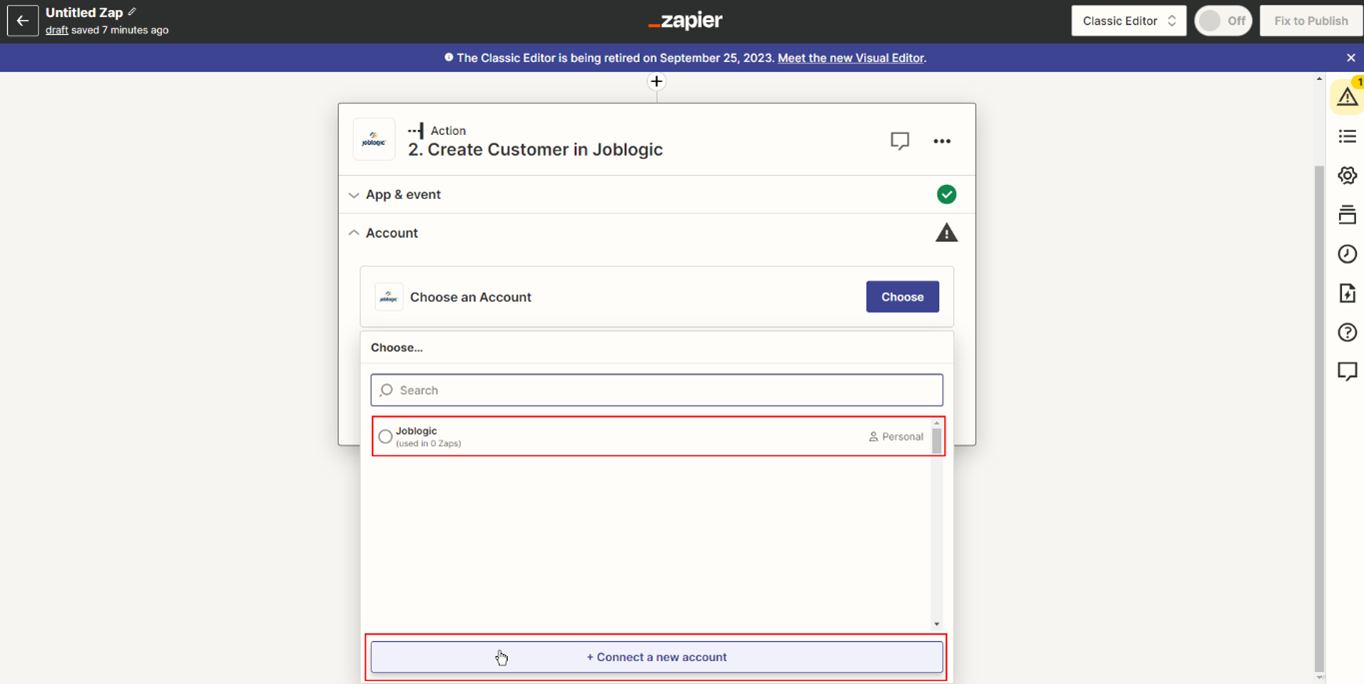
- The Account section will be available now. In this step, you will need to establish a connection with your Joblogic account. To do this, click on the Choose button and select the existing connection or connect to a new account by clicking on Connect a new account button and follow the prompts to connect to your account.
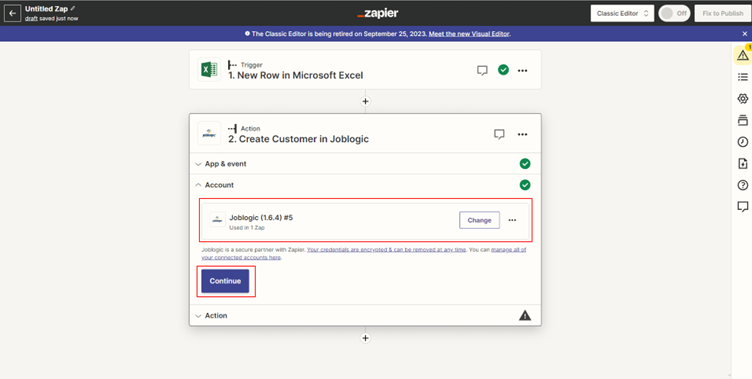
- Once you have successfully connected with your Joblogic account by entering the required data, click on the Continue button to proceed.
Now the Action section will become available. Here, you will map your source data fields to the corresponding fields in the Joblogic application. In our example, using Create Customer, we will map the Excel Template header fields of Create Customer with corresponding Joblogic action fields.
- Once you have successfully mapped the source data fields to the destination fields, click on the Continue button to proceed to the next step.
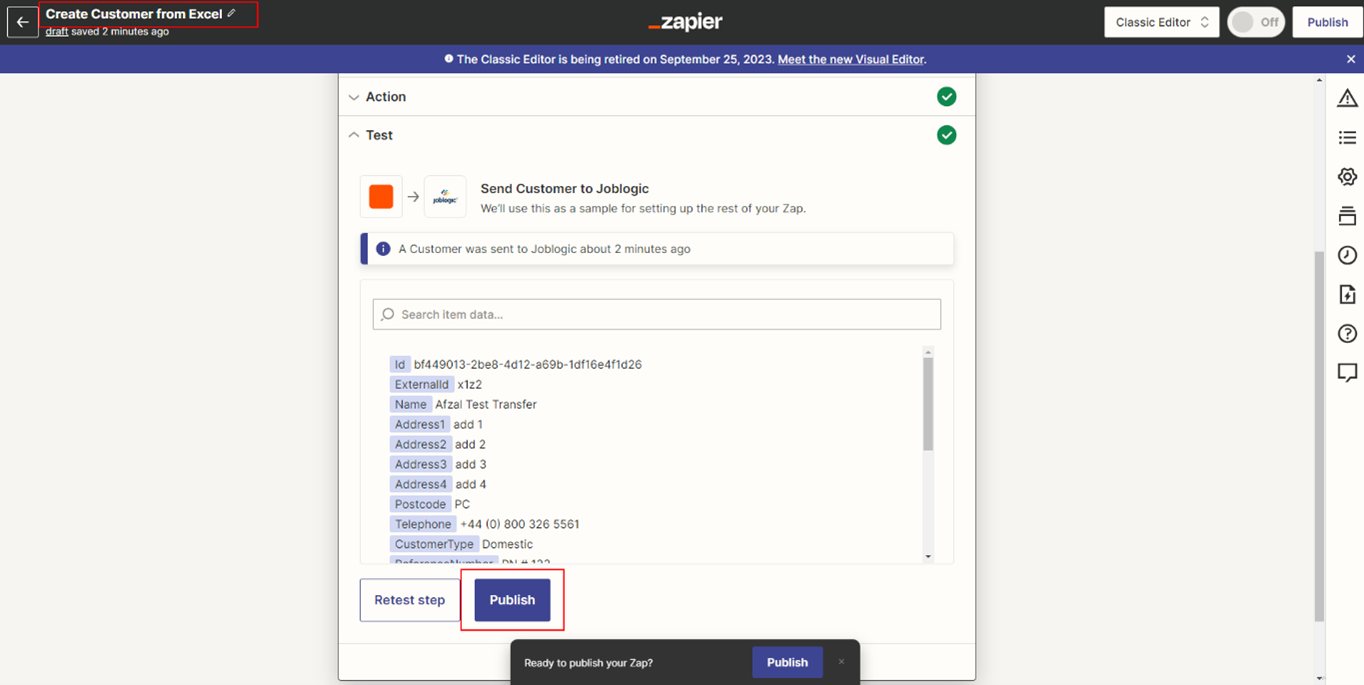
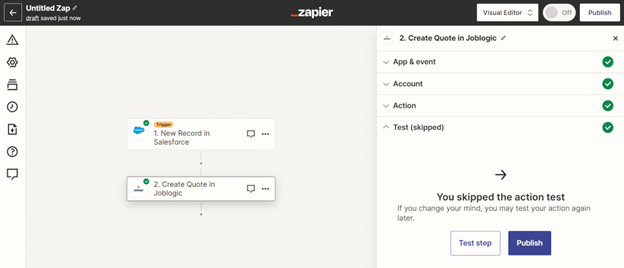
- You will reach the Test section, where you can test your Action configuration. If you have accurately followed all the Action configuration steps, clicking the Test Step button should create a new record in the Joblogic application. However, if any issues arise, it is crucial to review and verify your Action configuration and data source values, and if necessary, revisit the steps highlighted above.
- To finalize the Zap configuration, rename it to a meaningful name like Create Customer from Excel, and then click on the Publish button.
7.3 Salesforce to Joblogic setup
Integration between Salesforce and Joblogic.
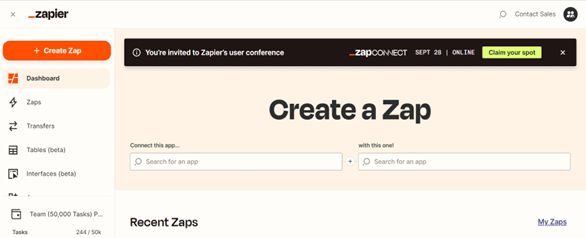
- To create a Zap please click on the Create Zap button on the left then click on Create on the top right side of the window:
- You will be presented with the screen as shown below where you will select your Trigger App and Action App:
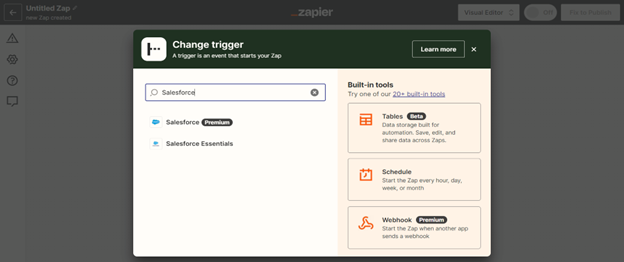
- In the Trigger App you will select Salesforce as shown below.
- Please select the desire Event from the dropdown options on which basis you would like the data from Trigger App to Import/Update in your Action App:
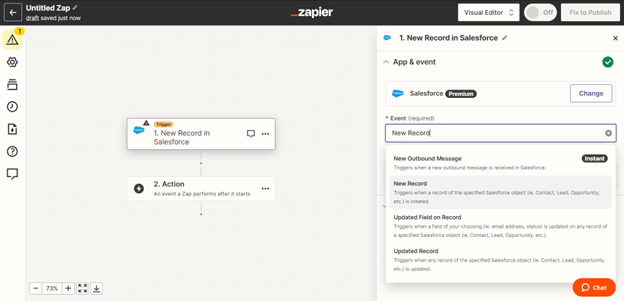
- In this example we will be using New Record then click on Continue.
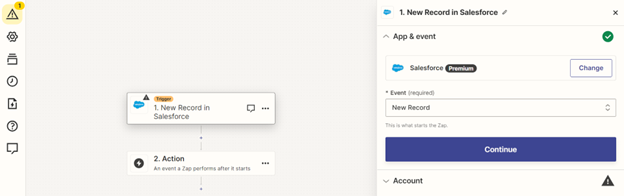
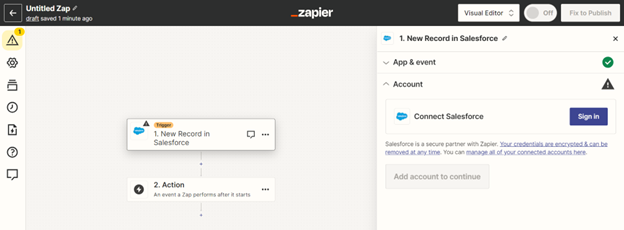
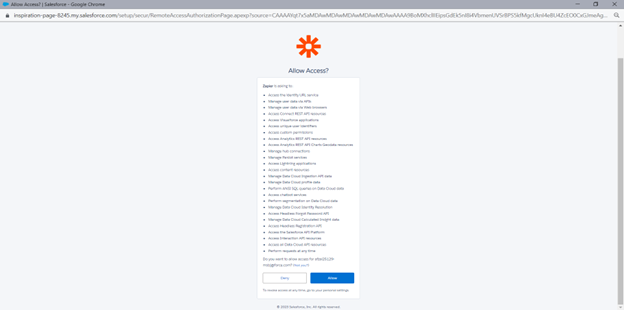
- You will be presented with an option to Connect Salesforce by Signing In.


- Under Trigger section please select your desire trigger from the dropdown in this example we will be using Opportunity and click on Continue.
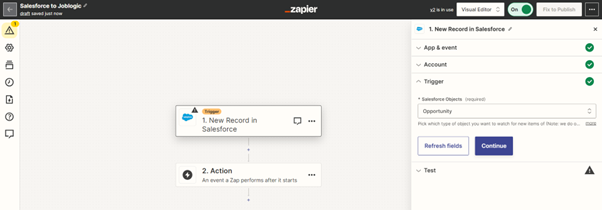
- Once done with the above, you will be prompted to the Test your Trigger. You may proceed by clicking on Test trigger option and will now be able to see all the Opportunity in your Salesforce from which you can choose one and click on Continue with selected record.
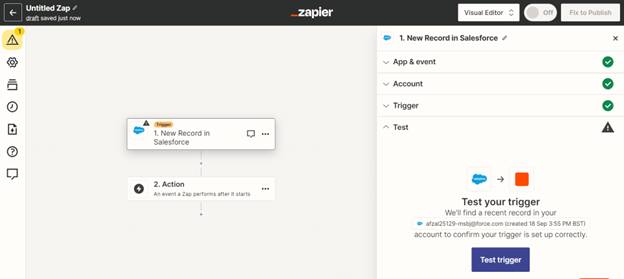
- At this stage you successfully set up your Trigger.
- To setup Action you can use your desire app from the dropdown in our example we will be using Joblogic.
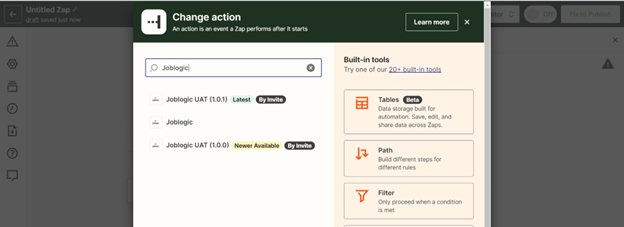
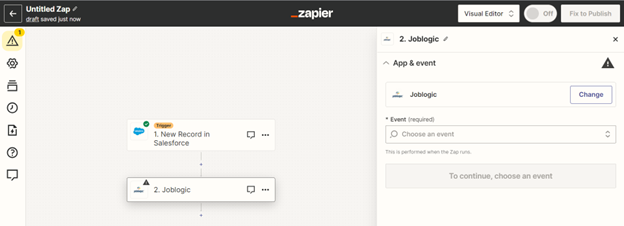
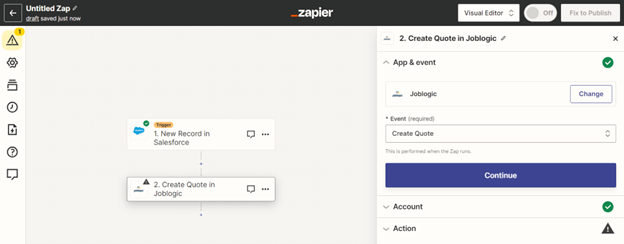
- Under the Event section we will choose for desire action in Joblogic, for this example we select the event as Opportunity in Salesforce and action as Create Quote in Joblogic. Hence, we will choose Create Quote from the dropdown and click on Continue.
-
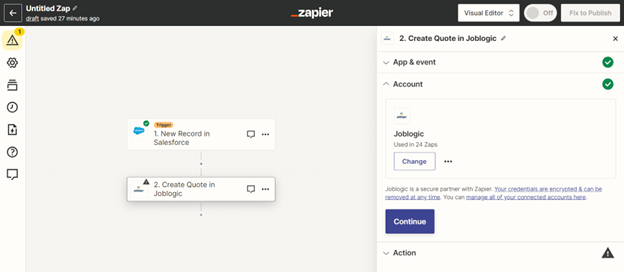
Under Account you can choose Joblogic from the dropdown and connect to your Joblogic account by inputting the Tenant Id, Client Secret, and Client Id.
You can obtain this information by reaching out to our Support Team at support@joblogic.com. -
Now click on Continue to proceed forward.

- Important: map carefully available Salesforce fields from the dropdown and select them against the field you would like to map the data in Joblogic.
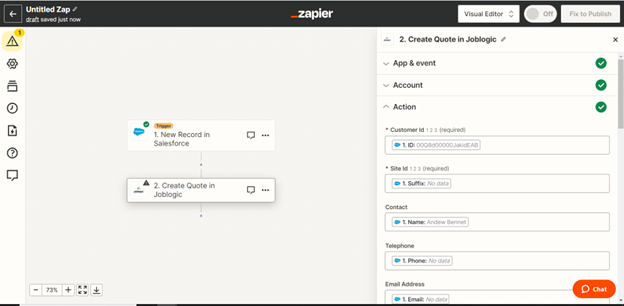
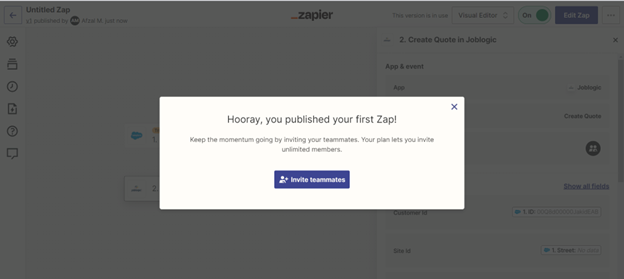
- Once done you can Test step or skip it and click on Publish to get it on air.
- At this stage you have now successfully set up your Zap.
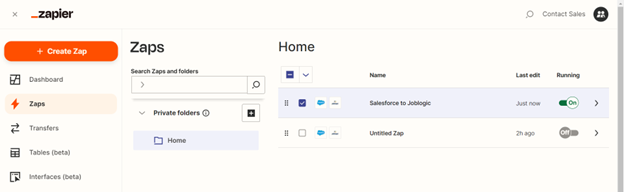
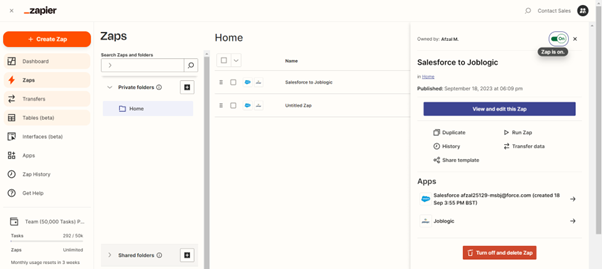
- Now it will display your newly created zap under the Zaps tab, you can rename it to something meaningful in our example we have renamed it to Salesforce to Joblogic.
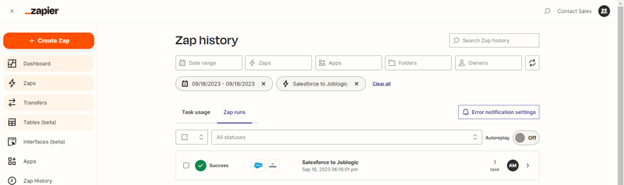
- Now once a new Opportunity has been generated a zap will run automatically and create a Quote in Joblogic which we can verify under the Zap History as shown below.
7.4 Transfer Historical Data from Zap
- The above created zap will only work once an Opportunity has been created in Salesforce and it will then create a Quote in Joblogic. To import historical data please follow the steps below.
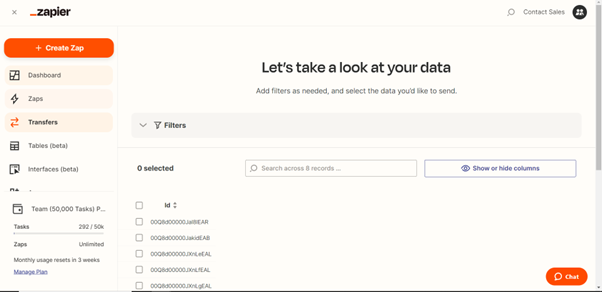
- From the Zap tab click on the arrow next to your newly created zap in our example we will use Salesforce to Joblogic and you will be presented with screen as well and you can choose Transfer data option.
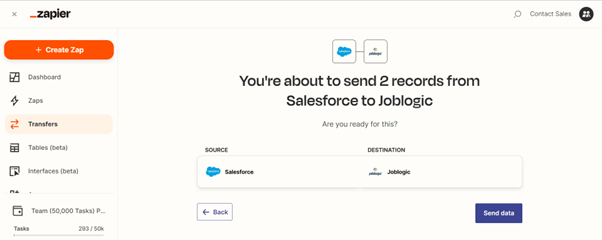
- It will take you to the next screen where you can choose the item you would like to import and press Next and click on Send Data option.
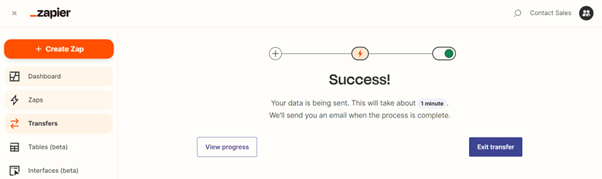
- Once the above have been completed you can check the status for these under the Zap History tab.
7.5 Zap History Analysis
To verify the successful import of data using Zapier Zaps into the Joblogic system, you can conduct a Zaps history analysis. This involves checking the Zaps run status to ensure that the data was imported as intended.
By reviewing the Zaps history, you can confirm whether the Zaps were executed without any issues and whether the information has been seamlessly integrated into the Joblogic system.
The following actions need to be performed for the History analysis.
- Go to your Zapier Zaps page.
- Click the arrow left to Zap name whose history we want to analysis.
- Click on the History option.
- For the details History analysis please refer to Zap History Analysis section.
7.6 Sharing Zap
You can share your available Zaps within and outside of the organization:
With in same Zapier account Domain users, Zapier users can share their Zap with other team members by using the Zapier Shared folder option. You can move the existing Zap to a shareable folder that can be accessed by other team members.
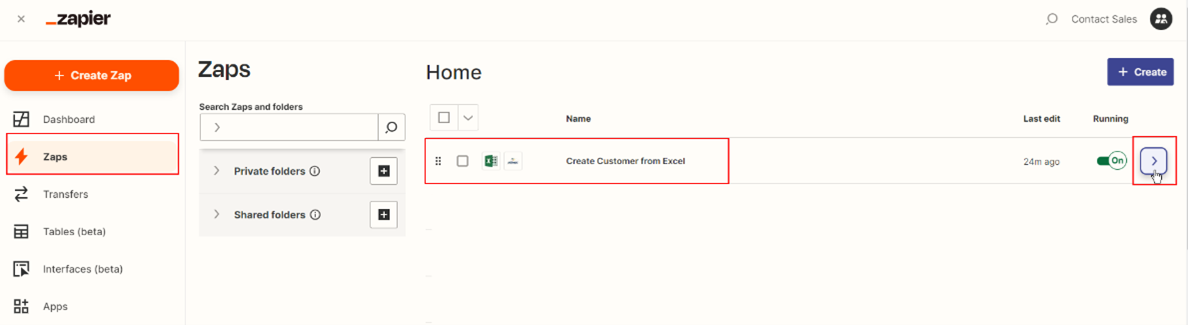
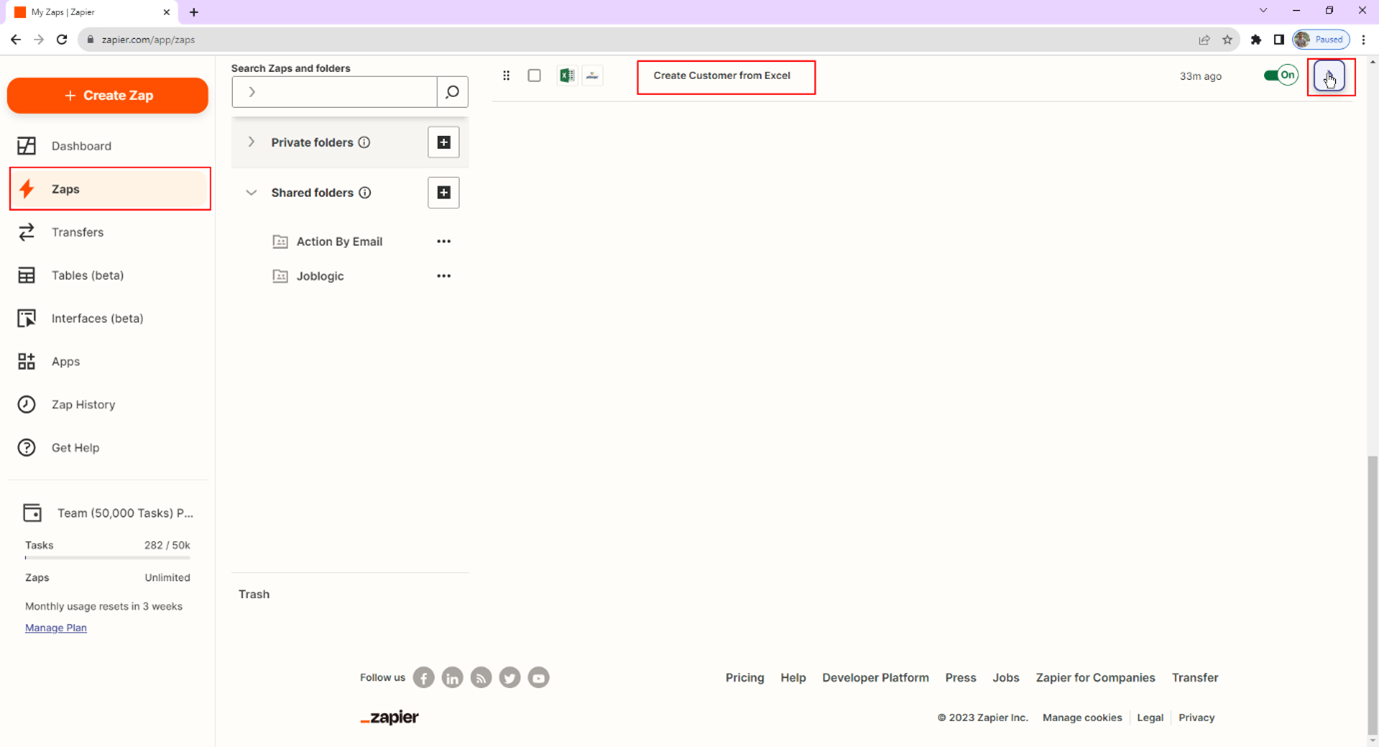
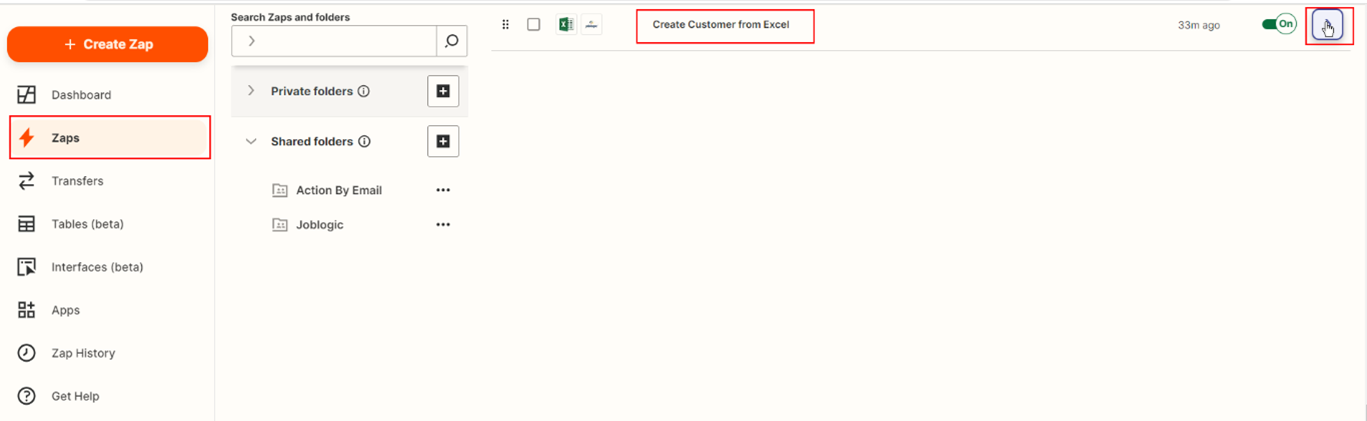
- Go to Zap section.
- Click on the Created Zap like Create Customer right arrow for more options.
- To proceed, click on the Move Folder button in the newly opened window.
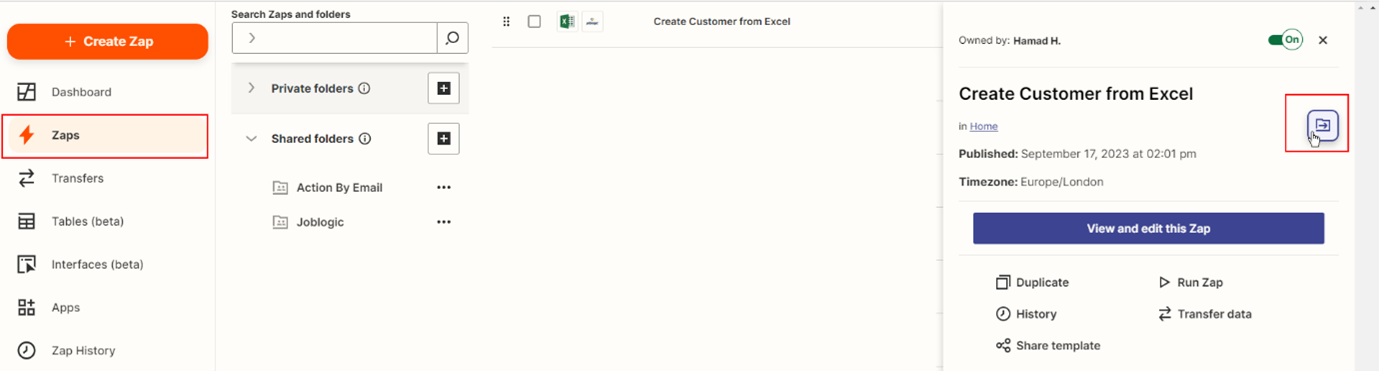
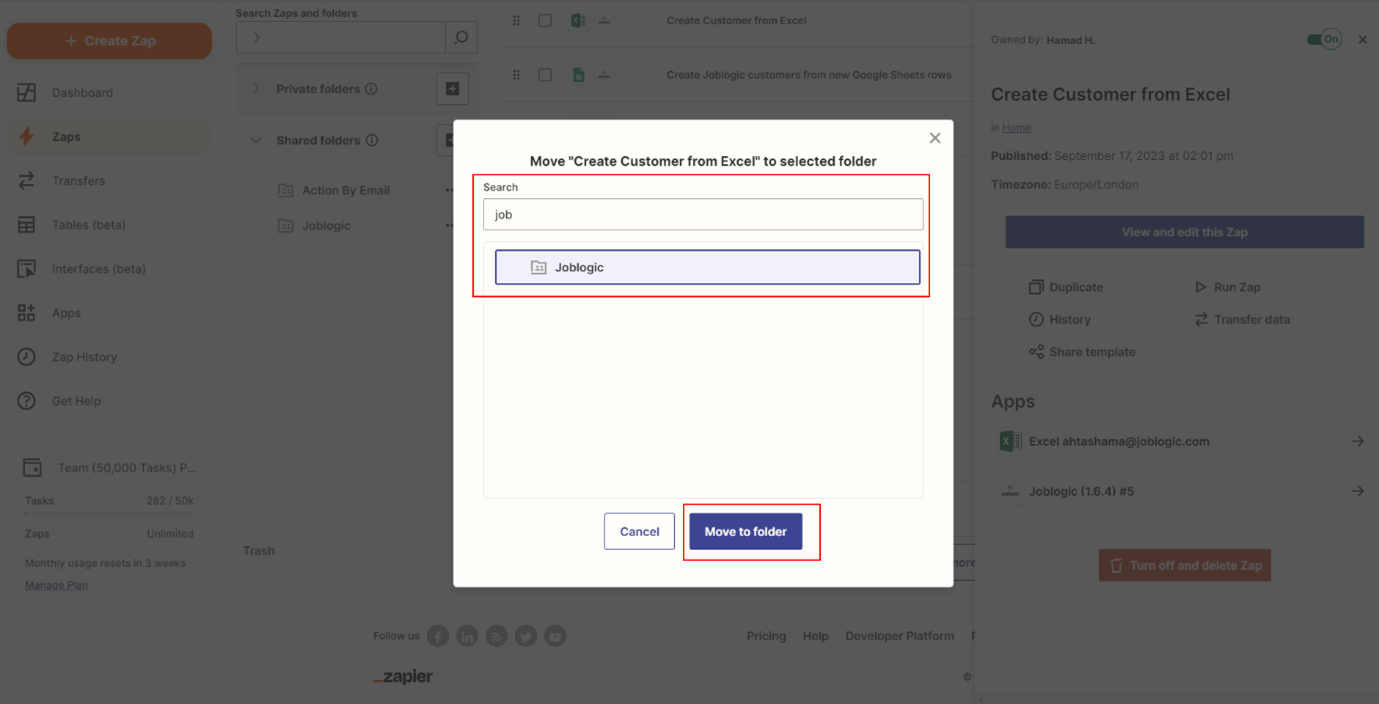
- Select the shareable Folder Name where we want to move this zap like “Joblogic” for our example.
- Then click the Move to folder button to make this zap shareable.
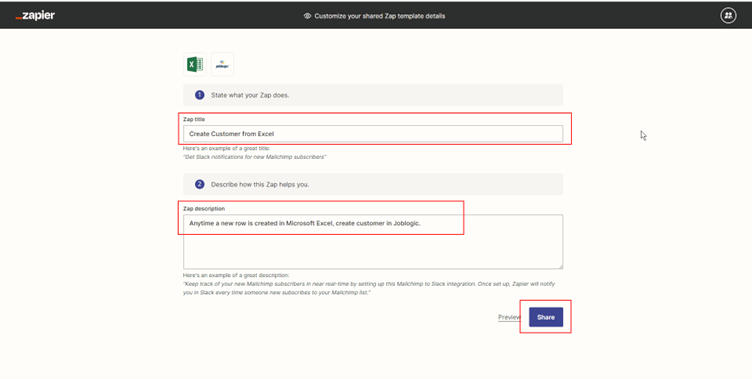
Sharing Zap out of the organization: Zap can be shared as a template, and this can be done by sharing a link to a copy of the Zap. For Instance, a Create Customer Zap that we have just created triggers whenever we add a new row in Microsoft Excel, it creates a customer in Joblogic as an Action. This Zap is shareable so that others can use this Zap with their own Microsoft Excel and Joblogic account.
Note: By default, shared Zaps are visible through their sharing link, and will appear on pages related to the apps used in the Zap. Your connected accounts, Zap history and data will not be shared.
- Go to Zap section.
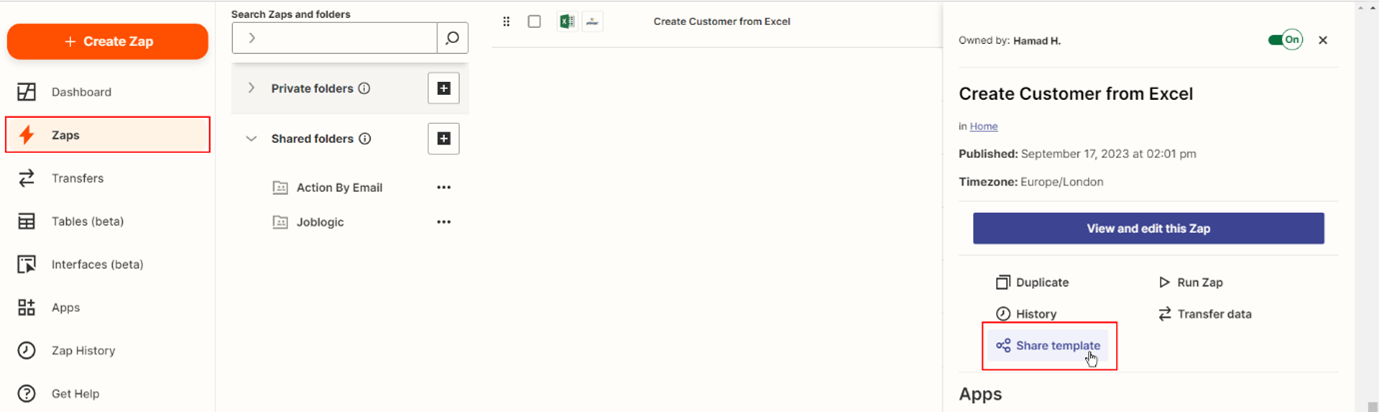
- Click on the Created Zap like Create Customer right arrow for more options.
- Click on the Share template button.
- In the new opened windows fill the listed below details to proceed:
- Zap Title
- Zap Description
- After providing the above details click on the Share button.
8. Zap History
Zap History serves comprehensive logs of all the actions and events that have occurred within your automated workflows like Zaps and Transfers.
To verify the successful import of data using Zapier Zaps into the Joblogic system, we will conduct a Zaps history analysis. This involves checking the Zaps run status to ensure that the data was imported as intended.
By reviewing the Zaps history, we can confirm whether the Zaps were executed without any issues and whether the information has been seamlessly integrated into the Joblogic system. This analysis provides valuable insights into the integration process, enabling us to validate the effectiveness of our automation and troubleshoot any potential errors if necessary.
The following actions need to be performed for the History analysis.
- Go to your Zap History page and you will be presented with the available filters and two major section such as Tasks Usage and Zap runs:
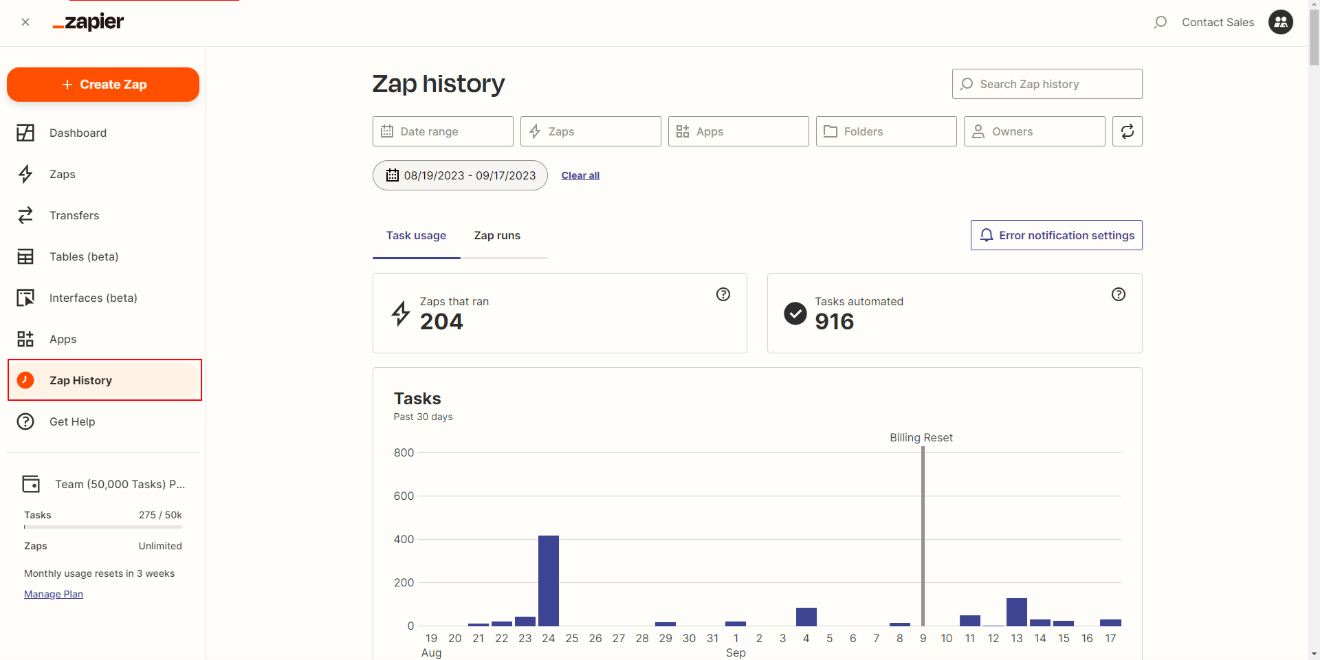
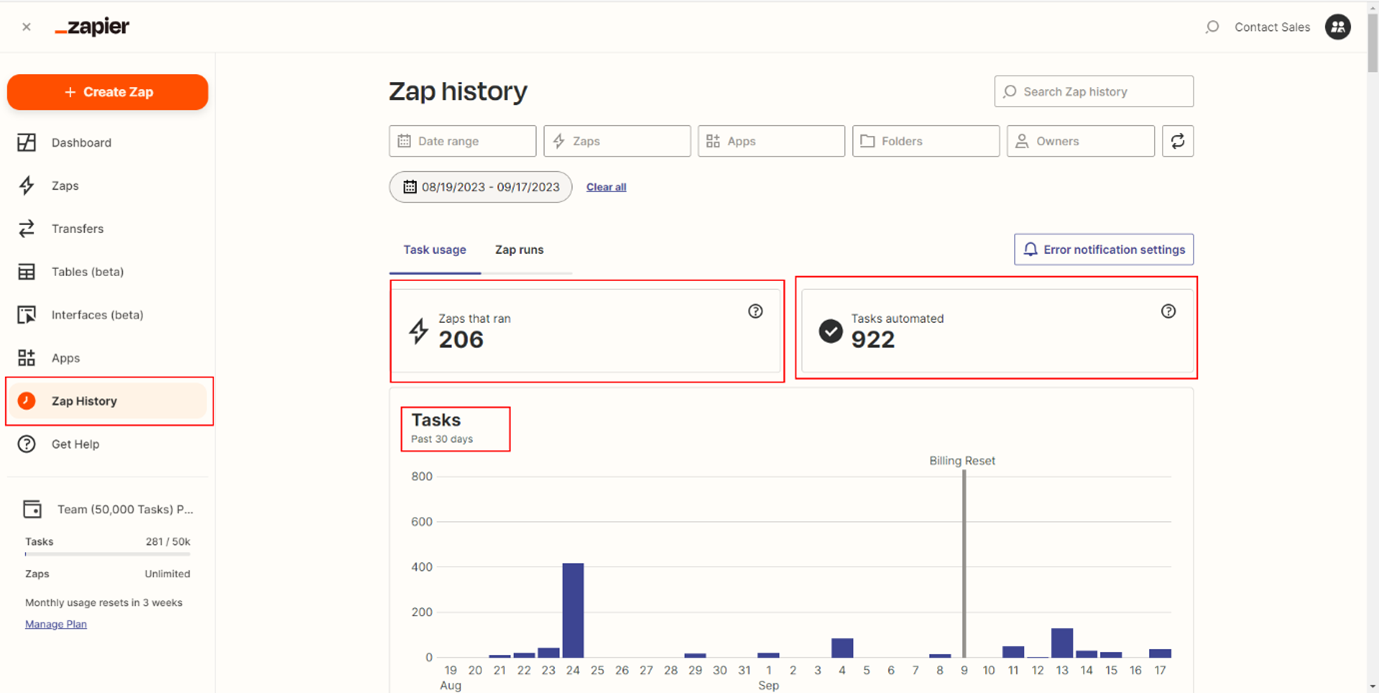
8.1 Task Usage
Zapier history module has the Task Usage section which shows the comprehensive details of last 30 days (Approximately 4 and a half weeks) task usage, this section includes the following items:
- The number of tasks consumed by Zap and Transfer.
- Task Usage count based on the individual Zap and Transfer.
- The count of Zap run.
- The count of automated task.
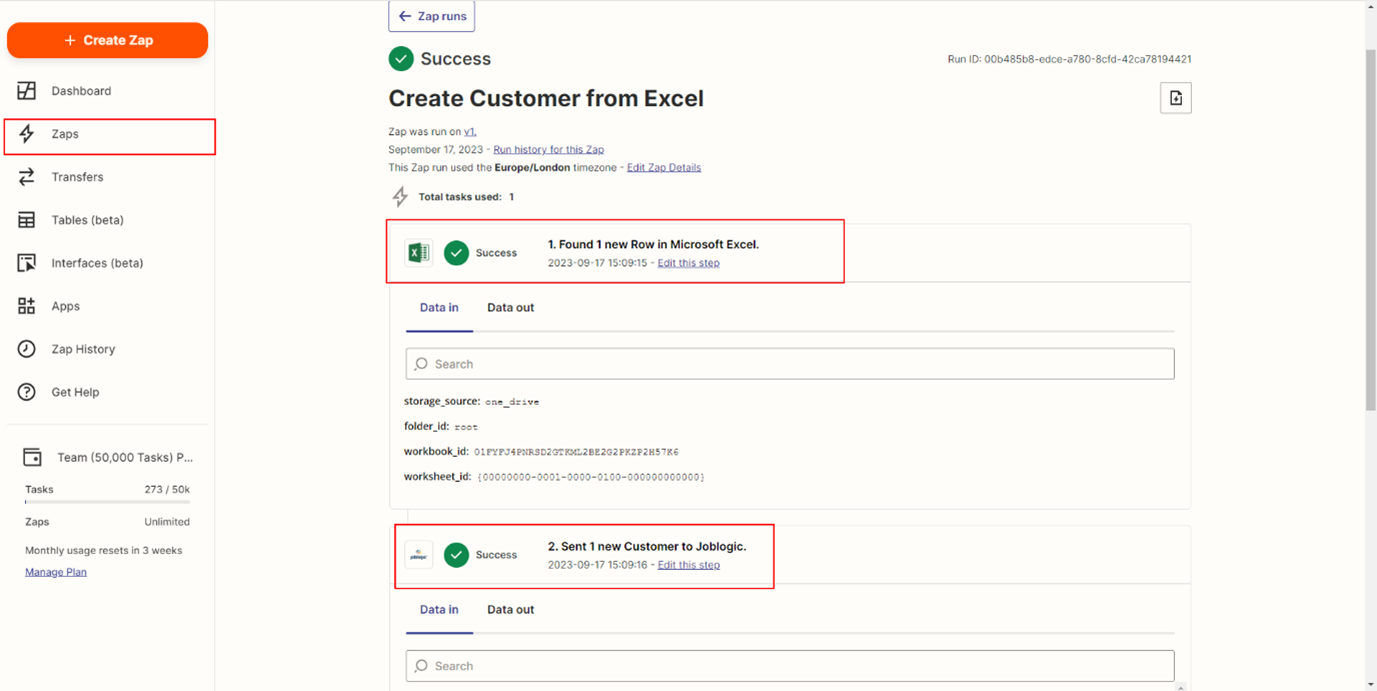
8.2 Zap runs
Zapier history module has the Zap runs section which shows the Run status of Zap and Transfers. We have two statuses for transfer and Zap runs like
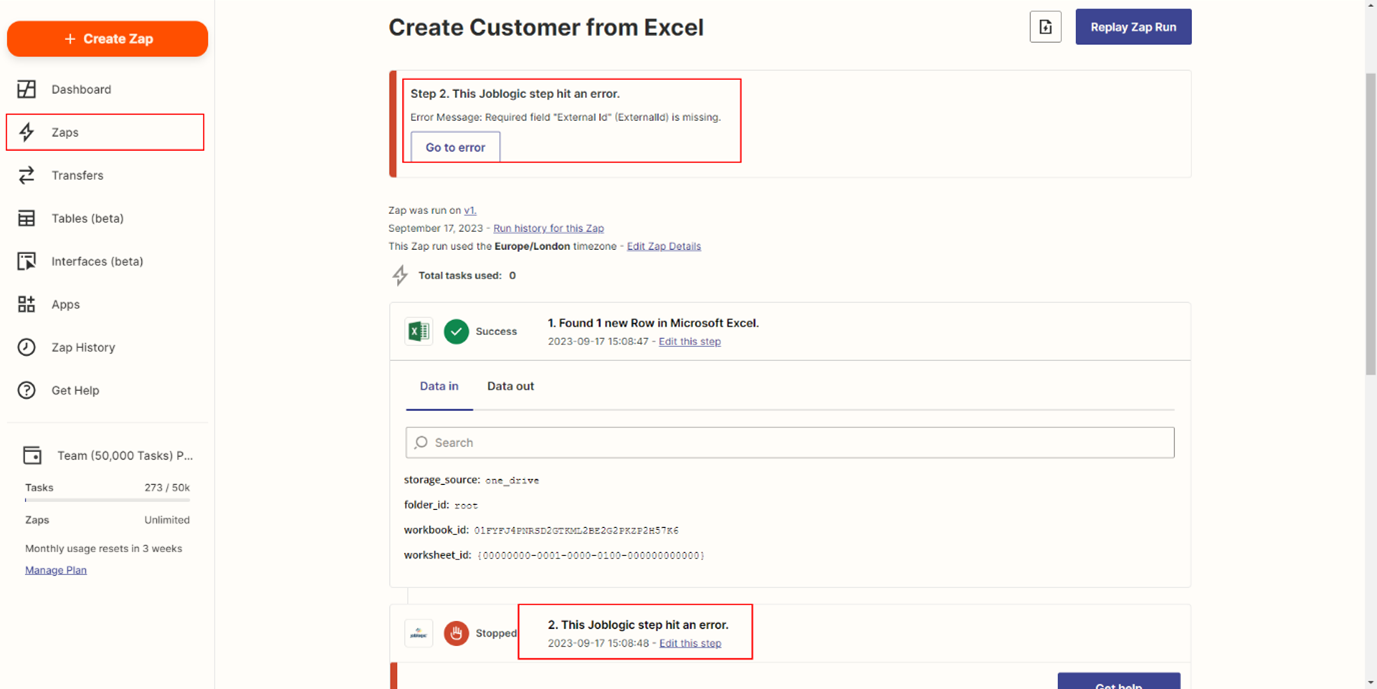
- Stopped: This means Zapier gets an error from Joblogic Endpoint then we need to investigate the failure and run the zap or transfer again to import this row of data.
- Success: This means our Excel Template data was successfully uploaded into the Joblogic database.

8.3 Stopped Status Analysis
- Click on the Zap run where status is ‘Stopped.’
- We have two sections here, one for getting data from Excel and Uploading data in Joblogic. So, identify which section has the ‘Stopped’ status.
- If fetching data from Microsoft Excel has the error, then we need to reconnect our Microsoft Excel account and re-run our transfer.
- If Uploading data in Joblogic step failed, then we need to analyze the Endpoint validation failure response and correct our excel template data according to the error and re-run transfer for this row data import.
8.4 Success Status Analysis
- If Transfer run status is ‘Success’, it means our data imported successfully into Joblogic then just verify data in Joblogic web application and data must be available on Joblogic web application.
- If the Uploaded data has some unexpected values like we mapped the wrong Excel header with the Zapier input field, then we need to update our Transfer and re-run for correct data import.
9. Notification and Alerts
Zapier History module offer the option to set up notifications or alerts based on the events recorded in Zap History. This helps you stay informed and respond promptly to critical activities.
You can configure your error notifications by following these steps:
- Access Zap History: Start by navigating to the Zap History page.
- Locate Error Notification Settings on the Zap History page. This is where you can customize how error notifications are handled.

-
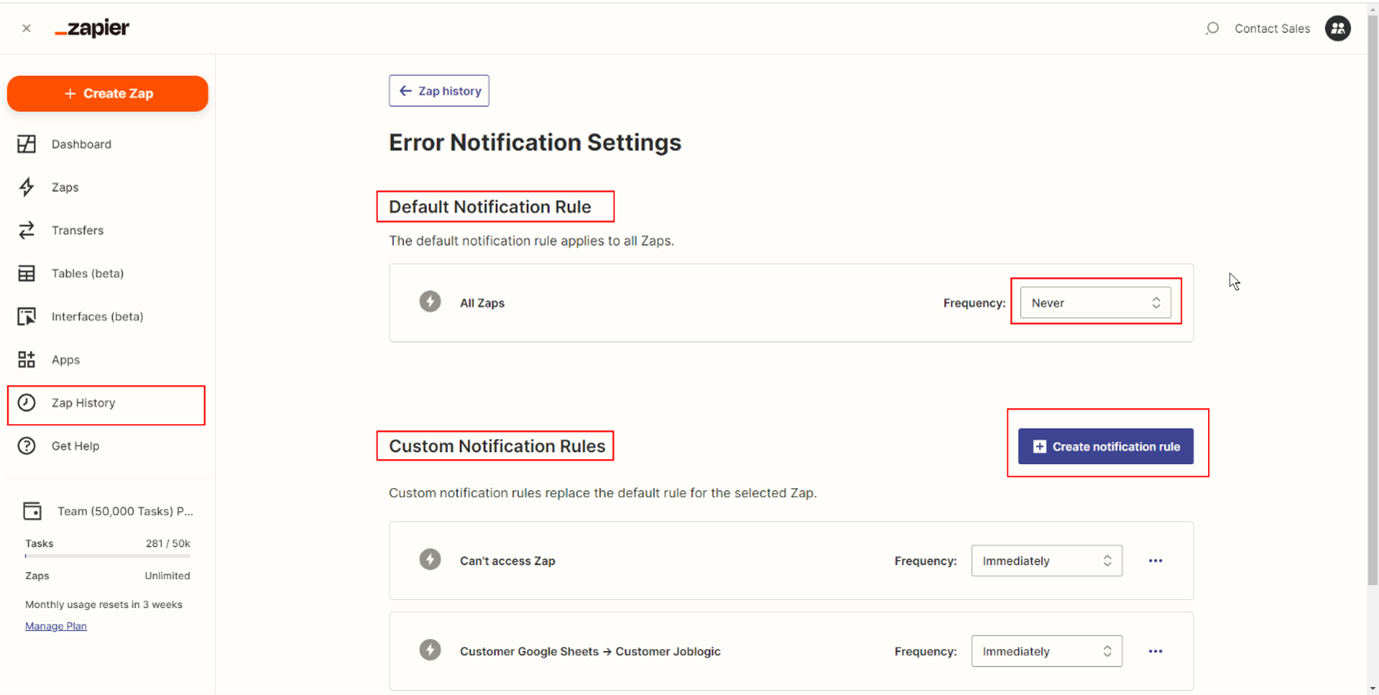
Click on Error Notification Settings to access the configuration options. Here, you can specify how you want to be notified when errors occur in your automation processes. You will see the following two options.
-
Default Notification Rule: This option is used for all Zap and Transfer notification settings, and you may choose one of the options to set its frequency and receive notification as:
- Immediate for each error
- Hourly summary
- Never.
-
Custom Notification Rule: This option is used for Individual Zap and Transfer notification settings, and you may choose one of the options to set its frequency and receive notification as:
- Immediate for each error
- Hourly summary
- Never.
-
11. Disclaimer
- Any Zap and Transfer run in Zapier by the customer and caused data addition/manipulation/deletion whereby Joblogic will not be liable for these changes.
- Joblogic will investigate the root cause and offer possible options.