Introduction
Cross Customer invoicing allows you to invoice different customers for costs recorded against the same job. You can assign individual costs to specific customers or assign all outstanding costs to one customer.
This user guide explains how to enable Cross Customer invoicing and create invoices for multiple customers from a single job.
Enabling the setting
To enable Cross Customer invoicing, go to Settings > System Setup and click Edit.
Find the 'Invoice - Cross Customer' setting and select Enable.
.png)
Creating a Cross Customer invoice
To create a Cross Customer invoice, go to Jobs > All Jobs and find the relevant job.
Click the arrow next to Add Invoice and select Add Invoice for Cross Customer.
.png)
A list of any outstanding costs against the job will be displayed here.
.png)
You can assign a customer to each line individually using the dropdown.
.png)
Alternatively, click Bulk Assign to assign the same customer to all lines.
.png)
Any unassigned lines will remain outstanding on the job.
Click Save when you're happy with your selections.
.png)
Joblogic will generate a separate invoice for each customer assigned to the costs.
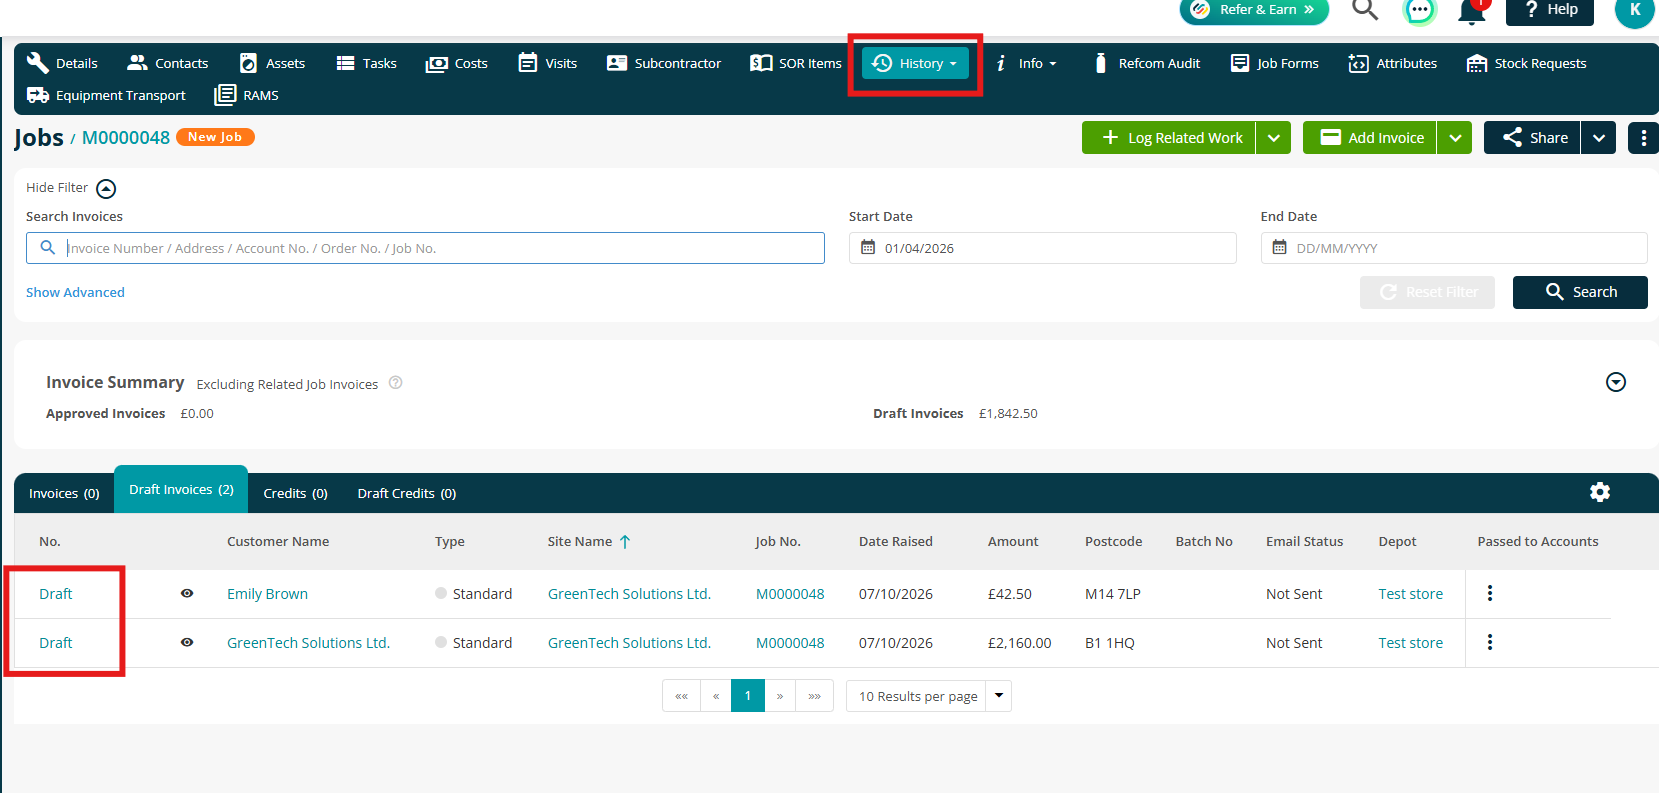
You can then continue with your usual invoicing process.
For more information, see Invoicing a Job.
Further Support
For further information or assistance with the above, contact our Support Team on 0800 326 5561 or email support@joblogic.com. Alternatively, our Customer Success Management team can be reached by emailing customersuccess@joblogic.com
Publishing Details
This document was written and produced by Joblogic’s Technical Writing team and was last updated on the date specified above. Be aware that the information provided may be subject to change following further updates on the matter becoming available or new releases within the system. Additionally, details within the guide may vary depending on your Joblogic account’s user permissions and settings or the electronic device being used.