Introduction
Geo-stamped photos add location and time information to images captured or uploaded through the Joblogic Mobile App. This provides clearer evidence of where and when work was completed, helping support audits, service-level agreements, customer records and invoice approval.
In this guide, we'll show you how to subscribe to Geo-Stamped Photos, configure the address and validation settings, and understand how location information is applied to images in the Mobile App.
Subscribing to Geo-Stamped Photos
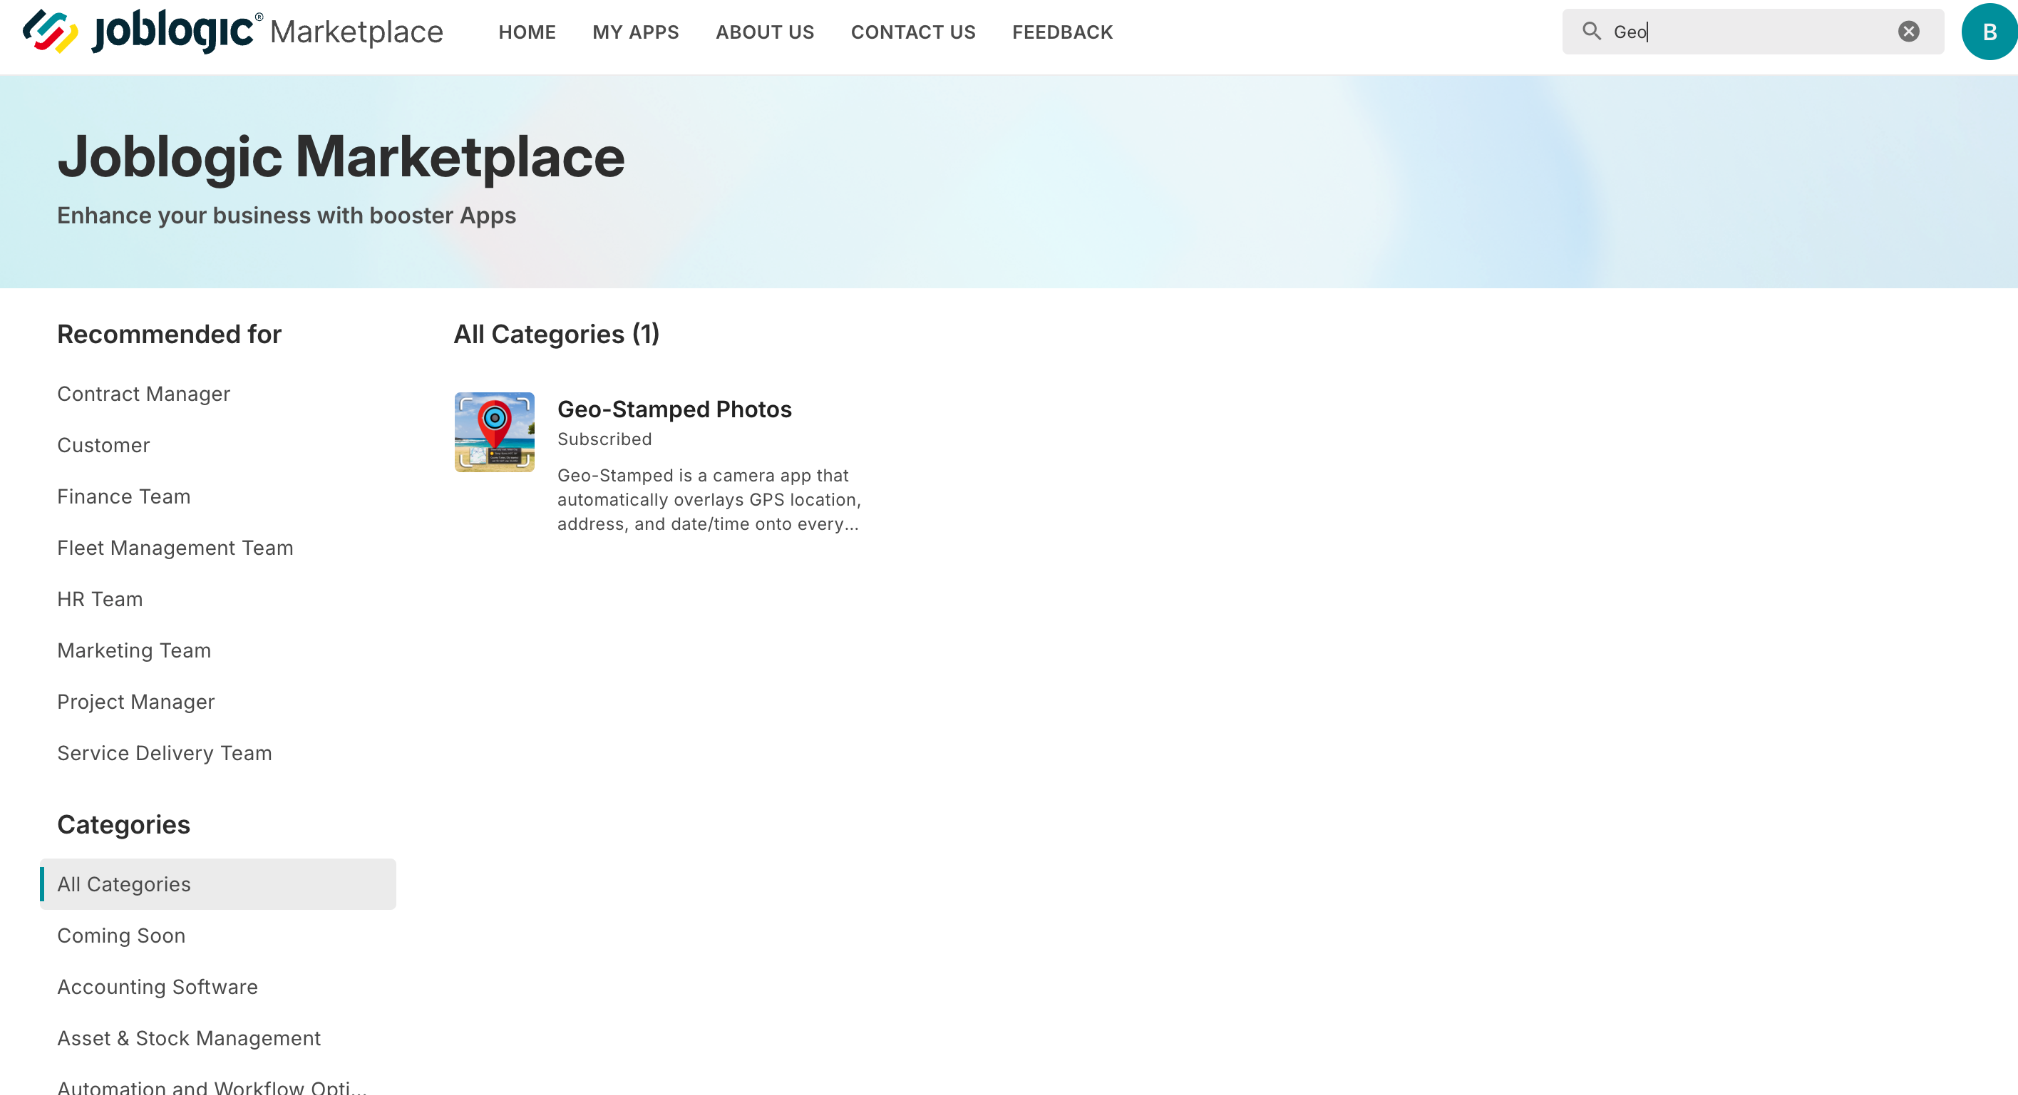
Navigate to Marketplace > Explore More and search for Geo-Stamped Photos.
Open the Geo-Stamped Photos app and select Subscribe to make the functionality available for your account.
Configuring Geo-Stamped Photos
Once the app is subscribed, navigate to Settings and open System Setup.
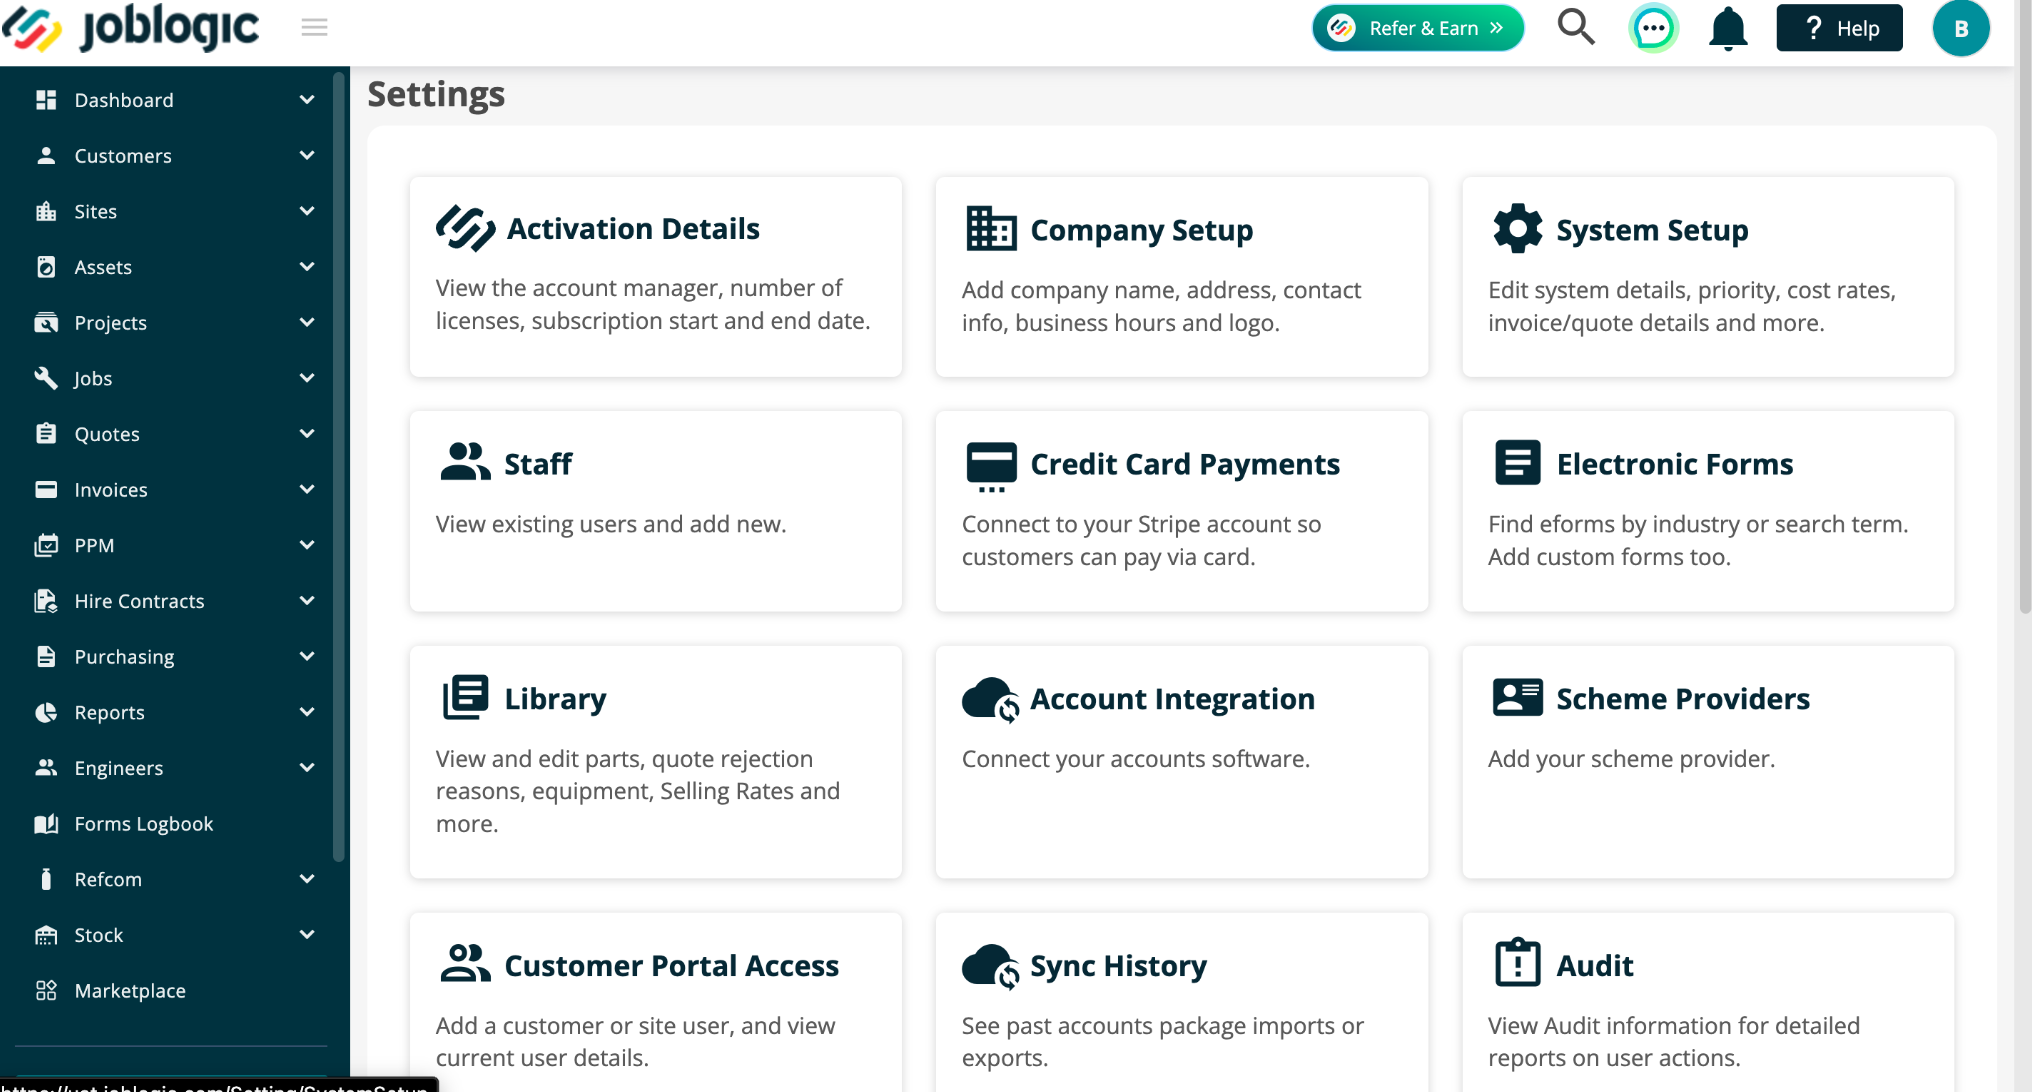
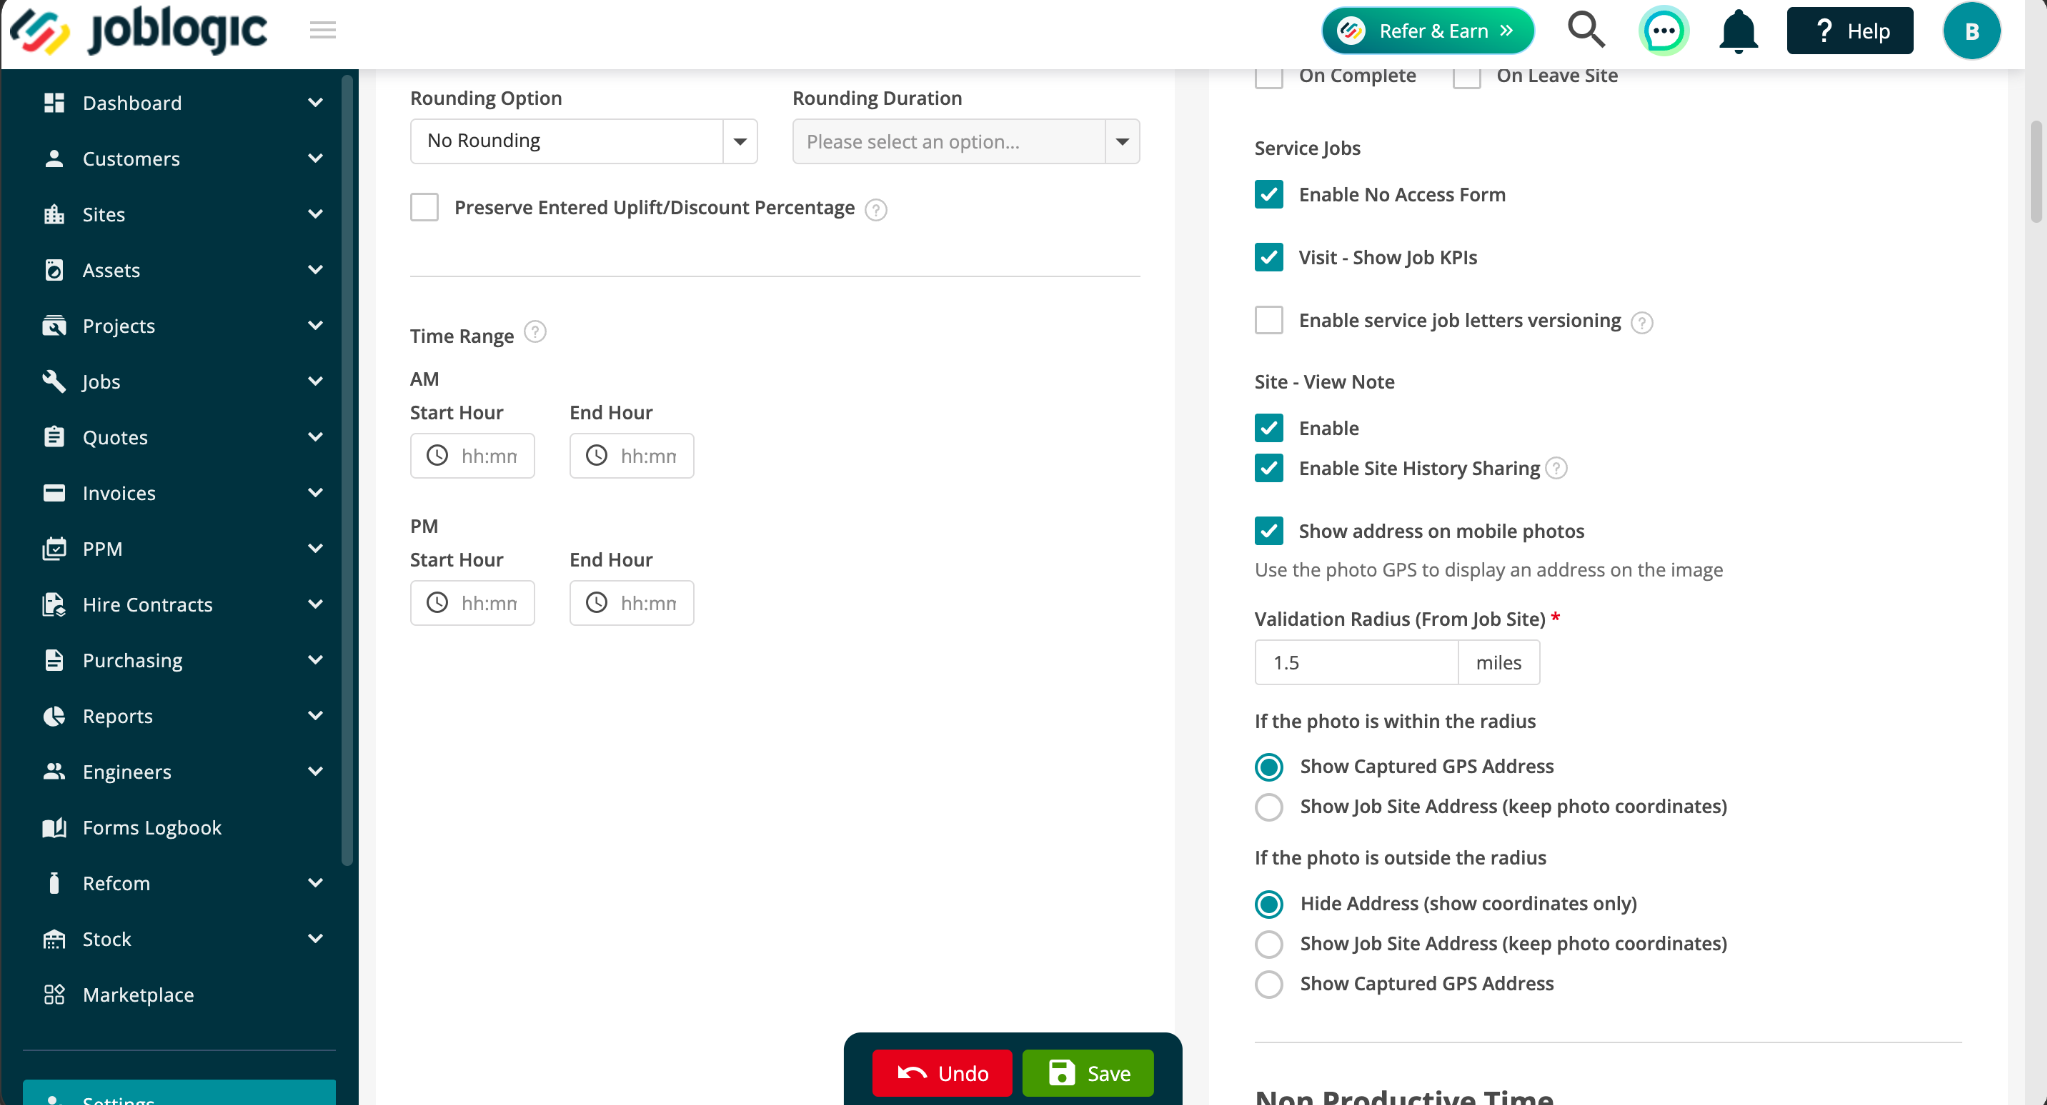
Click Edit and locate the mobile photo settings. Select Show address on mobile photos to allow location information to be displayed on geo-stamped images.
Enter the required distance in Validation Radius (From Job Site). The distance unit shown here is taken from your System Settings.
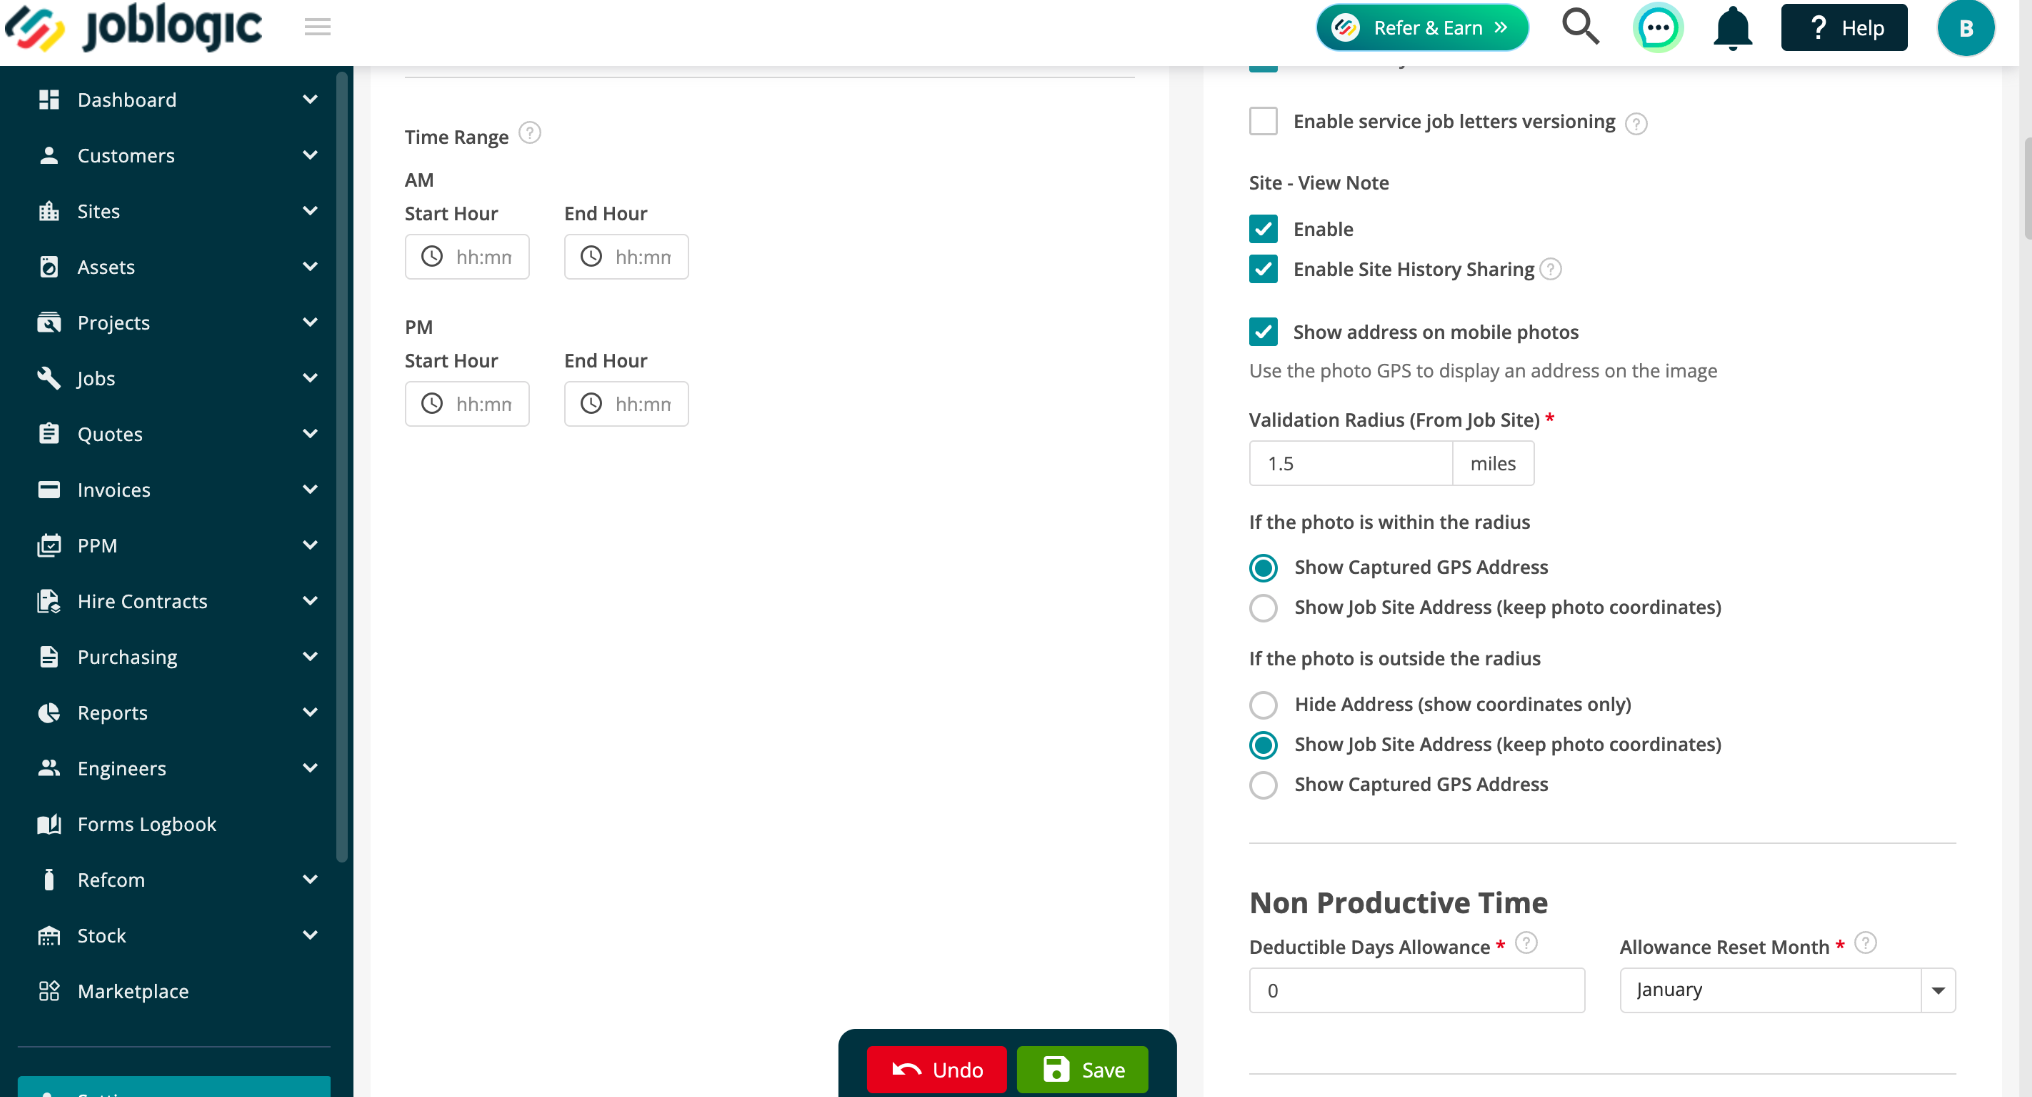
For photos taken within the radius, choose either Show Captured GPS Address or Show Job Site Address (keep photo coordinates). For photos outside the radius, choose whether to hide the address, show the Job Site address or show the captured GPS address.
When the required options are selected, click Save.
The address behaviour can be changed to suit your process. In the example below, photos outside the validation radius are set to Show Job Site Address (keep photo coordinates).
How the validation radius works
For images linked to a Job visit, Joblogic compares the image coordinates with the Job Site coordinates when a validation radius has been defined.
Within the radius: Show Captured GPS Address displays the address resolved from the actual image coordinates. Show Job Site Address displays the Job Site address while keeping the coordinates from the actual capture or upload location.
Outside the radius: Hide Address shows coordinates, date and time only. Show Job Site Address displays the Job Site address while keeping the actual photo coordinates. Show Captured GPS Address displays the address resolved from the actual capture or upload location.
If Hide Address (show coordinates only) is selected, the image keeps the capture date, time and coordinates visible without showing an address.
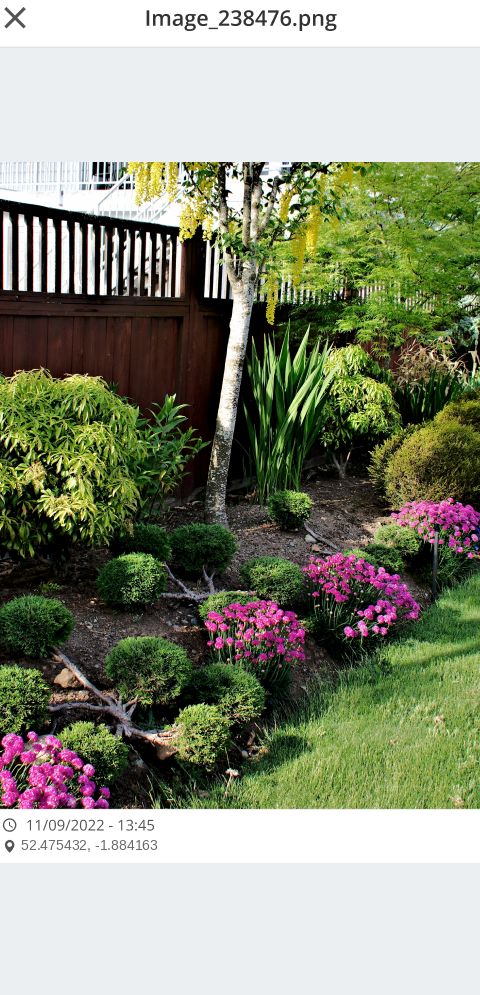
If Show Job Site Address (keep photo coordinates) is selected, the Job Site address is shown while the coordinates continue to reflect the actual capture or upload location.
Where geo-stamping applies
Geo-stamping is available wherever photos can be taken or uploaded in Joblogic Mobile, including attachments, notes, and expenses.
Capturing or uploading a geo-stamped photo
When an engineer takes or uploads a photo, Joblogic automatically records the location and time from the mobile device. The image can show the coordinates, date and time, and captured address, with no manual location entry required.
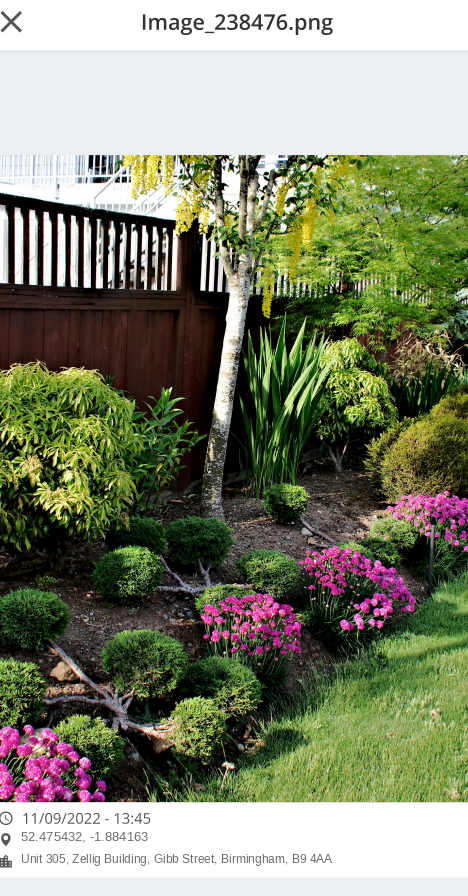
When no validation radius is set
If no Validation Radius has been defined, Joblogic displays the address resolved from the image coordinates. No distance comparison with the Job Site is applied.
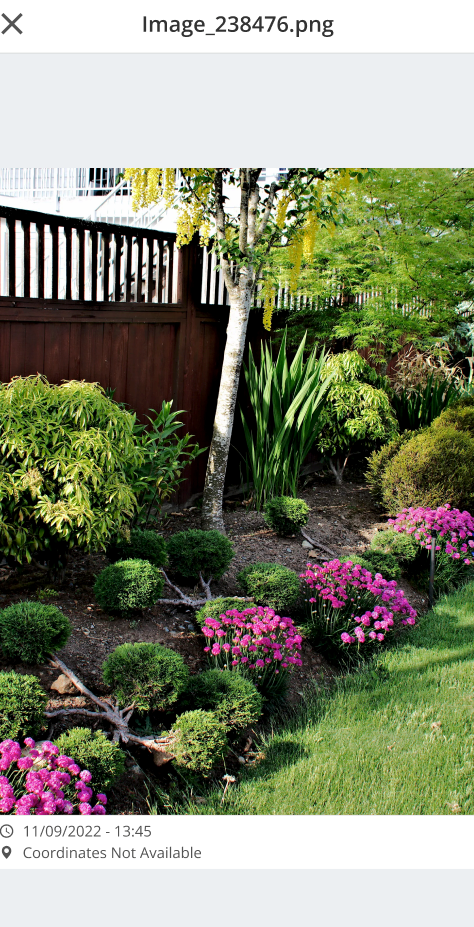
When coordinates are unavailable
If the uploaded image does not contain GPS information and the mobile device cannot provide coordinates at the time of upload, Joblogic cannot apply location details to the image.
In this situation, the image displays Coordinates Not Available so it is clear that location information could not be captured.
Reviewing geo-stamped evidence
Once the image is saved, the visible geo-stamp provides location and timestamp information alongside the photo, giving office teams and customers clearer supporting evidence for the work completed.
Image metadata and upload metadata are also stored in the Attachment audit trail, providing an additional record of the attachment activity.
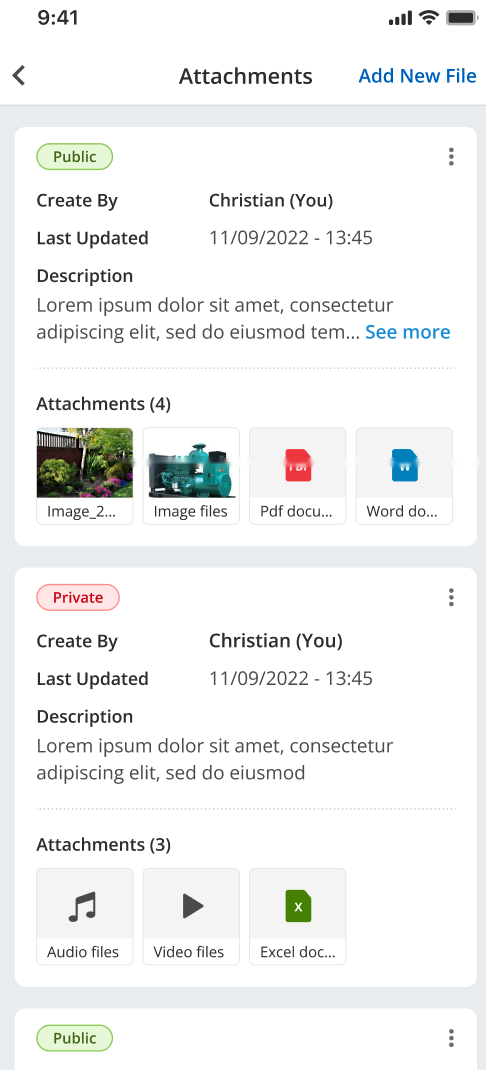
Note: If the Photo Annotation App is also subscribed, geo-stamping is designed to work alongside the photo annotation functionality.
Further Support
For further information or assistance with the above, contact our Support Team on 0800 326 5561 or email support@joblogic.com. Alternatively, our Customer Success Management team can be reached by emailing customersuccess@joblogic.com
Publishing Details
This document was written and produced by Joblogic's Technical Writing team and was last updated on the date stated above. Be aware that the information provided may be subject to change following further updates on the matter becoming available or new releases within the system. Additionally, details within the guide may vary depending on your Joblogic account's user permissions and settings or the electronic device being used.