Introduction
The Multi Depot app helps organisations manage different branches, warehouses and operational areas within one Joblogic account. Depots can control which records users see, which engineers and stock they can work with, and how operational and financial records are assigned across the business.
In this guide, we'll show you how to set up stores and depots, configure depot assignment, manage user access, update customers and sites, and understand how depot rules apply throughout Joblogic.
Subscribing to Multi Depot
The Multi Depot app is available in Joblogic Marketplace. Once the app is purchased, the Multi Depot functionality becomes available in the system.
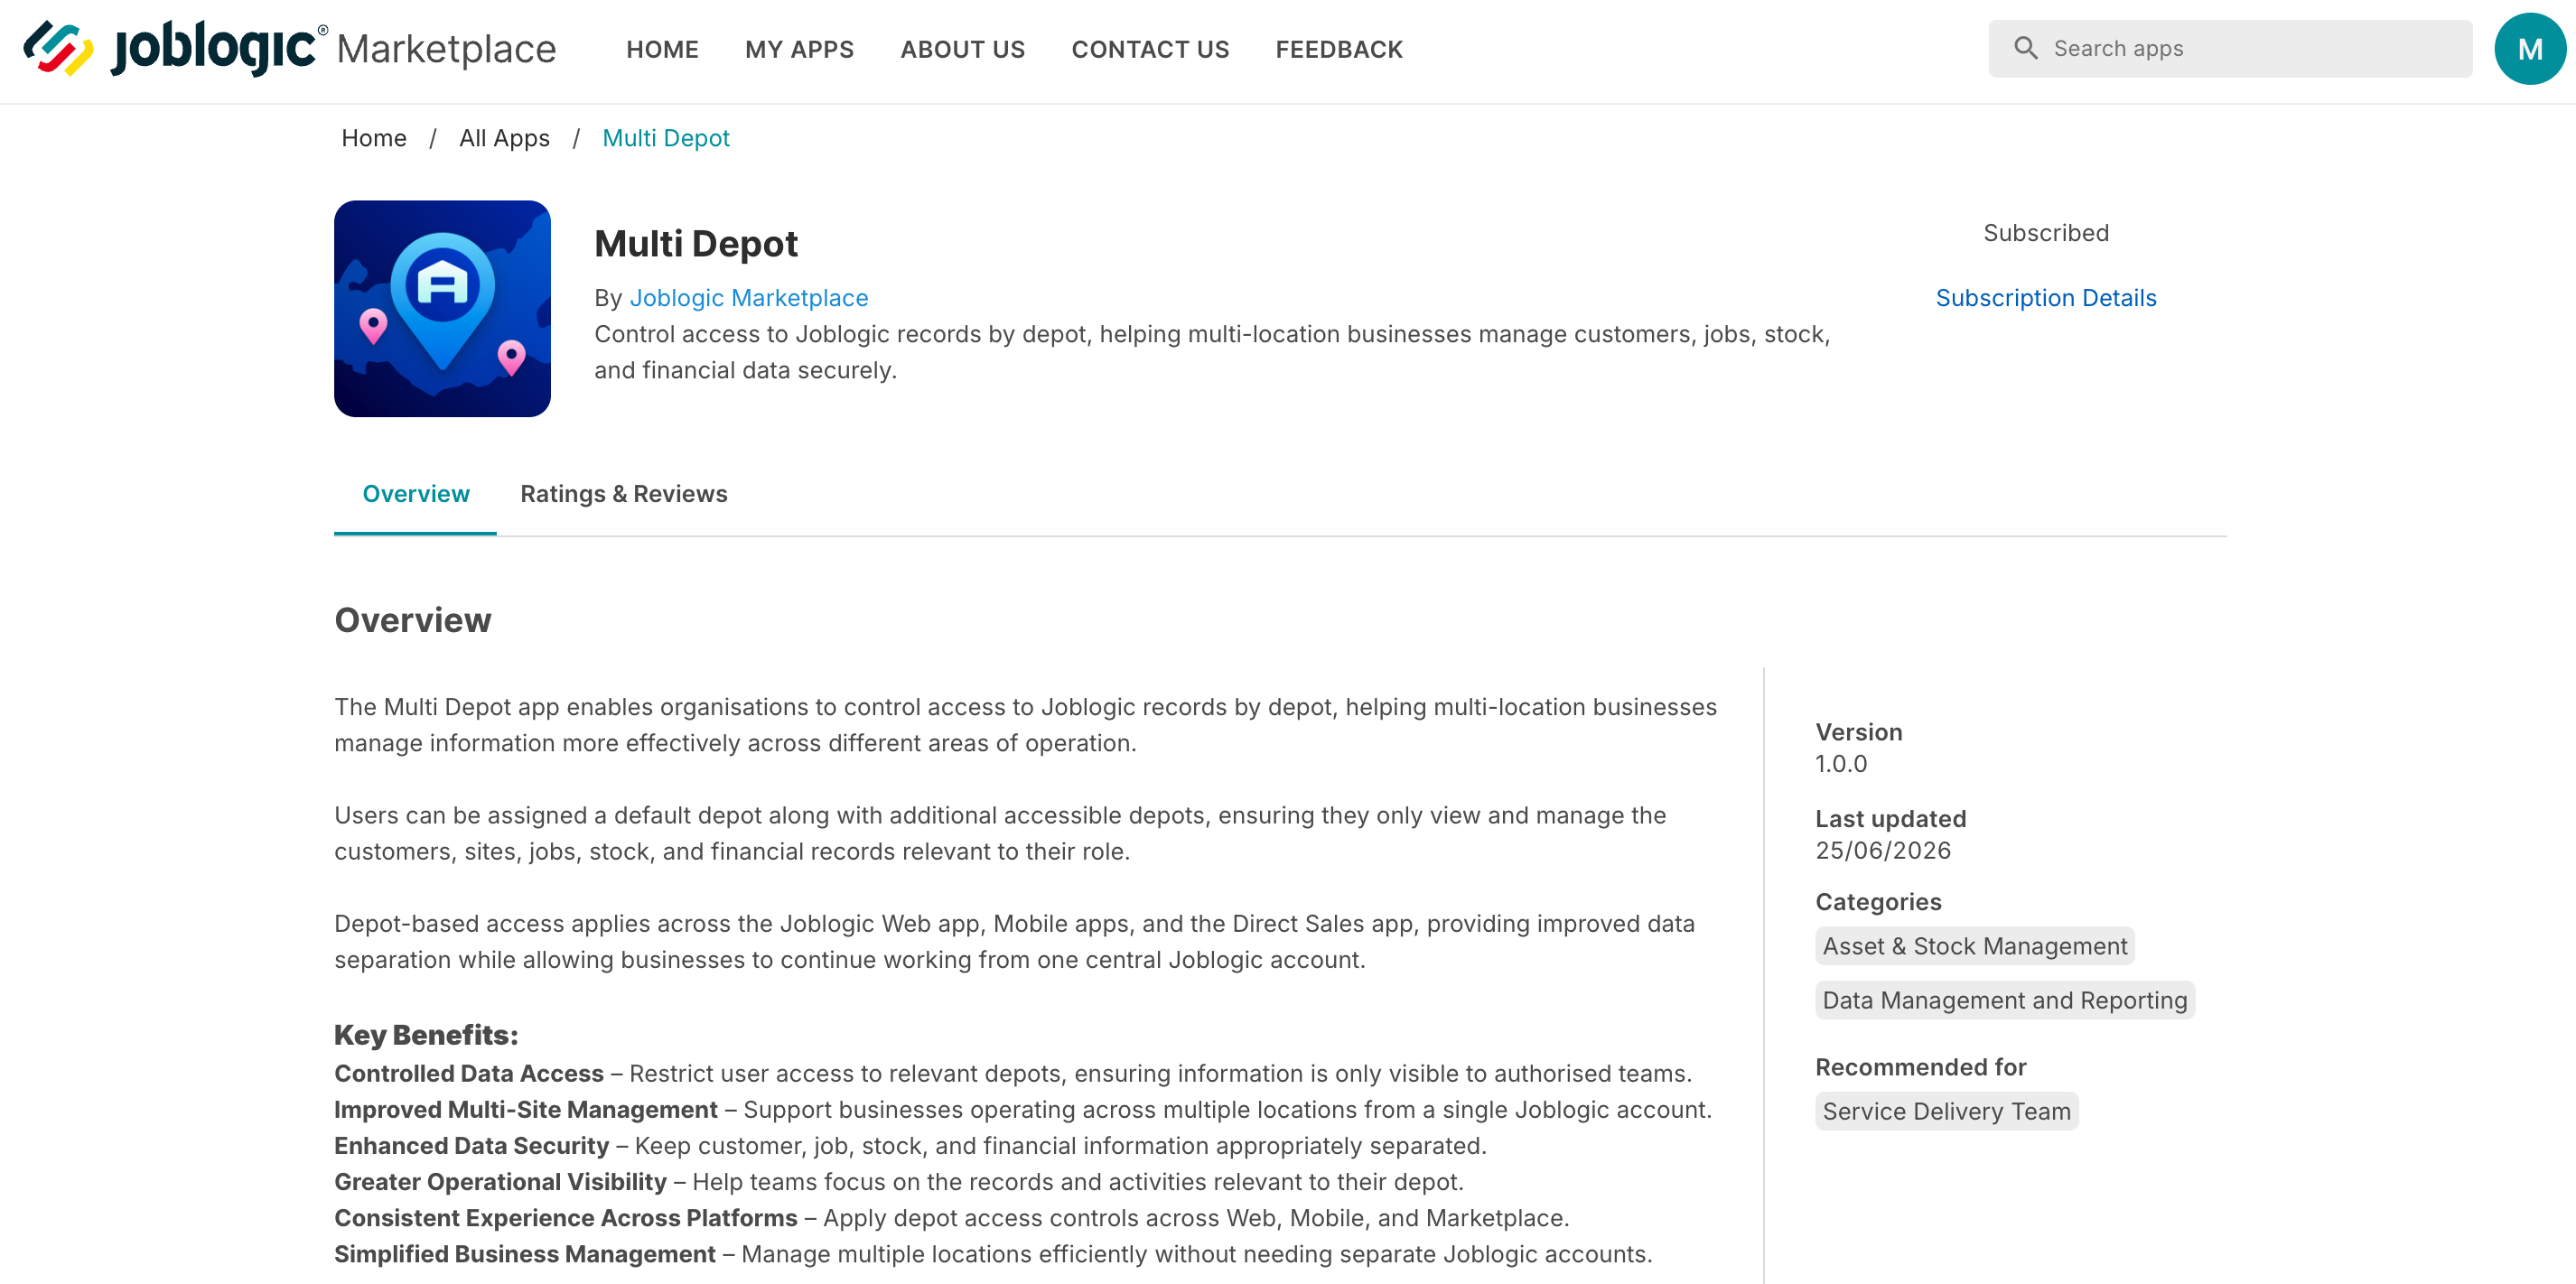
If the app is later unsubscribed, depot filtering is removed and users can see records across the account. Re-subscribing restores the previous depot configuration.
Accessing depots and stores
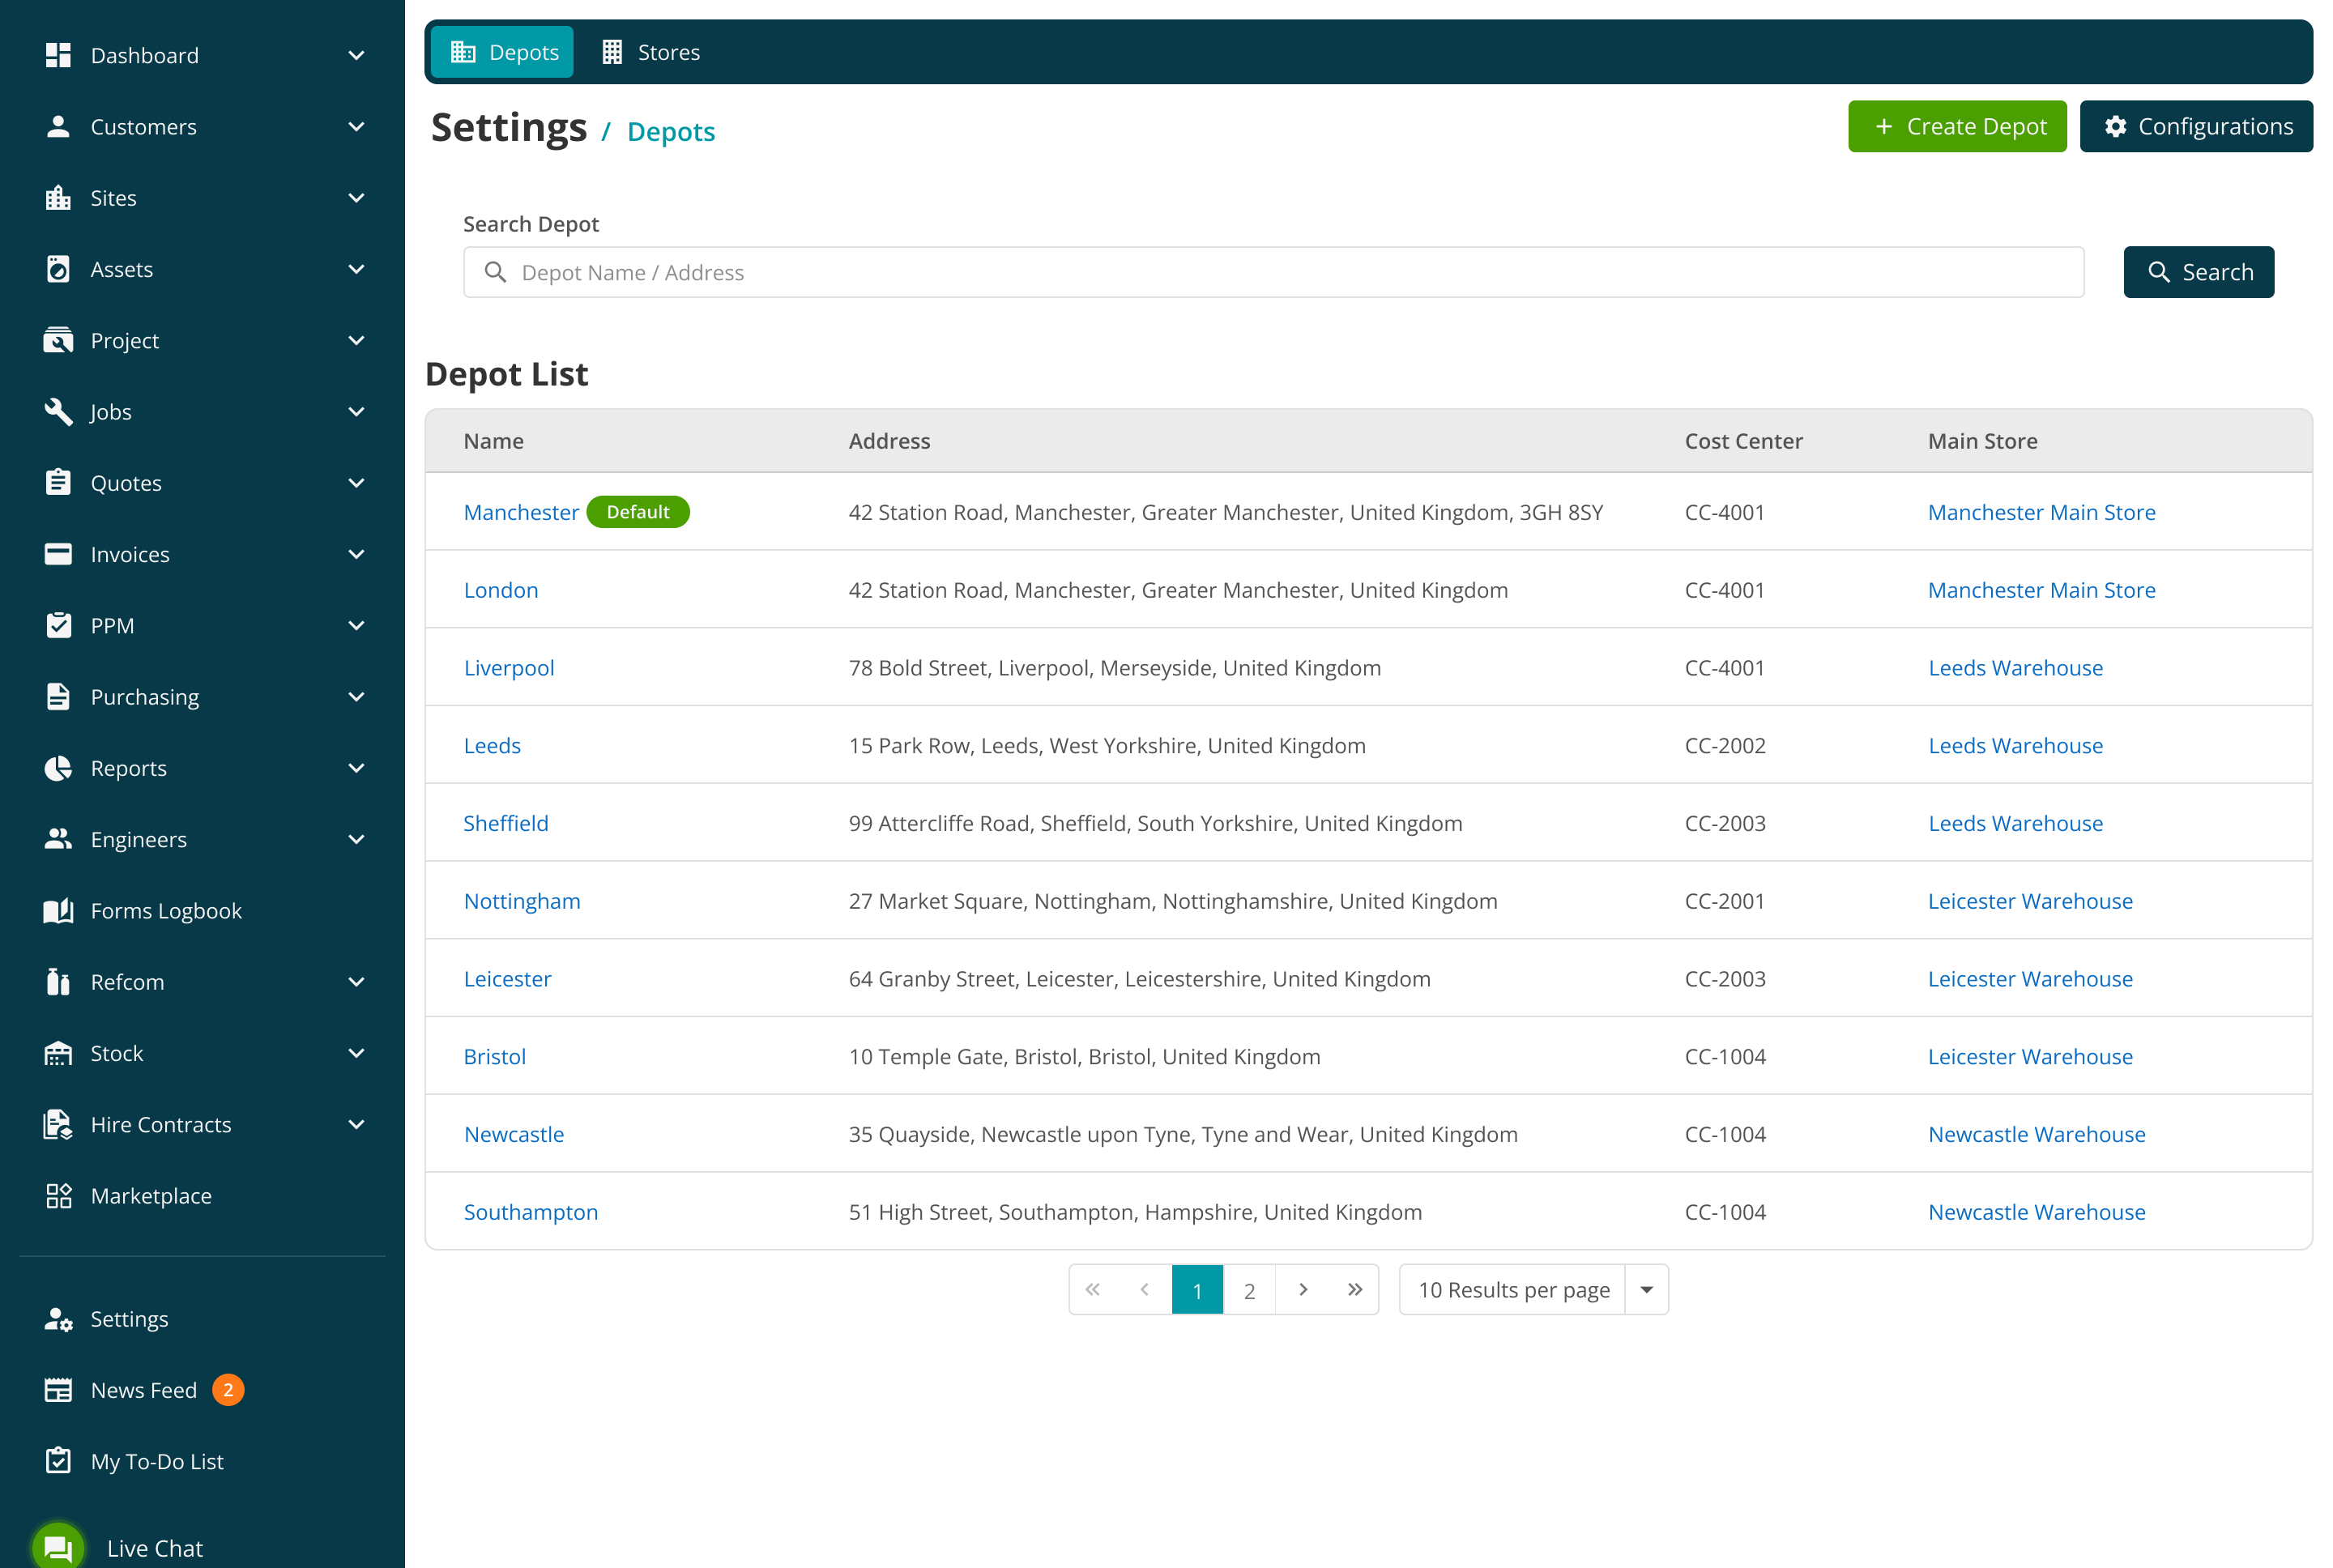
Navigate to Settings > Depots. The Depots tab lists each depot's address, cost centre and main store. Use the Stores tab to manage the operational locations associated with those depots.
Creating and managing stores
Create at least one store before creating a depot. Open the Stores tab, select Create Store and enter the mandatory Store Name.
If the Stock module is subscribed, select Use Stock Location and choose the required Stock Location from the dropdown. The dropdown lists stock locations that belong to the user's depot. Select Save to create the store.
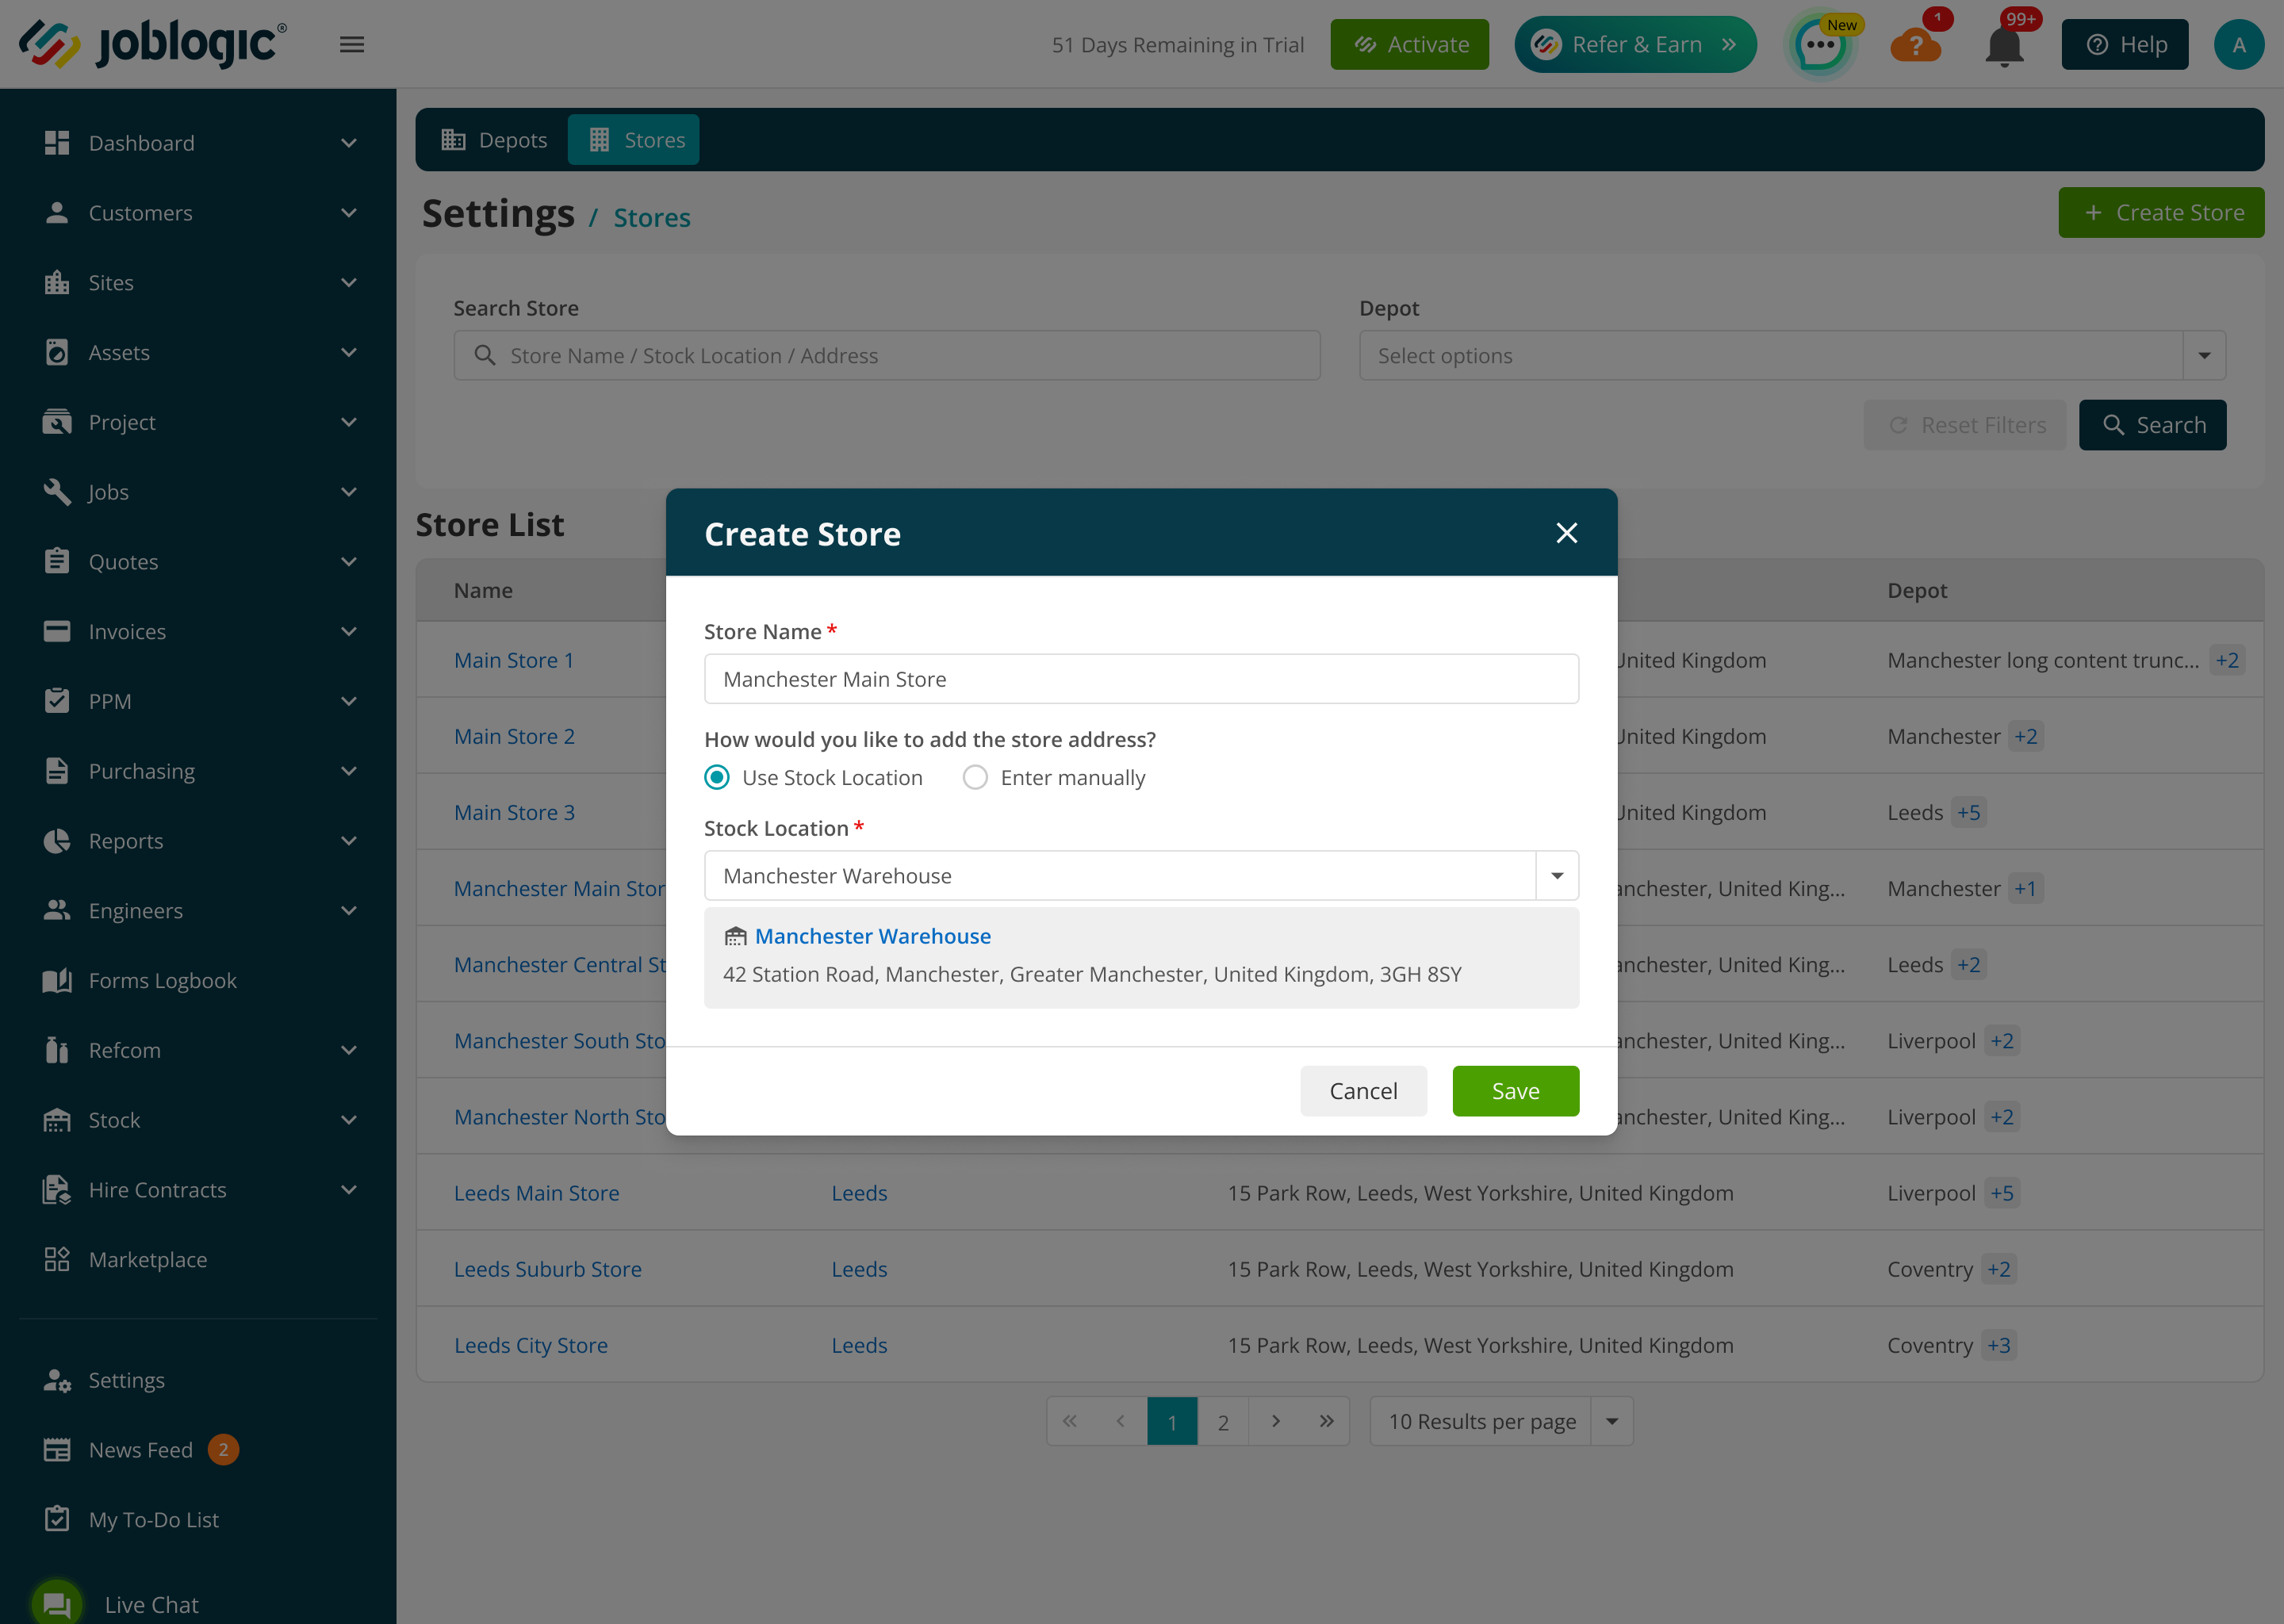
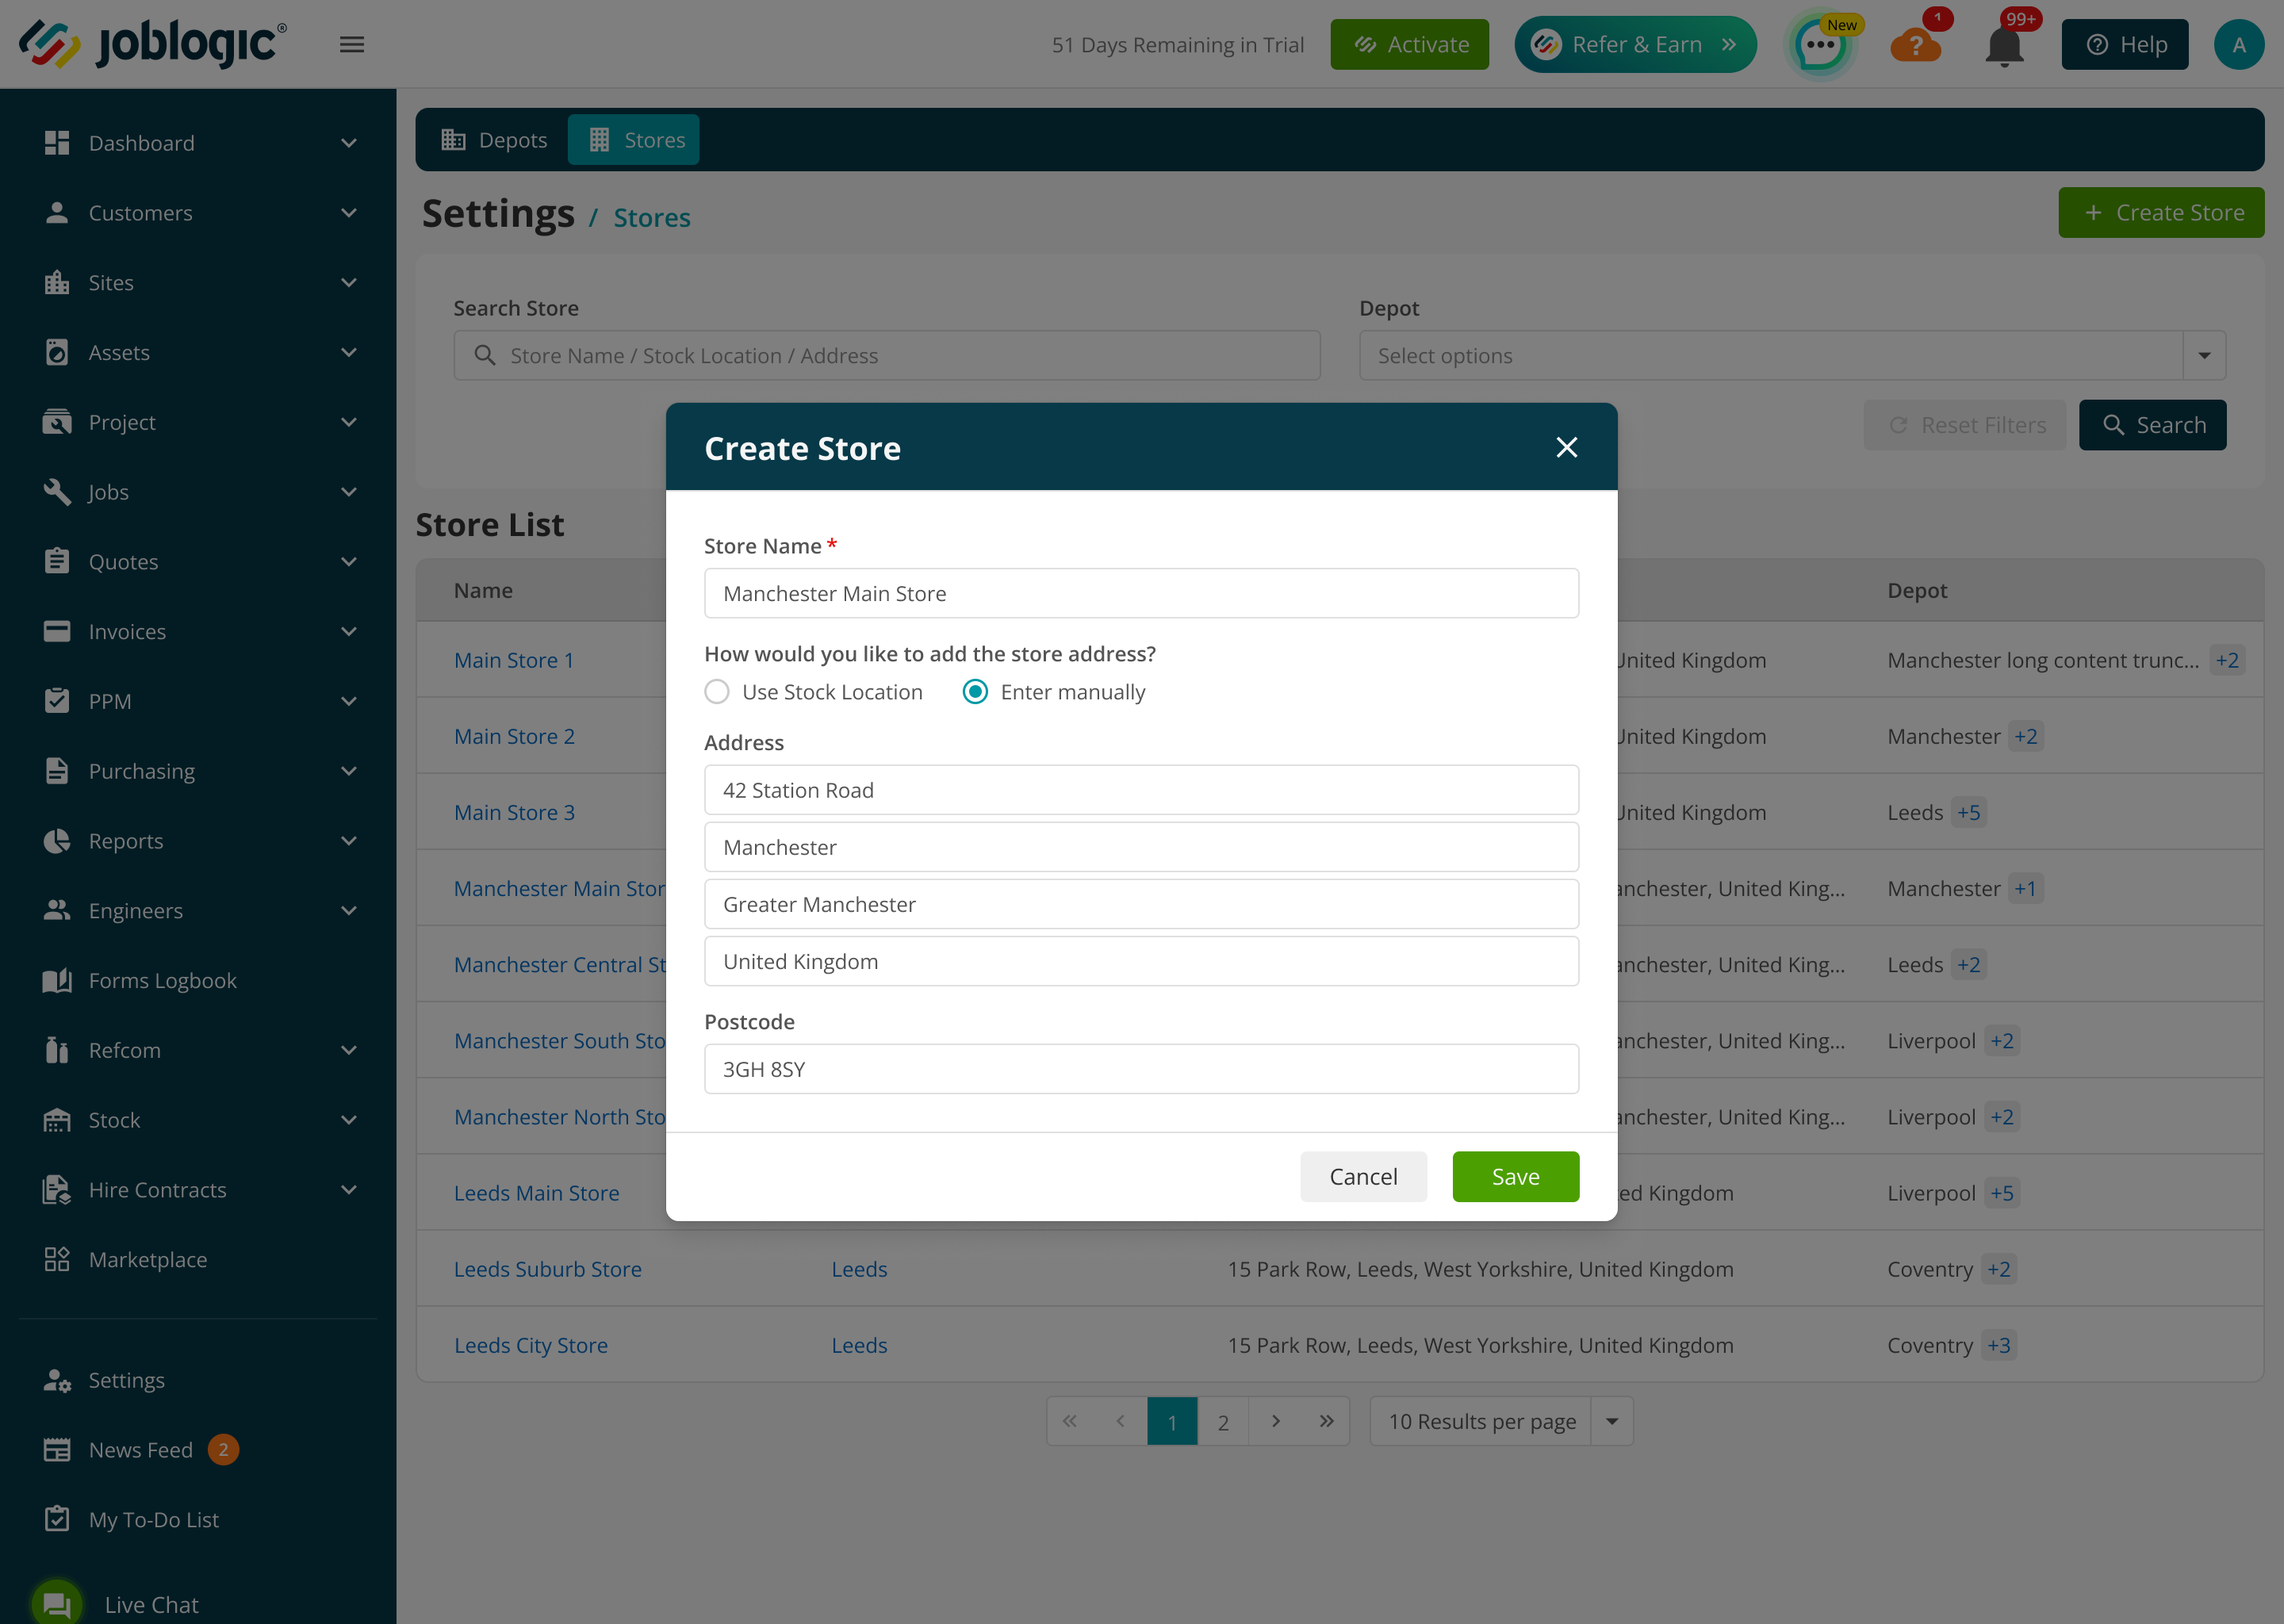
To create a store without linking it to a stock location, select Enter Manually, enter the address details and postcode, and then select Save. If the Stock module is not subscribed, the manual address method is used.
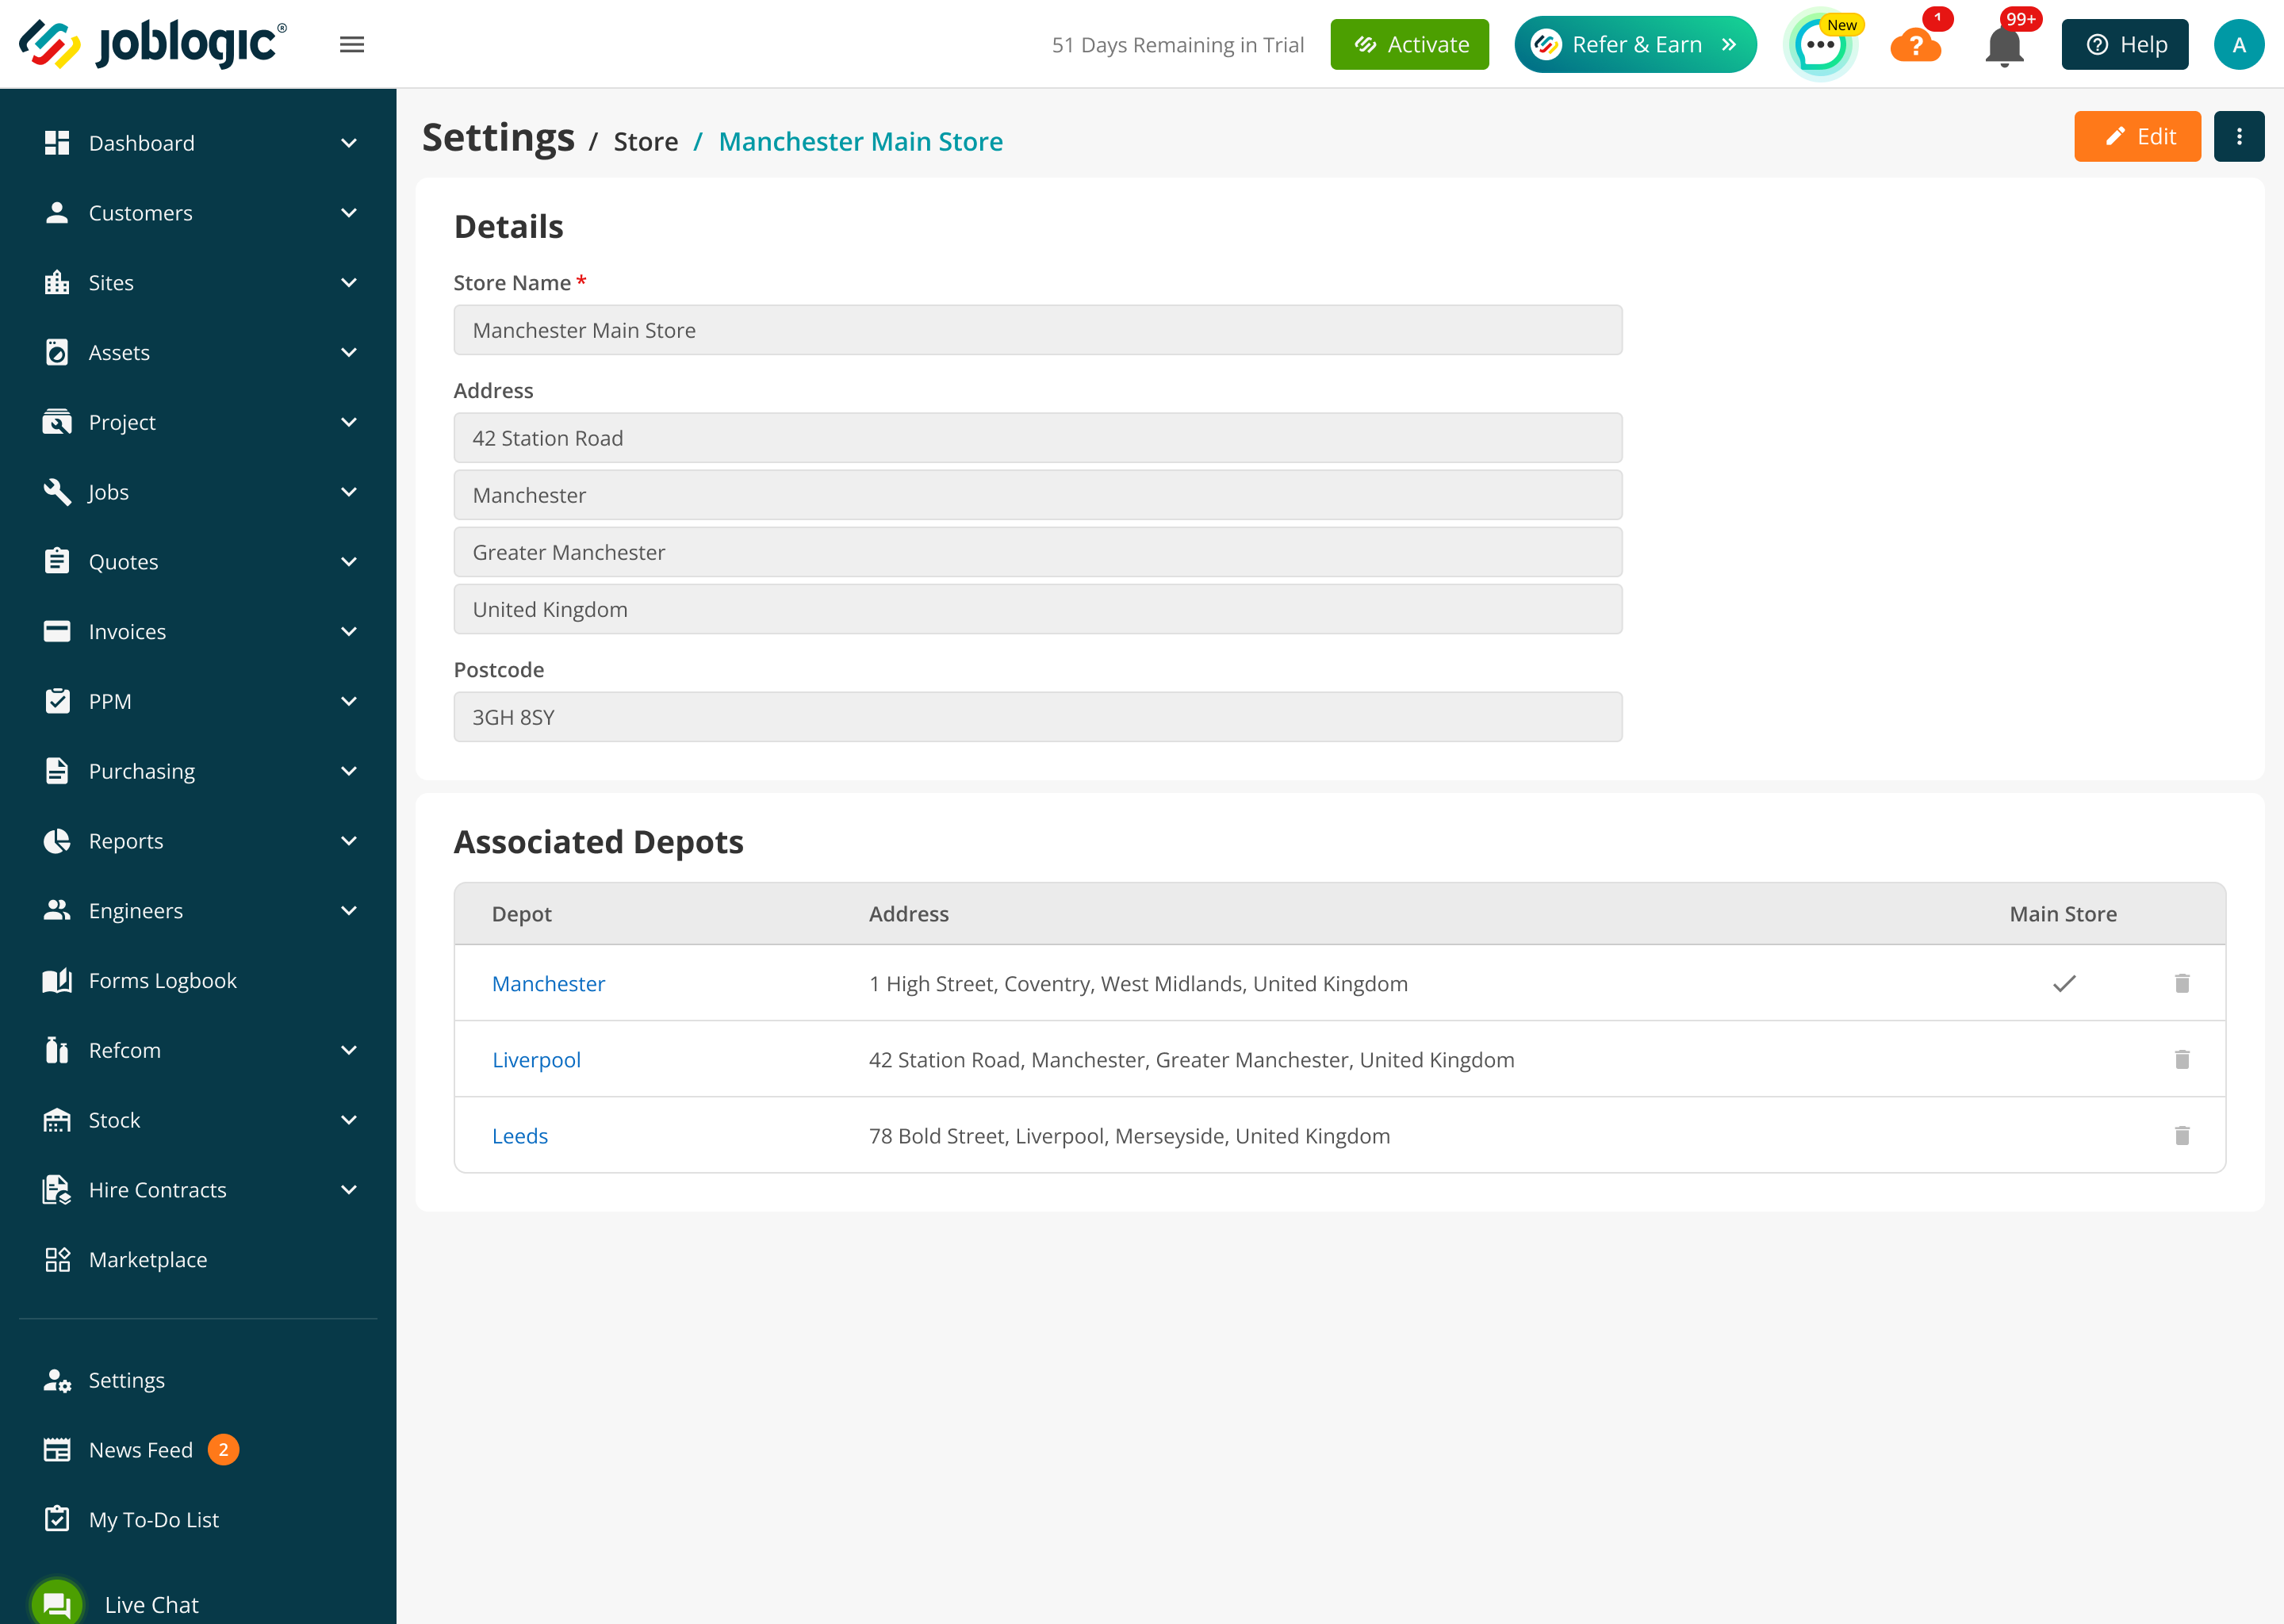
Stores are associated with depots from the Associated Stores section of a depot record. After a store is added to a depot, open the store name to view the linked depots under Associated Depots. The Main Store column shows whether that store supplies the depot address.
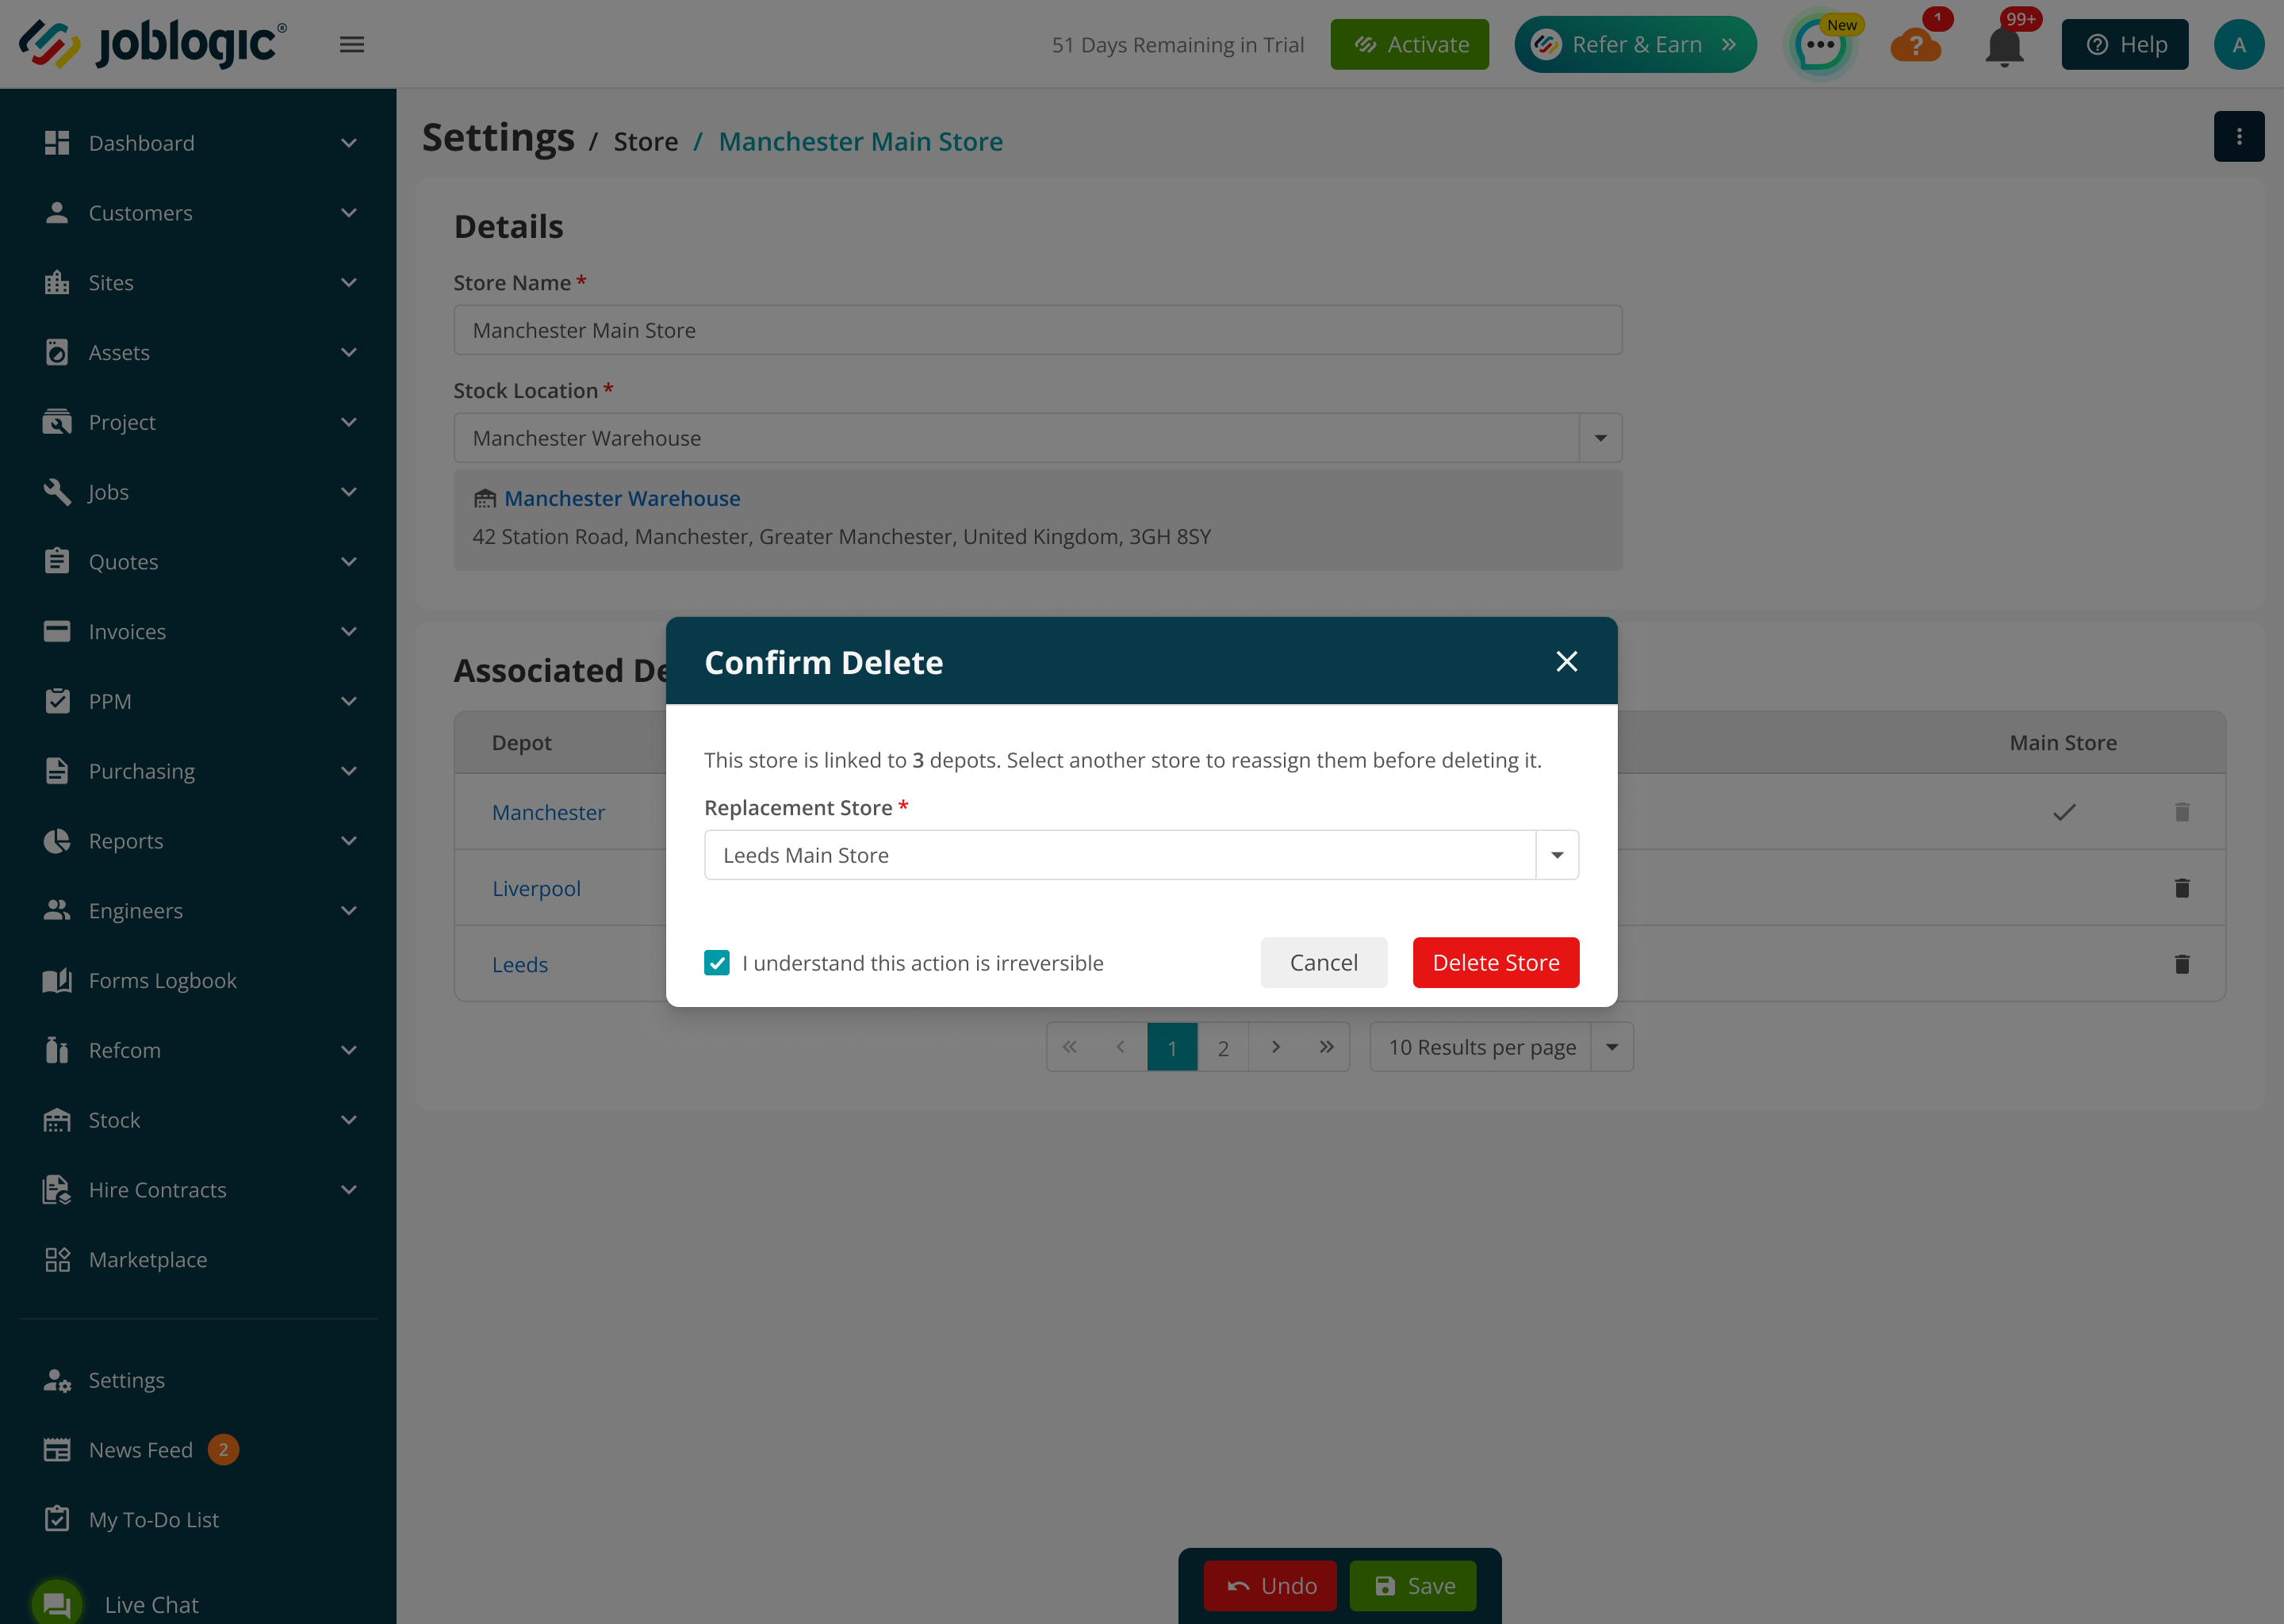
When deleting a store that uses a stock location and is linked to depots, the deletion pop-up shows the number of linked depots and provides a Replacement Store field. Select the replacement store and confirm the deletion.
Creating and managing depots
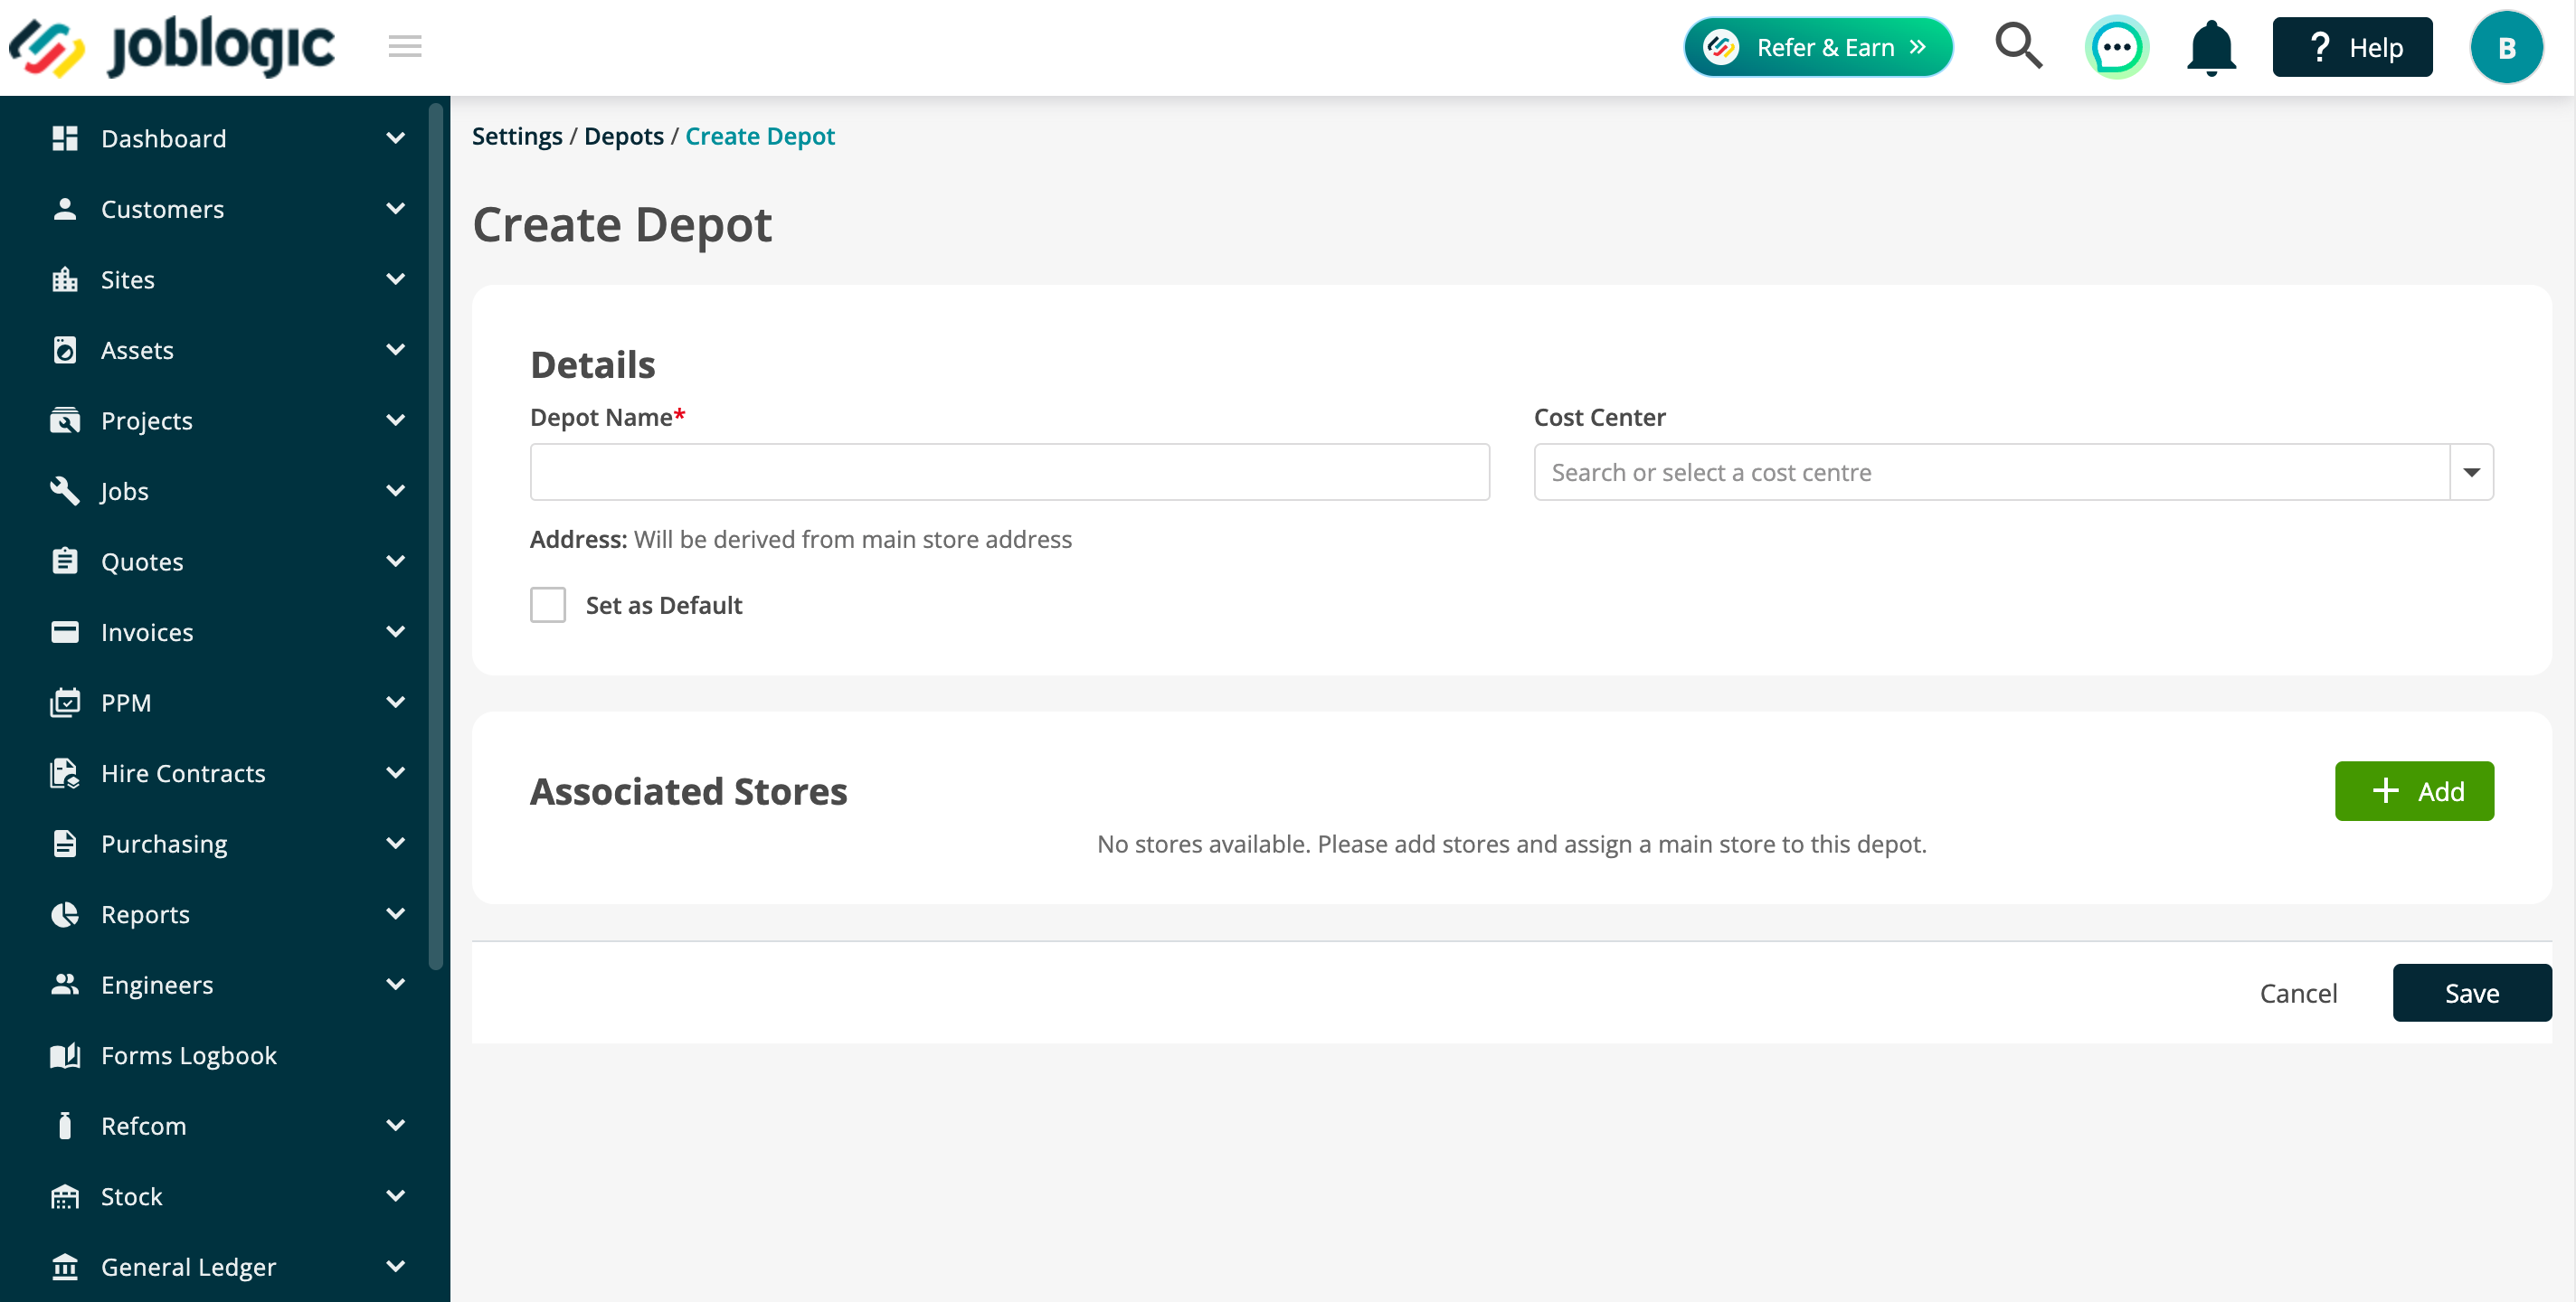
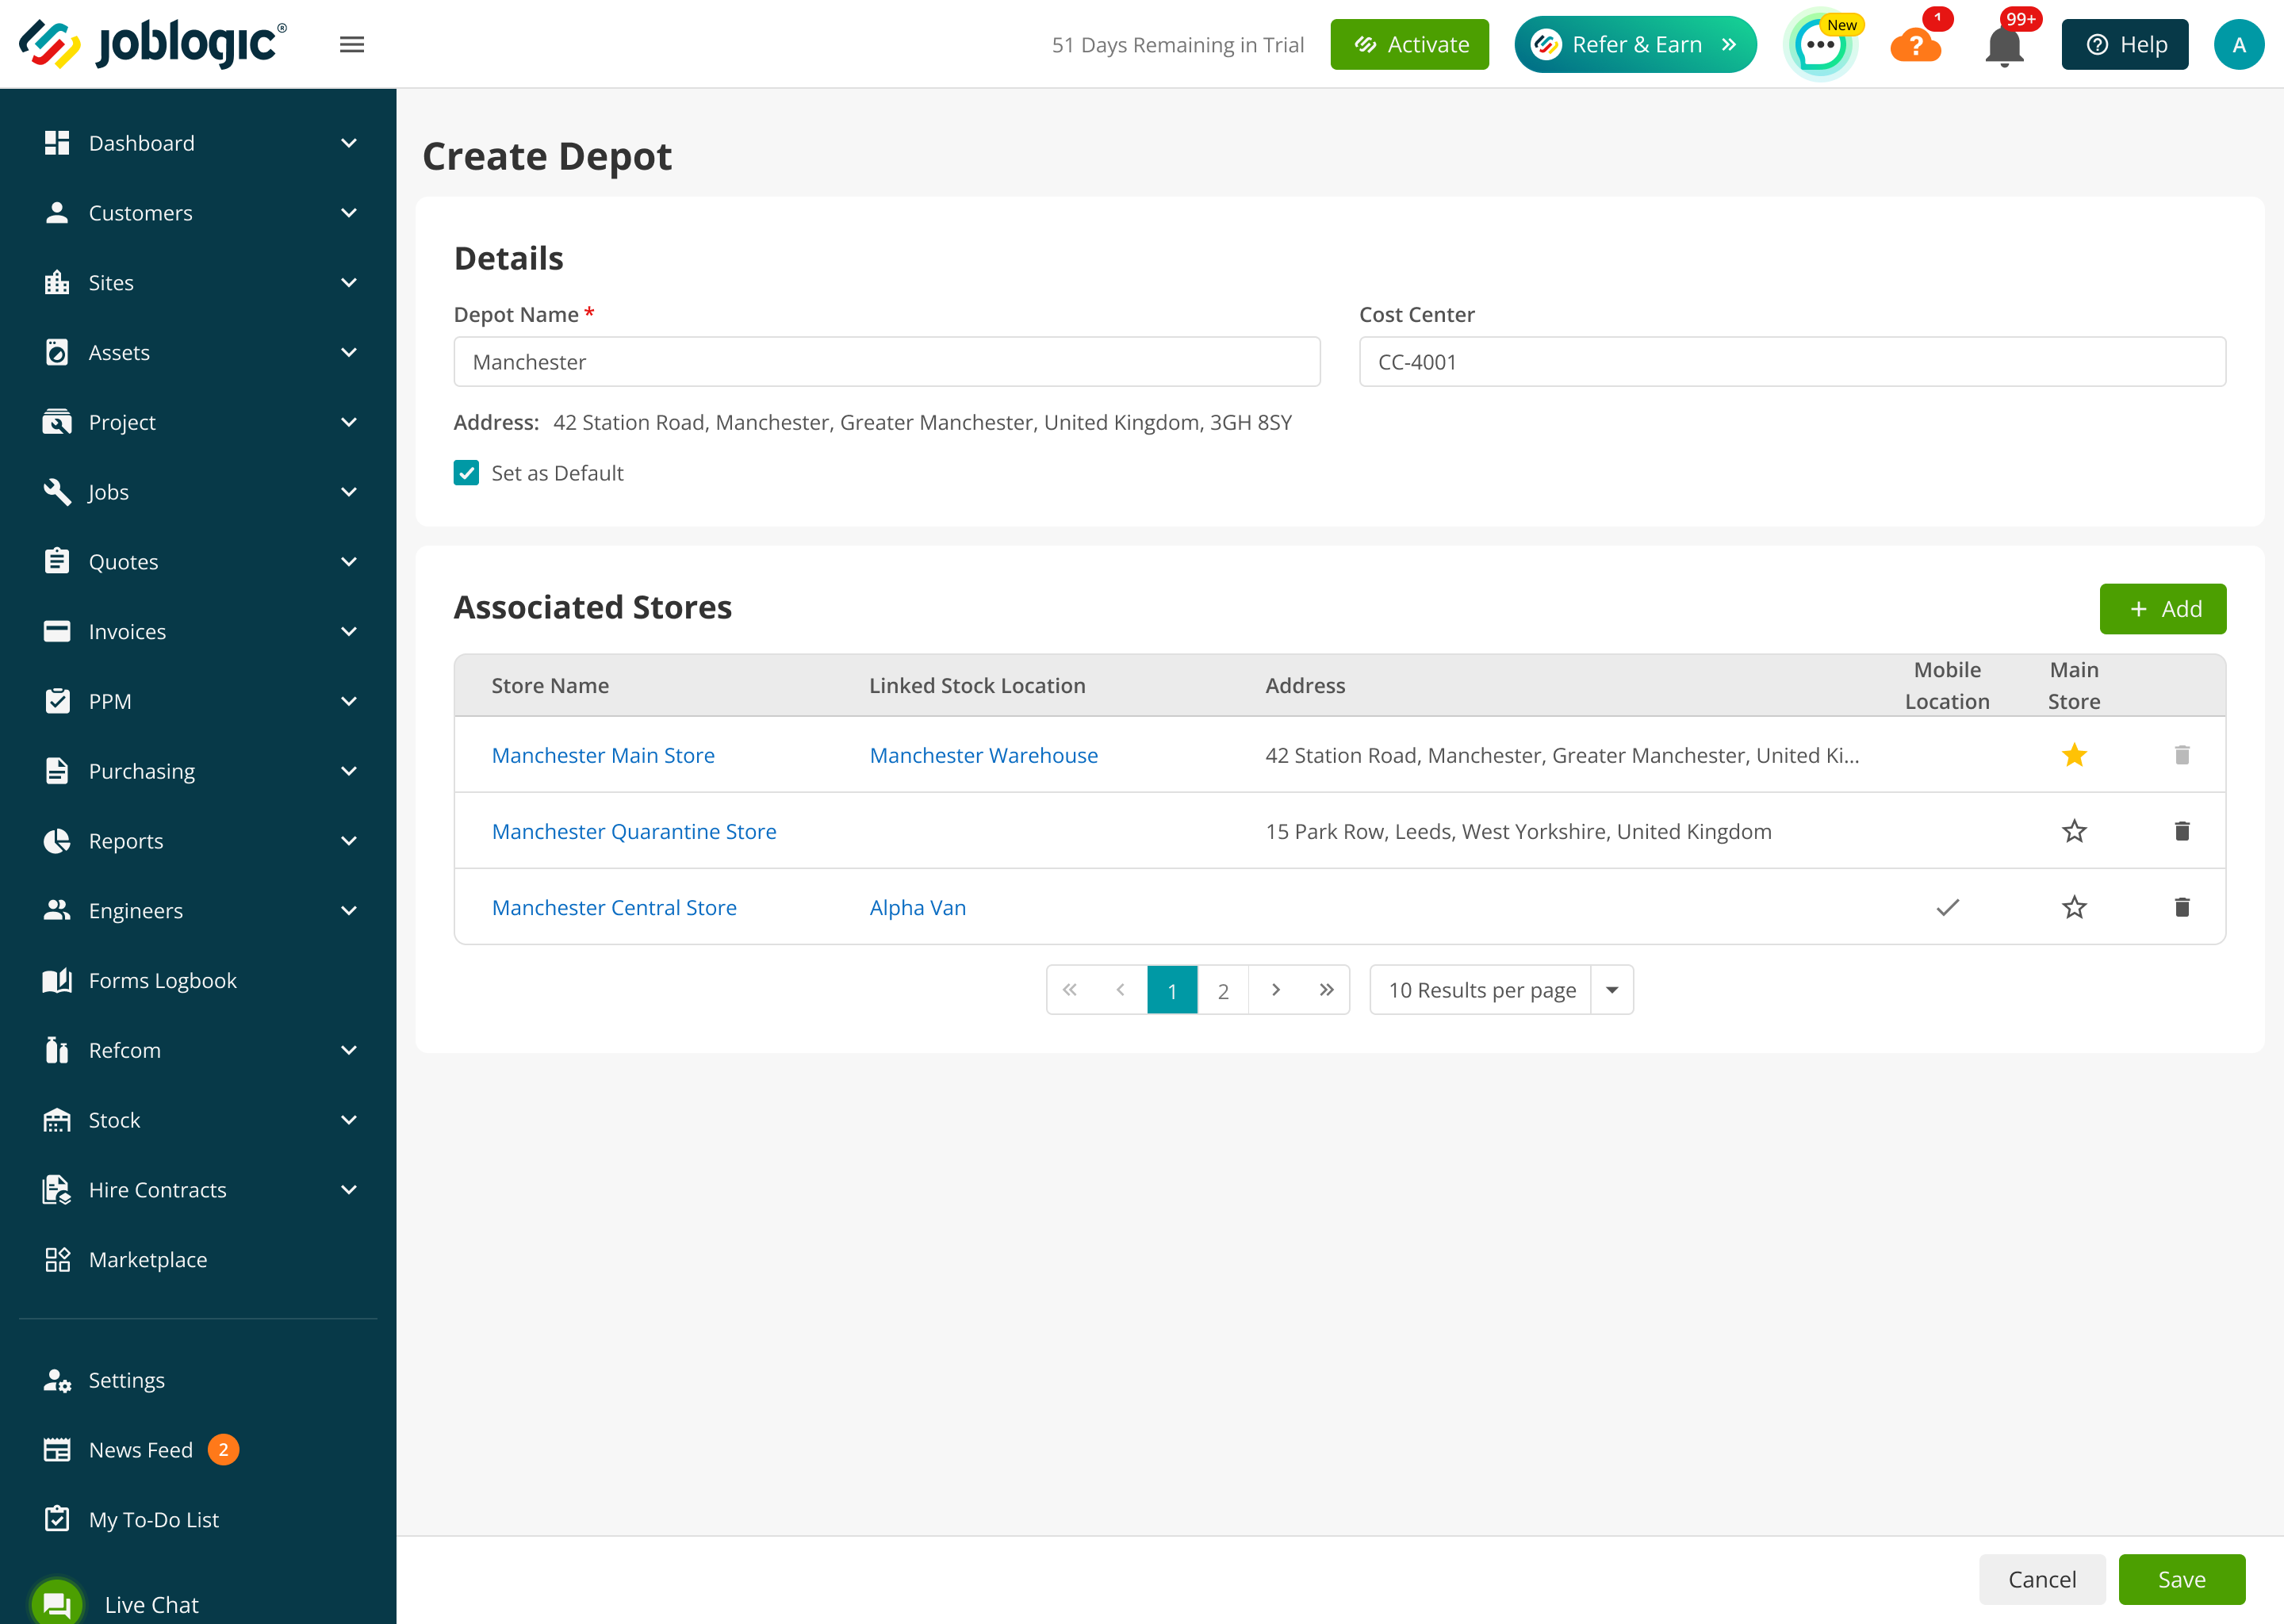
On the Depots tab, select Create Depot. Enter the depot name, choose a cost centre where required and select Set as Default if this should be the account's default depot.
Select Add in Associated Stores, choose one or more stores and mark one store as the main store. The main store supplies the depot address. Every depot must have a main store before it can be saved.
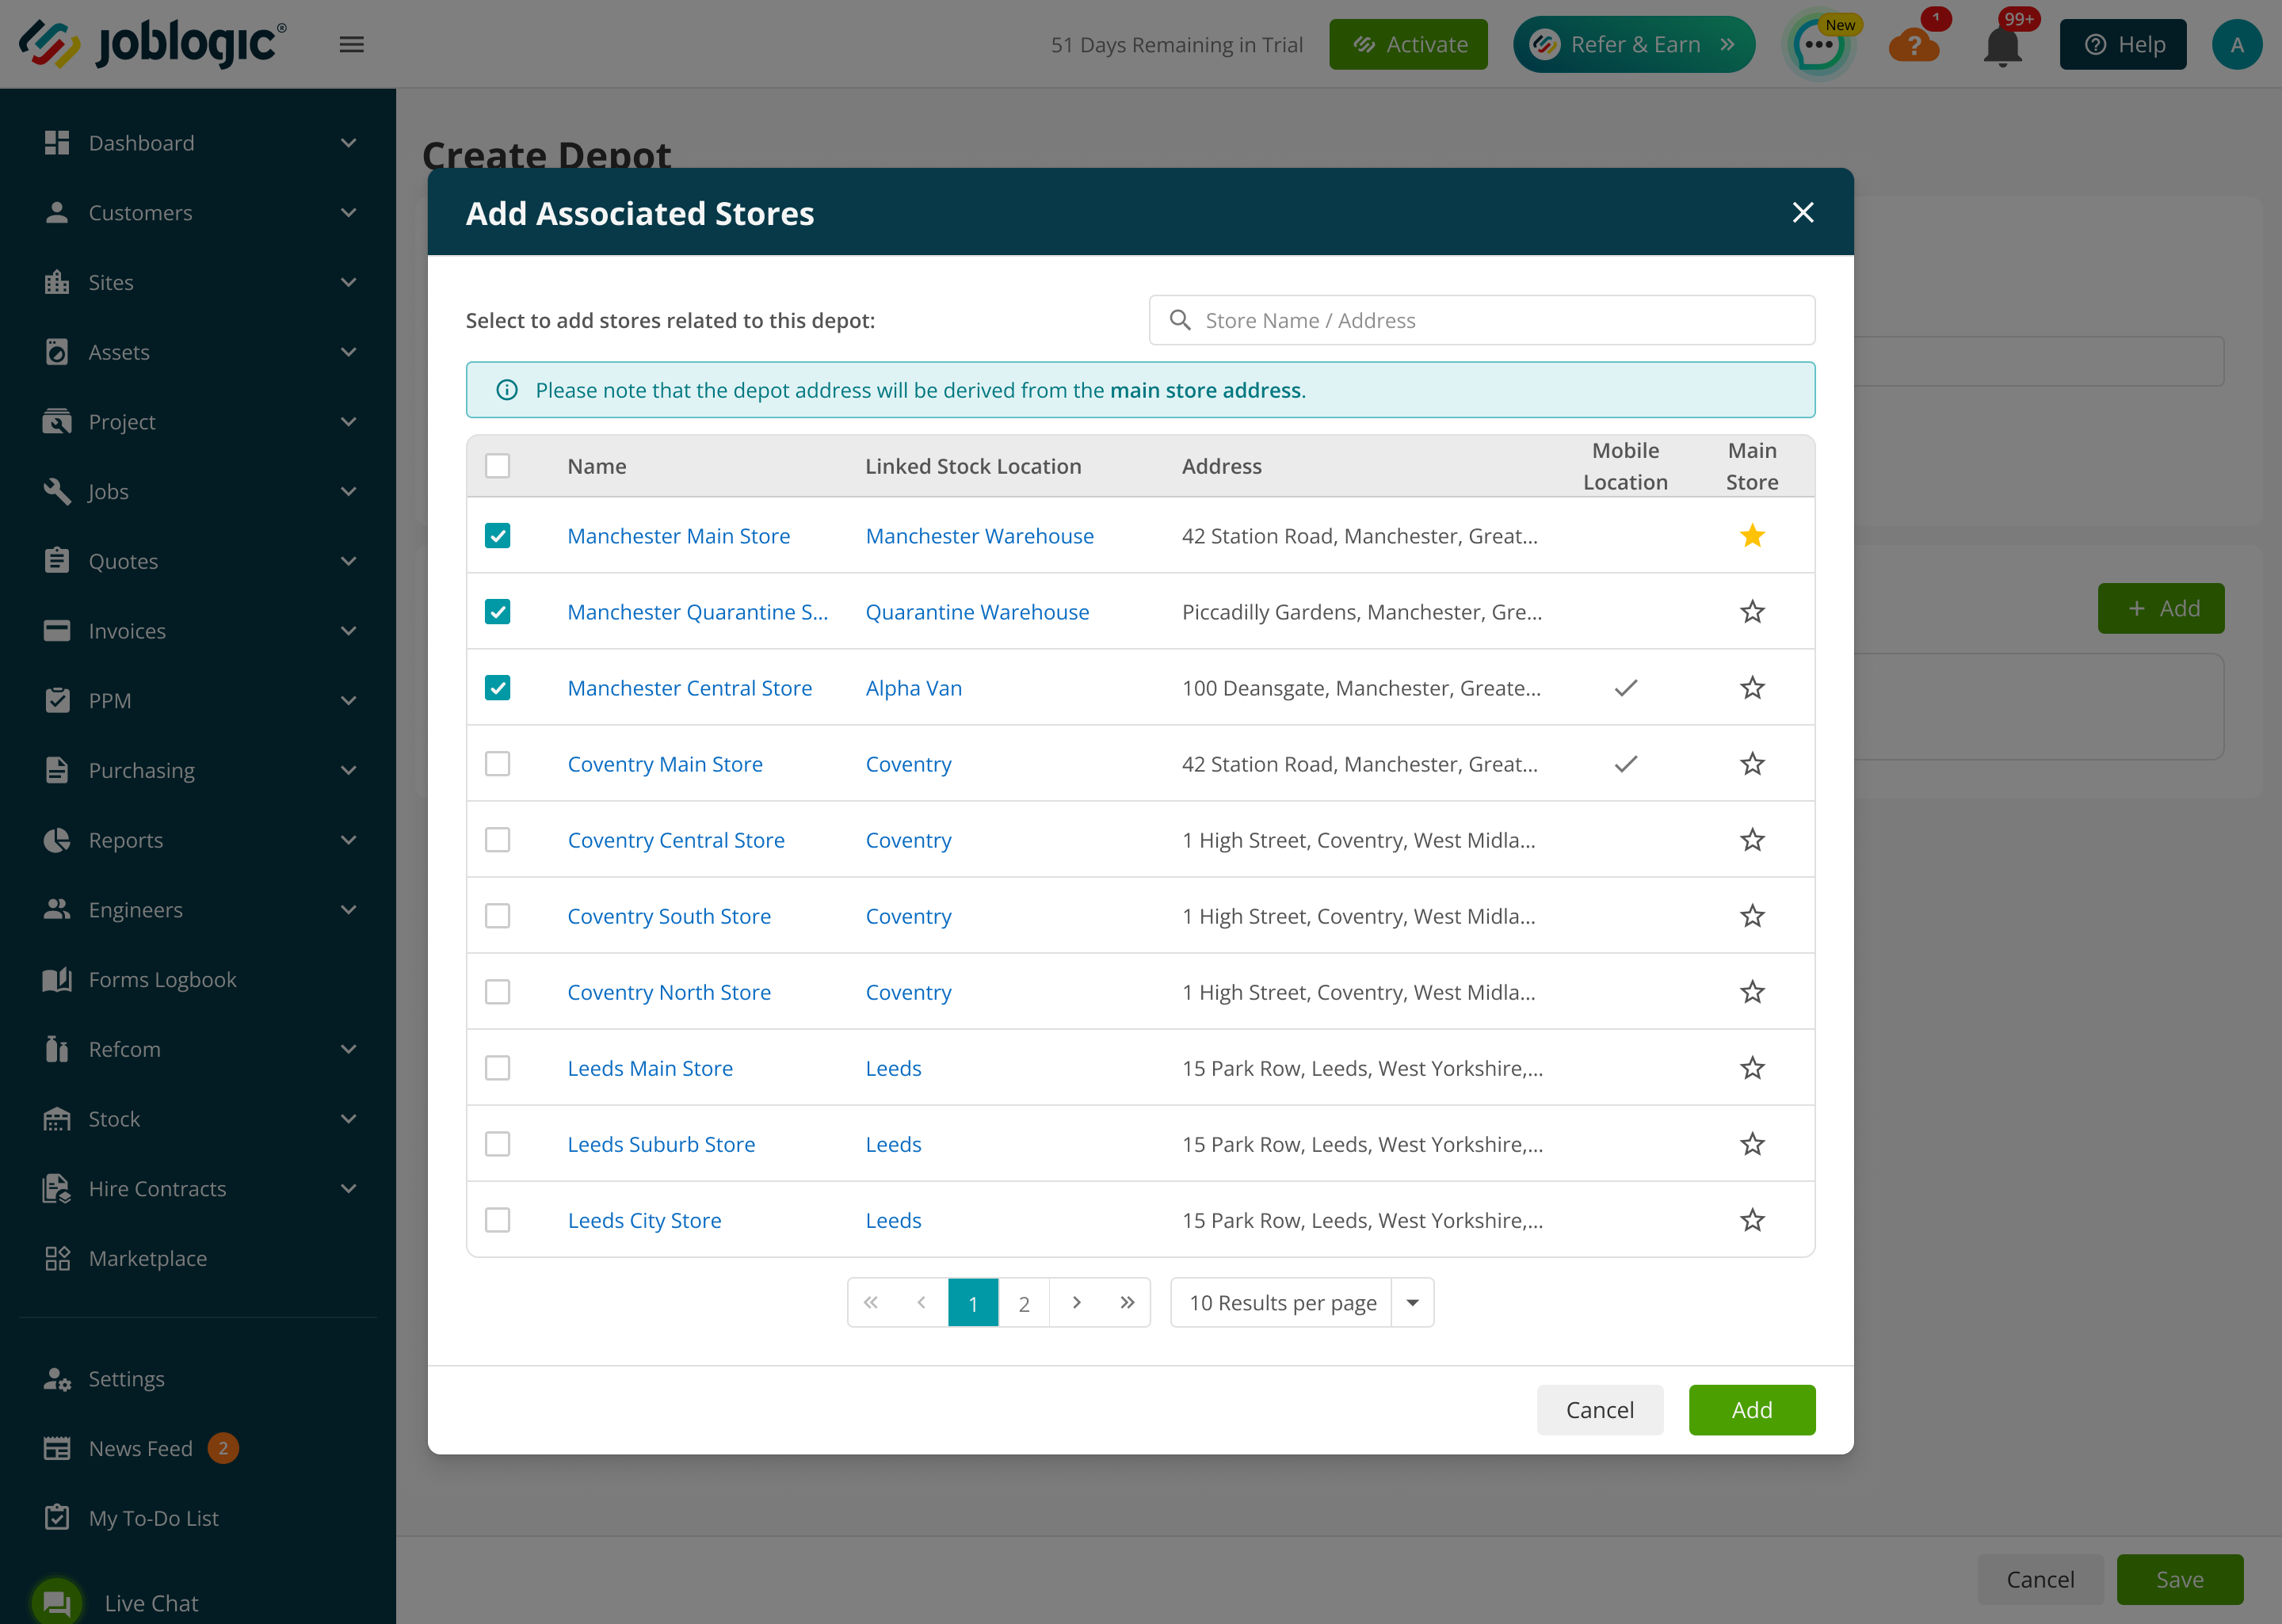
The selected stores appear in Associated Stores. Check that the star identifies the required main store, then select Save to create the depot.
The Depot List identifies the default depot and shows the main store and cost centre for each record. Open a depot name to review or edit its linked stores.
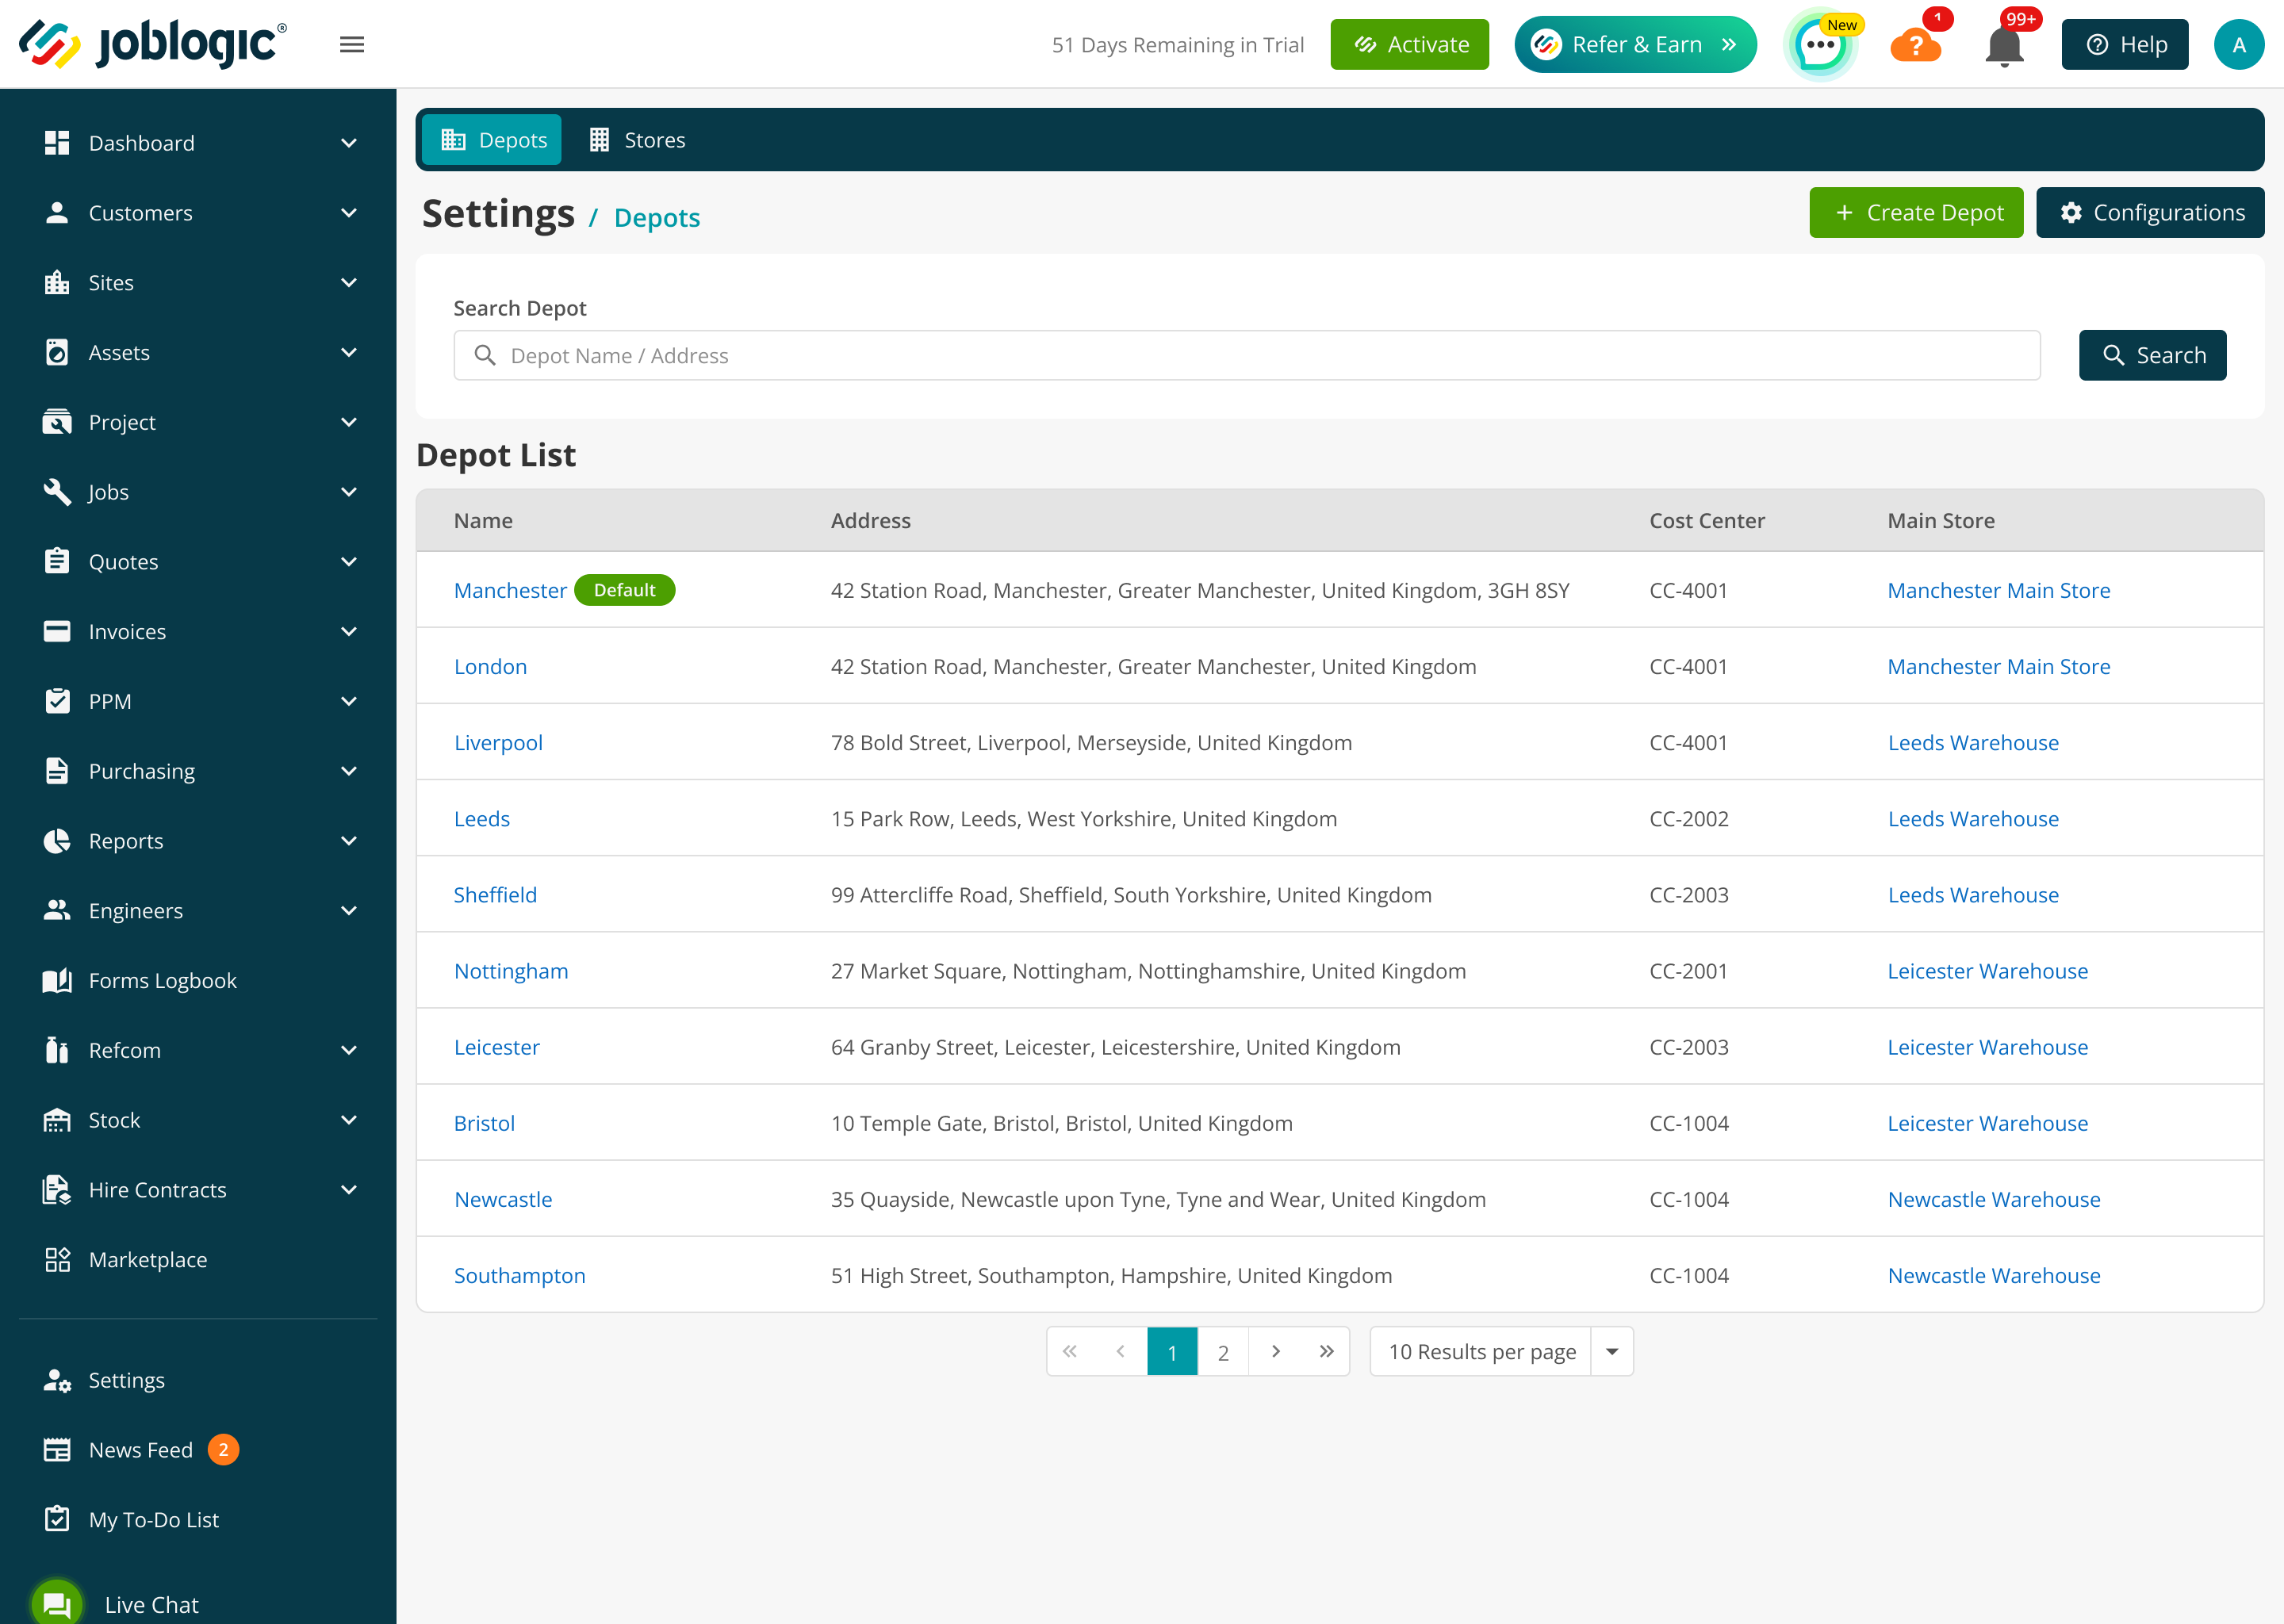
The default depot cannot be deleted. A main store also cannot be removed until another associated store is made the main store.
Choosing how records receive a depot
Before the first depot is created, Joblogic asks how entity records should receive their depot. This choice controls records such as jobs, quotes, purchase orders and contracts.
Inherit Site Depot: new records automatically use the depot assigned to their site. The depot on those records is read-only.
Use Entity Own Depot: each supported record can hold its own depot. The automatic source can be configured and authorised users can change it.
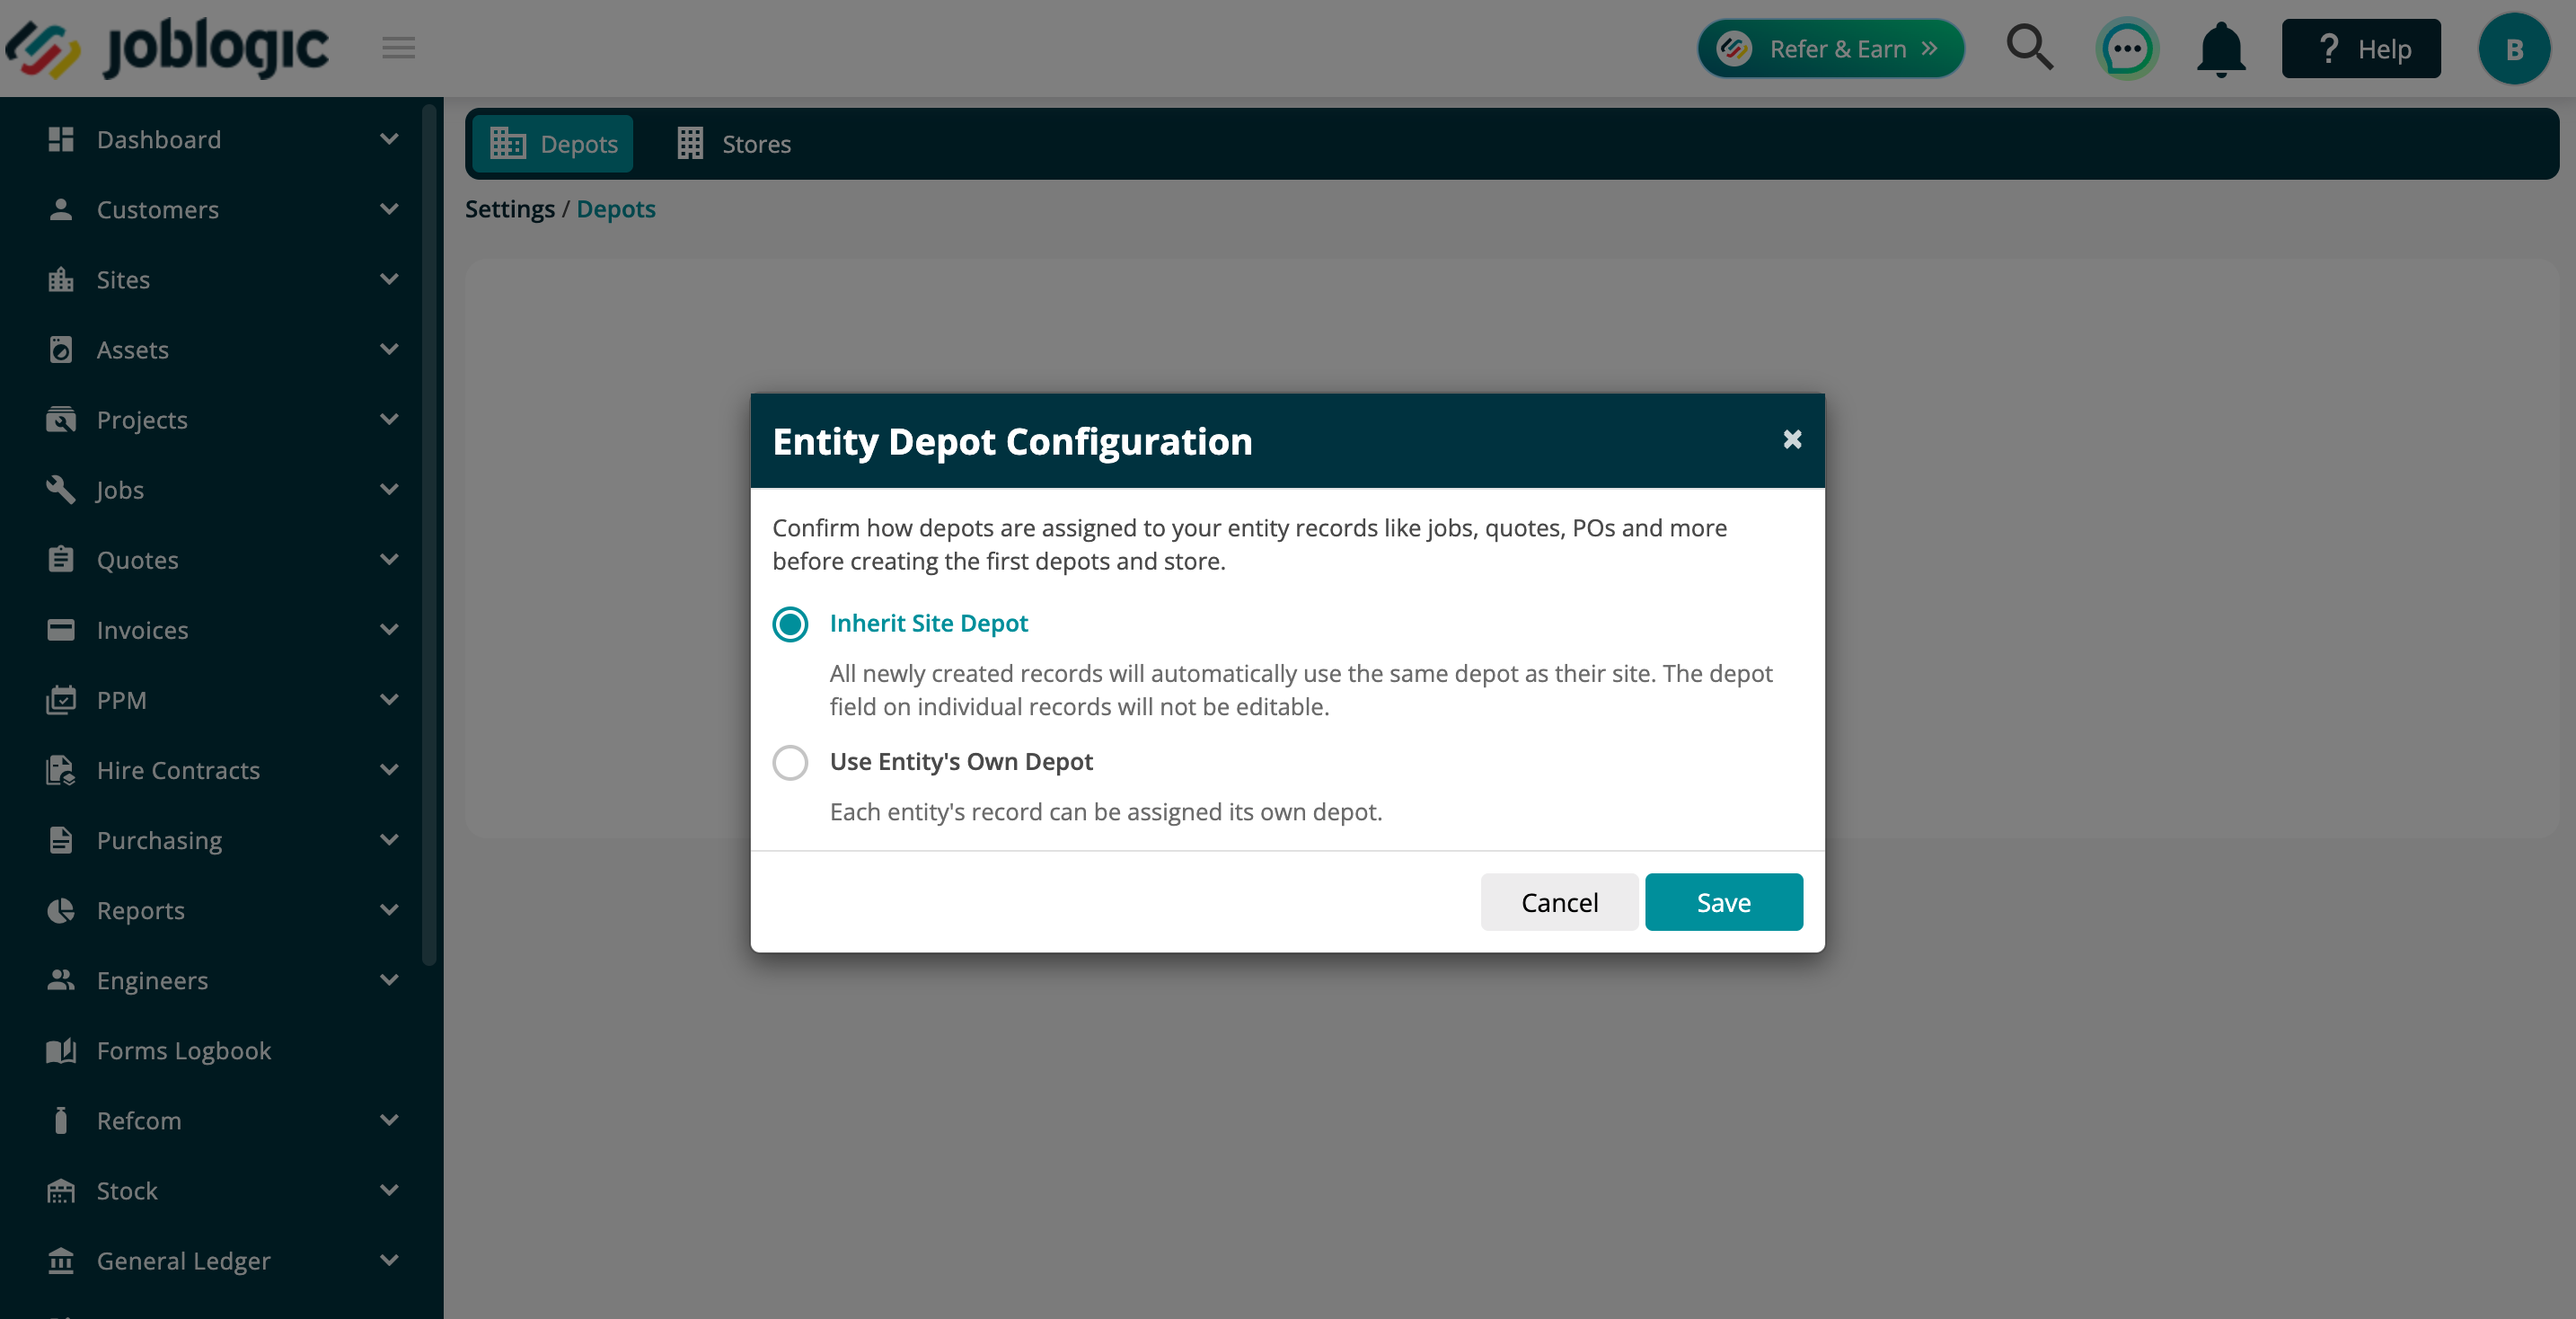
Changing from Use Entity Own Depot to Inherit Site Depot affects new records only. Existing records are not changed automatically; update the relevant customer or site and choose the downstream option when historical records should also be updated.
Configuring depot defaults
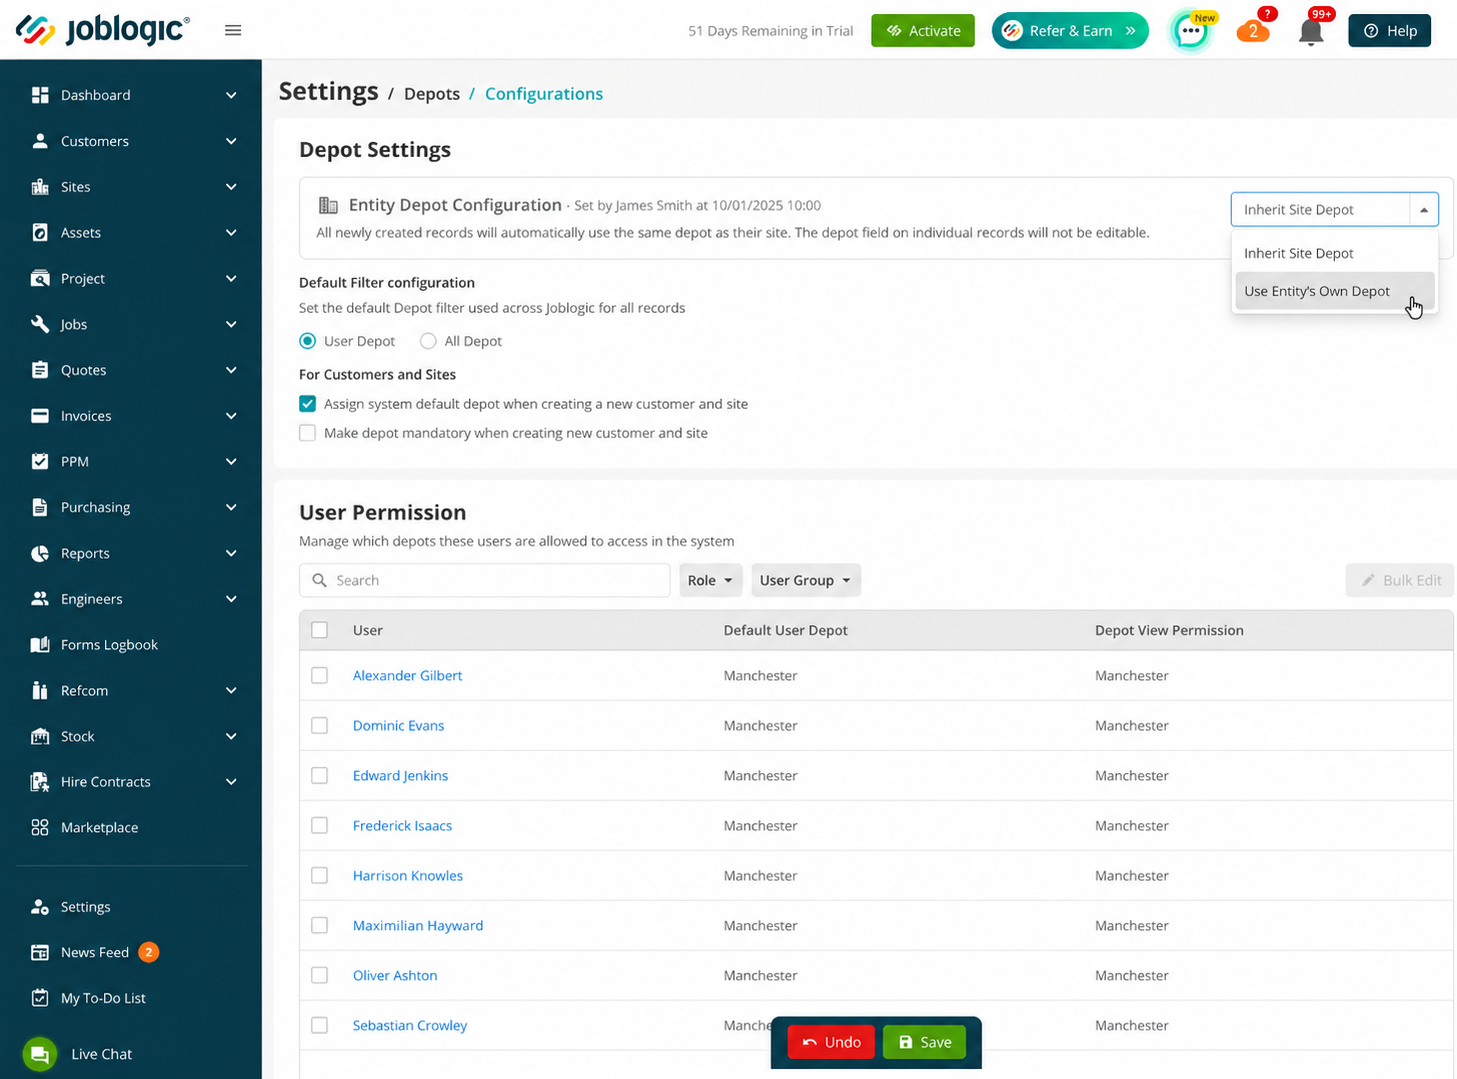
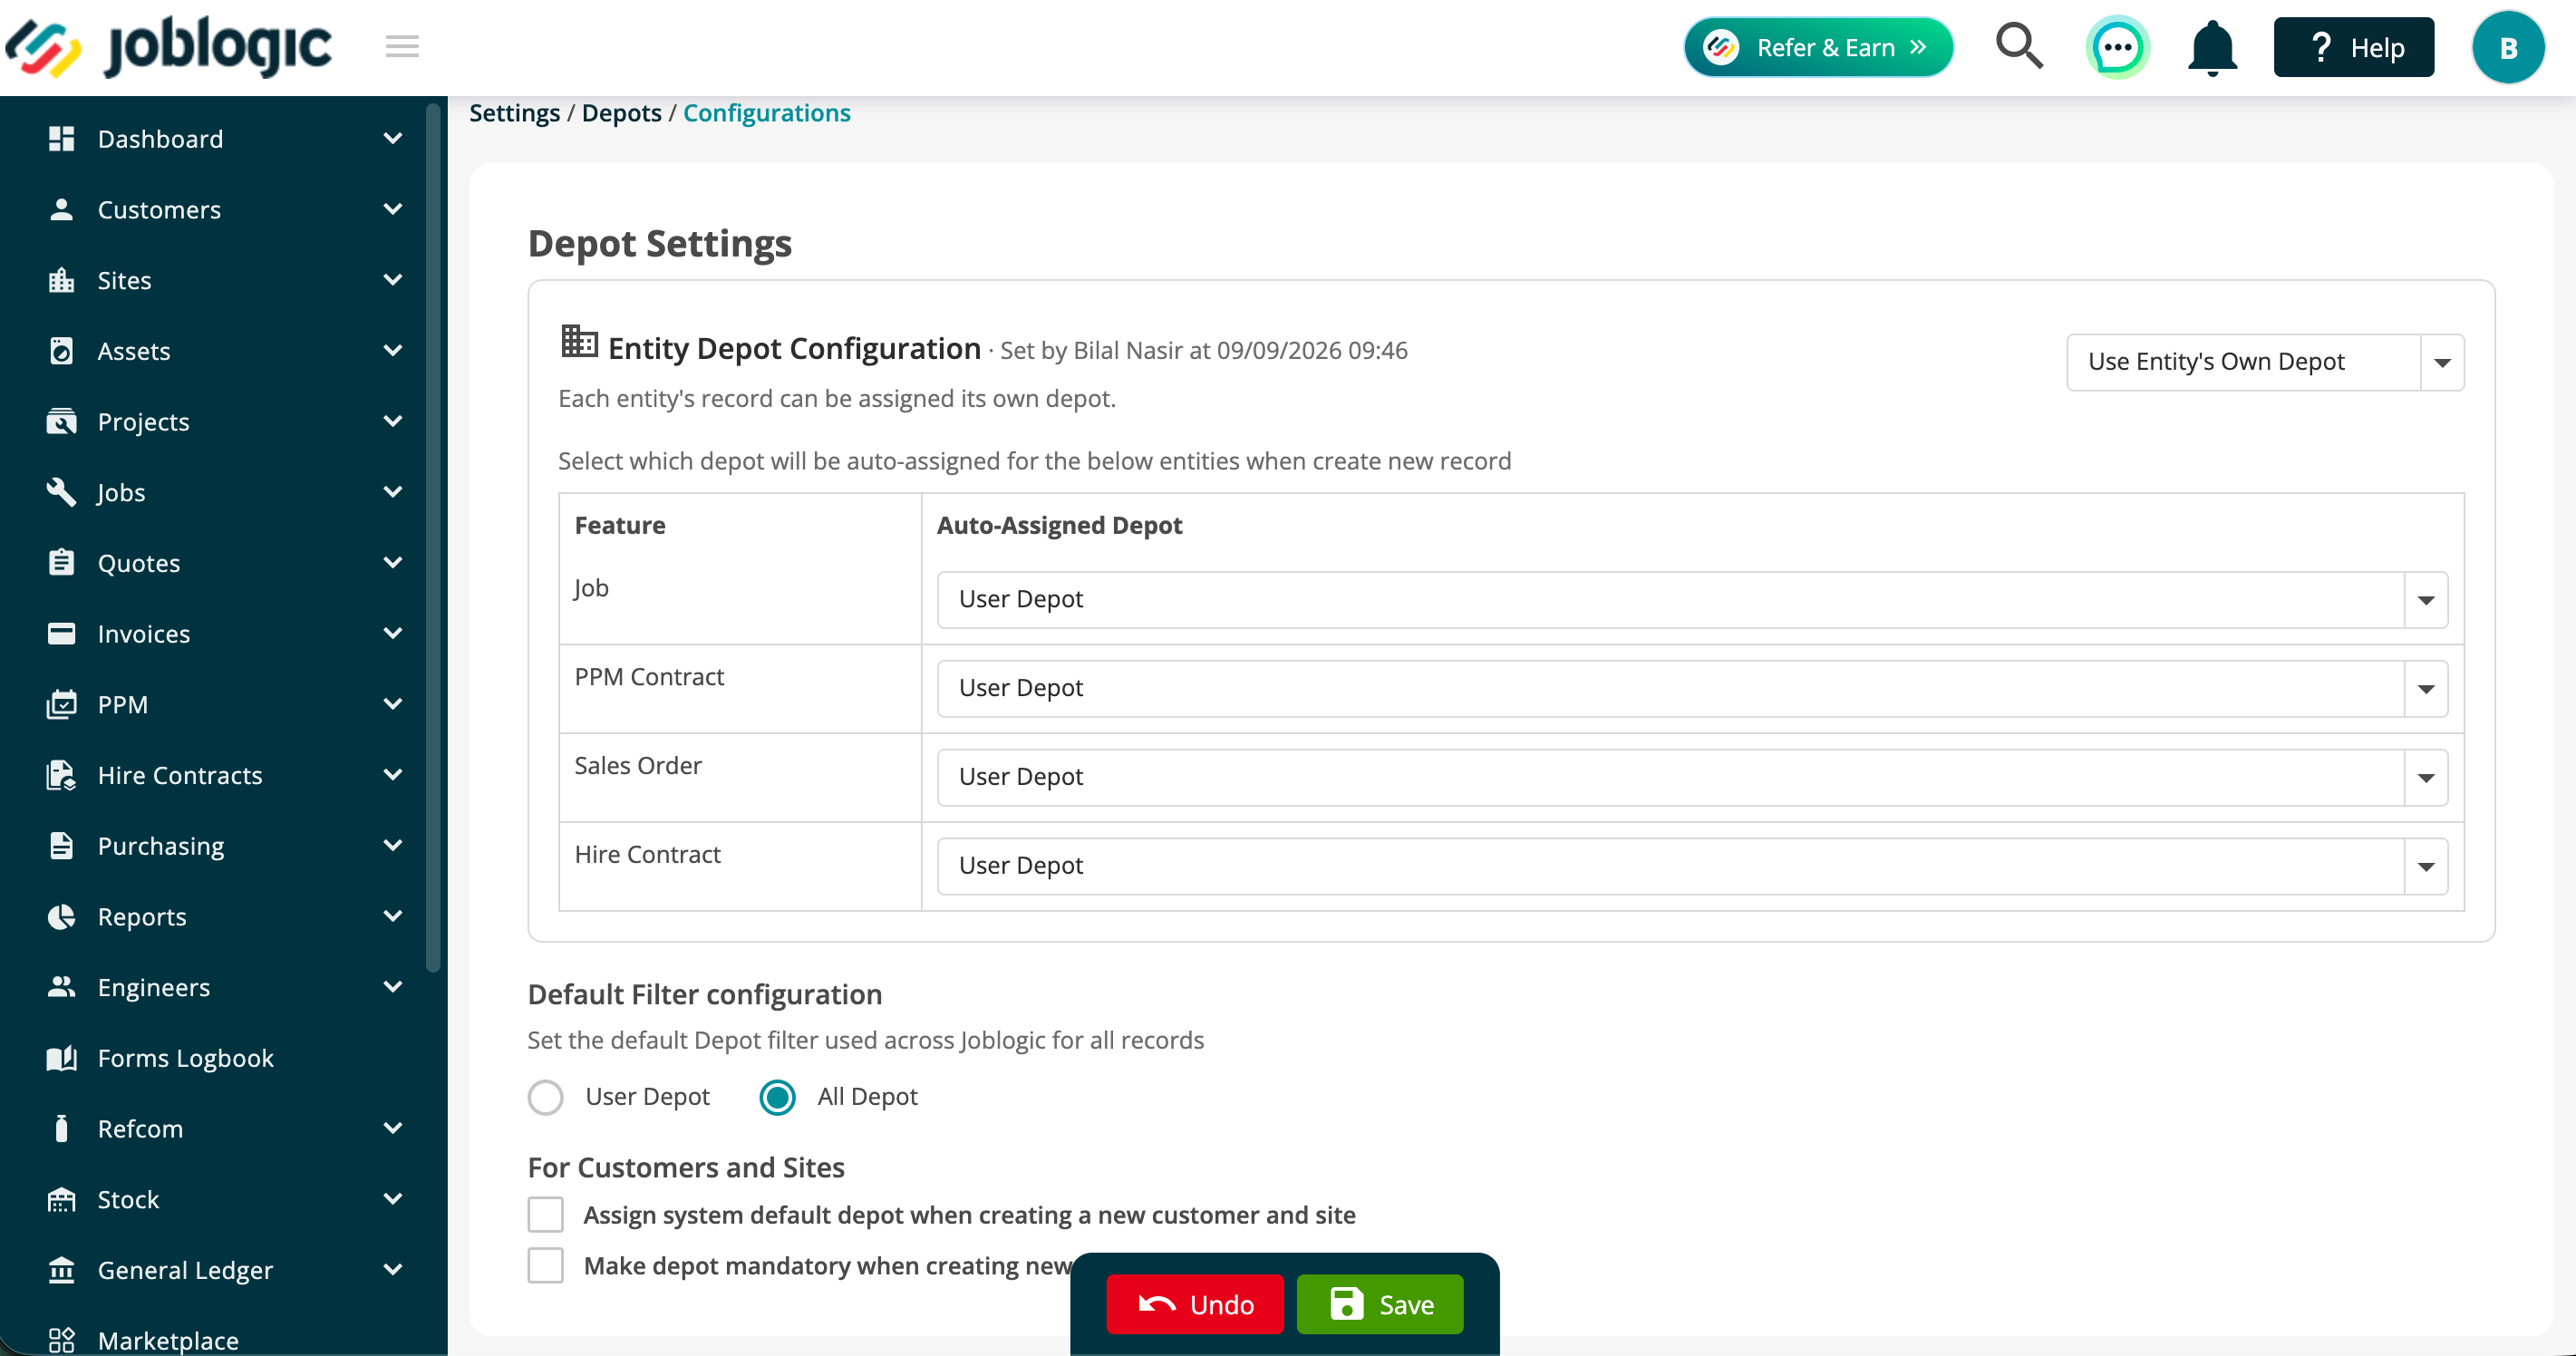
From the Depot List, select Configurations and then Edit. Under Default Filter configuration, choose how depot access should be applied across Joblogic.
User Depot: users work with records belonging to their default depot and any additional depots they are permitted to access.
All Depot: users can see records across every depot in the account.
When Use Entity Own Depot is enabled, Auto-Assigned Depot Configuration sets the preferred source for supported records. Options can include User Depot, Customer Depot, Site Depot and, for hire records, the first equipment or asset depot.
Assigning user depot permissions
The User Permission section controls each user's default depot, additional accessible depots and the features where they may change the assigned depot. Search for a user or filter the list by role or user group, then open the user's name to edit their access.
To apply the same settings to several users, select the users and click Bulk Edit. Choose the Default User Depot, Accessible User Depots and Features Allowing Depot Change, then apply the update.
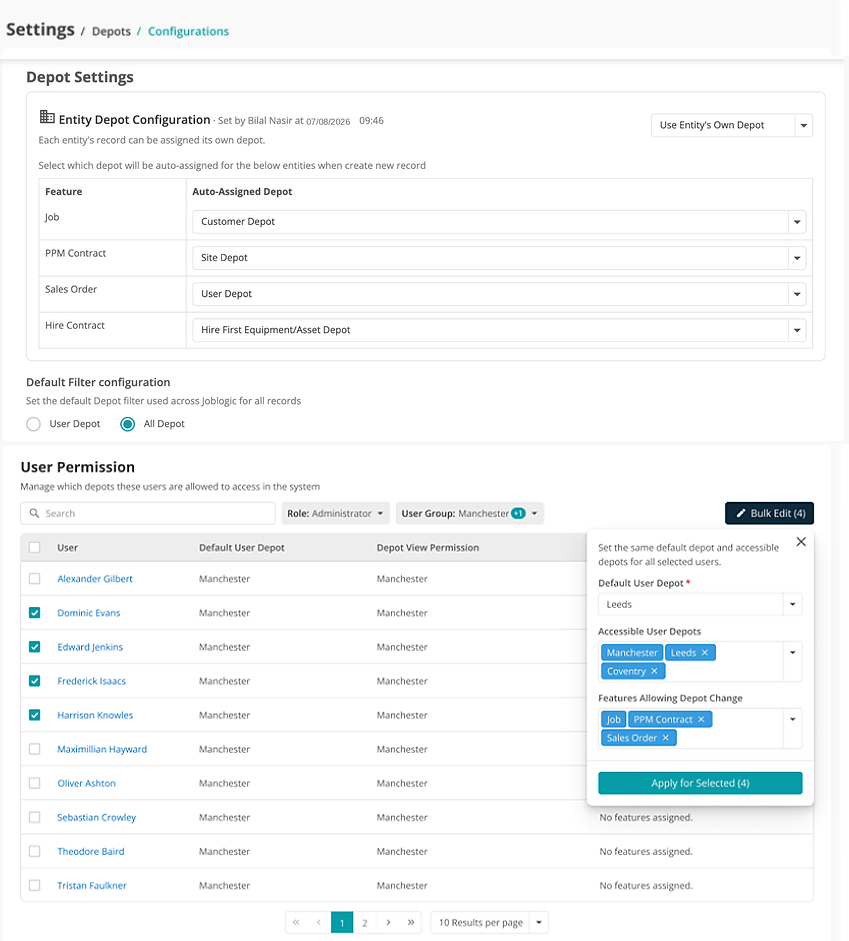
Default User Depot and Accessible User Depots determine the depots assigned to each user. Features Allowing Depot Change determines the areas where the user can change an assigned depot.
The auto-assigned depot options for Job, PPM Contract, Sales Order and Hire Contract appear only when Use Entity’s Own Depot is selected. These options are not available when Inherit Site Depot is selected from the dropdown.
Configuring Marketplace role permissions
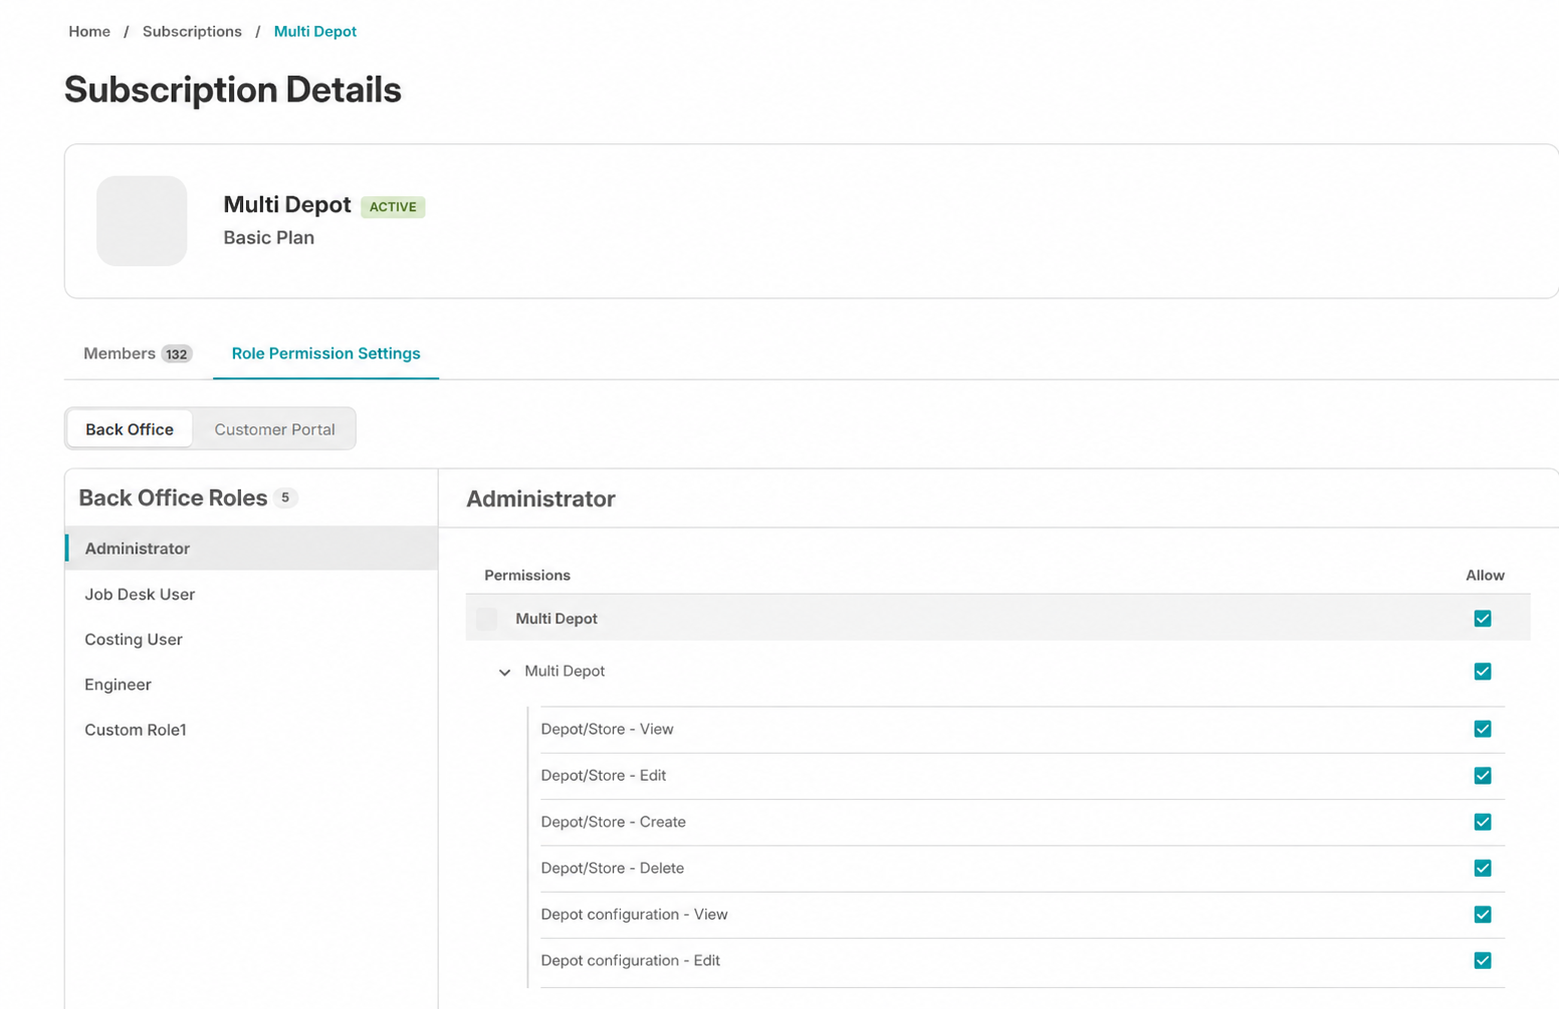
Marketplace administrators can control which back-office roles are allowed to use the Multi Depot app.
In Marketplace, open My Apps > Multi Depot and select Role Permission Settings. Choose a role, then enable the required permissions.
Permissions are available for viewing, creating, editing and deleting depot and store records, as well as viewing and editing depot configurations.
Assigning depots to customers and sites
Customer and site records include a Depot field. The assigned depot controls record visibility for depot-scoped users. The All Customers screen provides a multi-select Depot filter and a Depot column.
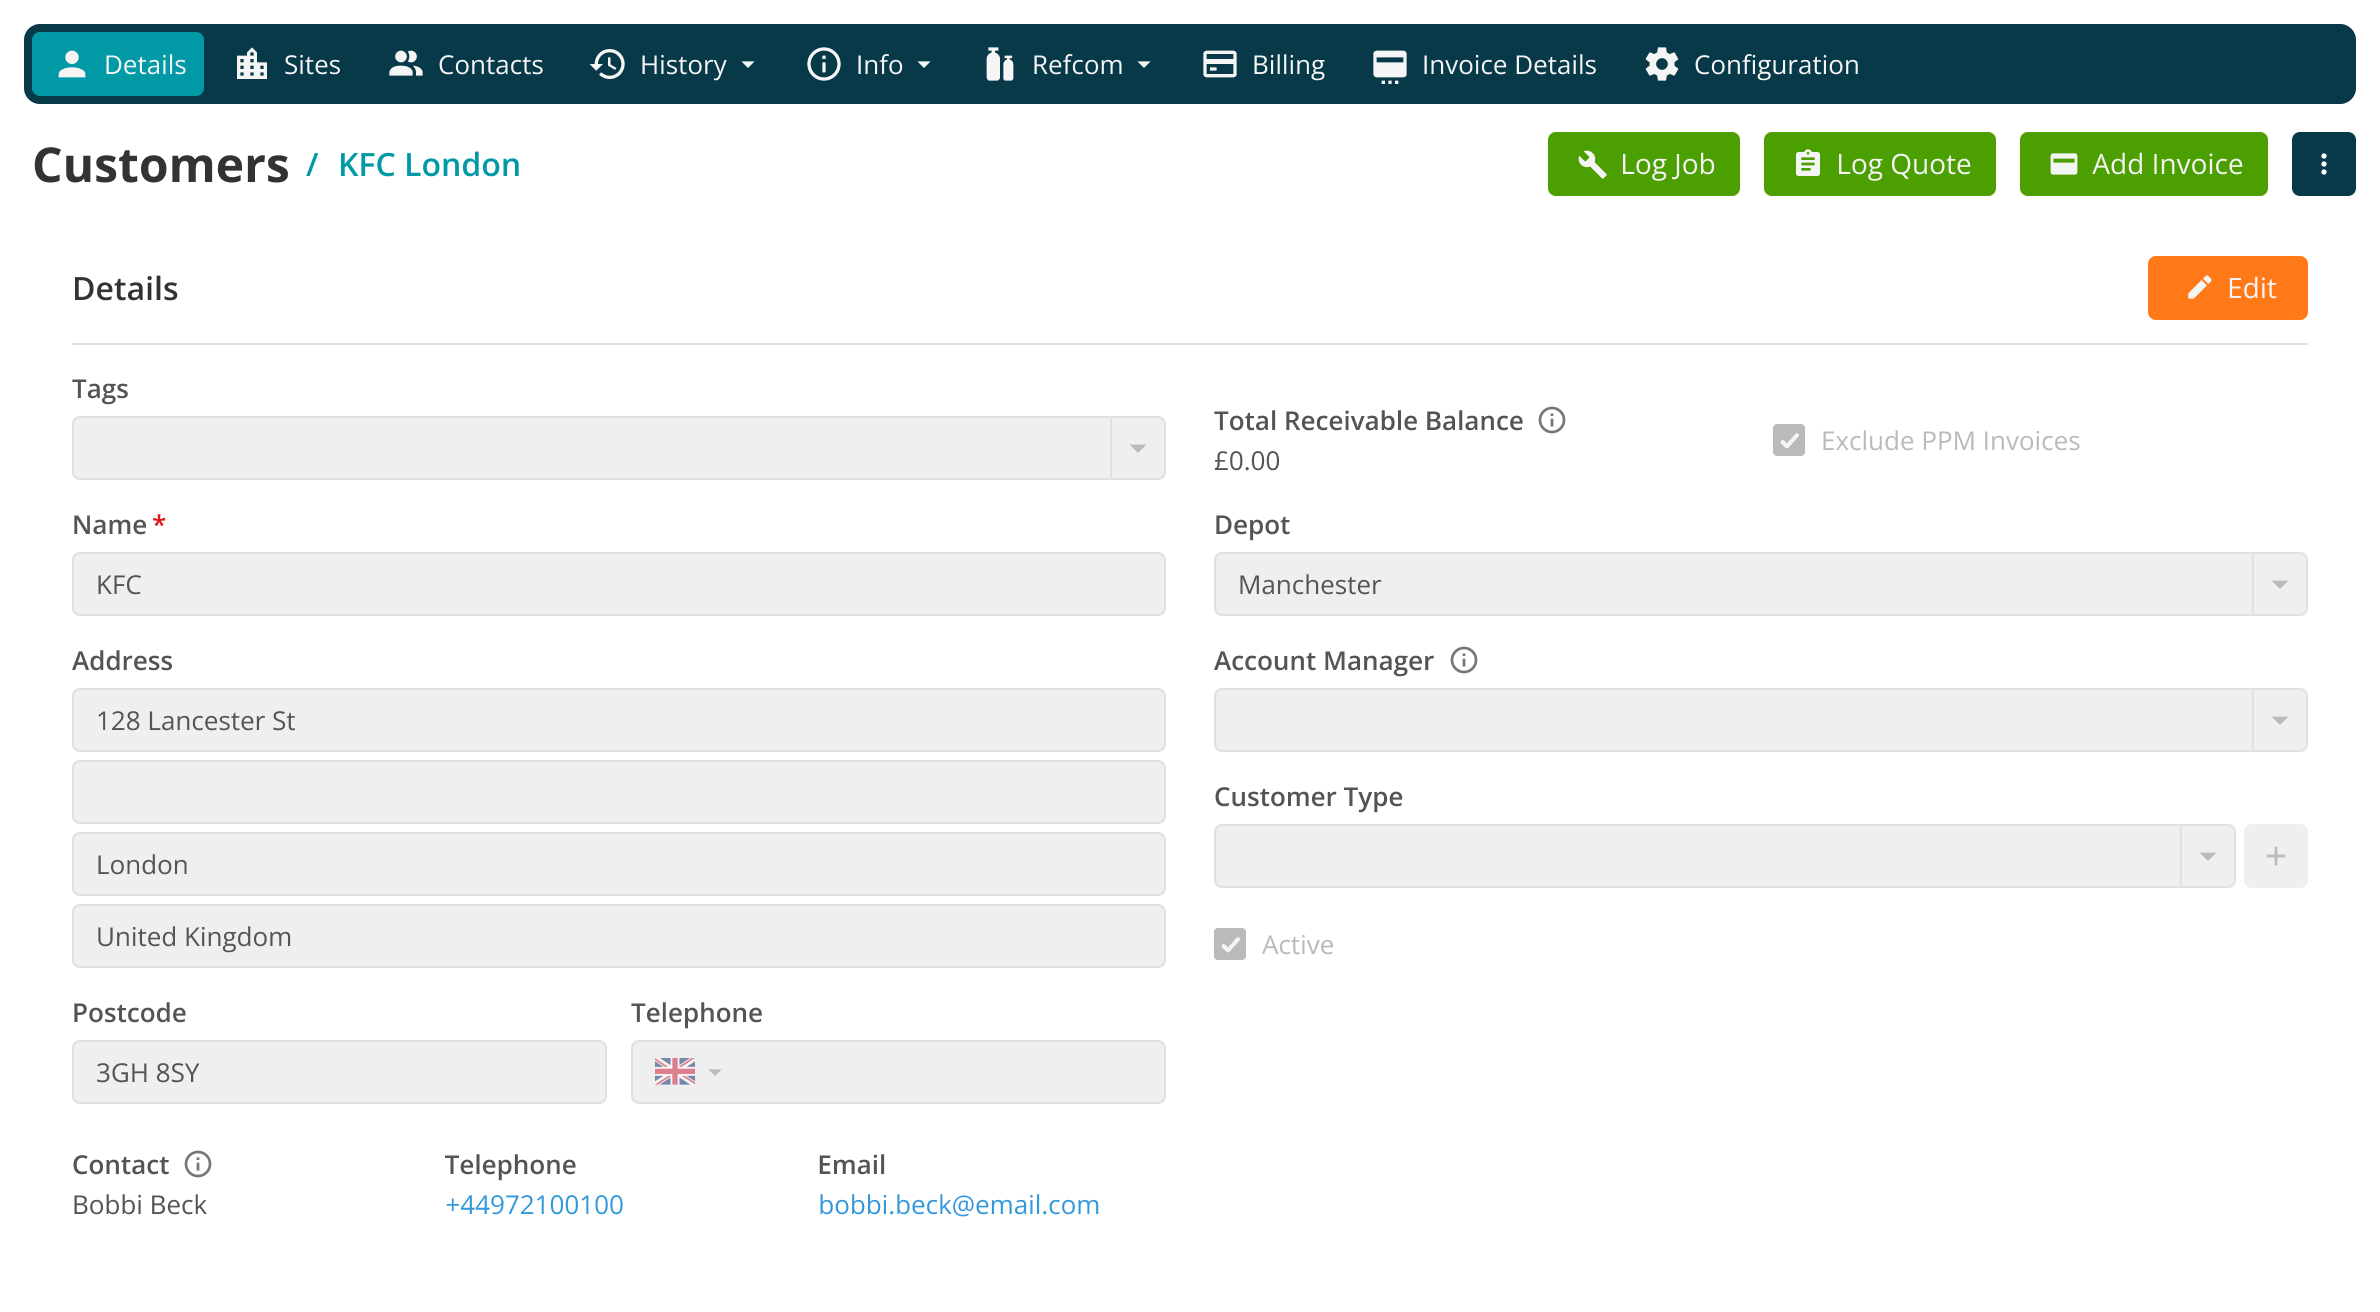
By default, every site inherits its customer's depot. The site depot then becomes the source for downstream records when Inherit Site Depot is selected.
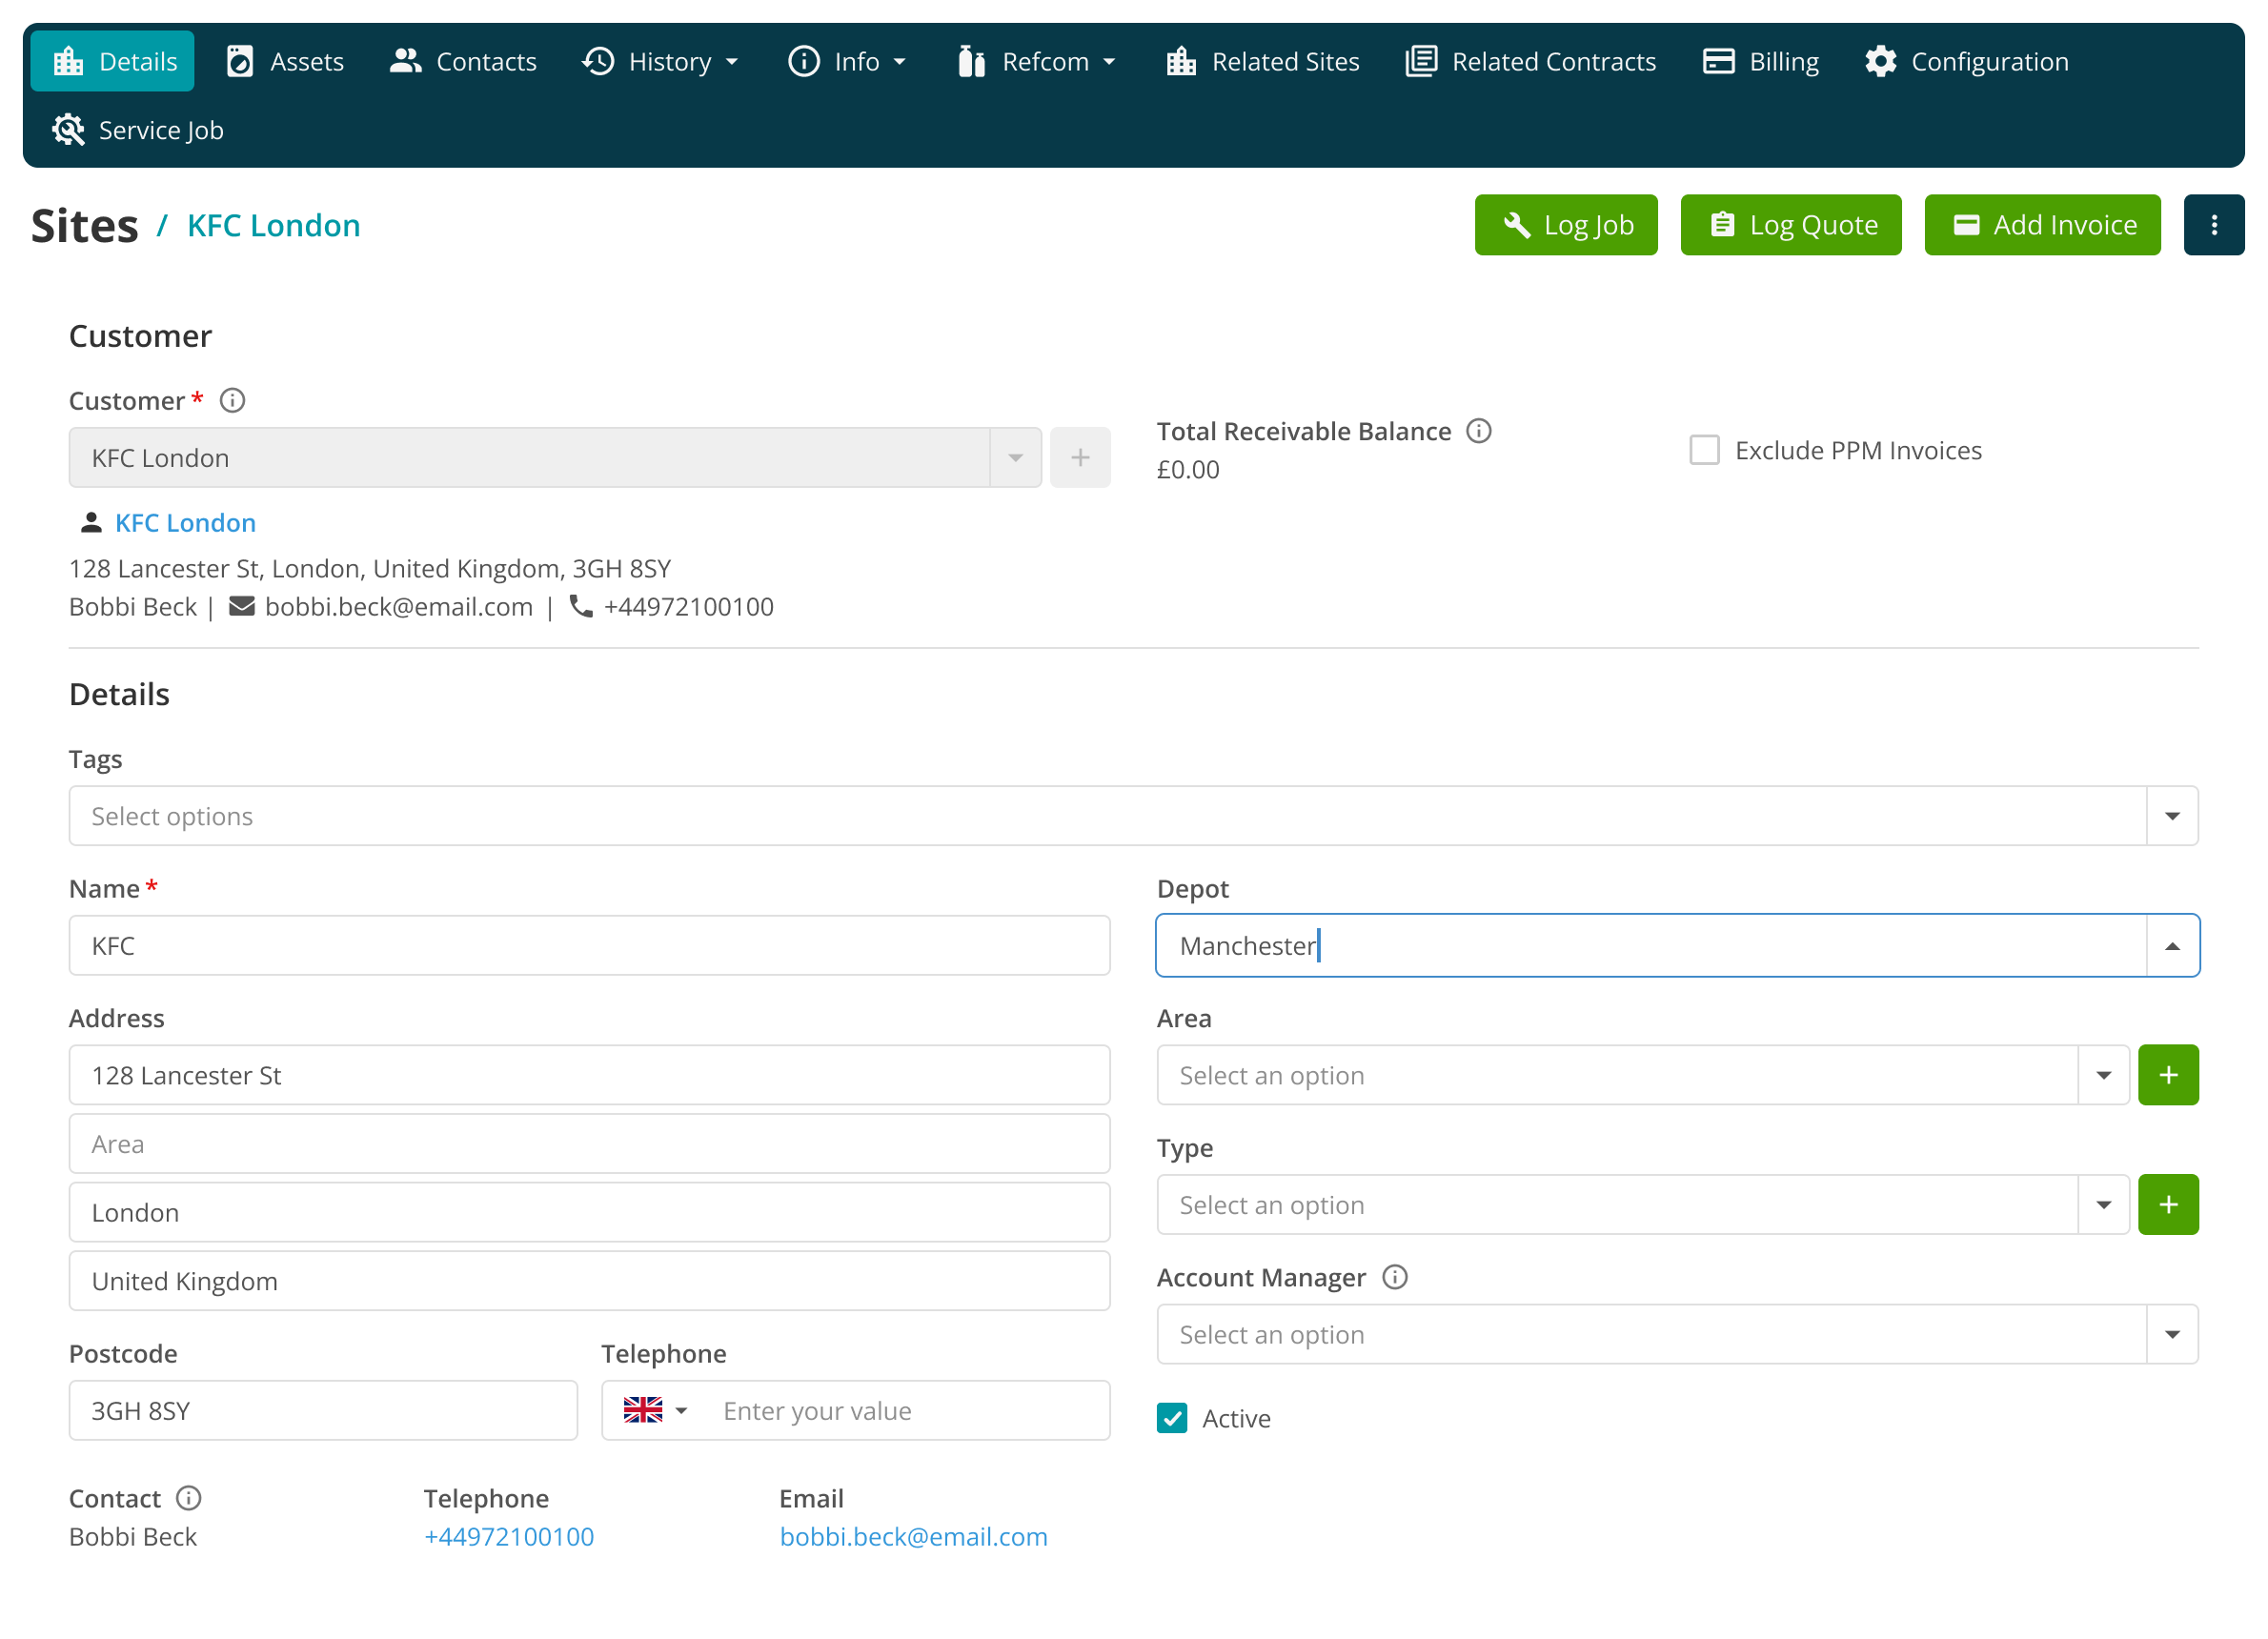
Updating a customer or site depot
Open the customer record, select Edit, choose the required depot from the Depot field and save the change.
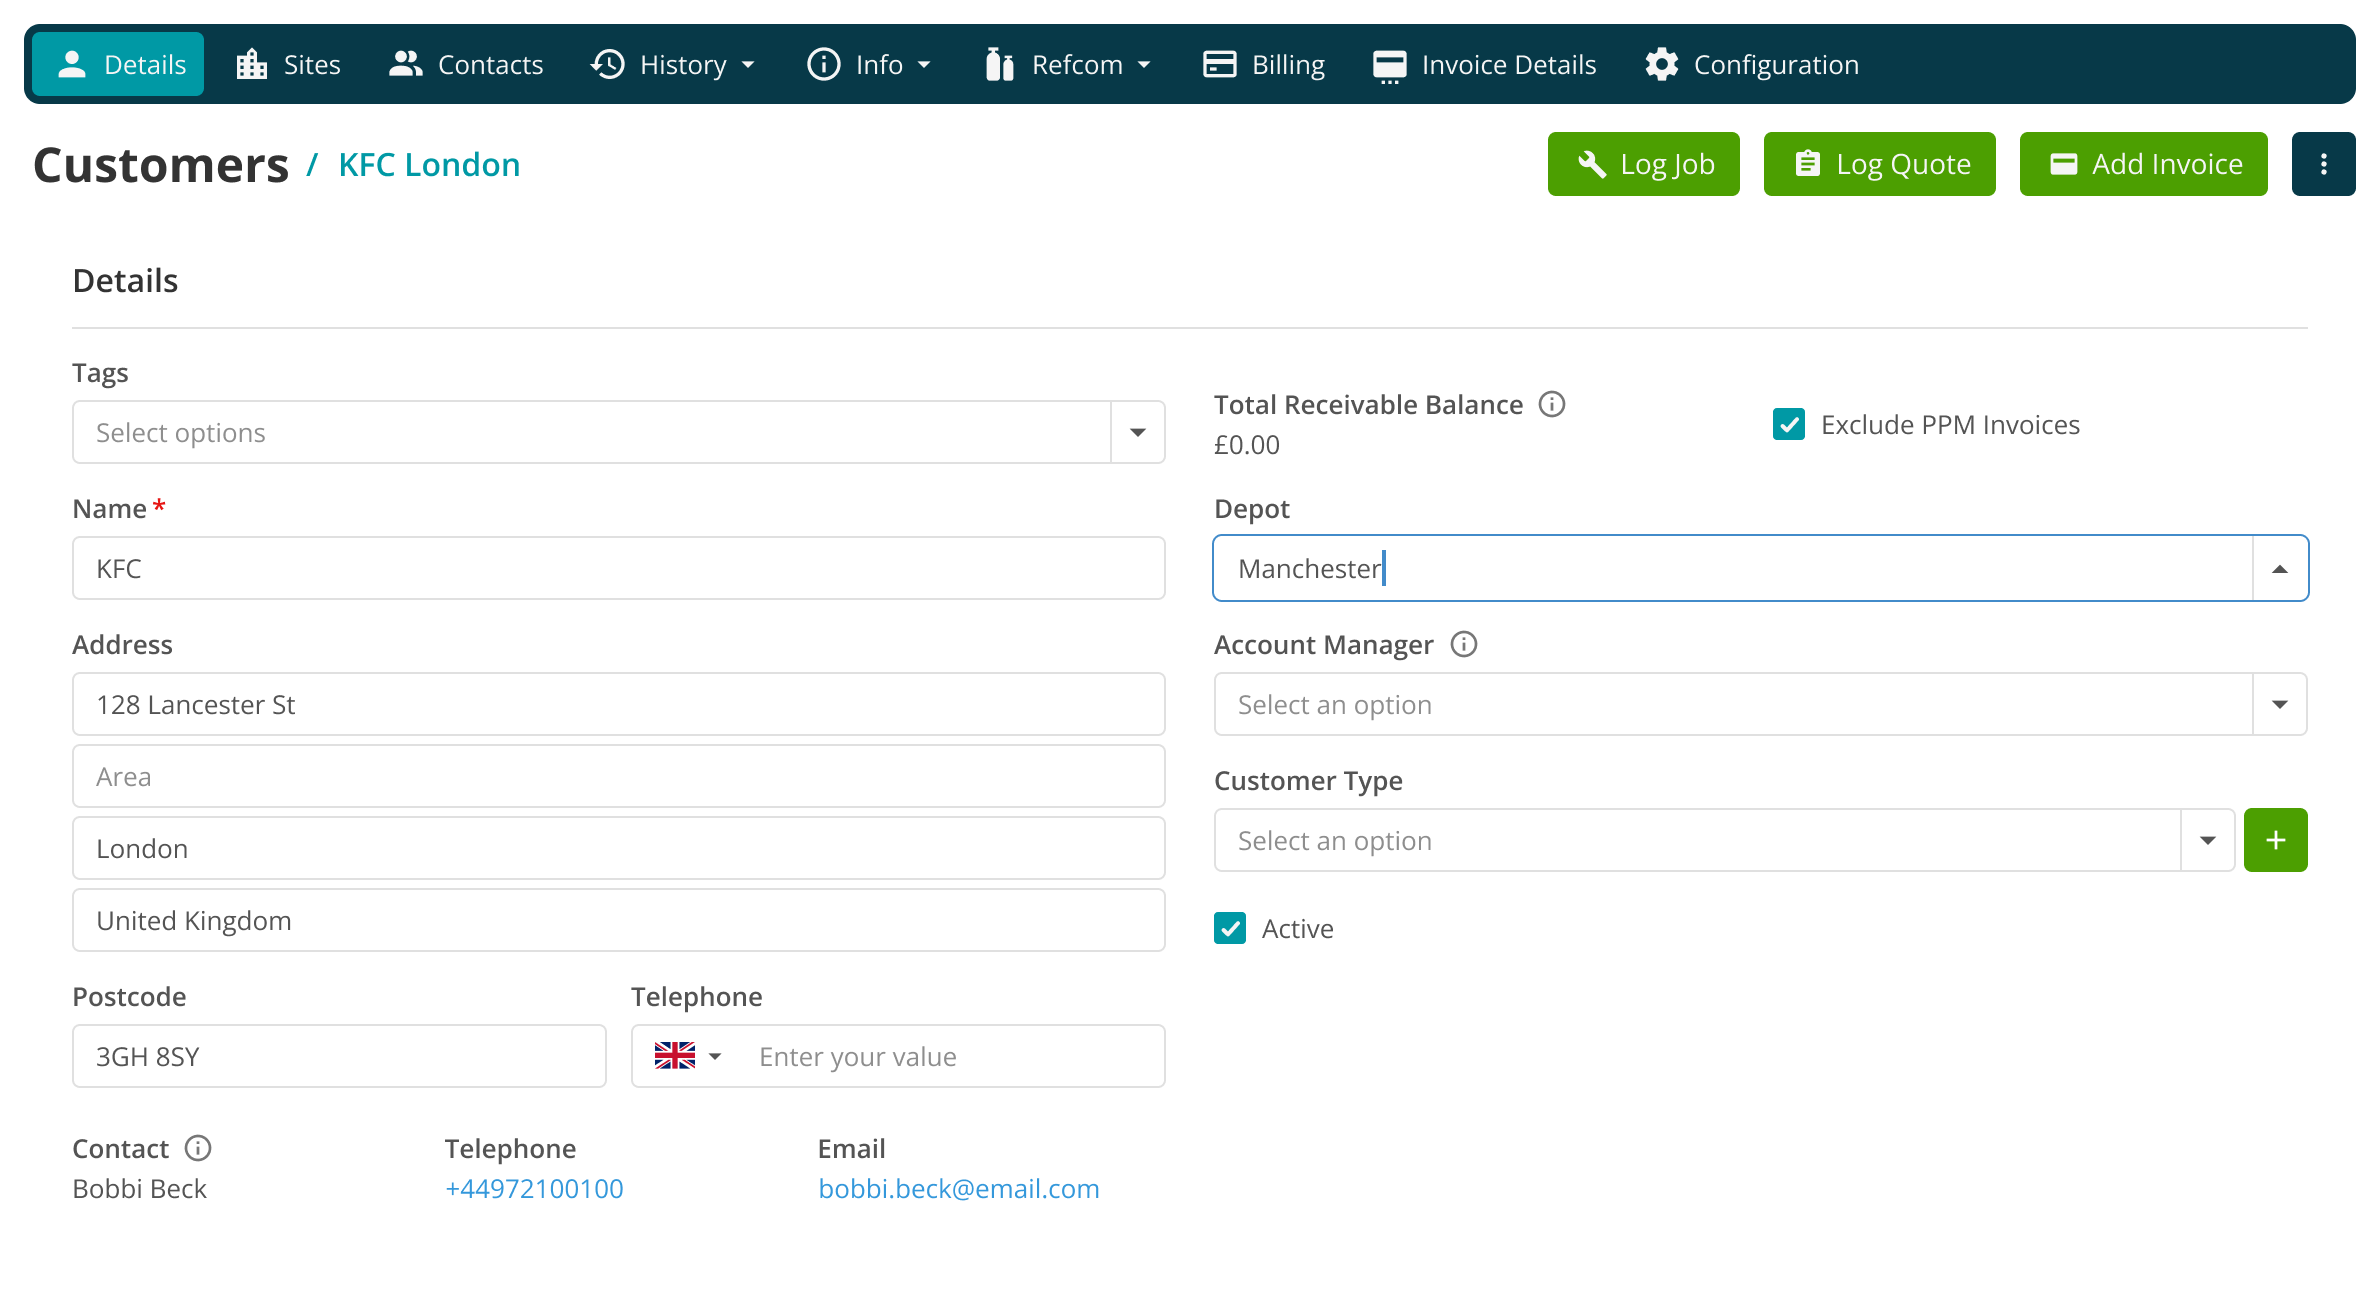
When Inherit Site Depot is enabled, changing a customer depot prompts you to decide whether each site's current depot should be kept or whether all sites should use the new depot. Changing a site depot provides the same control for records beneath that site.
If the downstream update is confirmed, Joblogic updates closed and historical records to the new site depot. Records still in progress keep their current depot. Records without a depot are assigned the new site depot.
When Use Entity Own Depot is enabled, changing a customer or site depot does not change depots on linked records. Closed and work-in-progress records keep their existing depot.
Requiring or automatically assigning a depot
To require a depot on newly created customers and sites, navigate to Settings > System Setup and enable Make Depot Mandatory on customer & site. This setting is available while the Multi Depot app is subscribed.
Auto-fetch depot on Customer/Site controls whether the default depot is automatically selected on newly created customer and site records. It is enabled by default. When the setting is cleared, the default depot is not automatically populated on newly created customer and site records.
Using cost centres with depots
Cost centres are managed from Settings > Library. Each cost centre contains a code and description. When creating or editing a depot, select the required cost centre from the Cost Centre dropdown. A cost centre that is already used by a depot cannot be deleted.
Working with stock locations and transfers
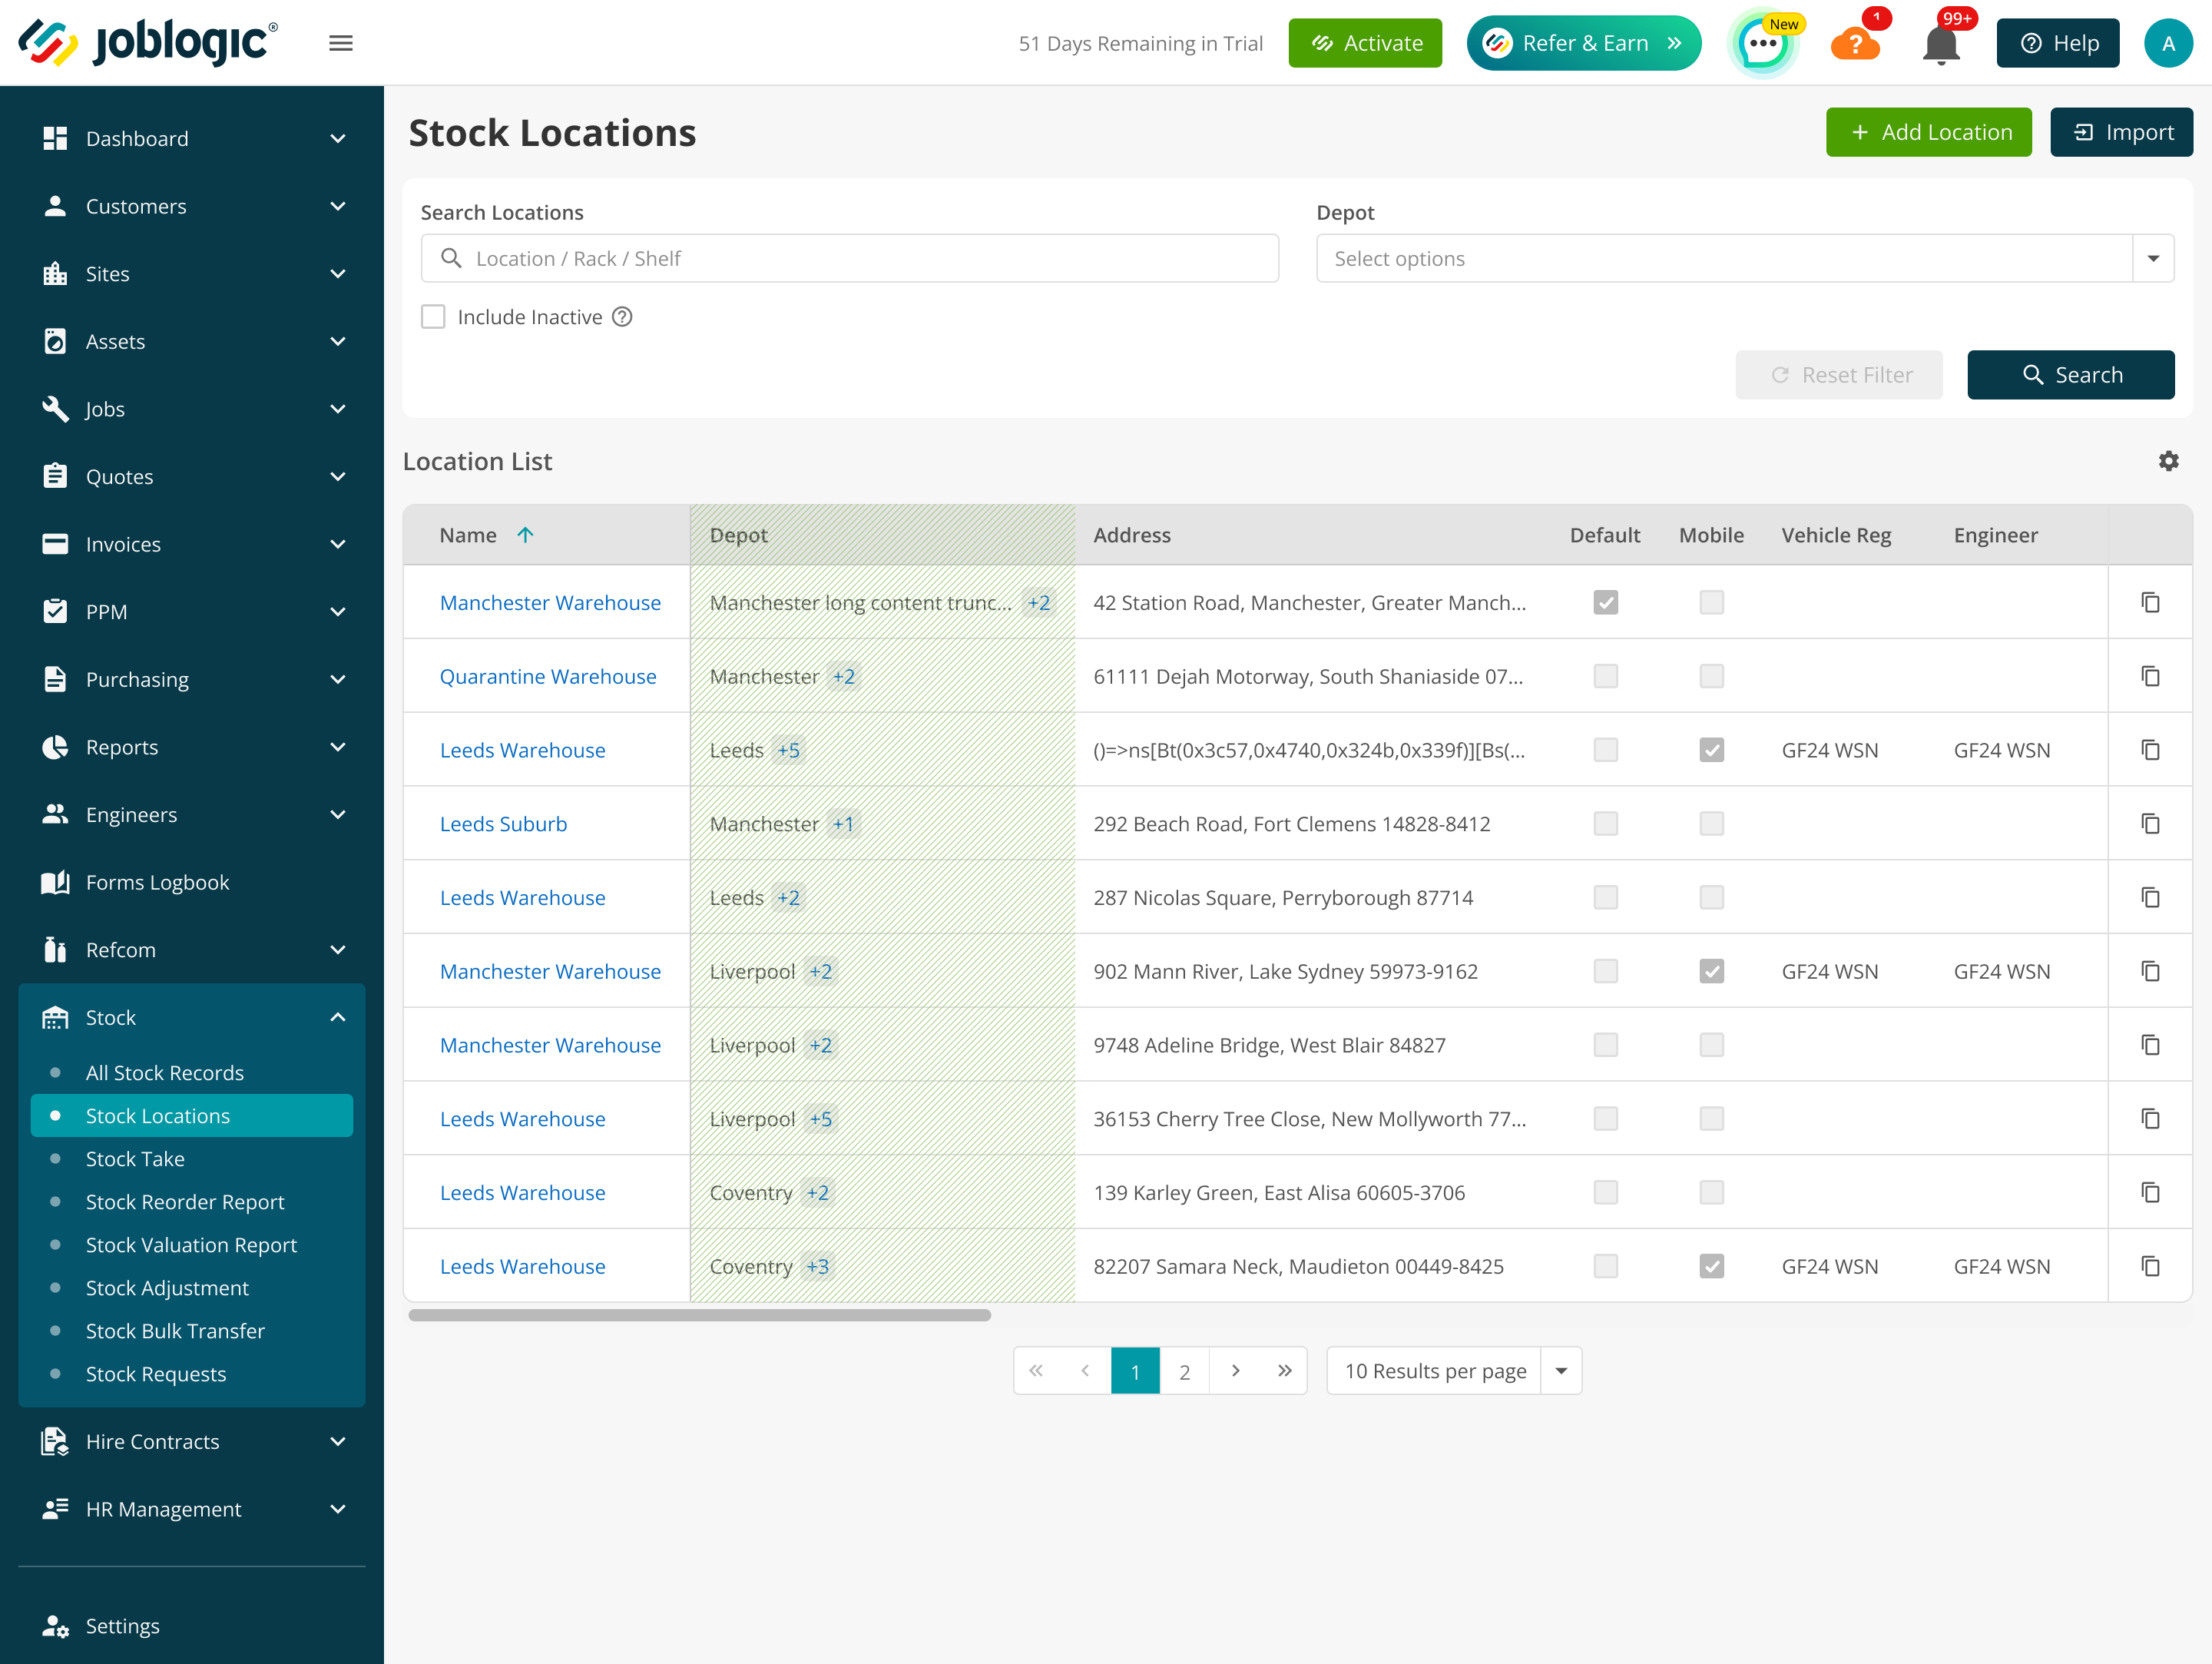
Stores connect depots to stock locations. Users can see only stock locations belonging to depots they are permitted to access. Stock Location and Stock Record screens show depot information and provide depot filters.
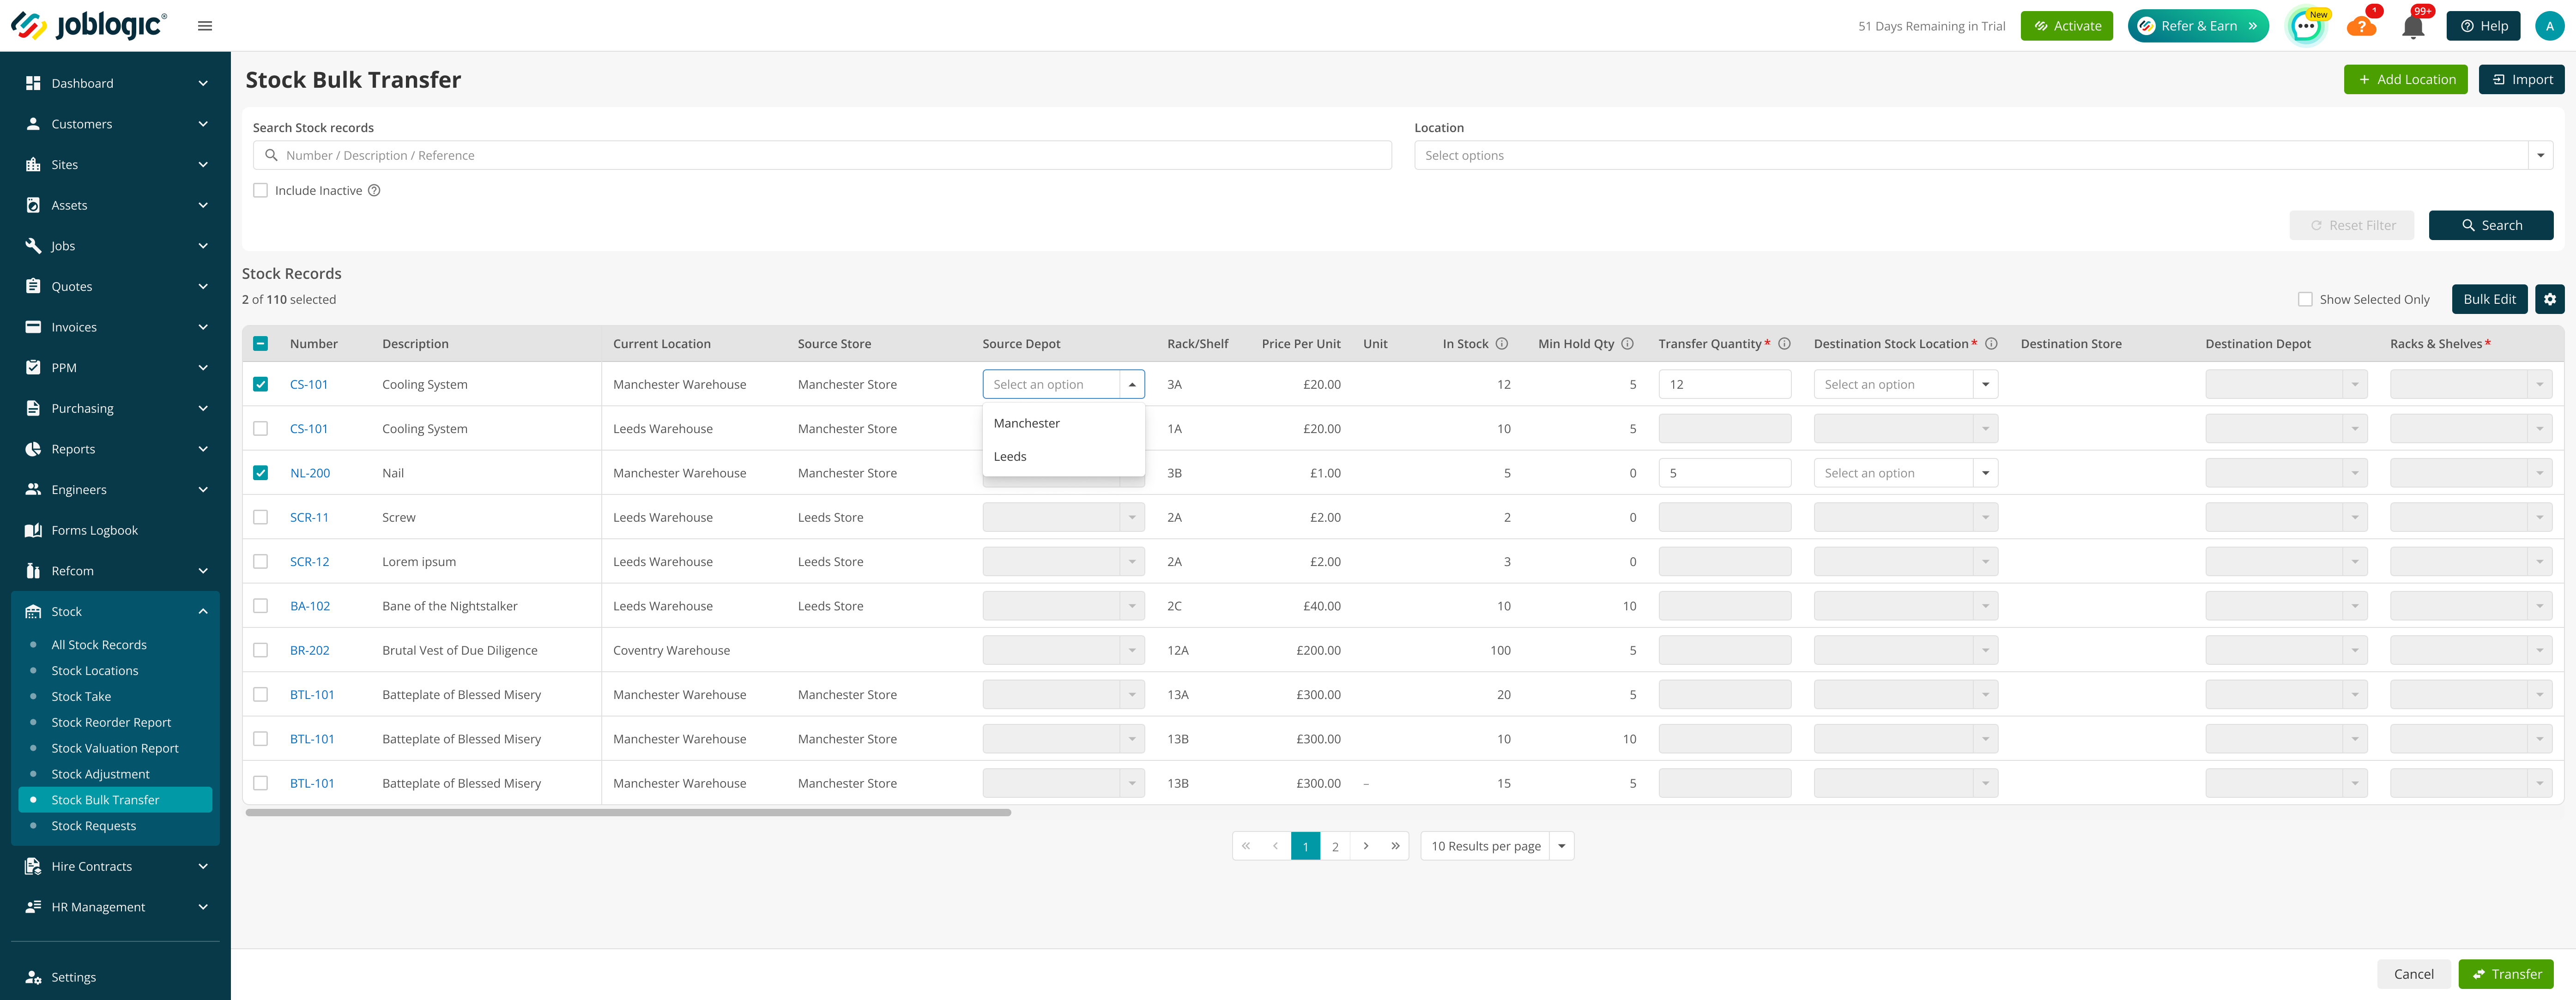
For a bulk stock transfer, select the source depot and store and the destination depot and store. If only one valid option exists, Joblogic can populate it automatically; where several options exist, select the required combination.
To transfer an individual stock record, open its Stock Location tab and select Transfer Stock. Confirm the source location, store and depot, then choose the destination location, store and depot and enter the quantity to transfer.
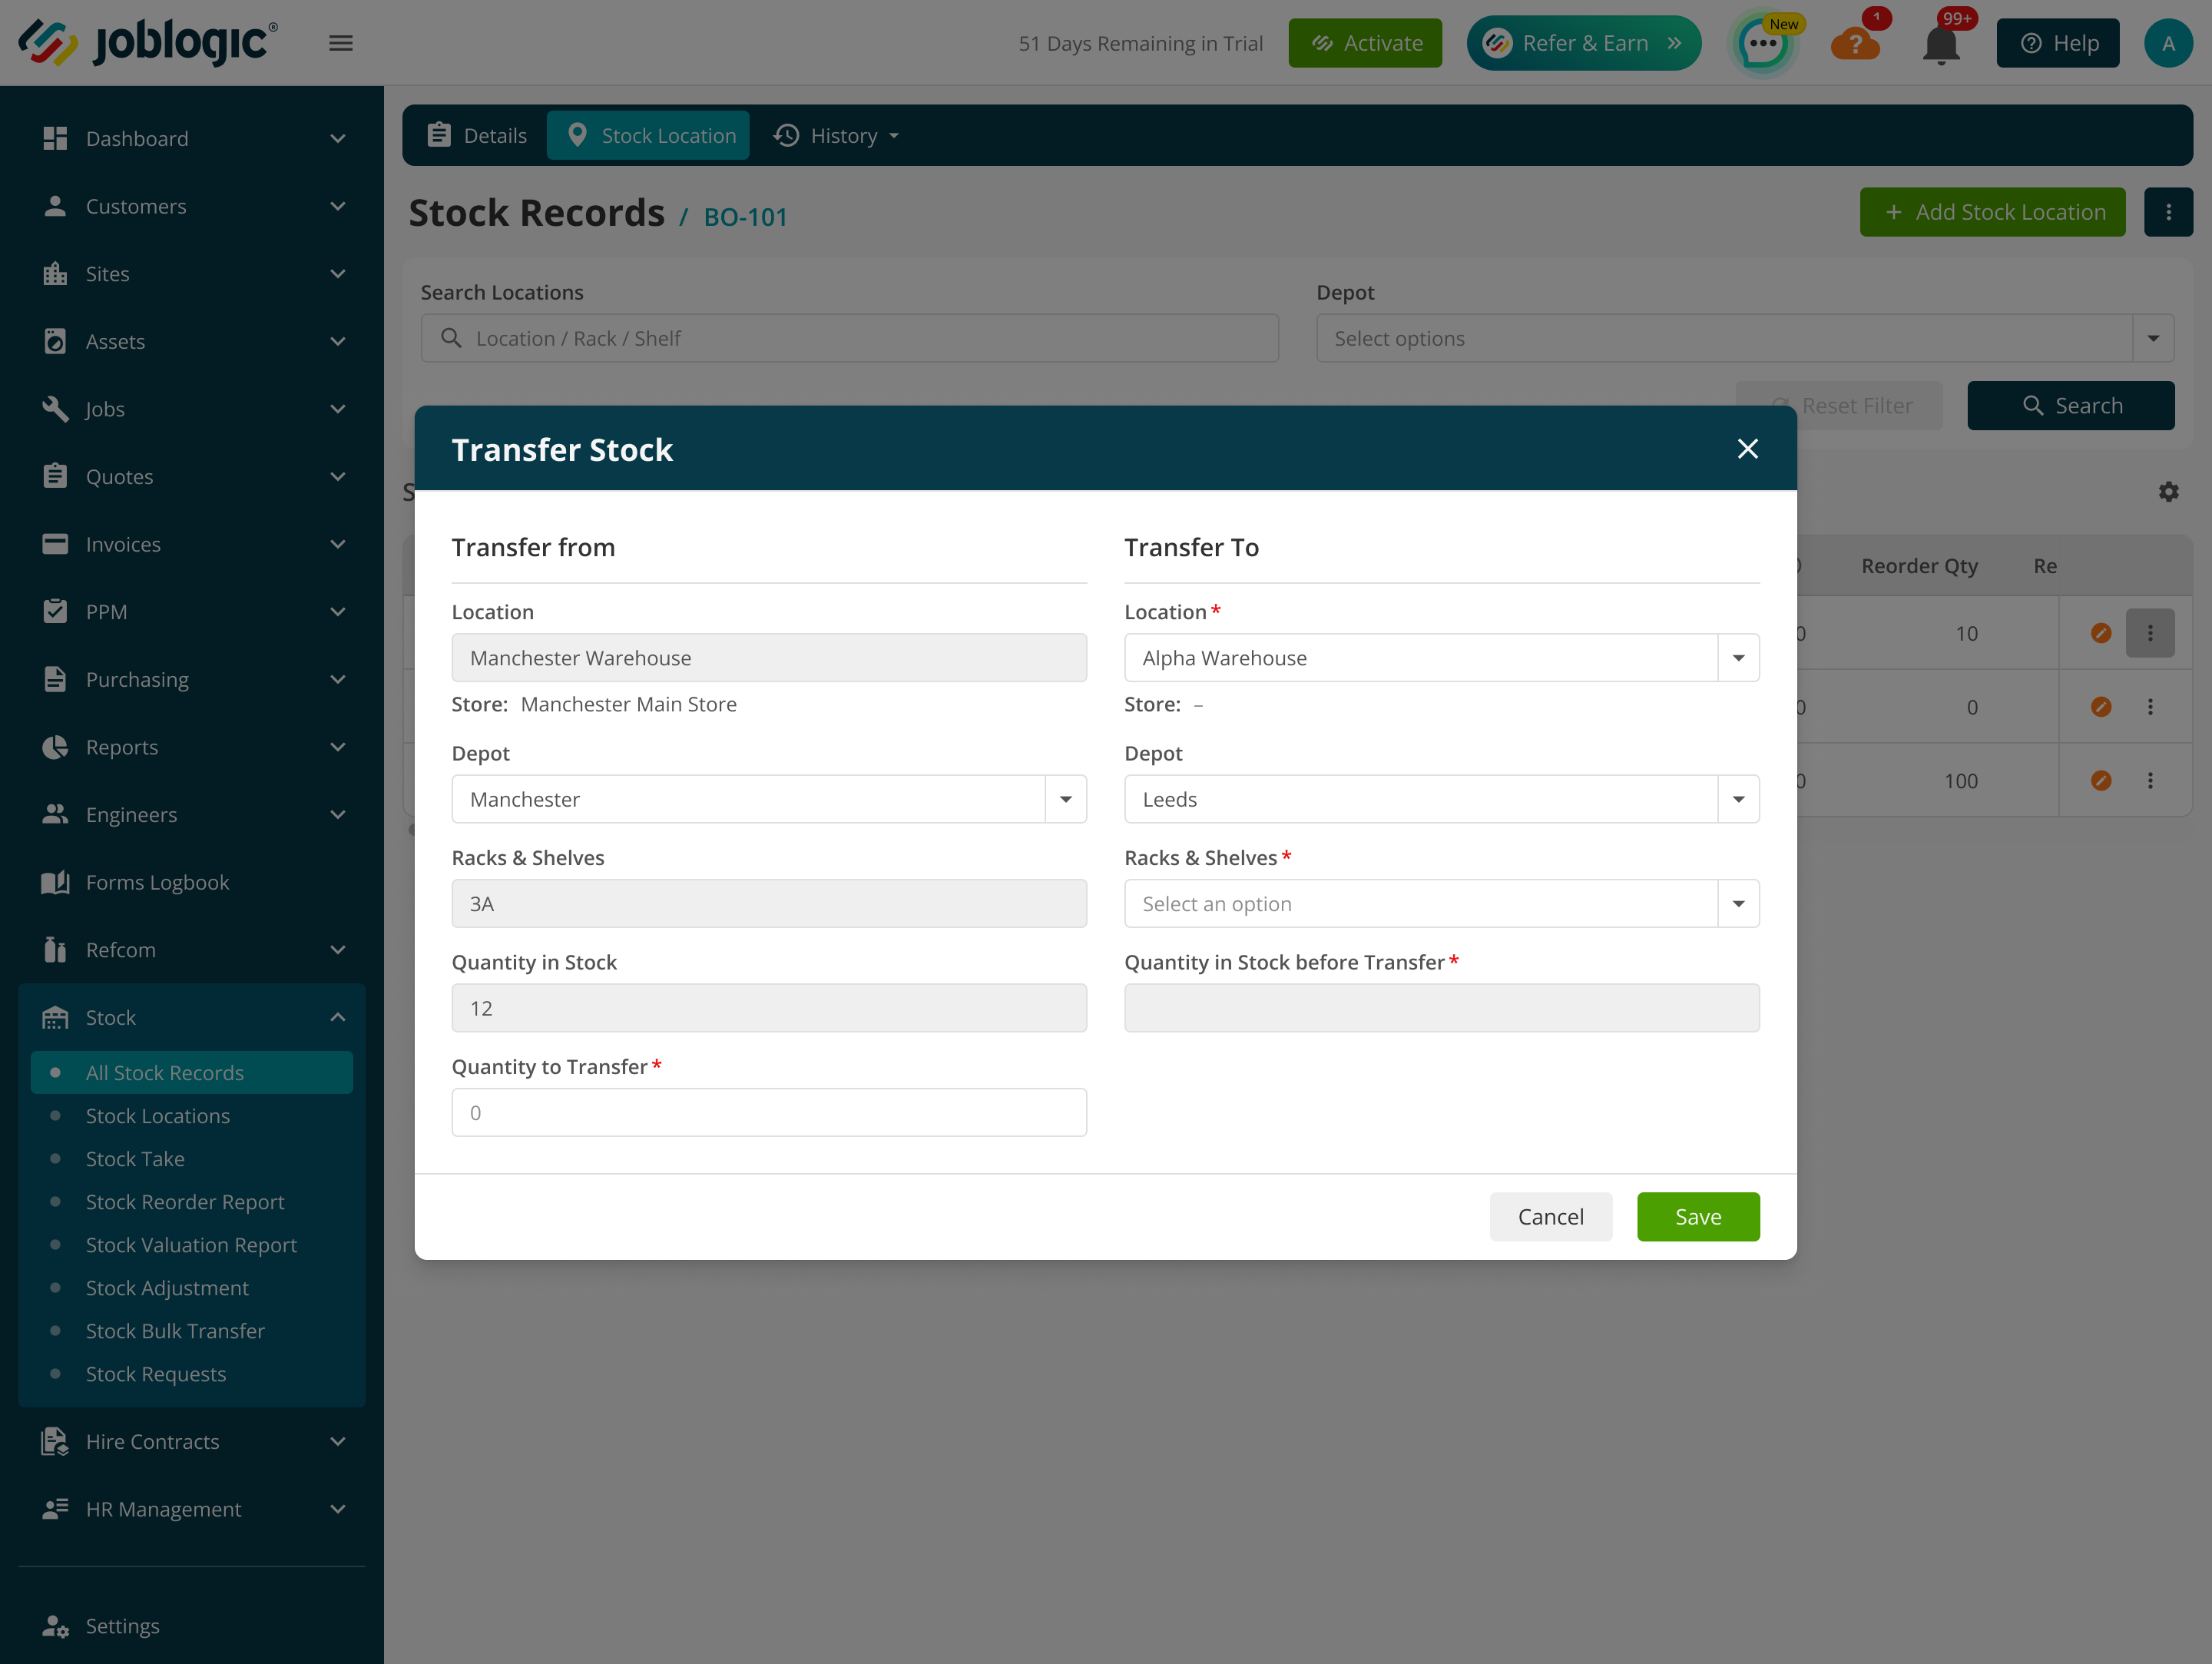
When issuing material from stock, part and equipment choices are restricted to stock held in the user's permitted depots and stores. Non-stock items do not require a depot or store.
Creating stock purchase orders and goods received notes
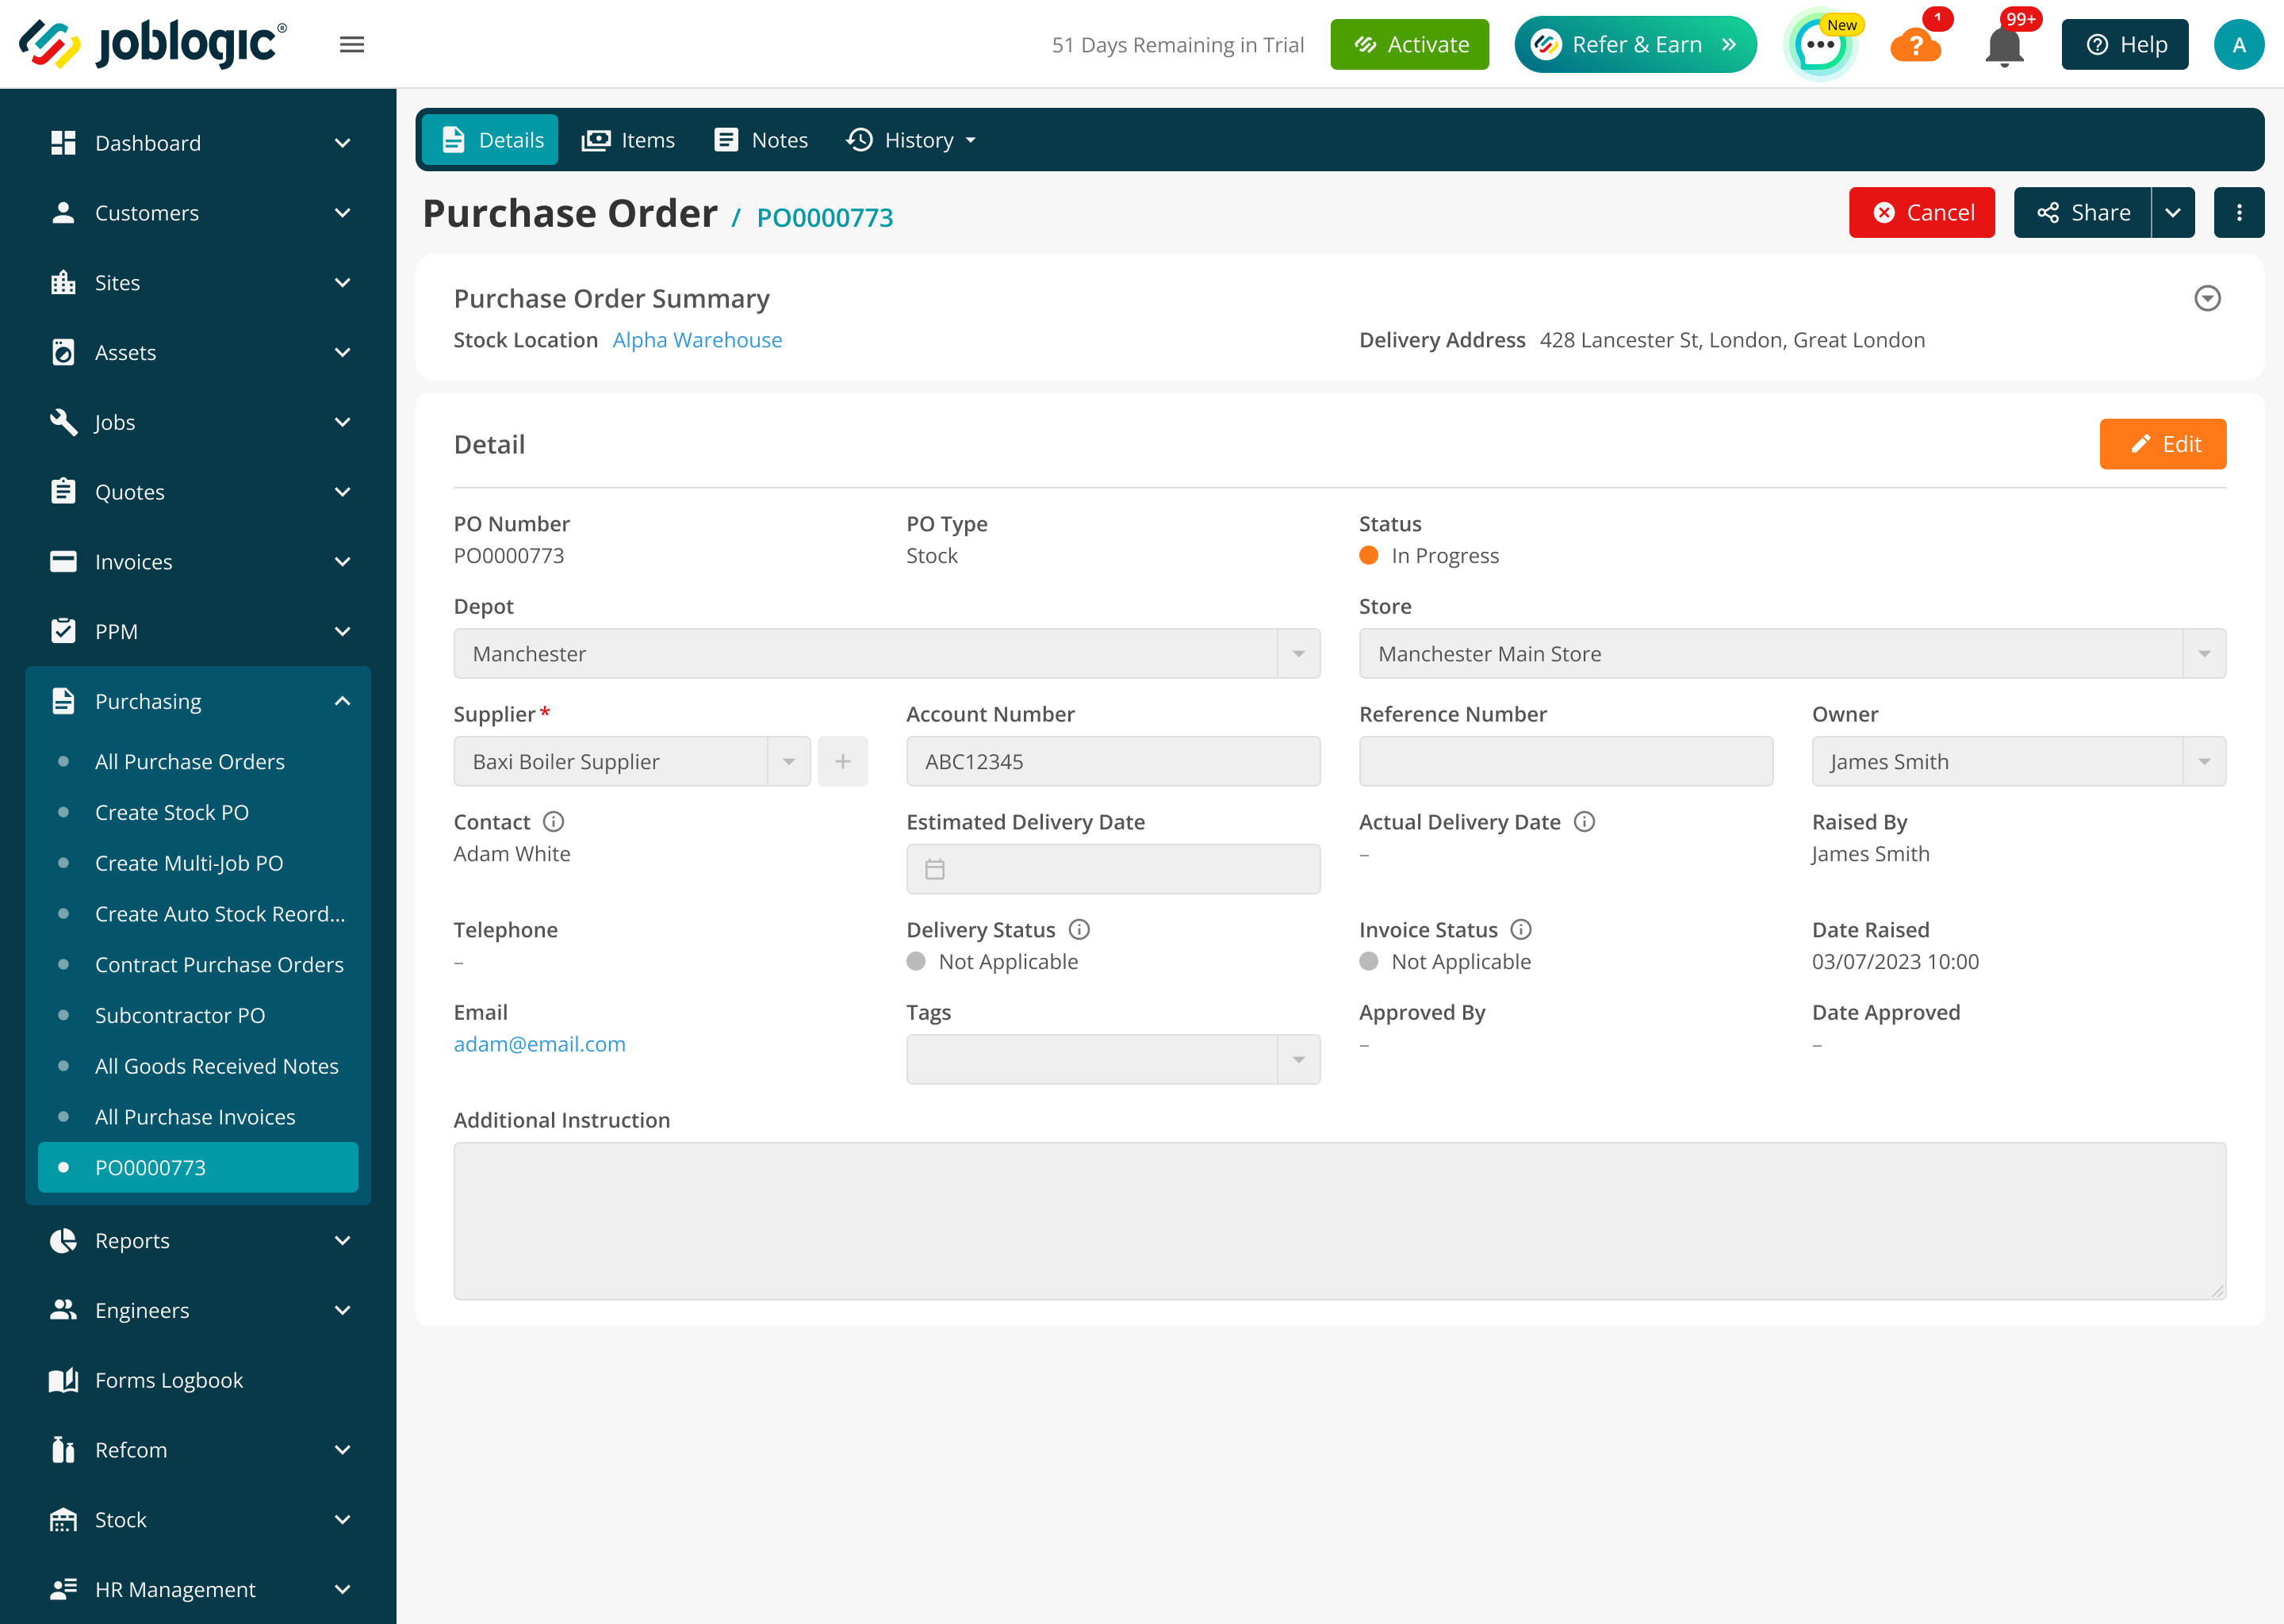
A Stock Purchase Order uses the selected stock location, store and depot. After items are added, the store and depot cannot be changed until the items are removed.
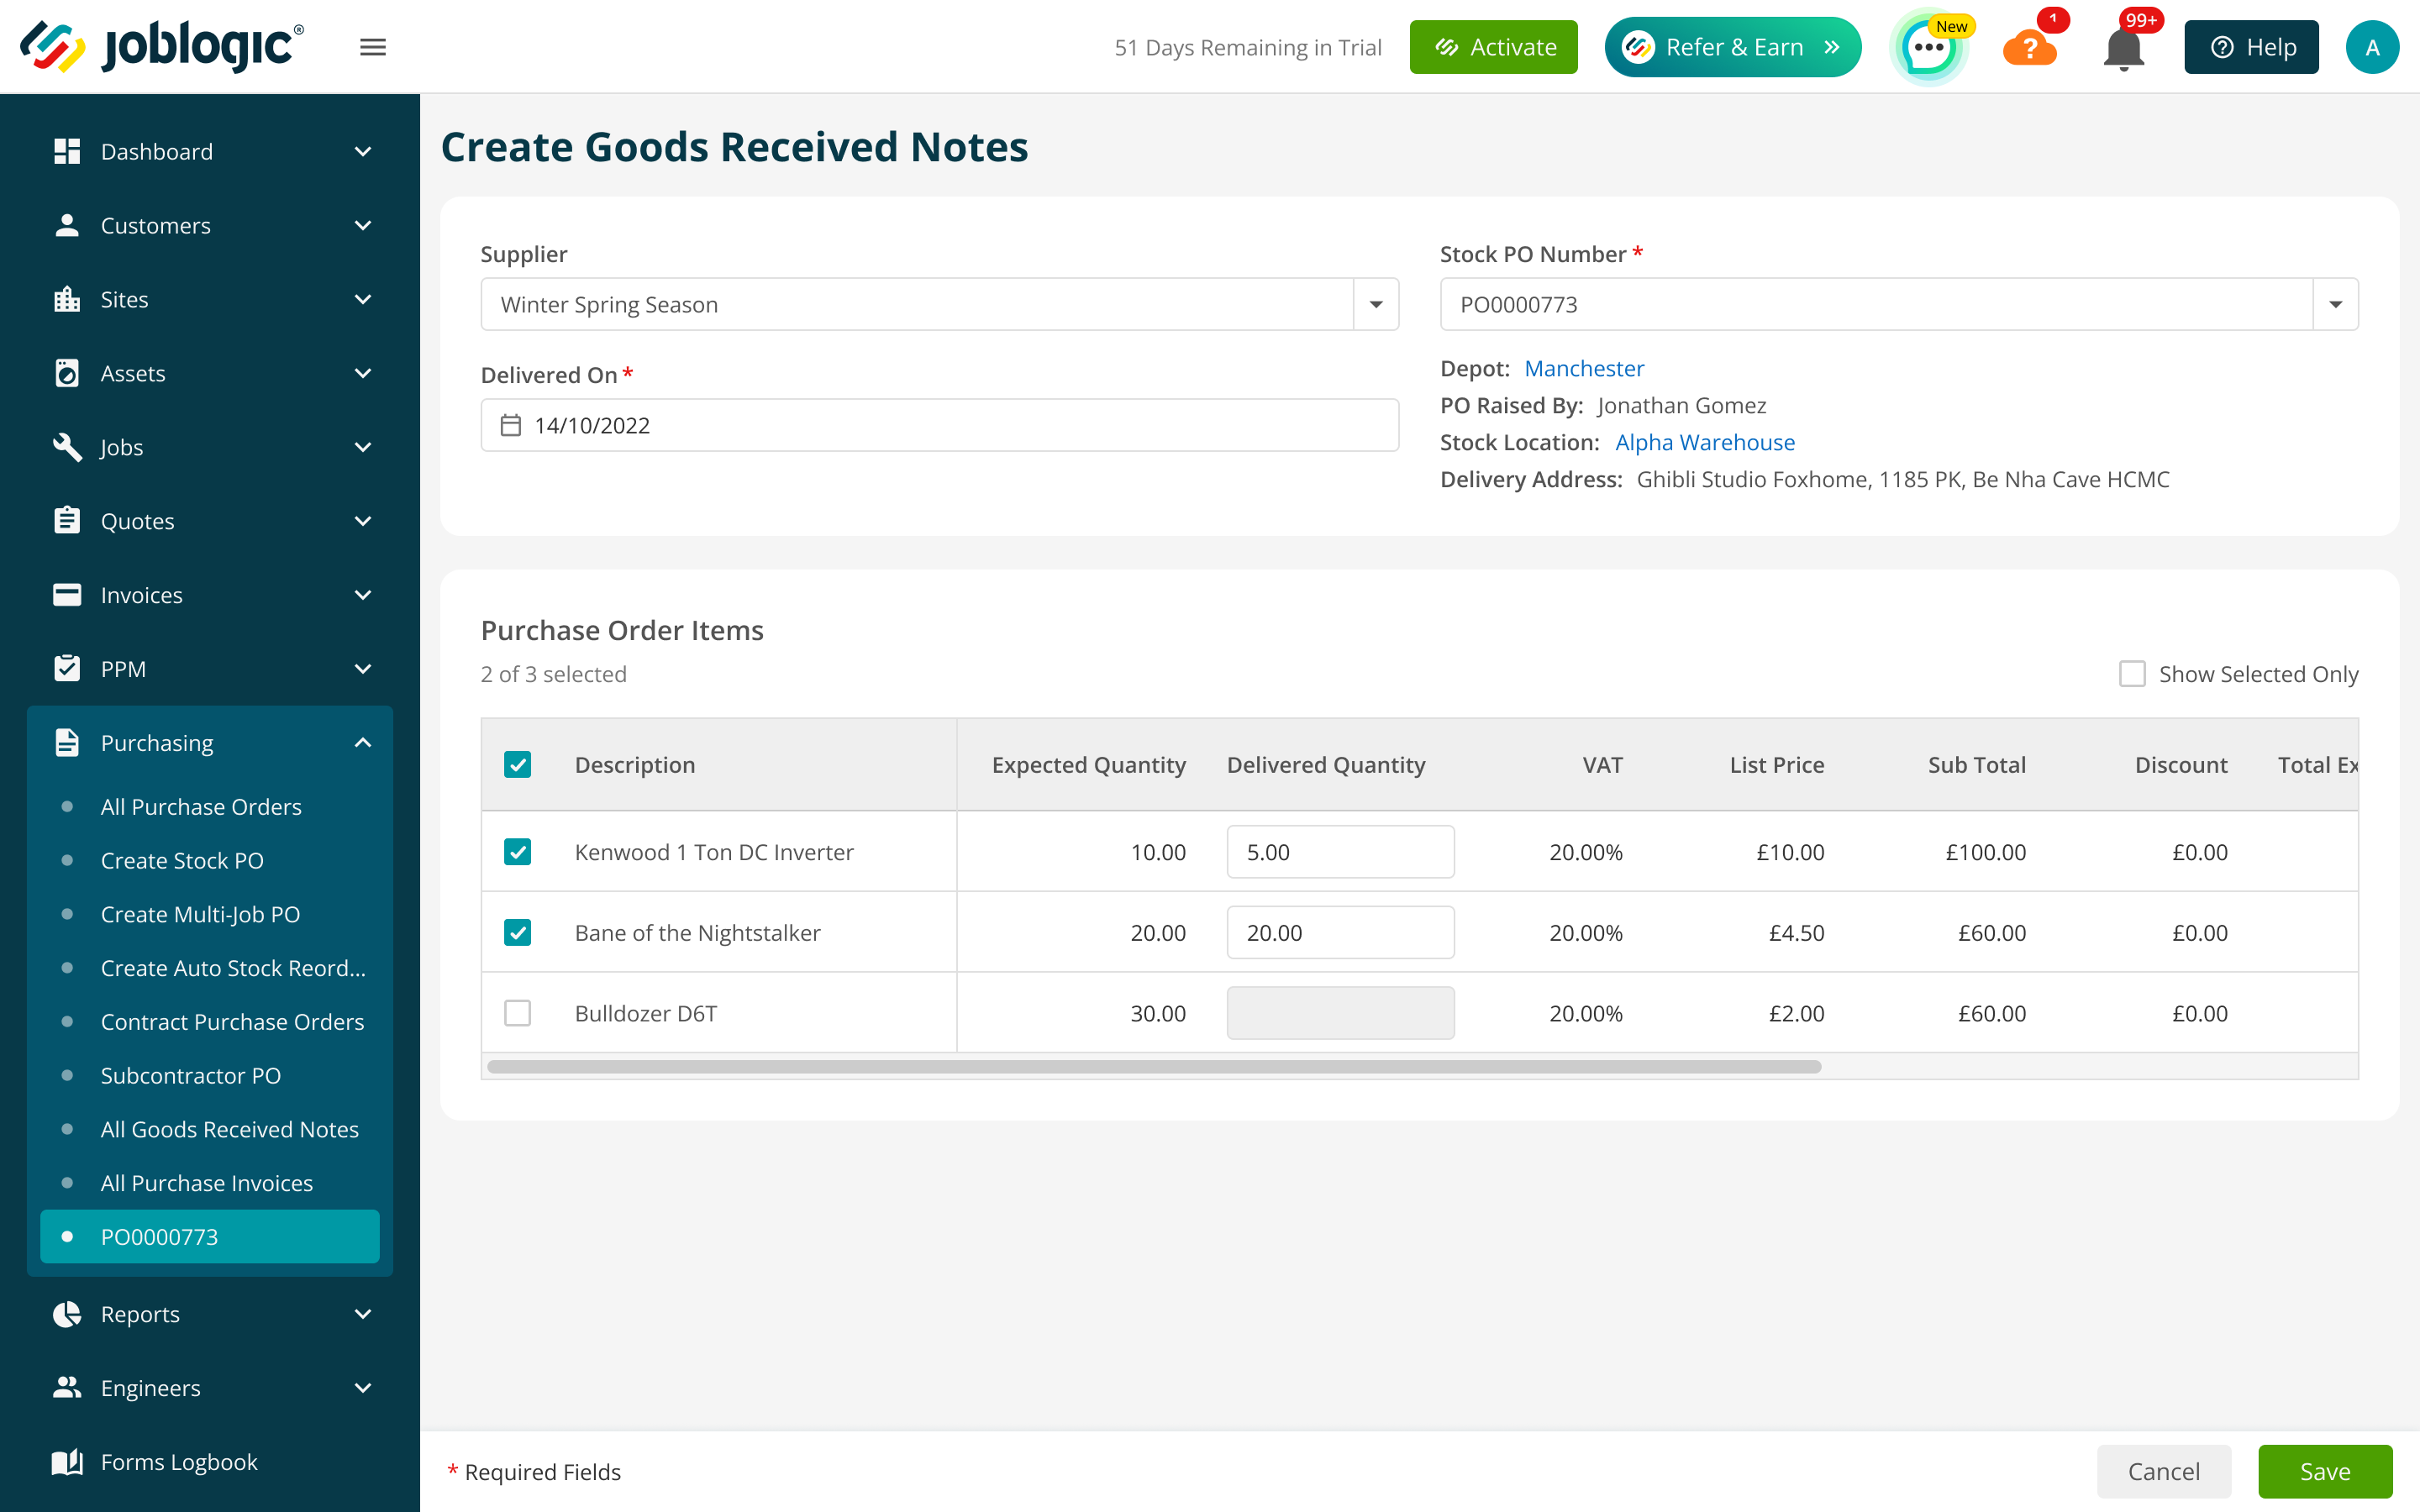
Goods Received Notes use the depot and store associated with the stock location. On Create Goods Received Notes, select the Stock PO Number. The screen shows the depot and stock location and allows delivered quantities to be entered for the selected items.
Use the Depot filter on the Purchase Orders list to focus on records for the locations you manage. The Depot column identifies the depot associated with each Job, Stock and Multi-job Purchase Order.
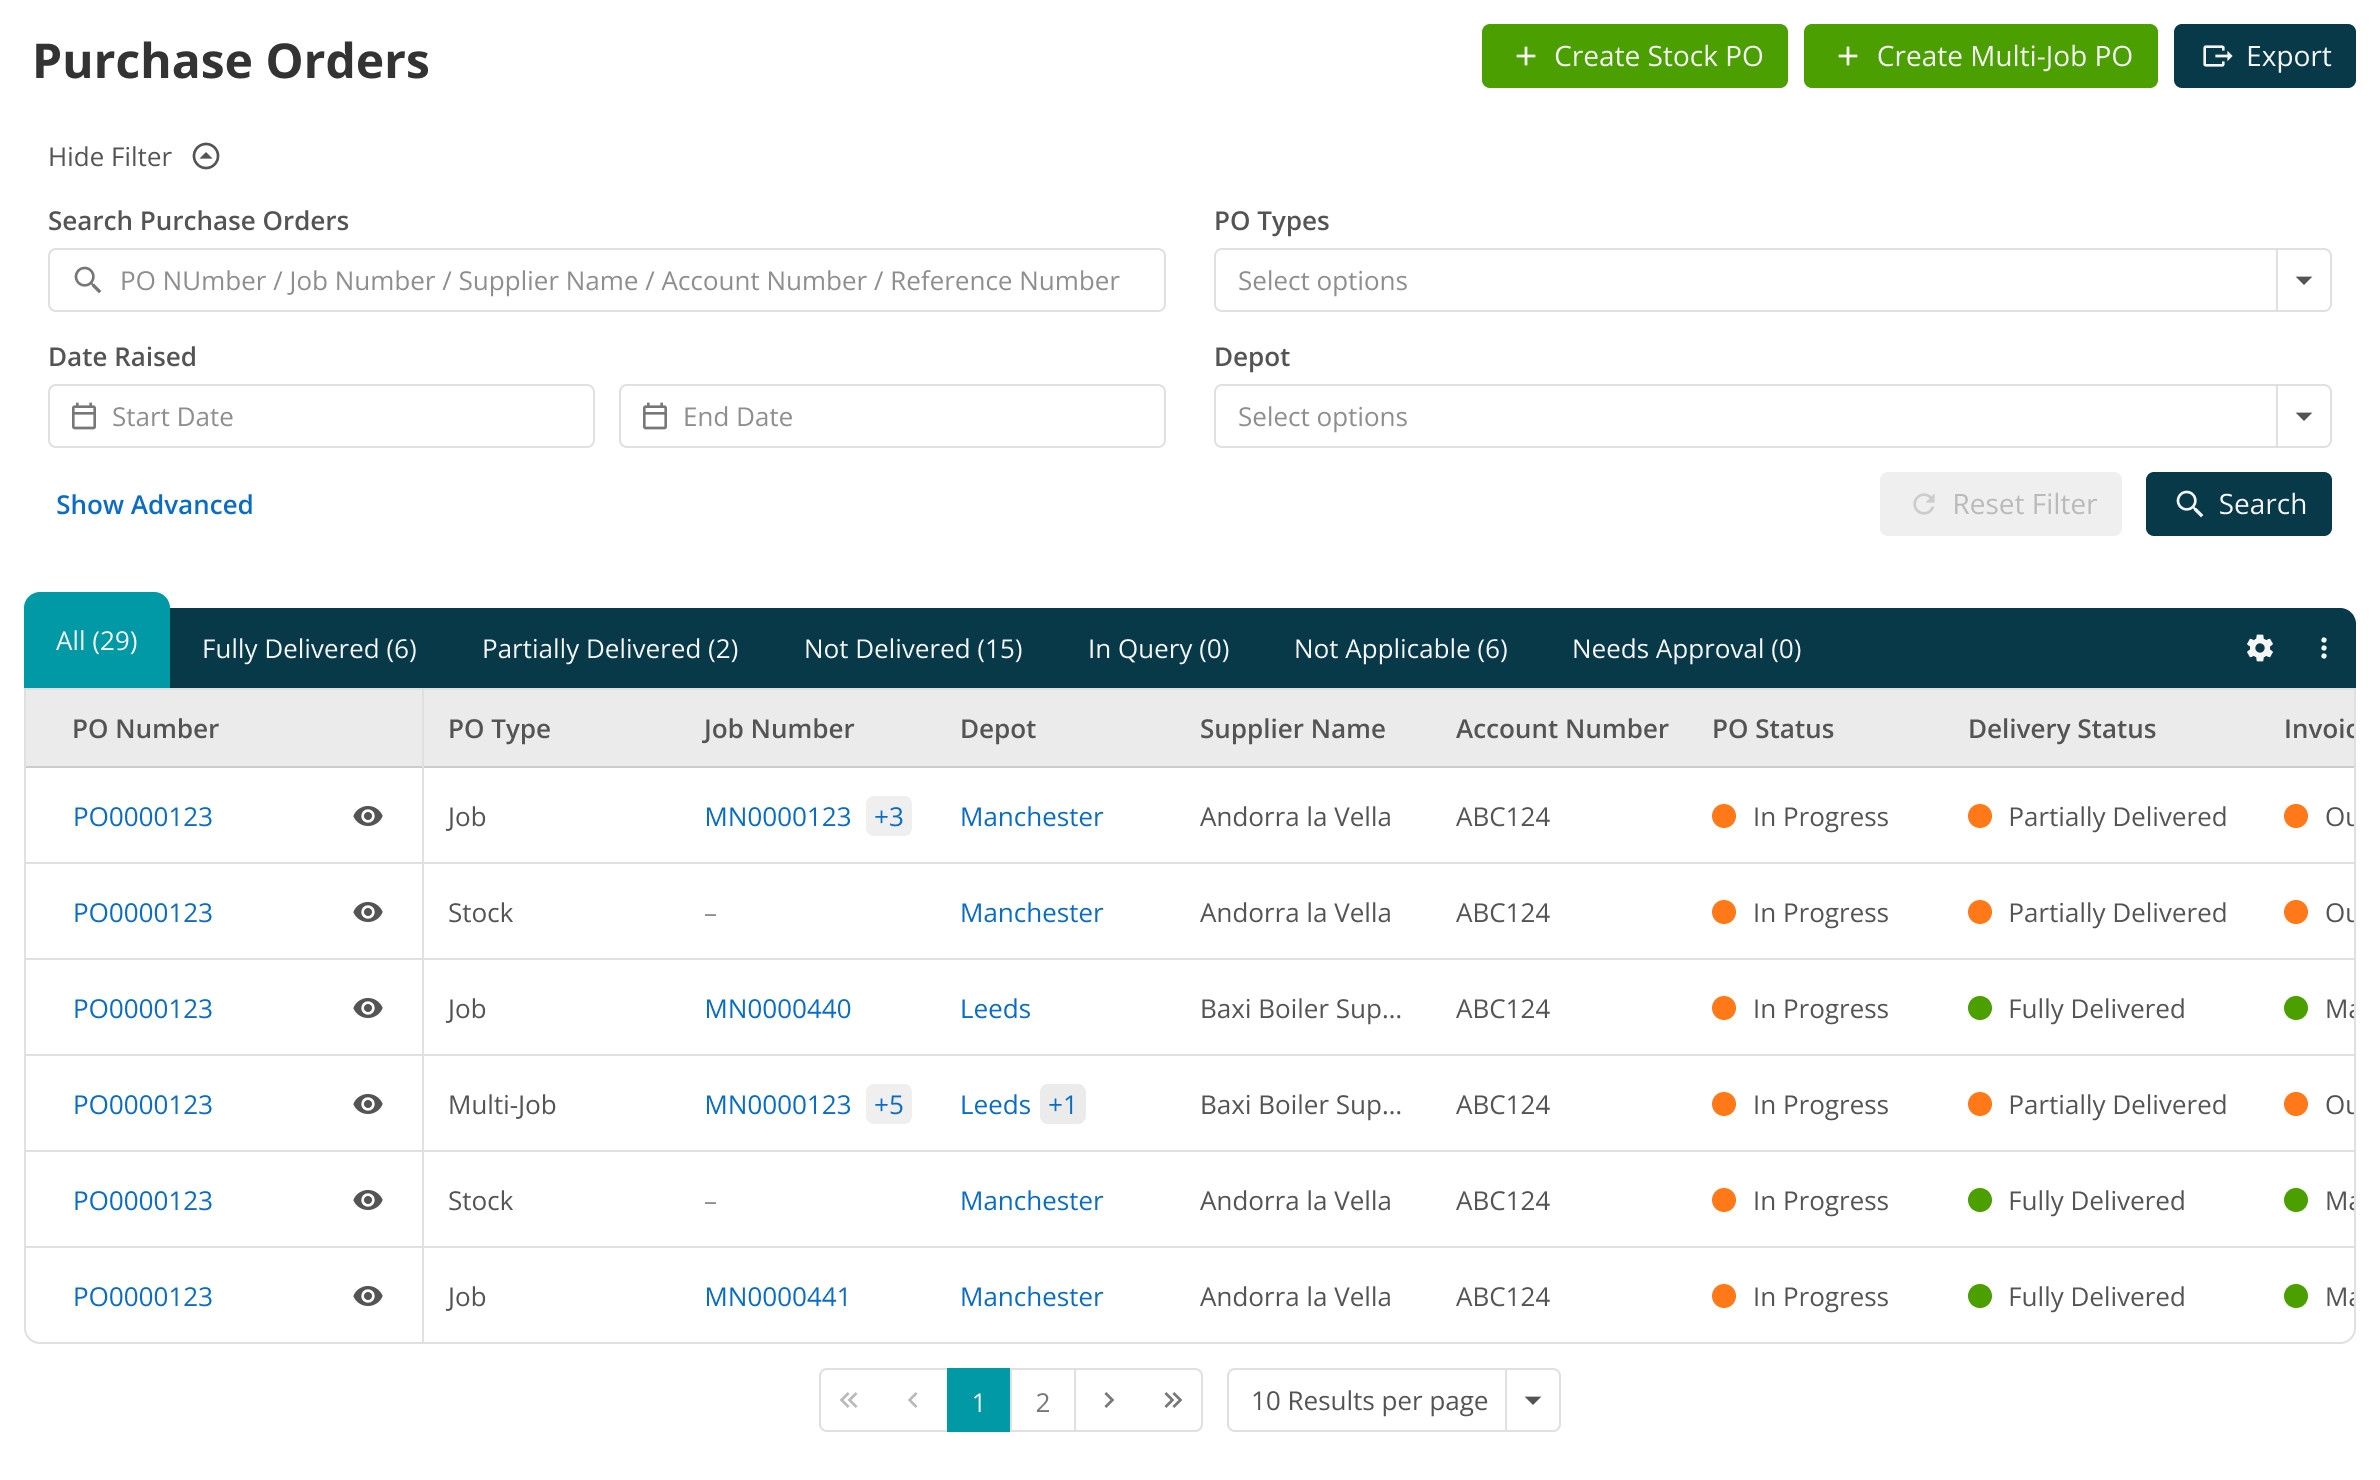
Purchase orders
A Job Purchase Order inherits its depot from the job. A Subcontractor Purchase Order inherits its depot from the related job, and a Contract Purchase Order uses its contract's depot. Under Inherit Site Depot, inherited depot values are read-only.
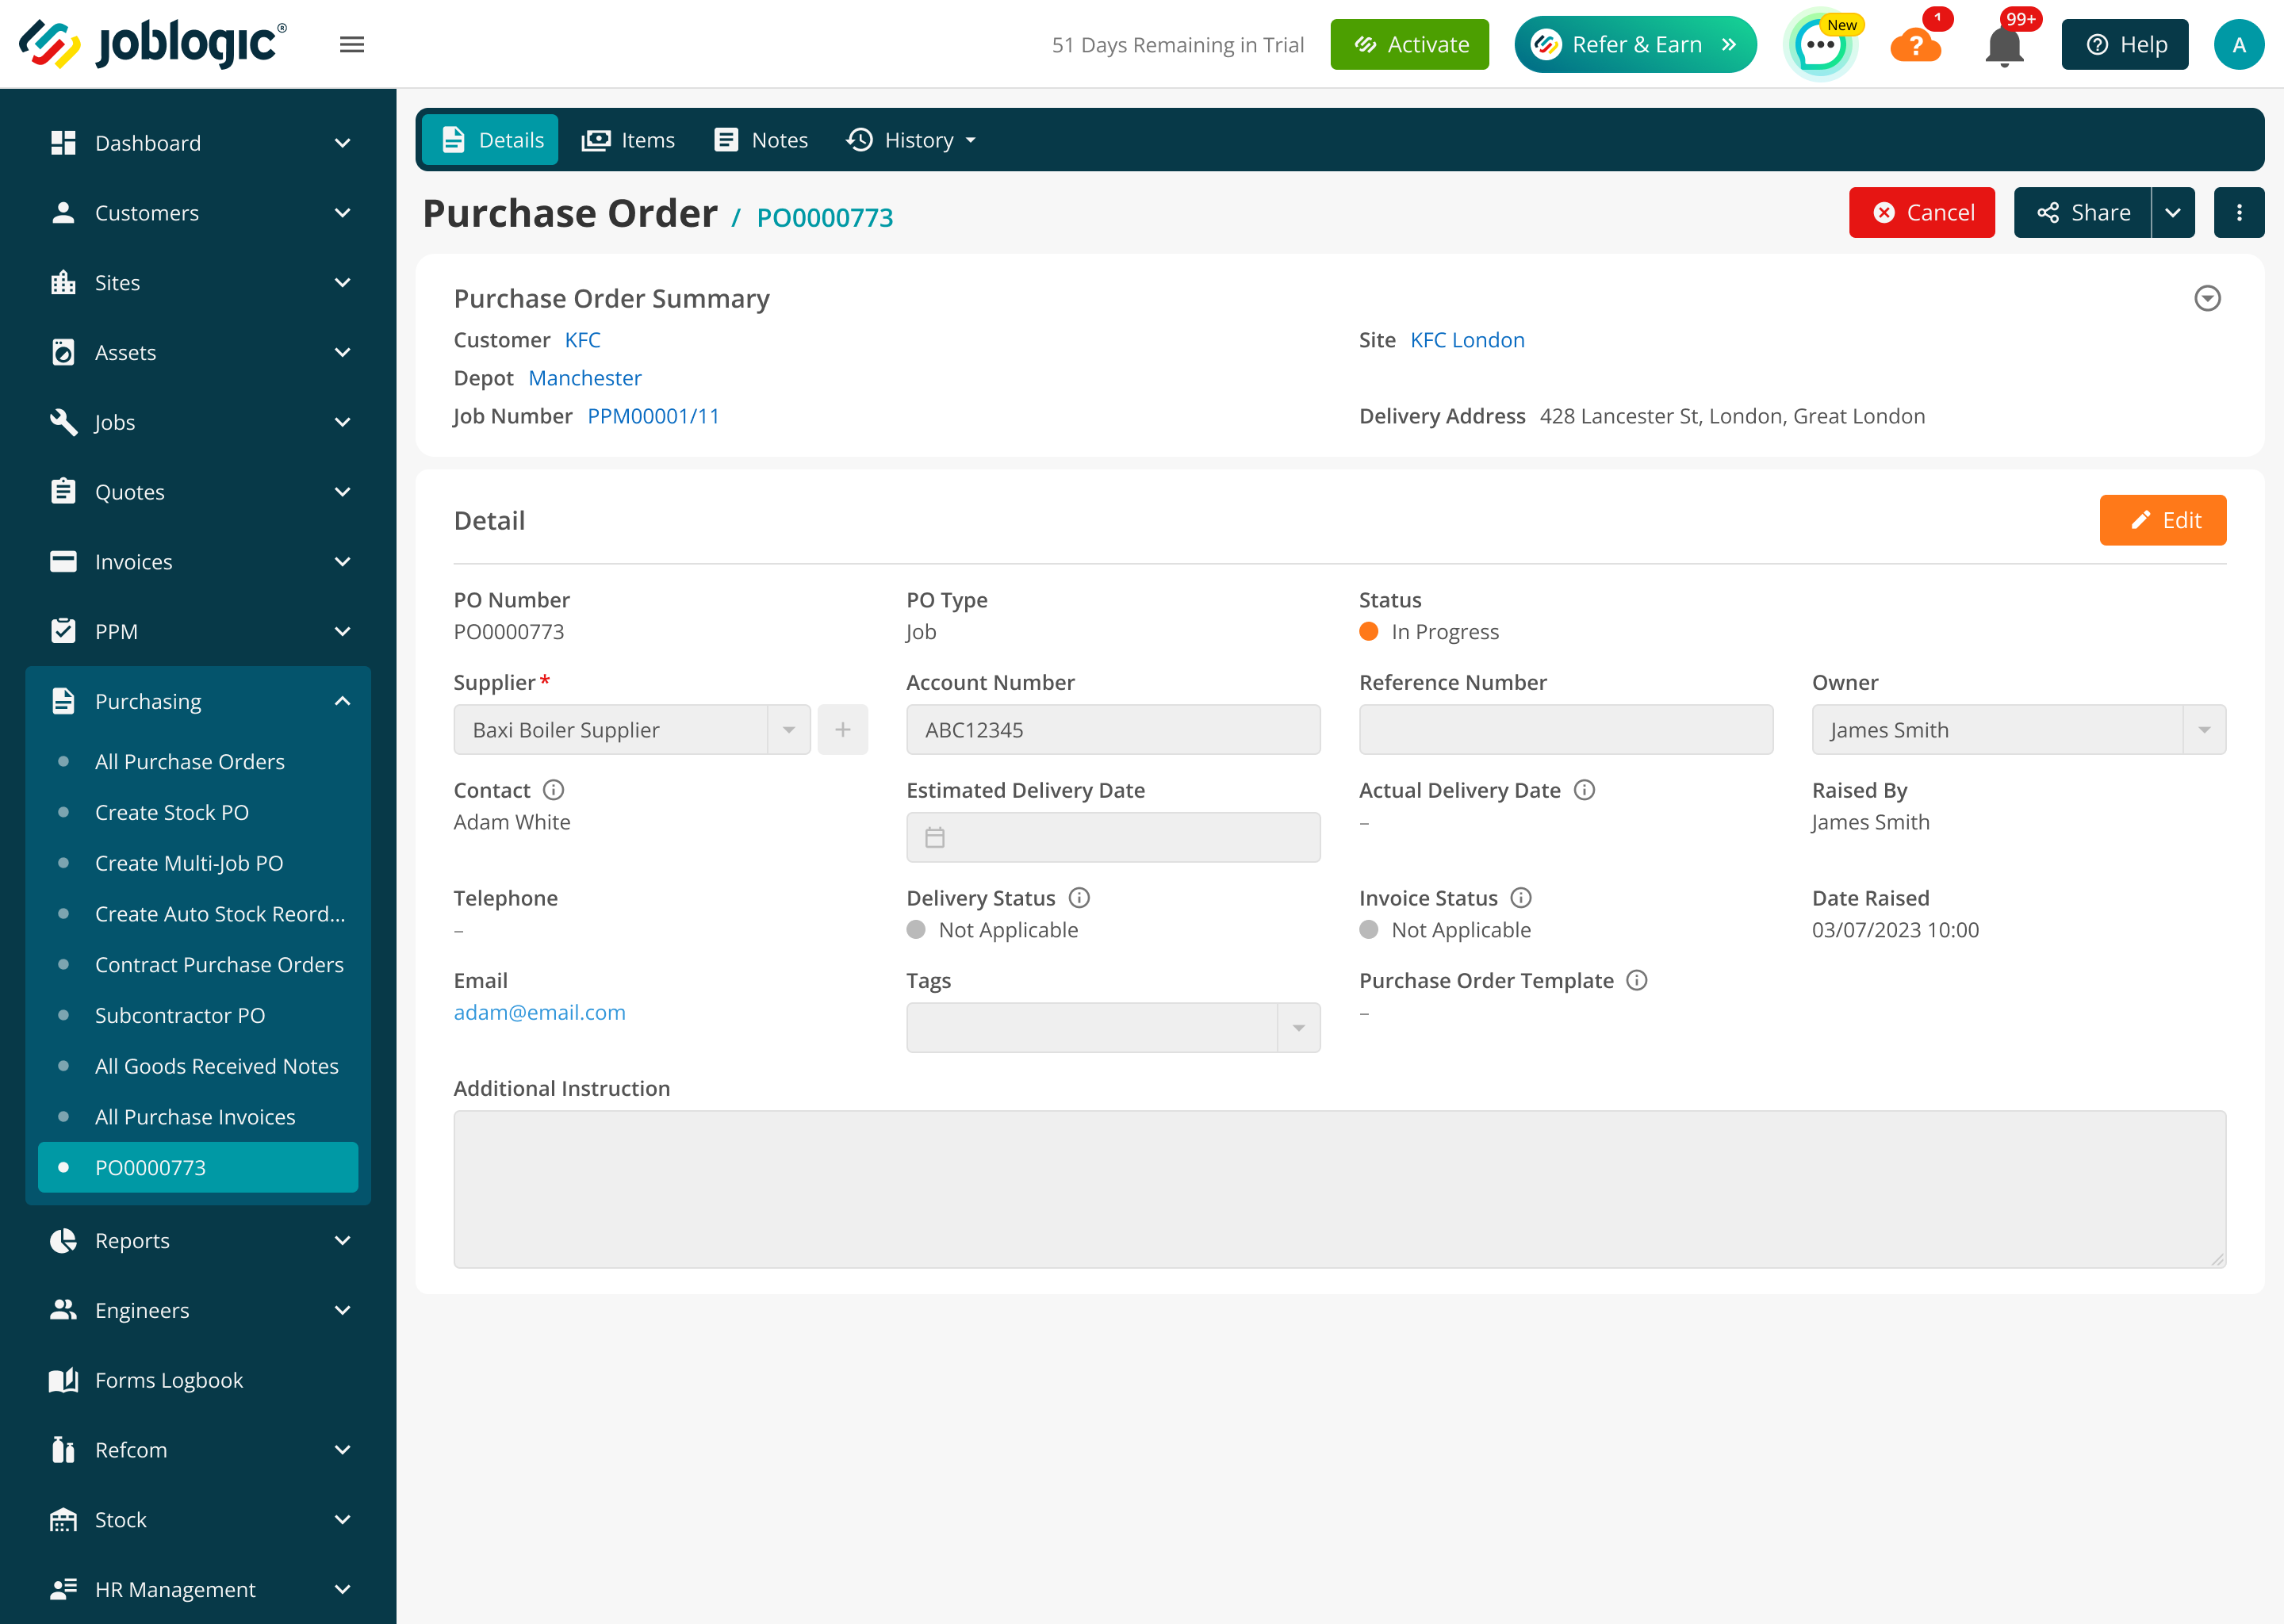
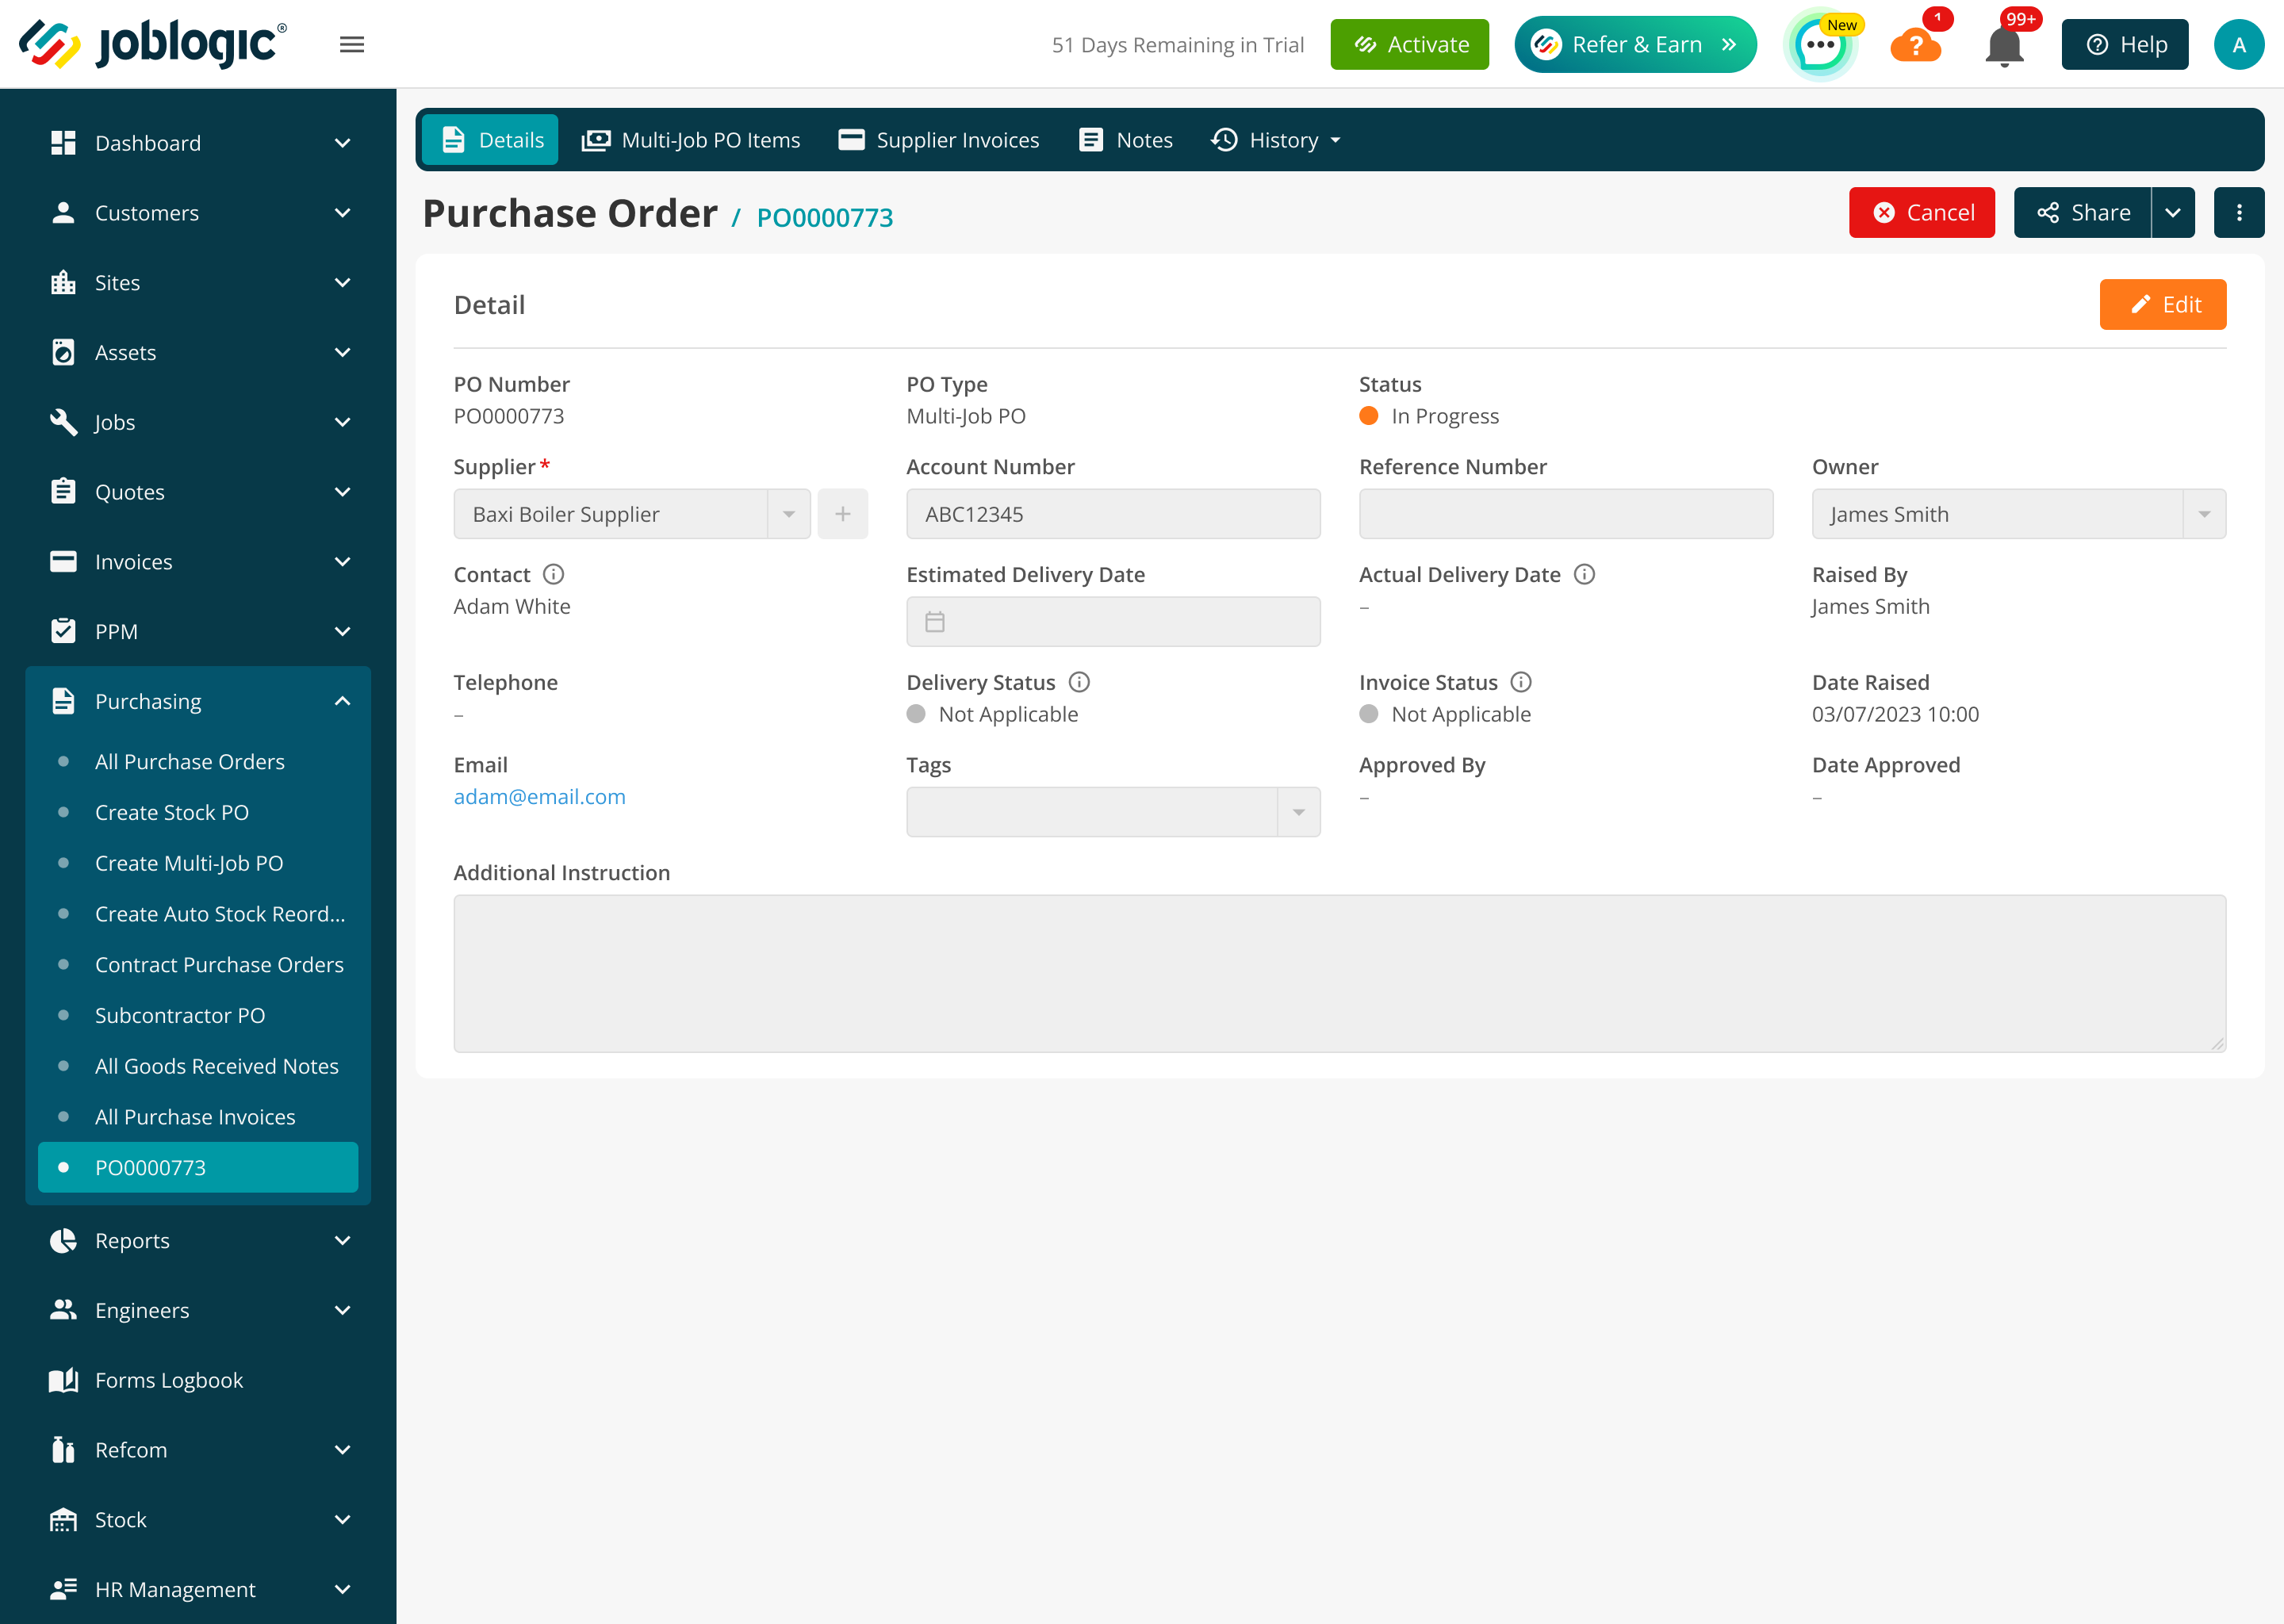
A Multi-job Purchase Order can contain jobs from several depots. A depot-scoped user can see the order only when they have access to every depot represented by its linked jobs.
Jobs, quotes and operational records
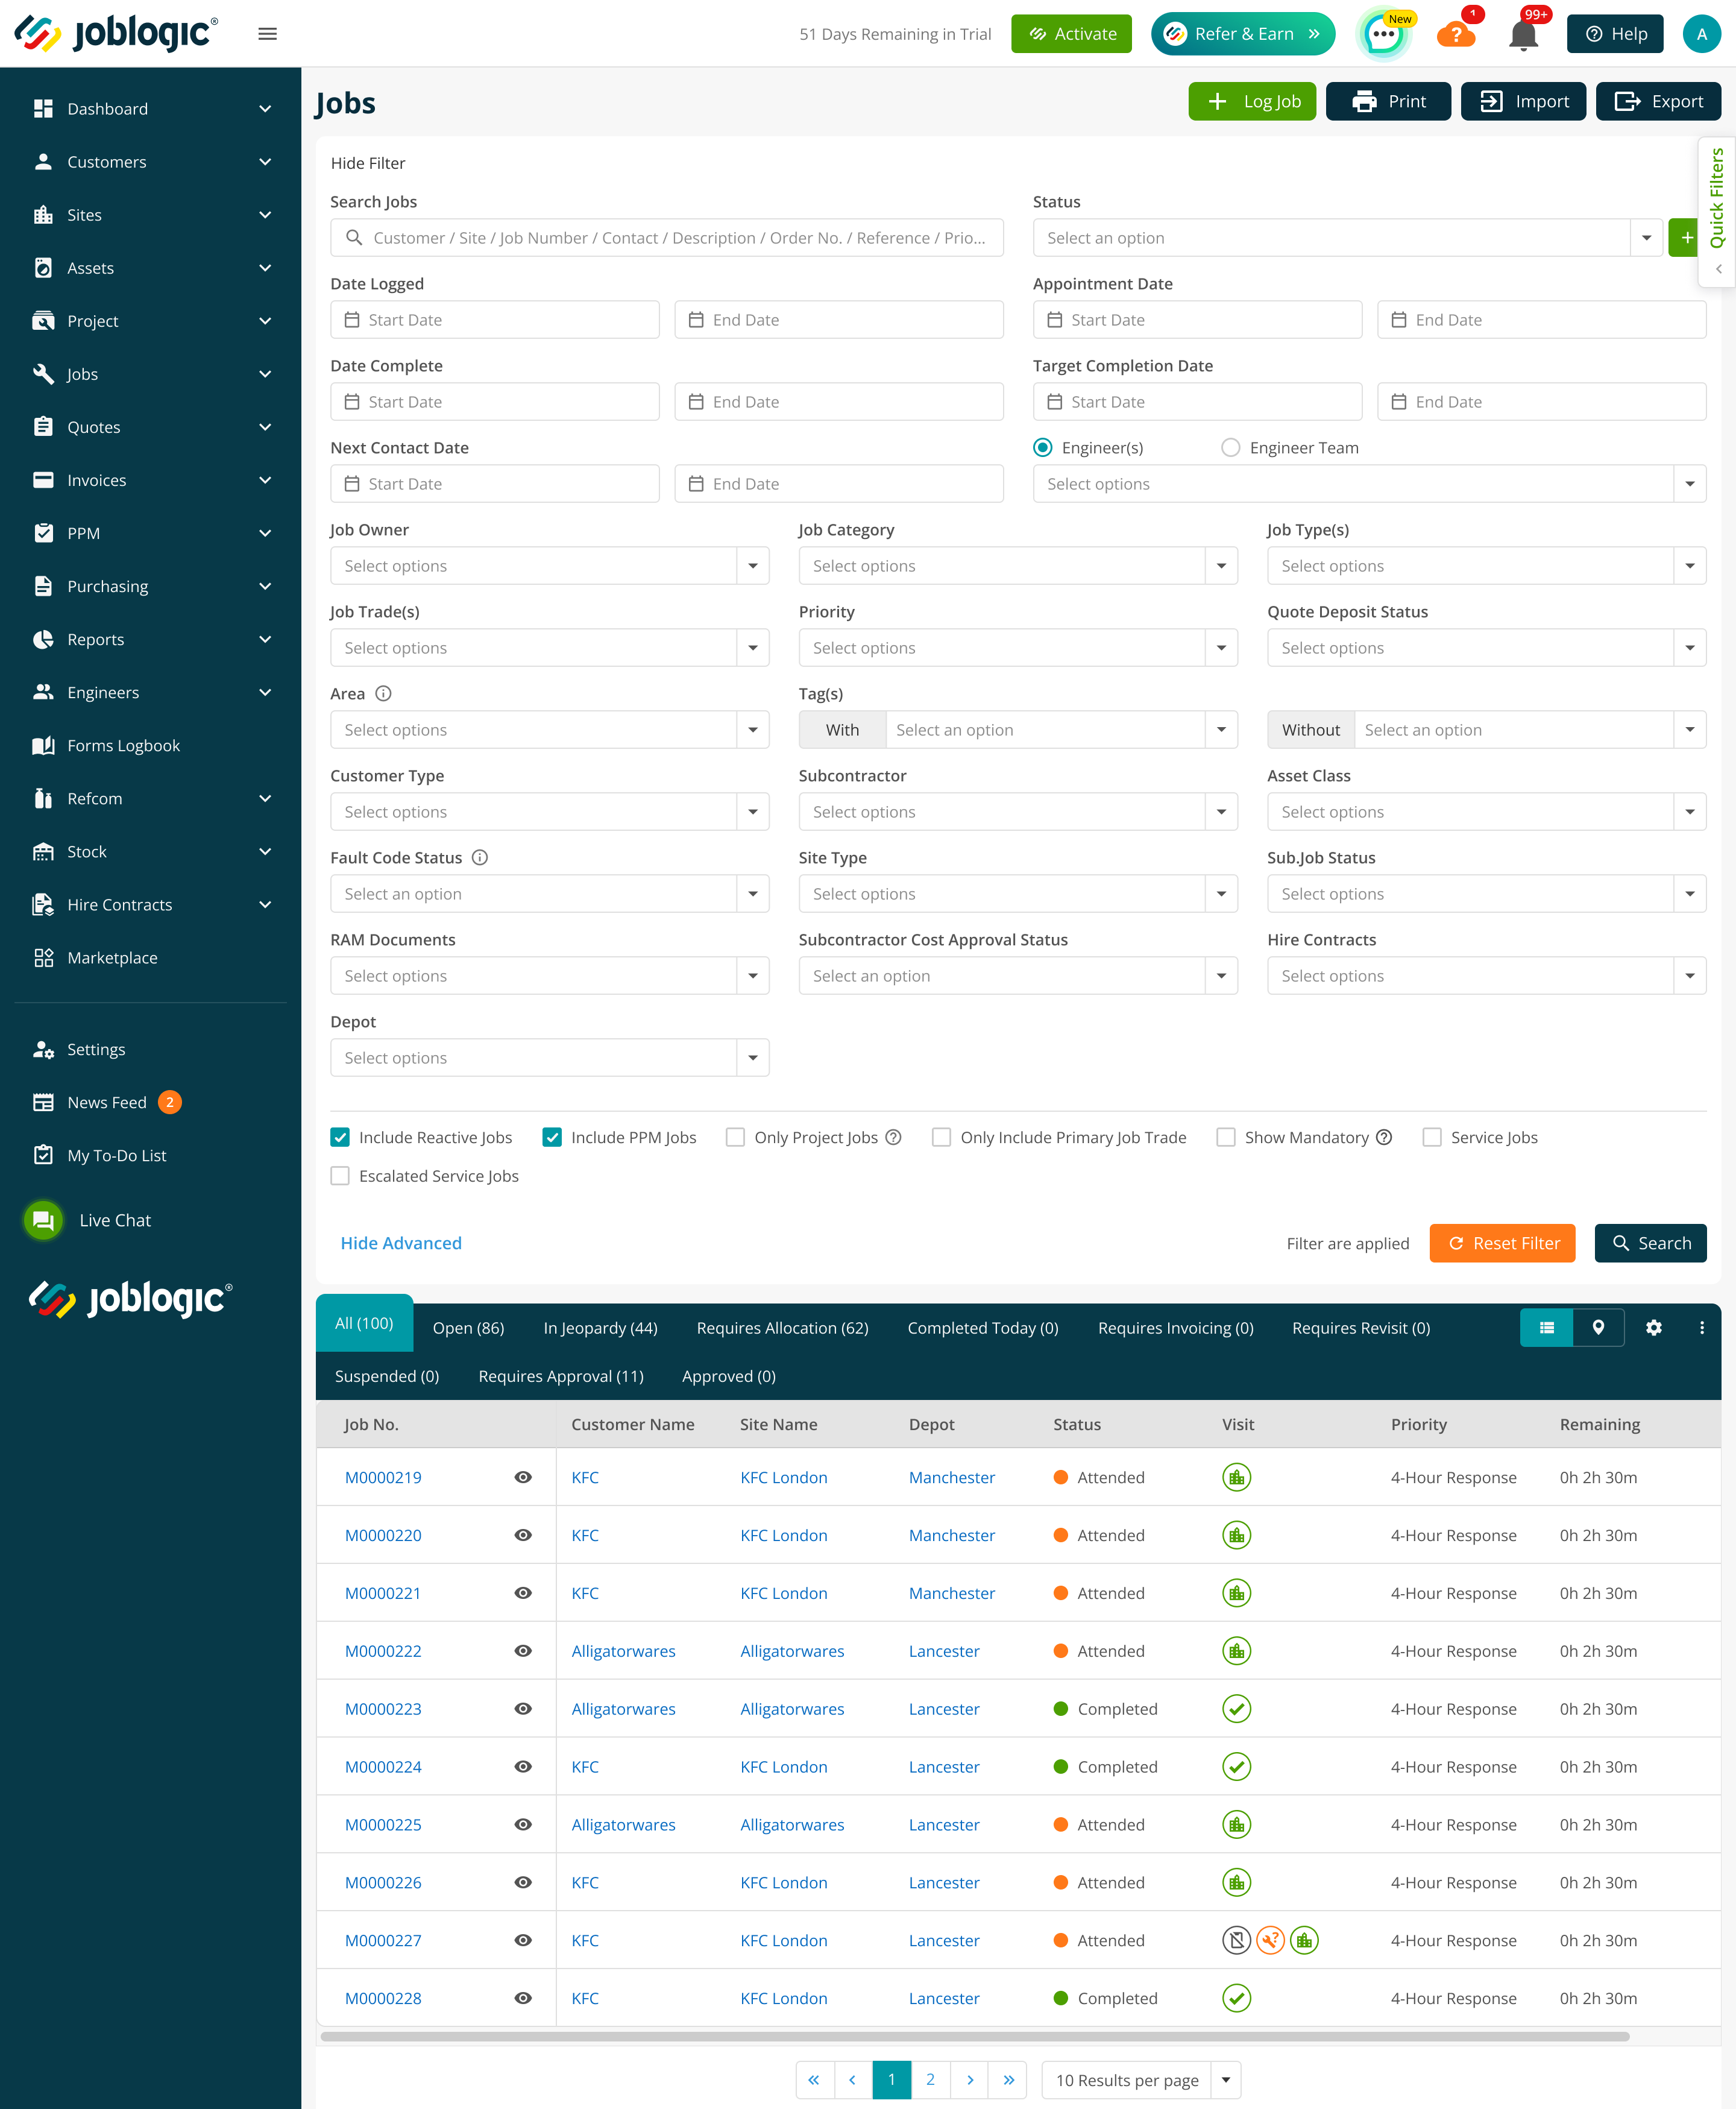
On Jobs > All Jobs, use the Depot filter to display jobs assigned to selected depots. The Depot column shows the depot assigned to each job.
When a job or quote is created, Joblogic assigns its depot according to the Entity Depot Configuration. With Inherit Site Depot, the record uses the site's depot and the Depot field is read-only. With Use Entity Own Depot, Joblogic uses the configured automatic source and authorised users can select an accessible depot.
PPM contracts follow the configured depot source. PPM visits inherit the contract depot, and a renewed PPM contract uses the depot from the previous contract.
With Inherit Site Depot, assets and projects use their site's depot, while invoices use the depot from the related job. Forms Logbook records linked to a job use the job depot; general forms use the submitting user's depot. REFCOM users can select from their accessible depots.
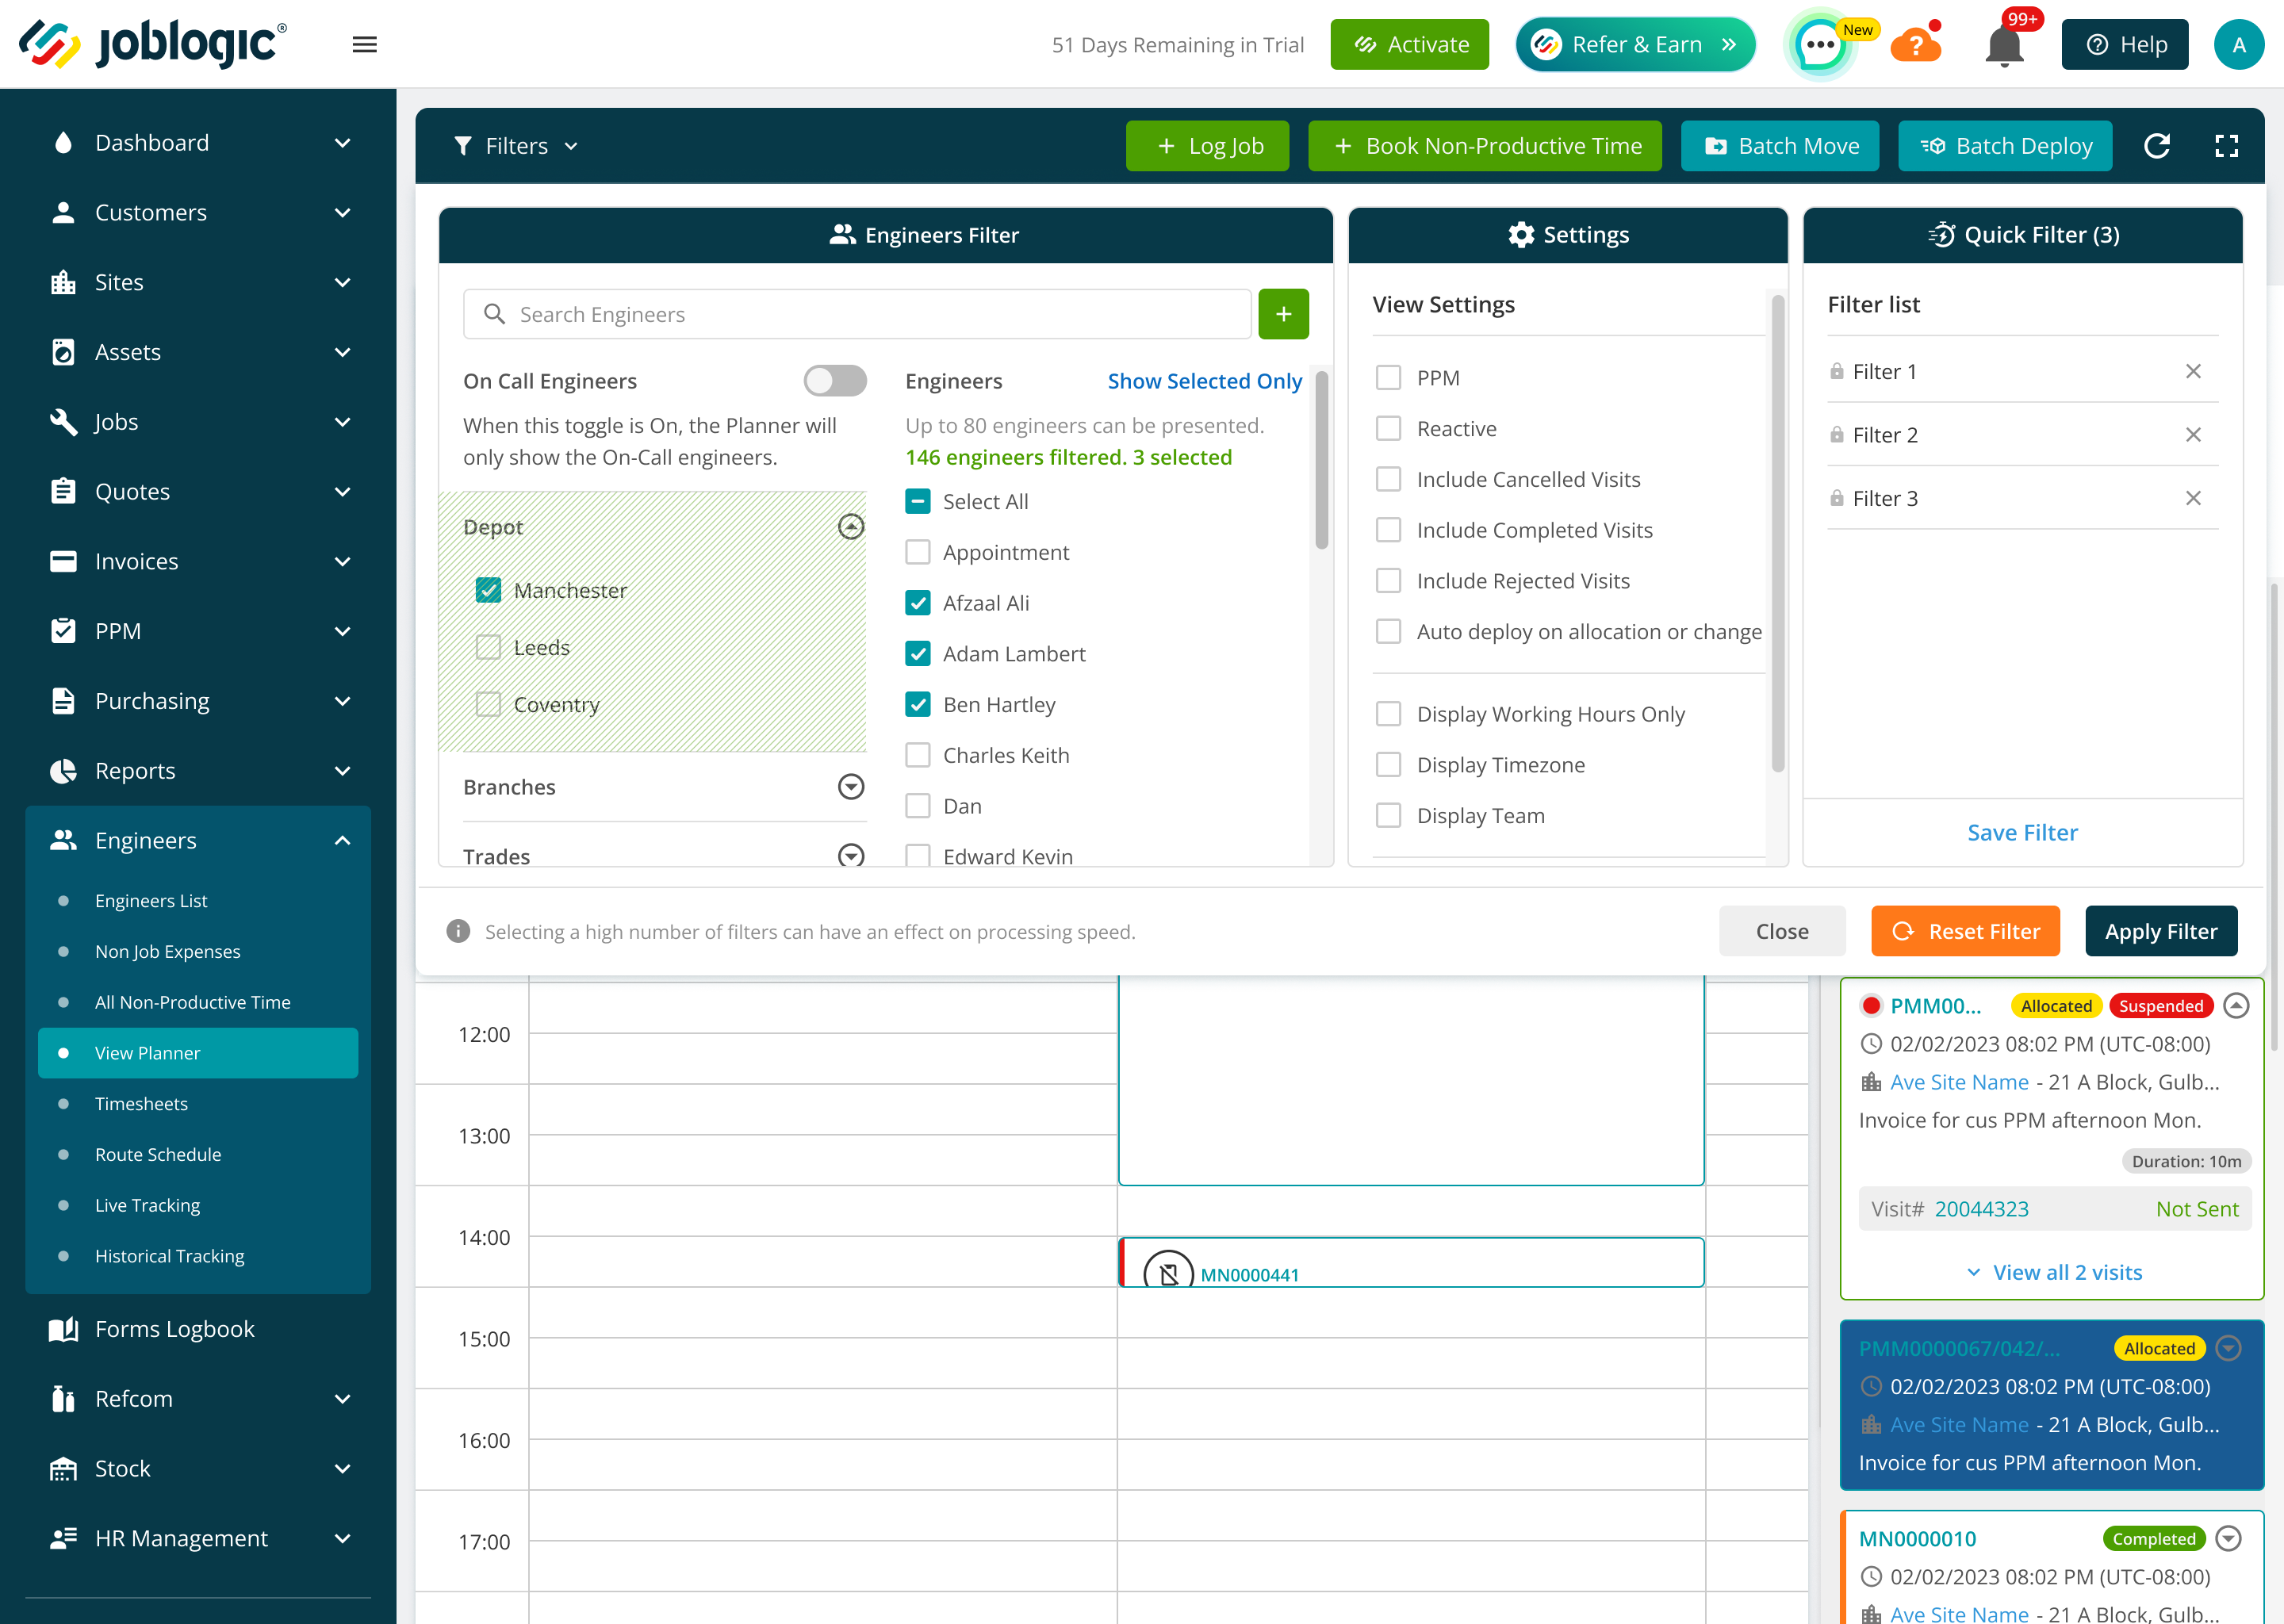
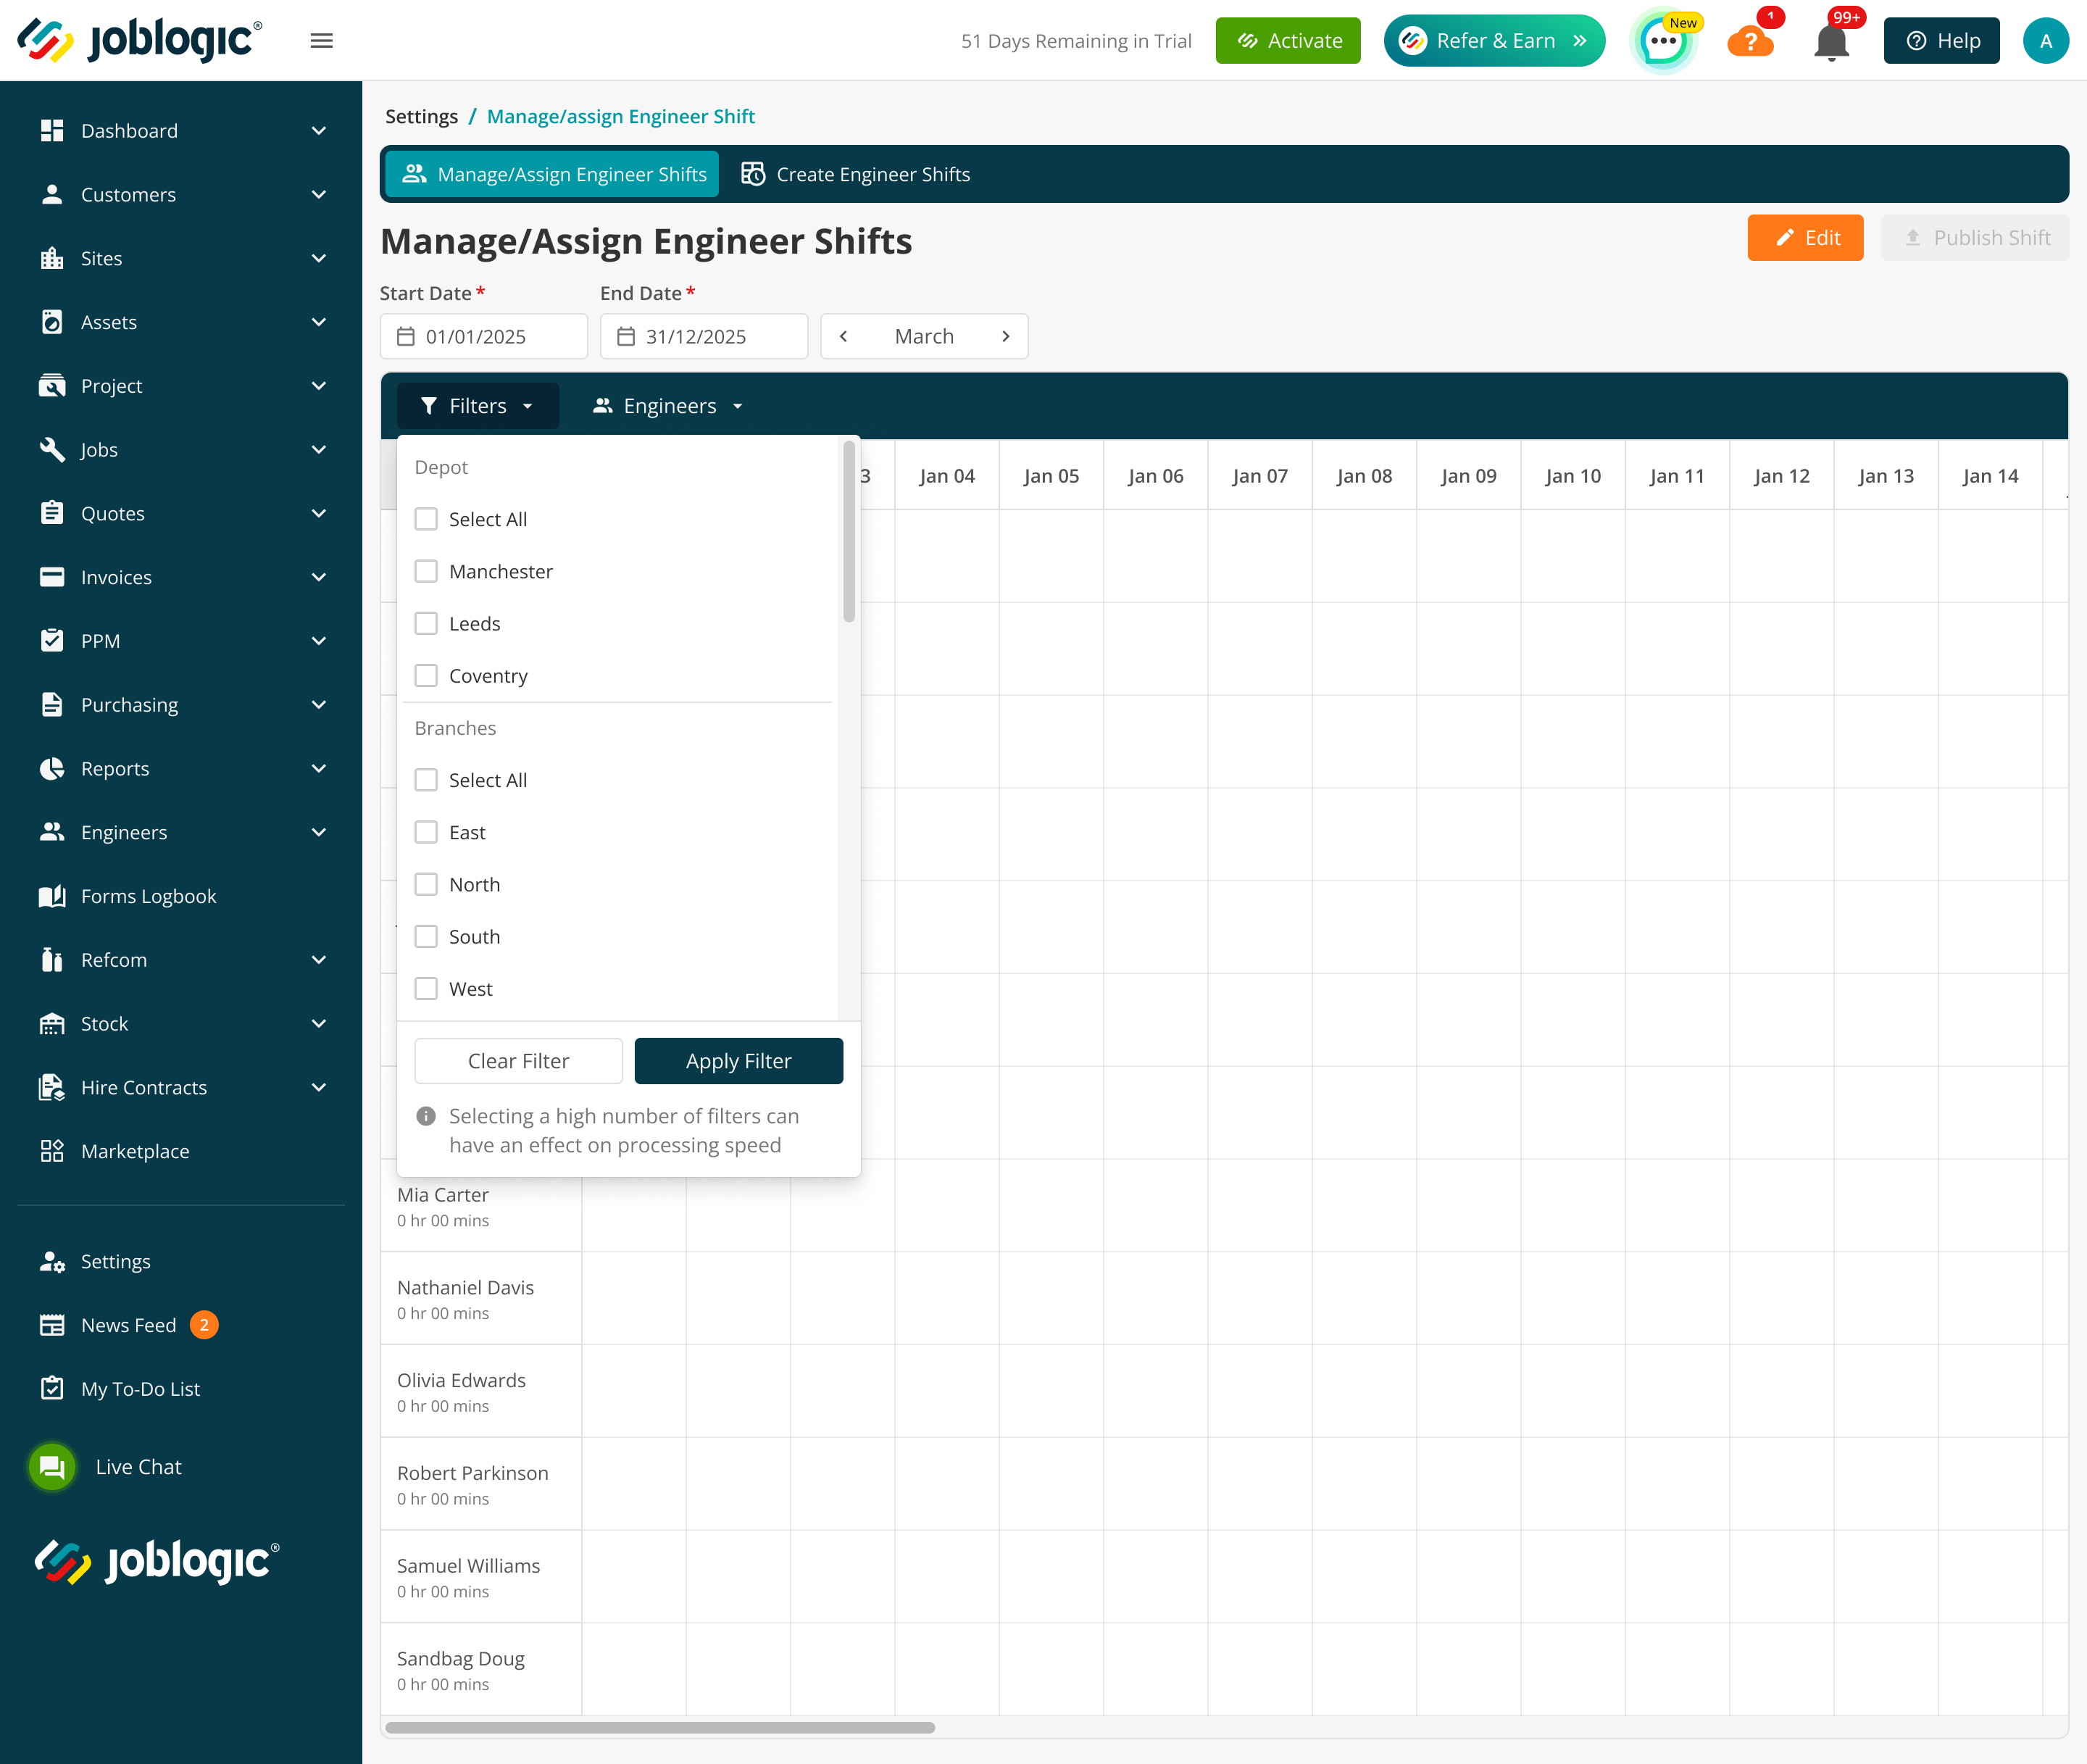
Planner, Engineer Shift and Timesheet show engineers from the user's depot and engineers without a depot. Booking Non-Productive Time is limited to engineers belonging to the user's depot.
Hire contracts and cross-hire equipment
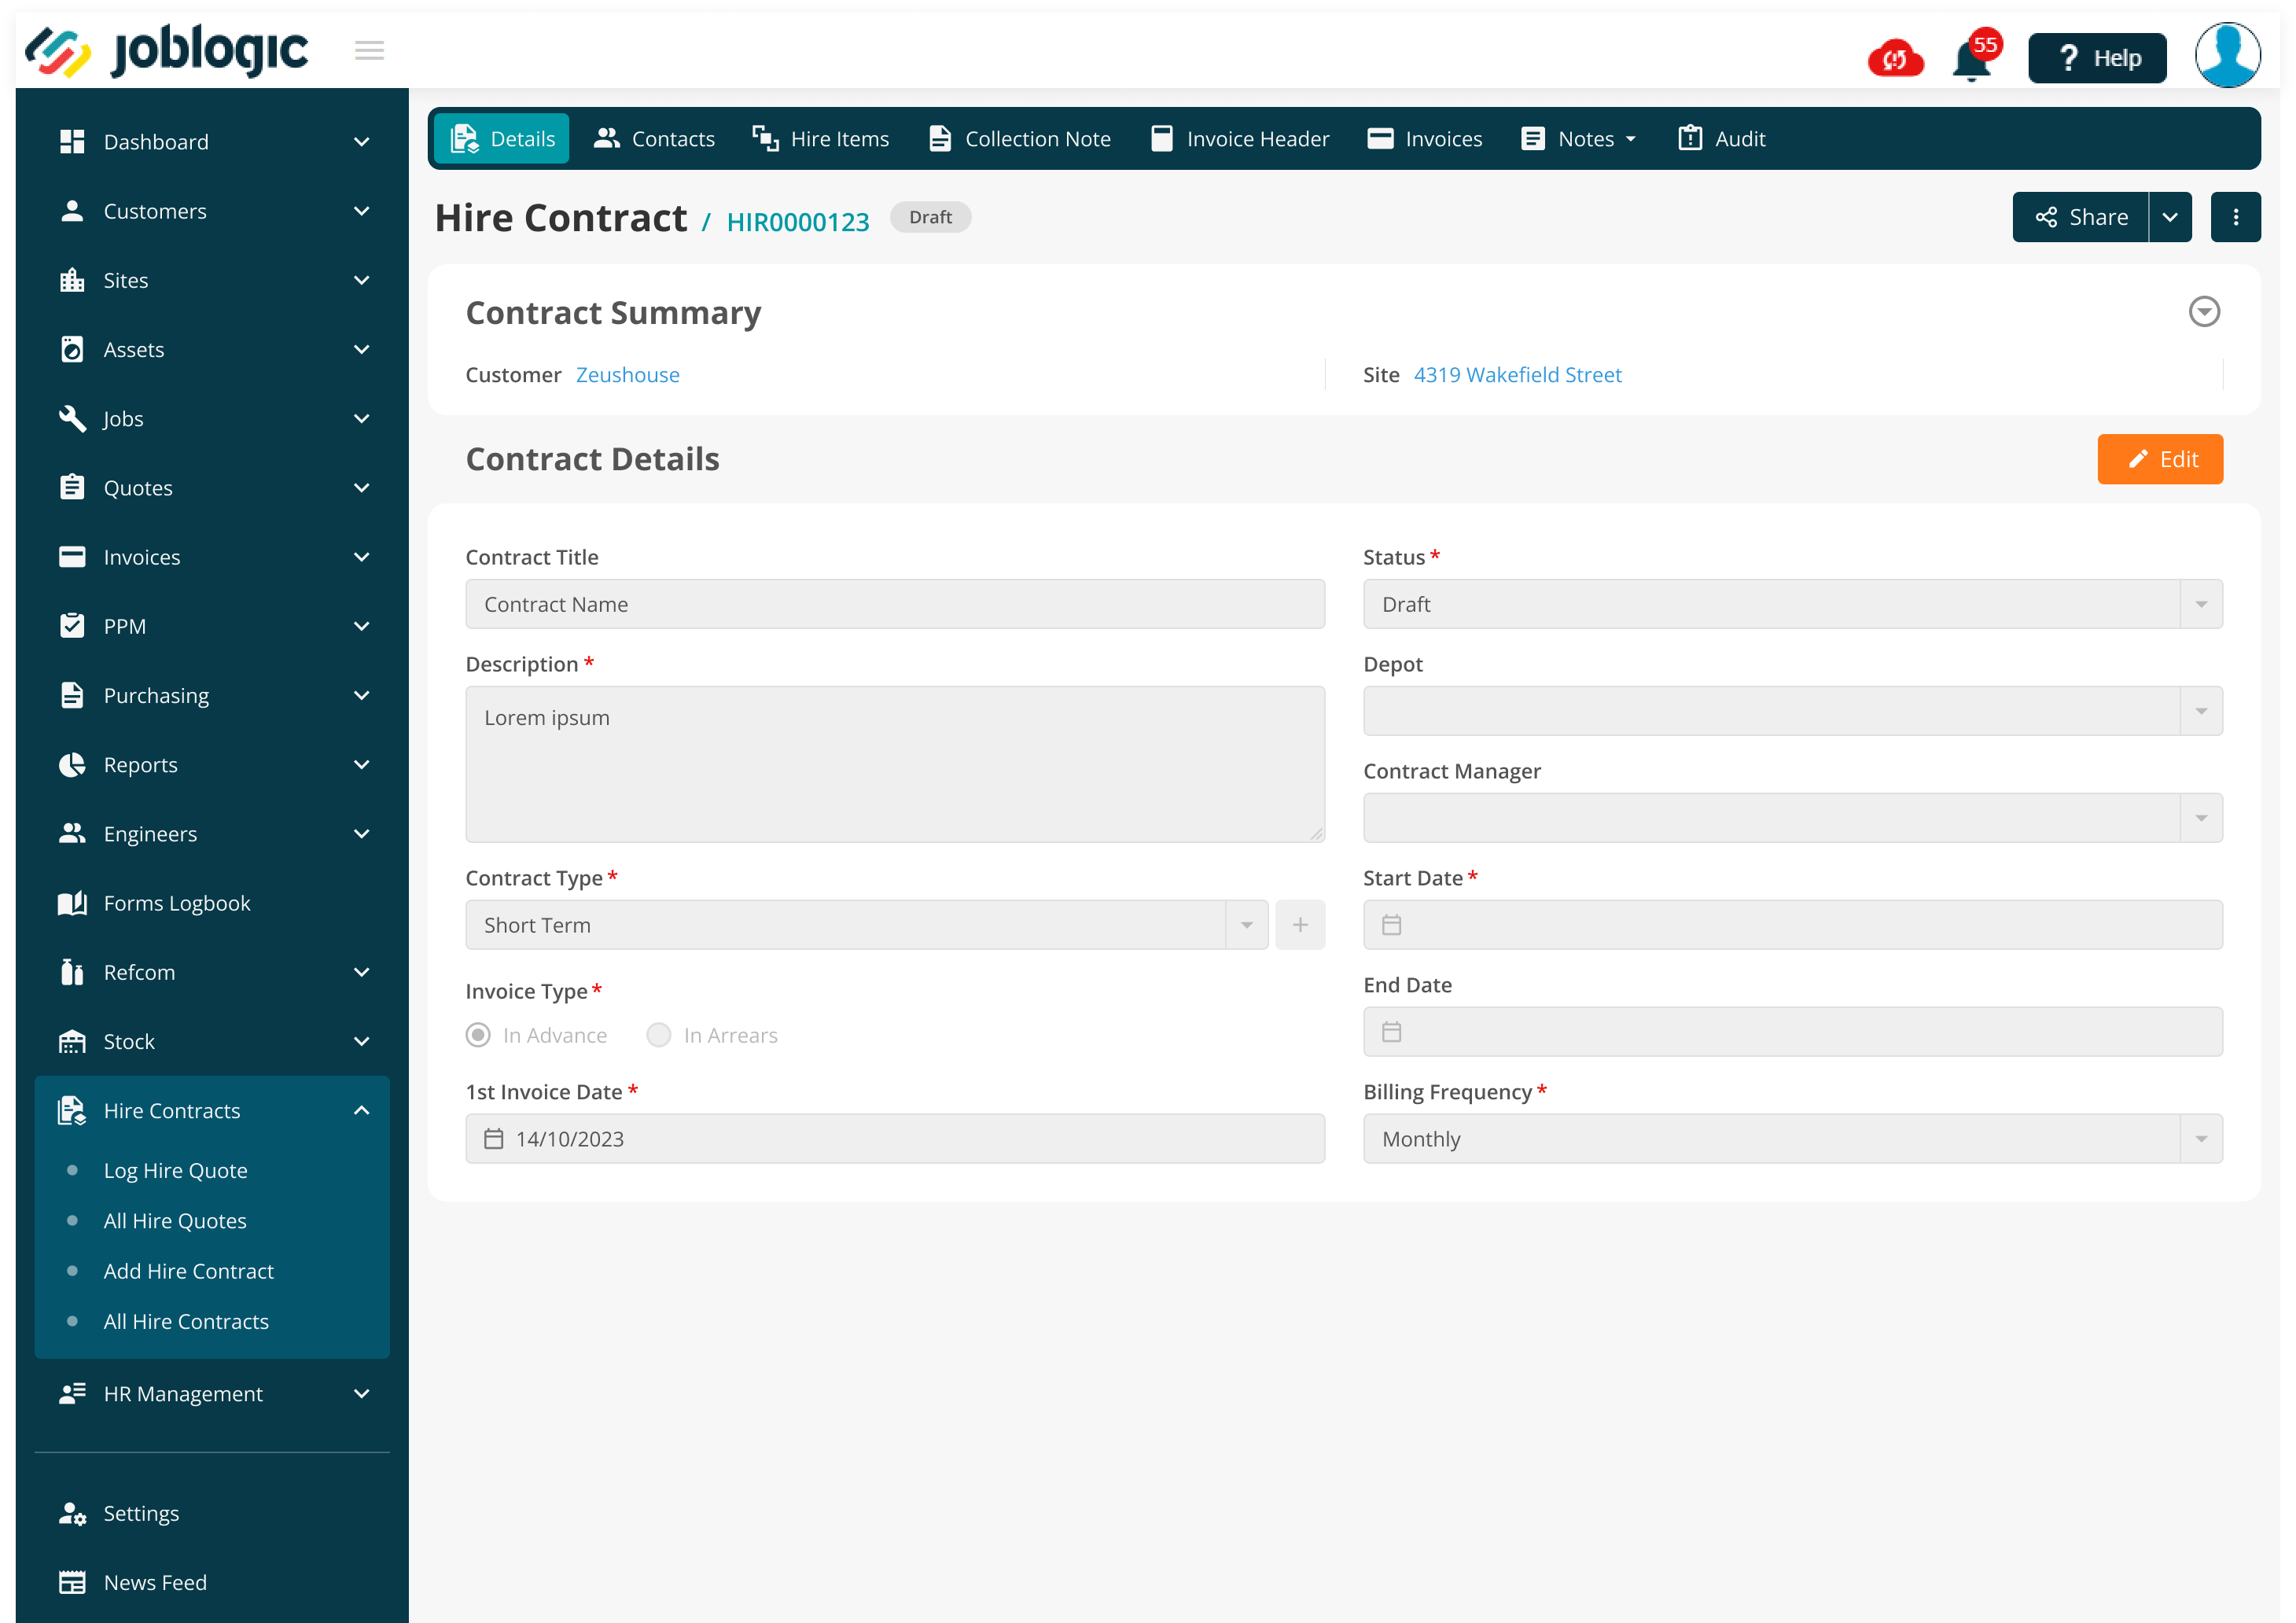
Under Inherit Site Depot, a Hire Contract inherits the site's depot and the depot is read-only. When Use Entity Own Depot is selected, First Equipment/Asset Depot can be selected as the automatic depot source. If a Hire Contract has no assets, no depot is assigned to the contract.
Cross-hire equipment uses the depot of the user who creates it by default, and this can be changed. Once the asset is hired, its depot is not changed to the site depot. The asset depot changes only if the asset moves to another depot.
Mobile
Engineers using Joblogic Mobile can access stock only from their assigned depots.
Further Support
For further information or assistance with the above, contact our Support Team on 0800 326 5561 or email support@joblogic.com. Alternatively, our Customer Success Management team can be reached by emailing customersuccess@joblogic.com
Publishing Details
This document was written and produced by Joblogic's Technical Writing team and was last updated on the date stated above. Be aware that the information provided may be subject to change following further updates on the matter becoming available or new releases within the system. Additionally, details within the guide may vary depending on your Joblogic account's user permissions and settings or the electronic device being used.